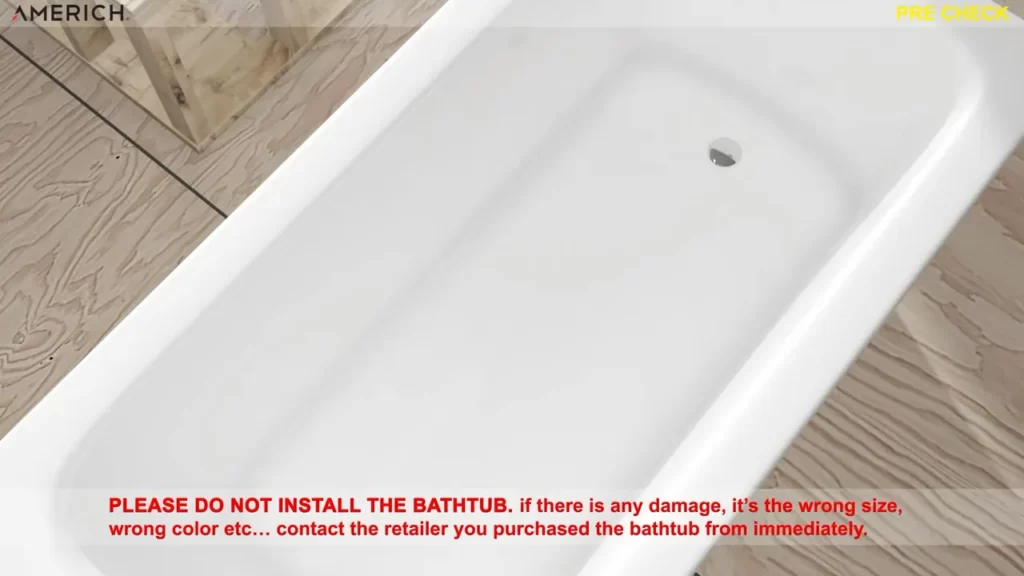
To install a soaking bathtub, begin by measuring and marking the desired location. Then, prepare the area by removing any existing fixtures or debris.
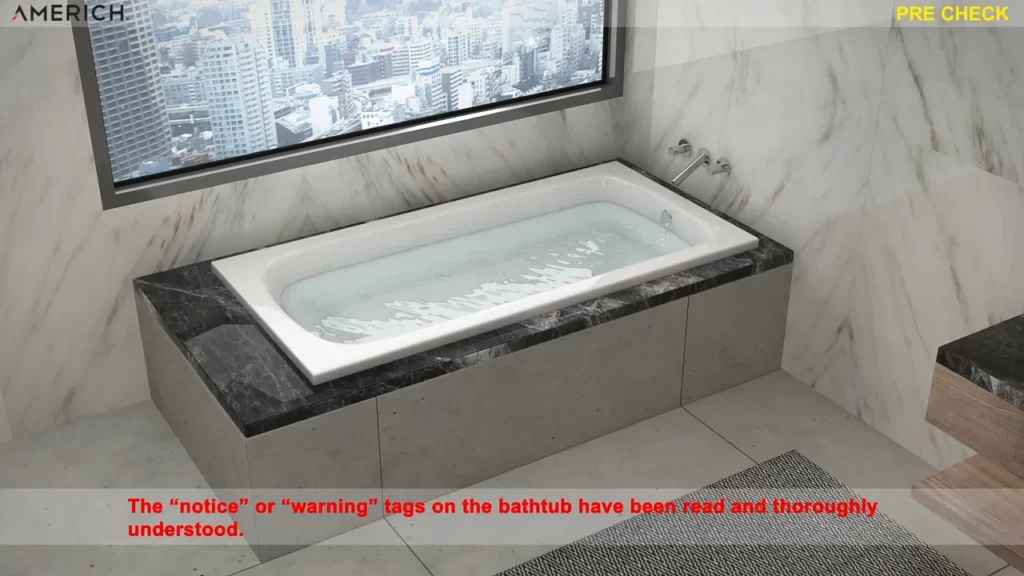
Install the drain and overflow system according to the manufacturer’s instructions, followed by the faucet and handles. Finally, secure the bathtub in place, making sure it is level and plumb. Installing a soaking bathtub can be a rewarding and rejuvenating addition to any bathroom.
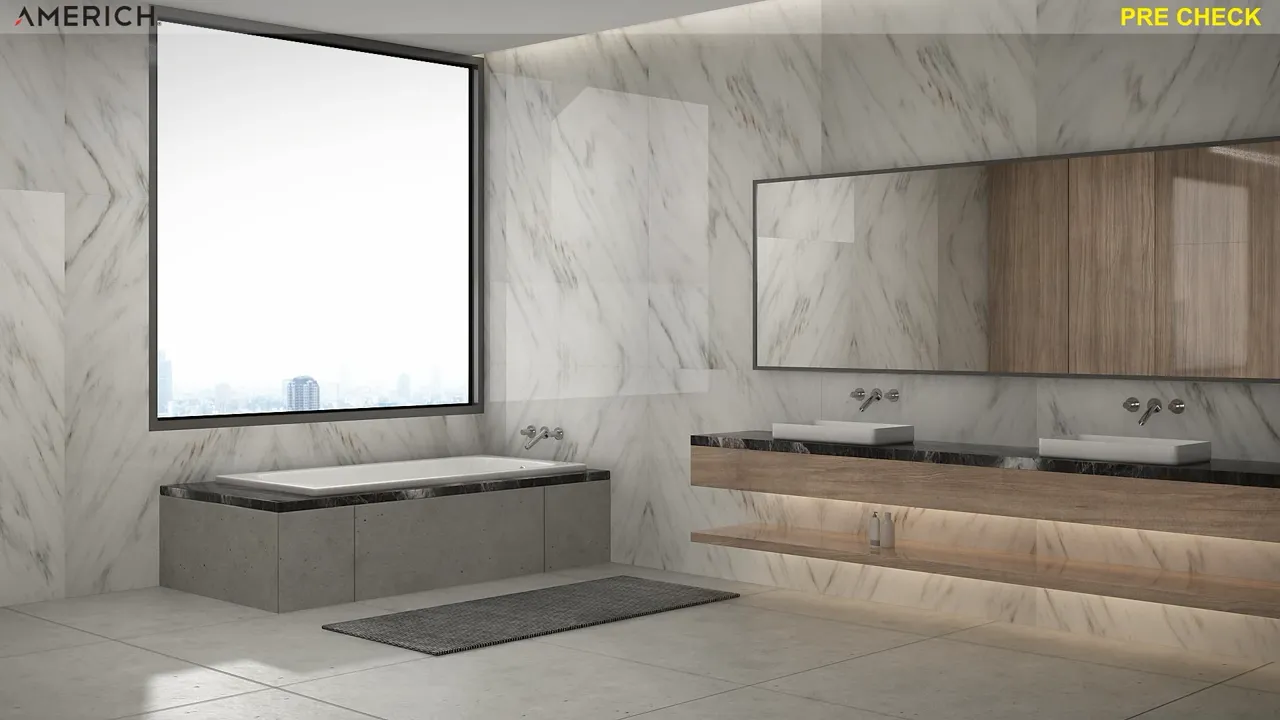
Whether you’re renovating, upgrading, or starting anew, a soaking tub can provide a luxurious and relaxing experience. However, the installation process requires careful planning and execution. This guide will provide you with a step-by-step overview of how to properly install a soaking bathtub, ensuring that your new centerpiece is securely in place and ready for use. From measuring and marking the location to securing the tub and connecting the plumbing, we’ll walk you through the process. So, if you’re ready to embark on this satisfying home improvement project, let’s dive in and get started.
Choosing The Right Soaking Bathtub For Your Bathroom
When it comes to creating a luxurious and relaxing atmosphere in your bathroom, nothing quite compares to the experience of soaking in a bathtub. Whether you’re looking to unwind after a long day or indulge in some much-needed self-care, a soaking bathtub can be the perfect addition to your bathroom. However, with so many options available in the market, choosing the right soaking bathtub can be a daunting task. In this article, we will guide you through the factors to consider when selecting a soaking bathtub, ensuring that you make an informed decision that fits your needs and adds a touch of elegance to your bathroom.
Factors to consider when selecting a soaking bathtub:
Size and dimensions
One of the first things to consider when choosing a soaking bathtub is its size and dimensions. It’s important to measure your bathroom space to ensure that the bathtub fits comfortably without overpowering the room or causing inconveniences. Take into account both the length and width of the bathtub, as well as its depth, to ensure it provides optimum comfort for your soaking experience. Additionally, consider the shape of the bathtub – traditional rectangular designs may work well in most bathrooms, while freestanding tubs can be a stylish choice for larger spaces.
Material and durability
Another crucial factor to consider when selecting a soaking bathtub is the material it is made of. The material not only affects the bathtub’s visual appeal but also its durability and performance. Some popular bathtub materials include acrylic, cast iron, fiberglass, and stone. Acrylic tubs are lightweight, affordable, and stain-resistant, making them a popular choice. Cast iron tubs, on the other hand, are known for their durability and heat retention. Fiberglass tubs are low-maintenance and easy to install, while stone tubs add a touch of elegance and luxury to any bathroom. Consider your budget, cleaning preferences, and desired aesthetic when choosing the material of your soaking bathtub.
Style and design options
The style and design of your soaking bathtub can significantly impact the overall aesthetic of your bathroom. From classic and traditional to contemporary and modern, there are various design options available to suit your personal taste and complement your existing bathroom decor. Consider elements such as the shape of the tub, the presence of decorative details, the color options, and the faucet and drain styles. Additionally, think about the functionality of the bathtub – do you prefer a built-in tub or a freestanding one? Do you want the option of having jets for a spa-like experience? Paying attention to these design details will help you choose a soaking bathtub that not only provides comfort and relaxation but also enhances the visual appeal of your bathroom.
In conclusion, selecting the right soaking bathtub for your bathroom involves careful consideration of various factors such as size and dimensions, material and durability, and style and design options. By taking the time to evaluate these aspects, you can ensure that your soaking experience is everything you desire and more.
Preparing For The Bathtub Installation
Gathering the necessary tools and materials:
Before starting the installation process, it is crucial to gather all the necessary tools and materials. Here are the essential items you will need:
- Measuring tape
- Level
- Adjustable wrench
- Caulk gun
- Pipe wrench
Having these tools readily available will make the bathtub installation process smooth and efficient. These items will help you handle any plumbing or leveling requirements that may arise during the installation.
Taking accurate measurements of the bathroom:
To ensure a perfect fit for your new soaking bathtub, it is crucial to take accurate measurements of your bathroom. Follow these steps:
- Using a measuring tape, measure the length, width, and height of the space where the bathtub will be installed.
- Double-check these measurements to avoid any errors that could lead to a poorly fitted bathtub.
- Ensure that the tub will fit in the available space by comparing the measurements with the dimensions of the bathtub you have chosen.
It is also vital to identify the location of the plumbing and drainage in your bathroom. This will help you connect the bathtub properly and ensure smooth water flow. Use a pipe wrench to loosen any existing connections and prepare the plumbing for the new installation.
By following these steps and gathering the necessary tools and materials, you will be well-prepared for the soaking bathtub installation process. Taking accurate measurements and identifying plumbing and drainage locations will help you ensure a seamless installation and a luxurious bathing experience.
Preparing The Bathroom For Installation
Before you can install a soaking bathtub in your bathroom, it’s crucial to properly prepare the space. This involves clearing the area of any existing fixtures or obstructions and ensuring that the bathroom floor and walls are ready for the installation. In this article, we will guide you through each step, ensuring a smooth and successful installation.
Clearing the Space and Removing Any Existing Fixtures or Obstructions
In order to create a clean and open space for your new soaking bathtub, it’s important to remove any existing fixtures or obstructions. This includes removing the old bathtub, if applicable, as well as disconnecting and capping off water supply lines. Additionally, you may need to remove floor tiles or carpet to ensure a level surface for installation.
Removing Old Bathtub, if Applicable
If you are replacing an existing bathtub, you will need to remove it before installing the new soaking tub. This can be a labor-intensive process, so it’s important to take your time and follow the proper steps. Depending on the type of bathtub you have, you may need to unscrew or cut through the surrounding materials to detach it from the wall and floor. It’s essential to have the necessary tools and equipment to safely and effectively remove the old bathtub.
Disconnecting and Capping Off Water Supply Lines
Before removing the old bathtub, it’s crucial to disconnect and cap off the water supply lines. This ensures that no water will leak or cause damage during the installation process. Use a wrench to disconnect the supply lines, and then cap them off using fittings or plugs specifically designed for this purpose. It’s important to follow your local plumbing codes and regulations when performing this step.
Removing Floor Tiles or Carpet
In order to create a level and stable foundation for your new soaking bathtub, you may need to remove any existing floor tiles or carpet. This will ensure that the bathtub sits securely and does not wobble or shift over time. Use a flat-edge tool or scraper to carefully remove the tiles or carpet, taking care not to damage the underlying floor. Once the area is clear, thoroughly clean the surface to remove any debris or residue.
Ensuring the Bathroom Floor and Walls are Properly Prepared
With the space cleared and any existing fixtures removed, it’s time to ensure that the bathroom floor and walls are properly prepared for the installation of the soaking bathtub. This involves repairing any damaged surfaces and installing moisture-resistant materials, if necessary. Additionally, you may need to apply a waterproofing membrane or sealant to protect against any potential water damage.
Repairing Any Damaged Surfaces
If you notice any damaged areas on the bathroom floor or walls, it’s important to repair them before proceeding with the installation. This can include patching holes, filling cracks, or replacing any weakened or rotten materials. By addressing these issues beforehand, you can ensure a stable and secure foundation for your new soaking bathtub.
Installing Moisture-Resistant Materials, if Necessary
In areas where moisture is a concern, such as bathrooms, it’s important to use moisture-resistant materials to prevent any potential damage. This can include installing moisture-resistant drywall, cement backer board, or waterproof underlayment. These materials are designed to withstand the effects of moisture and provide a stable and long-lasting surface for the bathtub installation.
Applying Waterproofing Membrane or Sealant, if Required
To further protect your bathroom from water damage, you may need to apply a waterproofing membrane or sealant. This can be especially important if your bathroom is located on an upper floor or if the bathtub is positioned near walls or vulnerable areas. Follow the manufacturer’s instructions to properly apply the waterproofing membrane or sealant, ensuring a tight and effective seal.
By following these steps to prepare your bathroom for the installation of a soaking bathtub, you can ensure a successful and long-lasting result. Taking the time to properly clear the space and repair any damaged surfaces will provide a solid foundation for your new bathtub, while moisture-resistant materials and waterproofing measures will protect against any potential water damage. With a well-prepared bathroom, you’ll be ready to move forward with the installation process.
Installing The Soaking Bathtub
Installing the soaking bathtub
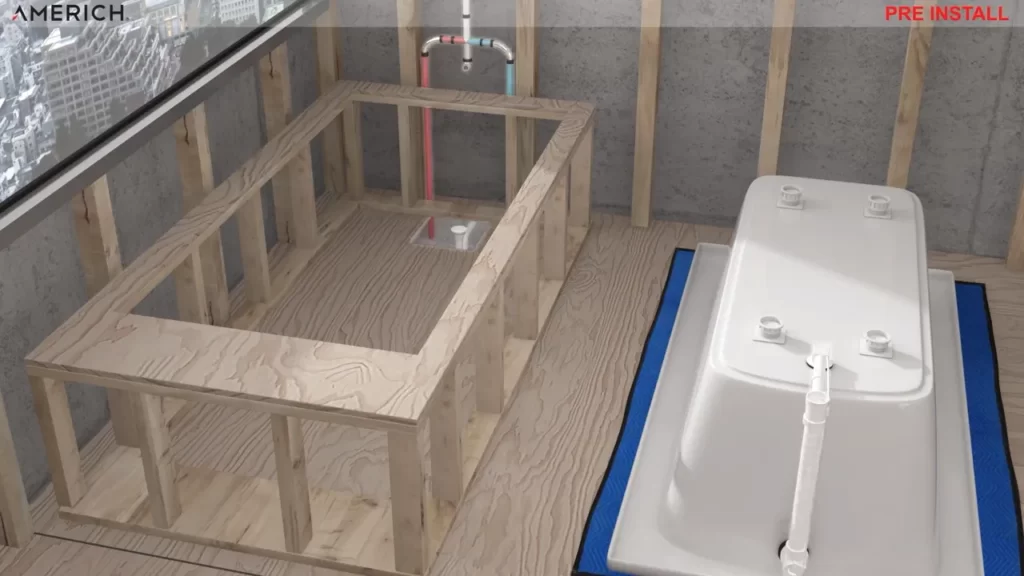
Positioning the bathtub in the designated area:
When it comes to installing a soaking bathtub in your bathroom, the first step is to position it in the designated area. Make sure you have measured the space accurately to ensure a perfect fit. Once you have determined the ideal location, follow these steps to properly position the bathtub:
1. Mark the area: Use a pencil or tape to mark the outline of the bathtub on the floor. This will serve as a guide when positioning the tub.
2. Ensure level and alignment: Place a level across the top edges of the bathtub to ensure it is level and aligned with the drainpipe. Adjust as necessary to achieve perfect alignment.
3. Use shims for stability: If you find that the bathtub is not sitting level or aligned with the drainpipe, you can use shims to stabilize and adjust its position. Insert the shims underneath the tub’s base until it is level and secure.
Connecting the plumbing and drainage:
Now that the bathtub is properly positioned, it’s time to connect the plumbing and drainage. Follow these steps to ensure a seamless installation:
1. Install the bathtub drain assembly: Begin by installing the bathtub drain assembly according to the manufacturer’s instructions. This typically involves attaching the drain shoe and flange to the drainpipe and tightening them securely.
2. Connect the overflow drain: Next, connect the overflow drain to the designated opening on the bathtub. This will prevent overflowing in case of accidental overfilling. Secure the drain cover in place.
3. Attach water supply lines: To ensure the bathtub is fully functional, you need to attach the water supply lines. Connect the hot and cold water lines to the corresponding fittings on the bathtub. Double-check that the connections are tight to prevent leaks.
Securing the soaking bathtub to the floor or wall:
To ensure stability and prevent any potential accidents, it’s important to secure the soaking bathtub to the floor or wall. Here’s what you need to do:
1. Use an adhesive or anchor bolts: Depending on the type of bathtub and your bathroom’s configuration, you can secure the tub using an adhesive or anchor bolts. Follow the manufacturer’s instructions and apply the adhesive or install the anchor bolts accordingly.
2. Check for stability and make adjustments: Once the tub is secured, check for stability by applying pressure from different angles. If you notice any movement or instability, make the necessary adjustments. This may involve adding additional adhesive or tightening anchor bolts.
In conclusion, the process of installing a soaking bathtub involves precise positioning, connecting the plumbing and drainage, and securing the tub to ensure stability. By following these steps, you can have a perfectly installed soaking bathtub in your bathroom.
Finishing Touches And Testing The Installation
Applying caulk and sealing any gaps around the bathtub:
Once the soaking bathtub is securely in place, the next step is to ensure a proper seal by applying caulk and sealing any gaps around the bathtub. This helps prevent water from seeping into the gaps and causing water damage to the surrounding area. To achieve this, follow these simple steps:
- Clean the area: Before applying caulk, make sure the area around the bathtub is clean and dry. Remove any dirt, dust, or old caulk residue using a scraper or a putty knife.
- Choose the right type of caulk: Opt for a high-quality silicone caulk that is specifically designed for bathroom use. This type of caulk is waterproof and flexible.
- Cut the caulk tube: Cut the nozzle of the caulk tube at a 45-degree angle to create a small opening. This allows for precise application.
- Apply the caulk: Starting from one corner, gently squeeze the caulk into the gap between the bathtub and the wall. Use steady pressure and ensure an even bead of caulk along the entire length.
- Smooth the caulk: Once the caulk is applied, use a caulking tool or your finger dipped in water to smooth it out. This helps create a neat and professional-looking finish.
- Finish the caulk line: Wipe away any excess caulk with a damp cloth or sponge. This gives the caulk line a clean and seamless appearance.
This simple process ensures that all gaps and spaces around the bathtub are properly sealed, preventing any potential water damage. By taking the time to apply caulk correctly, you can enjoy a watertight seal that keeps your bathroom safe and dry.
Testing the bathtub installation:
After completing the caulk application, it’s time to test the soaking bathtub installation to ensure everything is functioning properly. These are the key steps to follow:
- Filling the tub with water: With the caulk fully dried and the bathtub securely in place, fill it up with water. This checks if there are any leaks.
- Checking for any leaks or drainage issues: Keep a close eye on the bathtub and its surroundings while the water is filling up. Look for any signs of water escaping or drainage issues in the pipes. If any leaks or issues are found, it’s important to address them before using the bathtub.
- Checking the stability of the bathtub: While the tub is filled with water, carefully test its stability by applying gentle pressure from different angles. The bathtub should remain solid and firm without any wobbling or shifting.
By conducting this simple testing process, you can ensure that your soaking bathtub is installed correctly and ready for use.
Finalizing the installation:
Once you have completed the necessary tests and are confident in the bathtub installation, it’s time to focus on the final touches and enjoy your new soaking bathtub. Here are some important steps to consider:
- Cleaning up any debris or mess: Remove any debris, packaging material, or excess caulk from the installation process. Wipe down the bathtub and surrounding area to create a clean and welcoming space.
- Installing any additional fixtures, such as faucets or handles: If you haven’t already done so, now is the time to install any additional fixtures that go along with your soaking bathtub. Follow the manufacturer’s instructions for proper installation.
- Enjoying your new soaking bathtub: With the installation complete, take the time to relax and enjoy the benefits of your new soaking bathtub. Fill it up with warm water, add some bath salts or bubbles, and indulge in a well-deserved soak.
By following these steps and paying attention to the finishing touches, you can ensure a successful installation of your soaking bathtub. Taking the time to apply caulk, properly test the installation, and finalize any additional fixtures will help create a functional and beautiful bathroom space that you can enjoy for years to come.
Frequently Asked Questions
How Hard Is It To Install A Soaking Tub?
Installing a soaking tub is not too difficult. It requires basic plumbing and carpentry skills. First, you need to prepare the space, including plumbing connections. Then, you will need to secure the tub in place and connect the drainage system.
Finally, test for leaks and ensure everything functions properly.
How Do You Secure A Soaking Tub To The Floor?
To secure a soaking tub to the floor, follow these steps: 1. Use waterproof adhesive to attach the tub to the floor. 2. Install support brackets beneath the tub for added stability. 3. Use screws or anchors to secure the brackets to the floor.
4. Check for any leaks or movement once the tub is installed.
Do You Need To Tile Behind A Soaker Tub?
Yes, it is recommended to tile behind a soaker tub. Tiling provides a waterproof barrier, protects the wall from moisture damage, and enhances the overall look of the bathroom. It also makes it easier to clean and maintain the area around the tub.
What Do You Put Under A Bathtub For Support?
Bathtubs require a sturdy support structure. You can use a wooden or metal framework to provide support and distribute the weight evenly. This will ensure the stability and durability of the bathtub.
Conclusion
Installing a soaking bathtub can be a straightforward process if you follow the steps outlined in this guide. By preparing the area, measuring and leveling, connecting the plumbing, and sealing the bathtub, you can achieve a relaxing and functional addition to your bathroom.
Remember to consult professional help if needed and enjoy the ultimate relaxation experience in your new soaking bathtub.