
To install a sliding shower door, first measure and cut the top and bottom tracks to fit the width of the shower opening. Then attach the tracks to the walls using screws or adhesive, making sure they are level.
Next, insert the rollers into the top and bottom of the door panel, and hook the door onto the top track. Finally, adjust the rollers for smooth operation and secure the door in place.
Choosing The Right Sliding Shower Door
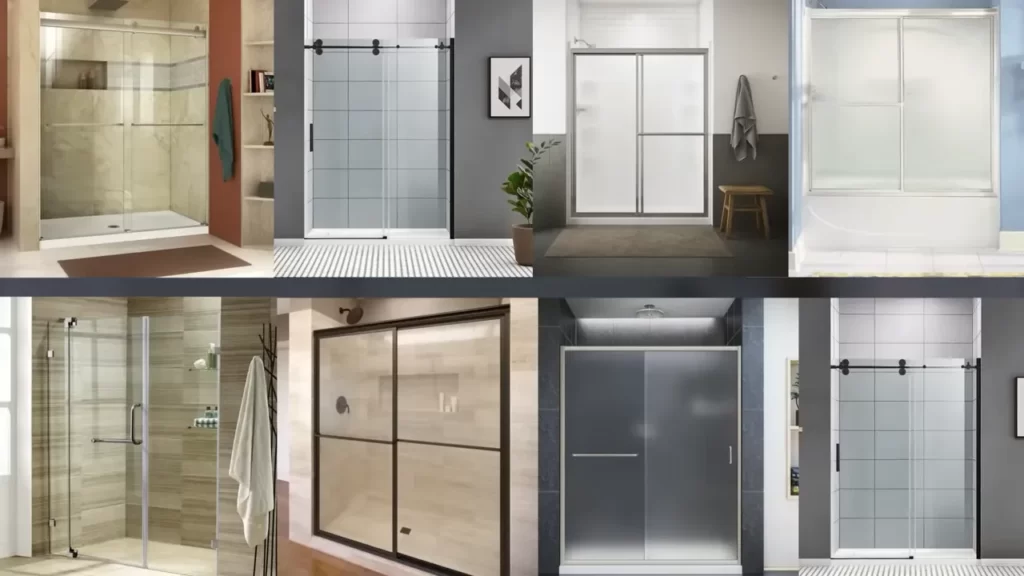
When it comes to upgrading your bathroom, installing a sliding shower door can add a touch of elegance and functionality. However, with so many options available in the market, it can be daunting to choose the perfect one for your shower space. To ensure that you make the best decision, there are a few factors that you need to consider when selecting a sliding shower door, finding the perfect fit for your bathroom decor, and measuring your shower space accurately. Let’s delve into these factors below:
Factors to consider when selecting a sliding shower door
Before making your purchase, it’s important to consider a few key factors that will help you select the ideal sliding shower door for your bathroom. By taking these factors into account, you can ensure that the door not only fits your shower space but also meets your specific needs.
- Size: Measure the width and height of your shower space accurately. This will help you determine the size of the sliding shower door you need. Make sure to account for any obstructions like faucets or tiles that might affect the installation.
- Style: Consider the overall style and design of your bathroom. Choose a sliding shower door that complements your existing decor, whether it’s modern, traditional, or minimalist. Look for options with different finishes, such as chrome, brushed nickel, or matte black, to match your bathroom fixtures.
- Glass: Decide on the type of glass you prefer for your sliding shower door. Options include clear, frosted, or textured glass. Privacy concerns and the amount of natural light in your bathroom should be taken into consideration when making this decision.
- Hardware: Pay attention to the hardware of the sliding shower door. Look for sturdy and durable materials like stainless steel or brass, as these will ensure a long-lasting and reliable installation. Consider the aesthetics of the handles, knobs, and hinges as well, to maintain a cohesive look in your bathroom.
- Budget: Set a budget for your sliding shower door project. With various options available in the market, there are doors to fit different price ranges. However, keep in mind that investing in a higher-quality door will often result in better performance and longevity.
Finding the perfect fit for your bathroom decor
When choosing a sliding shower door, it’s important to find one that complements your bathroom decor and creates a cohesive look. By considering the following tips, you can find the perfect fit for your bathroom:
- Color and Finish: Consider the color scheme and finish of your bathroom fixtures. Look for sliding shower doors that come in a variety of finishes to match your faucets, towel bars, and other bathroom accessories.
- Design: Take into account the overall design of your bathroom, including the style of the tiles, vanity, and bathtub. Choose a sliding shower door that harmonizes with these elements. Whether you prefer a sleek and minimalist design or intricate patterns, there are options available to suit your preferences.
- Texture and Patterns: If you want to add visual interest to your bathroom, opt for sliding shower doors with textured or patterned glass. These can create a focal point while adding a touch of uniqueness to your space.
Tips for measuring your shower space accurately
Proper measurements are crucial when selecting a sliding shower door. Accurate measurements will help you avoid installation issues and ensure a perfect fit. Follow these tips to measure your shower space accurately:
- Use a measuring tape: Measure the width and height of the shower opening, taking into account any additional space needed for clearance.
- Consider threshold size: Measure the threshold of your shower to determine the height restriction for the sliding shower door.
- Check for levelness: Ensure that the walls of your shower are level before measuring. If they are not, take measurements at multiple points to determine the smallest width for your sliding shower door.
By considering these factors and following these tips, you will be well on your way to choosing the perfect sliding shower door for your bathroom, both in terms of style and functionality.
Measuring For A Sliding Shower Door
Step-by-step guide for taking precise measurements
Accurate measurements are essential when it comes to installing a sliding shower door. Even the smallest miscalculation can lead to an ill-fitting door that doesn’t function properly. To ensure a seamless installation process, follow this step-by-step guide for taking precise measurements:
- Measure the width: Start by measuring the width of your shower opening. Use a measuring tape to measure from wall to wall, accounting for any unevenness or irregularities. Take three measurements: at the top, middle, and bottom of the opening. Record the smallest measurement, as this will be the width of your sliding shower door.
- Measure the height: Next, measure the height of your shower opening. Again, take three measurements: at the left, center, and right of the opening. Record the tallest measurement, as this will be the height of your sliding shower door.
- Check for level: Ensure that the walls of your shower are level by using a bubble level. If you notice any discrepancies, make note of them and adjust your measurements accordingly. It’s important to have accurate measurements based on a level surface for a proper fit.
- Consider any obstacles: Take note of any obstacles in your shower, such as fixtures, handles, or towel racks. These may affect the placement of your sliding shower door. Measure the distance between these obstacles and the shower opening to ensure they will not interfere with the door’s operation.
- Double-check your measurements: Once you have taken all the necessary measurements, double-check them to ensure accuracy. It’s always better to be safe than sorry when it comes to installing a sliding shower door. Taking the time to measure correctly at the beginning will save you headaches and frustration in the long run.
Common mistakes to avoid during the measurement process
While taking measurements for a sliding shower door may seem straightforward, there are some common mistakes that can easily be avoided. To ensure a successful installation, keep these common mistakes in mind:
- Not accounting for tile thickness: If you have tiled walls, it’s important to measure from the tile edge and not the wall surface alone. Failure to account for the thickness of the tile can result in incorrect measurements and an ill-fitting door.
- Assuming all walls are perfectly straight: Even the most well-constructed bathrooms can have slight imperfections in wall alignment. Take the time to measure at multiple points along the opening to account for any irregularities. This will ensure a precise fit for your sliding shower door.
- Forgetting to consider clearance: When measuring, it’s important to leave enough clearance for the sliding shower door to operate smoothly. Ensure there is ample space for the door to open and close without any obstructions. Taking this into account during the measurement process will prevent any surprises during installation.
- Skipping the level check: Failing to check for level walls can lead to inaccurate measurements and an improper fit. A quick check with a bubble level will give you peace of mind that your shower opening is level, providing a solid foundation for your sliding shower door installation.
Understanding the importance of accurate measurements
Accurate measurements are crucial when installing a sliding shower door. The precise dimensions ensure a proper fit, smooth operation, and overall functionality of the door. By taking the time to measure correctly and avoiding common mistakes, you can ensure a seamless installation process that will result in a beautiful and functional sliding shower door.
Remember, accuracy is key when it comes to measurements. Take the necessary steps to ensure your measurements are precise, and double-check them to avoid any potential problems down the line. By doing so, you’ll be well on your way to enjoying your new sliding shower door in no time.
Tools And Materials Needed For Installation
Installing a sliding shower door can transform the look and functionality of your bathroom. To ensure a successful installation process, it is essential to have the right tools and materials at hand. This article will guide you through the key tools needed for the installation, how to choose the appropriate materials, and where to purchase them.
Essential Tools Required for the Installation Process
Before starting the installation, it is crucial to gather the necessary tools. Here is a list of the essential tools needed for a hassle-free installation:
| Tool | Description |
|---|---|
| Screwdriver | A Phillips screwdriver will be required for attaching the door frame and other components. |
| Measuring Tape | Accurately measuring the dimensions of the shower opening is essential to ensure a proper fit. |
| Level | Use a level to ensure that the door frame and tracks are installed straight and properly aligned. |
| Drill | A power drill is needed for drilling holes and attaching screws securely. |
| Hacksaw | In some cases, you may need to trim the tracks to fit the shower opening, requiring a hacksaw. |
| Masking Tape | Masking tape can be used to mark positions and prevent surface damage during the installation process. |
Choosing the Right Materials for a Successful Installation
When it comes to choosing the materials for your sliding shower door installation, it is important to opt for high-quality, durable options that will withstand the daily wear and tear of bathroom use. Here are a few key materials to consider:
- Glass Panels: Opt for safety glass panels to ensure durability and prevent accidents.
- Door Frame: Look for a sturdy, rust-resistant aluminum or stainless steel frame that will provide stability and longevity.
- Rollers: Choose high-quality rollers made of materials like stainless steel or nylon to ensure smooth sliding motion.
- Sealant: Invest in a good quality caulk or silicone sealant to prevent water leakage and moisture damage.
Where to Purchase the Necessary Tools and Materials
Now that you know which tools and materials you need, it’s time to find a reliable source to purchase them. Here are a few options:
- Local Hardware Stores: Visit your nearest hardware store, where you can find a wide range of tools and materials required for your sliding shower door installation.
- Online Retailers: Explore online platforms such as Amazon, Home Depot, or Lowe’s for a convenient shopping experience, easy comparison, and reliable delivery.
- Specialty Bathroom Suppliers: Consider visiting specialized bathroom supply stores, where you can find high-quality materials specifically designed for bathroom installations.
By considering these options, you’re sure to find the tools and materials you need for a successful sliding shower door installation.
Preparing The Shower Area For Installation
Before you can install a sliding shower door, it is important to properly prepare the shower area. This involves removing the existing shower door or curtains, cleaning and prepping the shower walls and floor, as well as assessing the condition of the shower area for any repairs or modifications needed. By following these steps, you can ensure a smooth and successful installation process.
Removing the existing shower door or curtains
The first step in preparing the shower area for installation is to remove the existing shower door or curtains. This is necessary to create a clean and empty space for the new sliding door. Here’s how you can do it:
- Start by loosening any screws or bolts that are holding the shower door in place. Use a screwdriver or an appropriate tool for this.
- Gently lift the door off the tracks or hinges, taking care not to damage the surrounding shower walls or floor.
- If you have shower curtains, remove the curtain rod and take down the curtains.
- Set aside the old door or curtains for disposal or future use, depending on their condition.
Cleaning and prepping the shower walls and floor
Once the old shower door or curtains are removed, it’s time to clean and prep the shower walls and floor. This step is crucial to ensure proper adhesion of the new sliding door and to create a clean and pristine surface. Follow these simple steps:
- Start by cleaning the shower walls and floor with a mild detergent or a recommended cleaning solution. Scrub away any dirt, grime, or soap residue using a soft brush or sponge.
- Rinse the walls and floor thoroughly with water to remove any cleaning solution.
- If there are any stubborn stains or hard water deposits, you can use a mixture of vinegar and water to remove them. Apply the mixture to the affected areas, let it sit for a few minutes, and then scrub gently.
- Dry the walls and floor completely using a clean towel or cloth.
Assessing the condition of the shower area for any repairs or modifications needed
Before proceeding with the installation, it’s important to assess the condition of the shower area for any repairs or modifications needed. This will ensure that the sliding door fits properly and functions smoothly. Here’s what you should do:
- Inspect the shower walls and floor for any cracks, chips, or water damage. If you notice any issues, make sure to repair them before proceeding.
- Check the alignment of the shower walls and make any necessary adjustments to ensure they are straight and level.
- If you plan to make any modifications to the shower area, such as installing new tiles or adding additional fixtures, now is the time to do so.
- Measure the dimensions of the shower area accurately to ensure the sliding door you choose will fit perfectly.
By following these steps to prepare the shower area for installation, you can ensure a seamless and hassle-free process. Once the area is properly prepped, you’ll be ready to move on to the next steps of installing the sliding shower door.

Step-By-Step Installation Guide
In this step-by-step installation guide, we will walk you through the process of installing a sliding shower door to give your bathroom a modern and sleek look. Follow these simple instructions to transform your shower into a luxurious retreat.
Assembling the sliding shower door components
The first step in installing a sliding shower door is to assemble all the necessary components. This includes the door frame, tracks, glass panels, rollers, and any additional hardware that comes with your specific shower door kit. Refer to the manufacturer’s instructions provided with the kit to ensure you gather all the components needed.
- Start by laying out all the parts on a clean and flat surface, ensuring you have all the necessary screws and brackets.
- Once you have verified that all the parts are present, begin assembling the frame by connecting the top and bottom rails using the provided screws. Make sure the frame is square and level.
- Attach the rollers to the top of the frame, ensuring they are securely in place. These rollers will allow the door panels to glide smoothly along the tracks.
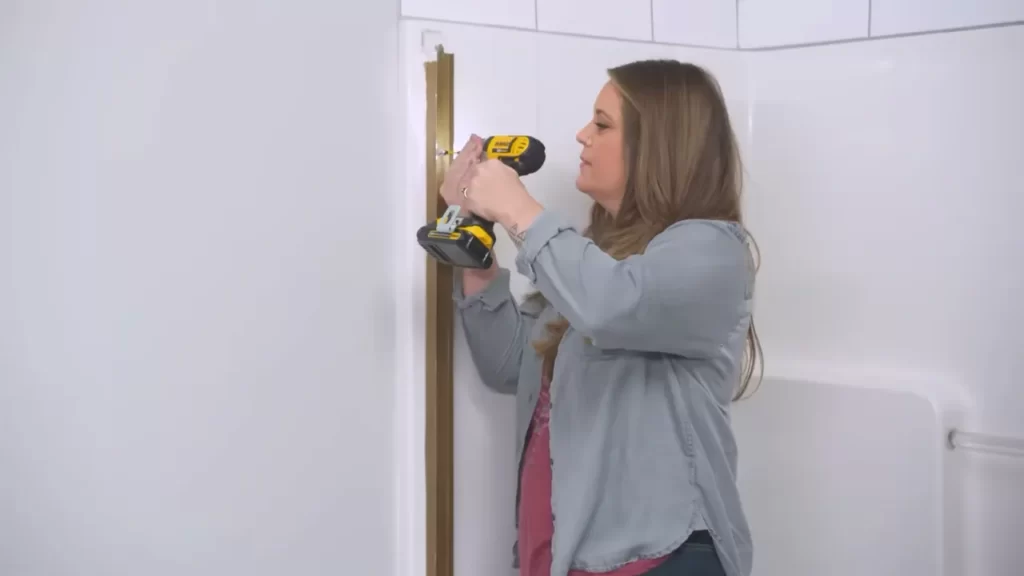
Mounting the door frame and tracks securely
With the sliding shower door components assembled, it’s time to mount the door frame and tracks securely in your shower space.
- Measure the width of your shower opening and mark the desired height for the door frame on each side.
- Using a level, ensure the marks are perfectly level and transfer them to the shower walls.
- Attach the door frame to the walls using screws or mounting brackets, making sure it is plumb and level. Ensure that the frame is securely attached to the walls to provide stability for the door panels.
- Mount the tracks on the bottom of the shower opening, aligning them with the marks made earlier. Use a measuring tape to ensure proper alignment and adjust if necessary.
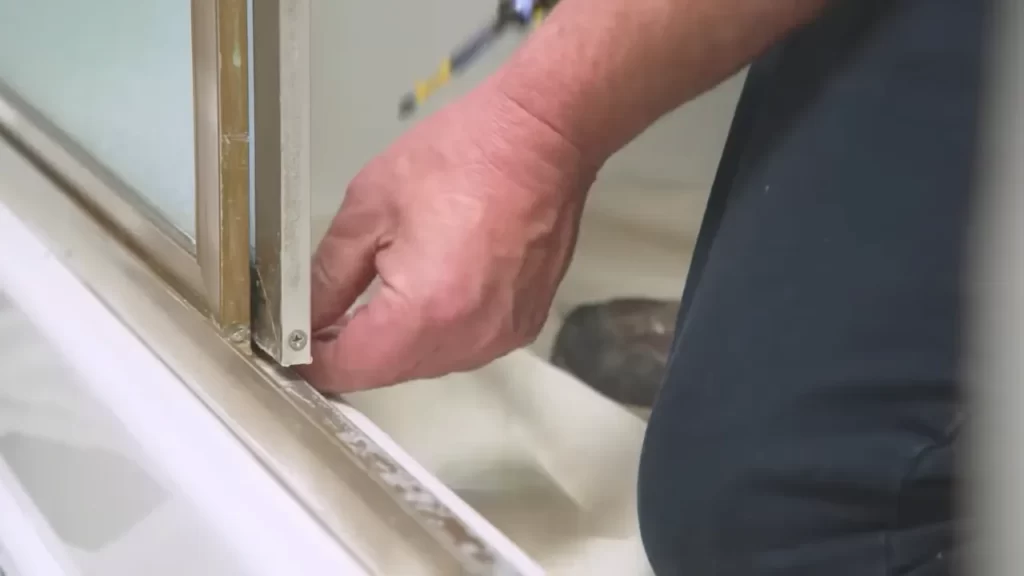
Attaching the glass panels and ensuring proper alignment
Once the door frame and tracks are securely mounted, it’s time to attach the glass panels and ensure they are properly aligned for a seamless finish.
- Carefully lift one of the glass panels and slide it into the upper track. Ensure it is securely in place.
- Slide the second glass panel into the lower track and align it with the first panel, ensuring it fits snugly.
- Check for proper alignment and adjust the panels as needed. Use a level to ensure they are perfectly vertical and adjust the position of the rollers if required.
- Once the glass panels are properly aligned, secure them to the frame using the provided screws or clips.
With the glass panels attached and aligned, your sliding shower door installation is almost complete. Give the door a gentle test slide to ensure smooth operation. Make any necessary adjustments to ensure proper functionality.
Follow these step-by-step instructions to successfully install a sliding shower door and transform your bathroom into a stylish oasis.
Adjusting And Testing The Sliding Shower Door
Adjusting and testing the sliding shower door is an essential step in the installation process to ensure smooth functionality and a perfect fit. This involves making necessary adjustments to the door and checking for any leaks or issues that may arise. By following these steps, you can ensure that your sliding shower door operates effortlessly and provides a watertight enclosure for your shower.
Ensuring smooth and effortless sliding functionality
To ensure smooth and effortless sliding functionality, it is crucial to adjust the rollers and tracks of the sliding shower door. Here’s what you need to do:
- Start by examining the door’s movement along the track. If it feels rough or drags, the rollers may need adjustment.
- Locate the adjustment screws on the rollers and turn them clockwise to raise the door or counterclockwise to lower it.
- Test the door’s movement after each adjustment to ensure it slides smoothly along the track.
By adjusting the rollers, you can optimize the sliding motion of the shower door, ensuring it operates effortlessly whenever you open or close it.
Making necessary adjustments for a perfect fit
In addition to ensuring smooth sliding functionality, it’s essential to make necessary adjustments for a perfect fit. Follow these steps:
- Check for any gaps between the door and the frame. If you notice any, adjust the door horizontally by turning the adjustment screws on the bottom of the door panels.
- Make vertical adjustments, if needed, by turning the adjustment screws on the side jambs. This will help align the door properly within the shower opening.
- Continue making necessary adjustments until the door fits snugly against the frame without any gaps.
By making these adjustments, you can ensure that your sliding shower door fits perfectly and provides an aesthetically pleasing look to your bathroom.
Checking for leaks and addressing any issues that may arise
After adjusting the sliding shower door, it’s crucial to check for leaks and address any issues that may arise. Here’s what you should do:
- Carefully inspect the door and its surrounding areas for any signs of water leakage.
- If you discover any leaks, check the door’s seals and gaskets to ensure they are intact and properly positioned.
- If needed, replace any damaged seals or gaskets to prevent water from escaping the shower enclosure.
- Test the door by running water through the shower and observing if any leaks occur. Address any issues immediately to ensure a watertight seal.
By regularly checking for leaks and promptly addressing any issues, you can maintain the functionality and integrity of your sliding shower door, creating a worry-free and enjoyable showering experience.
Maintenance And Care Tips For Sliding Shower Doors
Proper maintenance and care are essential to keep your sliding shower doors in top condition and ensure their longevity. By following these simple maintenance practices, you can prevent issues and keep your shower doors looking clean and appealing.
Regular cleaning and maintenance practices
Regular cleaning is crucial to prevent the buildup of soap scum, hard water stains, and other debris that can hinder the smooth functioning of your sliding shower doors. Here are some cleaning and maintenance tips:
- Use a mild detergent: Start by mixing a few drops of mild detergent with warm water. Using a soft sponge or cloth, gently scrub the door panels and tracks to remove dirt and grime.
- Avoid abrasive cleaners: Harsh chemicals and abrasive cleaners can damage the glass and aluminum frames of your shower doors. Stick to gentle cleaners to protect the integrity of your doors.
- Rinse thoroughly: After cleaning, make sure to rinse the doors with warm water to remove any residue. Leaving soap or cleaning agents on the glass can cause streaks and dullness.
- Dry after each use: To prevent water spots and mineral deposits, wipe down the doors with a clean, dry cloth after each shower.
Preventing mold and mildew buildup
Mold and mildew can be a common issue in damp environments like bathrooms. To prevent their buildup on your sliding shower doors, follow these tips:
- Ventilate the bathroom: Ensure proper ventilation in your bathroom to reduce humidity levels. Use exhaust fans or open windows to allow fresh air to circulate.
- Wipe down after showering: After each shower, use a squeegee or a towel to wipe down the doors and remove excess moisture. This step helps eliminate the damp conditions that mold and mildew thrive in.
- Regularly check for and fix leaks: Inspect the doors and surrounding areas for any leaks. Seal any gaps or cracks promptly to prevent moisture from seeping into the door tracks and causing mold growth.
Troubleshooting common issues and repairs
Occasionally, you may encounter common issues with your sliding shower doors that require repairs. Here are some troubleshooting tips:
- Sticking or misaligned doors: If your doors are sticking, check the tracks for any debris or obstructions. Clean the tracks thoroughly and ensure they are properly aligned to allow smooth sliding.
- Loose or broken parts: Inspect the door handles, rollers, and other hardware regularly for any signs of wear or damage. Replace or tighten any loose or broken parts as needed to maintain the functionality of your doors.
- Leaking doors: If you notice water leaking through the edges of your sliding shower doors, check the rubber seals and gaskets. Replace any worn-out or damaged seals to prevent further leaks.
By following these maintenance and care tips, you can keep your sliding shower doors in optimal condition and enjoy a clean and hassle-free showering experience.
Increasing The Lifespan Of Sliding Shower Doors
Sliding shower doors are not only a stylish addition to any bathroom, but they also provide convenience and functionality. To ensure that your sliding shower door remains in top condition and lasts for years to come, it is important to follow best practices and take proper care of the glass and hardware. By implementing these maintenance strategies, you can extend the longevity of your sliding shower door and enjoy a beautiful and functional bathroom for the long term.
Best practices for extending the longevity of your shower door
Maintaining the lifespan of your sliding shower door starts with adopting some best practices. By incorporating these tips into your regular cleaning and maintenance routine, you can prevent damage and keep your shower door looking pristine:
- Keep the shower area clean: Regularly clean the shower area, including the door tracks, to prevent dirt and debris buildup that can affect the sliding mechanism.
- Avoid the use of harsh chemicals: Harsh chemicals can damage the glass and hardware of your shower door. Opt for mild cleaners or natural solutions instead.
- Wipe down the door after each use: Wiping down the door with a squeegee or towel after each use helps to remove water spots and prevent mineral buildup on the glass.
- Check and tighten hardware: Periodically inspect the hardware on your sliding shower door, such as handles and hinges, and tighten any loose screws or fittings.
- Avoid slamming the door: Be mindful when opening and closing the shower door to avoid slamming it, as this can cause damage to the tracks and hardware.
Protecting the glass and hardware from damage
The glass and hardware of your sliding shower door are vulnerable to potential damage. To protect these components and ensure their longevity, consider the following precautions:
- Use a protective coating: Applying a protective coating to the glass can help prevent soap scum, hard water stains, and mineral buildup. This coating makes cleaning easier and helps maintain the overall appearance of the glass.
- Avoid abrasive cleaners or tools: When cleaning the glass, avoid using abrasive cleaners or tools that can scratch or damage the surface. Instead, opt for a soft cloth or sponge.
- Regularly lubricate the tracks: Keep the tracks of your sliding shower door lubricated with silicone spray or a similar lubricant. This helps to ensure smooth operation and prevents excessive wear and tear.
Replacing worn-out parts and components
Over time, certain parts and components of your sliding shower door may wear out and require replacement. By promptly replacing these components, you can maintain the functionality and appearance of your shower door. Here are some common parts that may need replacing:
| Component | Signs of wear | Replacement |
|---|---|---|
| Rollers | Difficulty in sliding, squeaking noises | Replace with new rollers |
| Seals and sweeps | Leaking water, mold or mildew growth | Install new seals and sweeps |
| Hardware | Rust, loose or broken parts | Replace with suitable hardware |
By regularly inspecting your sliding shower door for any signs of wear or damage, you can address these issues promptly and prevent further complications.
By adhering to these best practices for protecting and maintaining your sliding shower door, you can significantly increase its lifespan. With proper care, your shower door will continue to provide functionality and beauty in your bathroom for years to come.
Frequently Asked Questions
How Should Sliding Shower Doors Be Installed?
To install sliding shower doors, follow these guidelines: 1. Measure the opening and choose the right size doors. 2. Assemble the hardware and attach it to the walls and frame. 3. Hang the doors on the rollers and adjust them for proper alignment.
4. Install the bottom track to guide the doors. 5. Test the doors for smooth operation and make any necessary adjustments.
Can I Install A Shower Door Myself?
Yes, you can install a shower door yourself. Just make sure to follow the installation instructions provided with the door. It’s recommended to have basic DIY skills and take necessary safety precautions. If you’re unsure, hiring a professional might be a better option for proper installation.
How Do You Put A Sliding Shower Door Back On Track?
To put a sliding shower door back on track, follow these steps: 1. Remove the door by lifting it off the track. 2. Clean the track of any dirt or debris. 3. Check the rollers for damage or wear and replace if necessary.
4. Align the door with the track and slide it back into place. 5. Test the door to ensure it slides smoothly. Remember to handle the door carefully to avoid any damage.
How To Install 3 Panel Sliding Shower Doors?
To install 3 panel sliding shower doors, first measure and mark the desired height. Install the top track, ensuring it is level, followed by the side jambs. Hang the doors onto the top track and attach the bottom track. Adjust the doors for smooth sliding and secure them with screws.
Conclusion
Installing a sliding shower door is a straightforward process that can greatly enhance the functionality and aesthetics of your bathroom. By following the step-by-step instructions outlined in this guide, you’ll be able to effortlessly transform your shower space. Remember to carefully measure, gather the necessary tools, and take your time during the installation process.
With a little effort and patience, you’ll be enjoying the benefits of a sliding shower door in no time.