To install a shower system, first, locate and turn off the water supply, then follow the instructions provided with your specific shower system model. Shower system installation involves connecting the system components, such as the showerhead, faucet, and valves, to the existing plumbing.
Start by attaching the valve and then connect the water lines, ensuring proper sealing and secure connections. Finally, mount and secure the showerhead and faucet to complete the installation process.
Importance Of Shower System Installation
Why installing a shower system is essential
When it comes to bathroom renovations, one crucial aspect that is often overlooked is the installation of a proper shower system. Many homeowners may assume that installing a simple showerhead is sufficient, but the truth is that a well-functioning shower system offers a multitude of benefits that cannot be overlooked. In this article, we will delve into the importance of shower system installation and explore the numerous advantages it brings to your daily bathing experience.
Benefits of having a well-functioning shower system
Having a well-functioning shower system can completely transform your daily showering routine. Here are some key advantages that highlight why investing in a quality shower system is essential:
1. Enhanced water pressure and flow
A properly installed shower system ensures a consistent and powerful water pressure that results in a revitalizing shower experience. Say goodbye to weak streams and inadequate water flow, and enjoy a refreshing shower every time you step into your bathroom.
2. Improved bathroom aesthetics
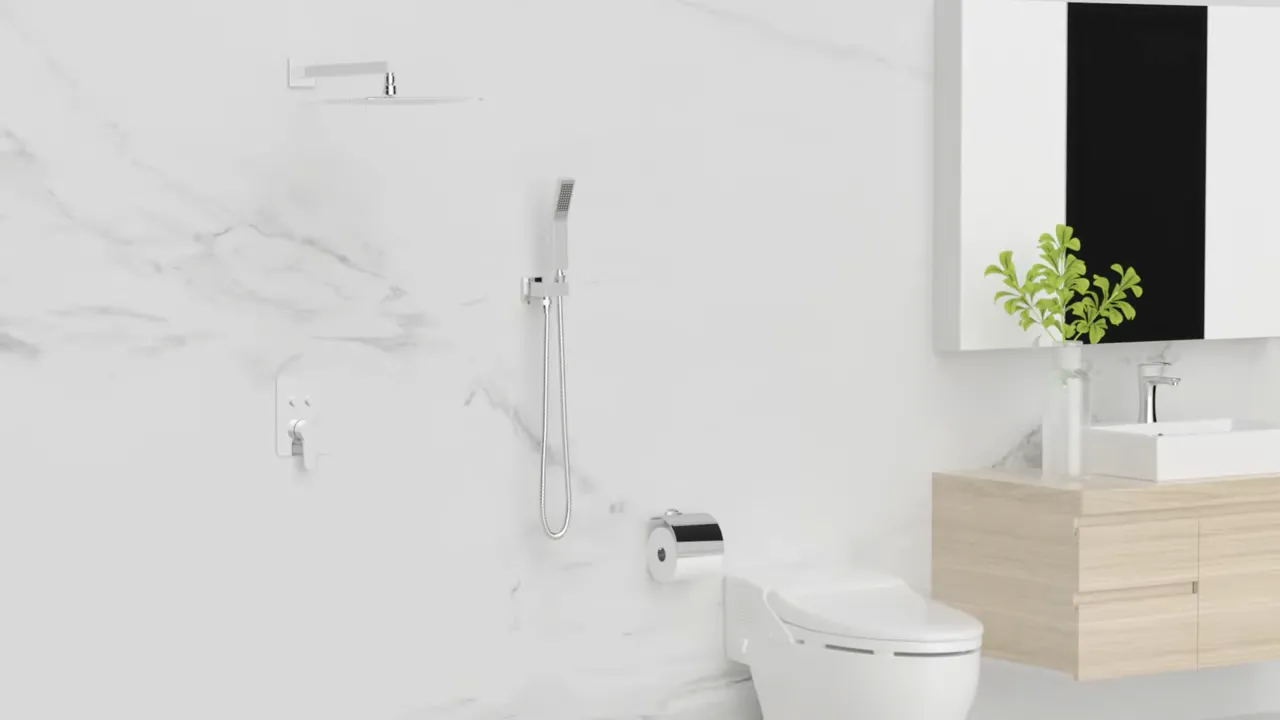
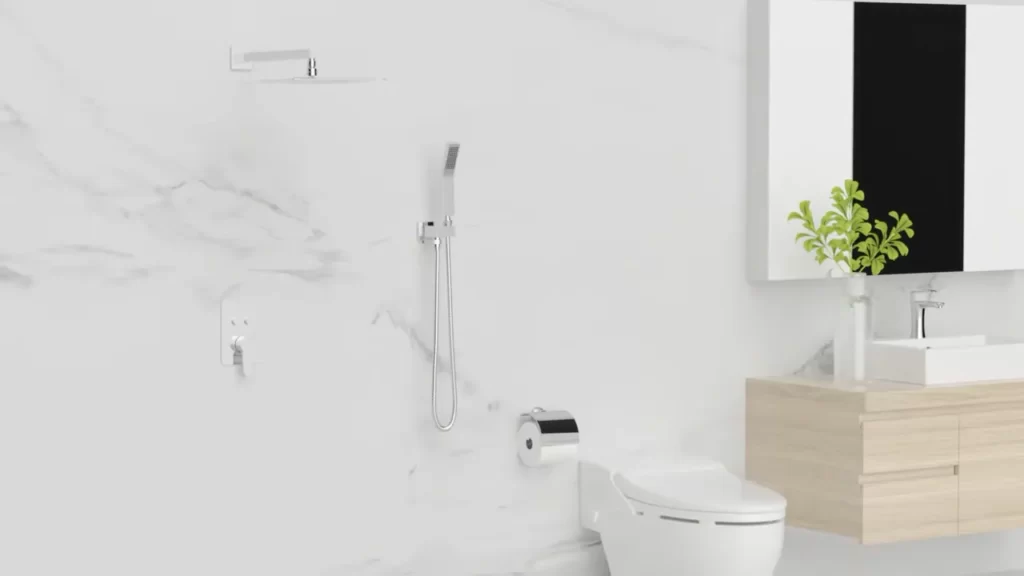
Aesthetics play a crucial role in any bathroom renovation. With a well-designed shower system, you can enhance the overall appearance of your bathroom. Choose from a wide range of stylish showerheads, handles, and fixtures that complement the existing decor and create a cohesive and visually pleasing atmosphere.
3. Customizable features for personalized comfort
A properly installed shower system offers various customizable features that cater to your personal preferences. From adjustable water temperature controls to different spray patterns and massage options, you can create a shower experience tailored to your unique needs, promoting relaxation and rejuvenation.
4. Water and energy efficiency
A well-functioning shower system can also contribute to water and energy conservation efforts. Modern shower systems incorporate technologies that reduce water wastage without compromising on the overall shower experience. This not only helps conserve our precious resources but also reduces your utility bills, making it an eco-friendly and cost-effective choice.
5. Reduced maintenance and repairs
Investing in a quality shower system and ensuring proper installation can minimize the need for frequent maintenance and repairs. With components that are built to last, you can enjoy a hassle-free shower experience for years to come, saving you both time and money in the long run.
In conclusion, the installation of a shower system is not just a functional requirement but an essential aspect of any bathroom renovation. The benefits it brings far surpass the initial cost, making it an investment that enhances your daily showering experience, improves your bathroom’s aesthetics, promotes water and energy efficiency, and offers long-term durability. Don’t overlook this critical aspect of your bathroom design and invest in a quality shower system that caters to your unique needs.
Tools And Materials Needed
Gathering all the necessary tools and materials for a successful installation
Before you begin installing a shower system, it is important to gather all the required tools and materials to ensure a smooth and successful installation process. Having everything you need at your fingertips will not only save you time but also prevent any unnecessary delays or interruptions during the installation.
A checklist of items needed for the project
Here is a checklist of the essential tools and materials you will need for installing a shower system:
| Tools | Materials |
|---|---|
|
|
With this checklist, you can ensure that you have all the necessary tools and materials to complete your shower system installation without any hassle. Gathering these items before you begin will make the process smoother and more efficient, allowing you to enjoy your new shower system in no time.
Assessing Your Bathroom Space
Evaluating the available space and layout for the shower system
Before diving into the exciting task of installing a new shower system in your bathroom, it is essential to assess the available space and layout of your bathroom. By doing this, you can ensure that the shower system you choose fits seamlessly into your existing bathroom design while maximizing the functionality and aesthetics of the space.
One way to evaluate the available space is to measure the dimensions of your bathroom. Take note of both the length and width of the area where you plan to install the shower system. This will give you a clear understanding of the space you are working with and help you determine the right size and style of the shower system.
Additionally, take into consideration any existing fixtures and features in your bathroom that may impact the placement or installation of the shower system. This can include plumbing, electrical outlets, windows, and doors. Make a mental note of these elements and how they could potentially affect the installation process.
Considering any necessary modifications to accommodate the new system
Once you have assessed the available space in your bathroom, it’s important to consider if any modifications are required to accommodate the new shower system effectively. Depending on your specific situation, you may need to make adjustments to the plumbing, electrical wiring, or even the structural layout of the space.
For example, if you are planning to switch from a bathtub to a shower system, you may need to remove the bathtub and create a designated shower area. This could involve making changes to the plumbing to reroute the water supply and drainage for the new shower system.
If you are installing a shower system in a newly constructed bathroom or during a bathroom renovation, you have the advantage of customizing the space to fit your needs. In such cases, you can consult with a professional contractor or plumber to help you with the necessary modifications and ensure that they are done correctly and safely.
Remember, assessing your bathroom space and considering any modifications will not only help you choose the right shower system but also provide a smooth and hassle-free installation process. Taking these steps ensures that your new shower system will not only be functional but also seamlessly integrate into your bathroom’s overall design and layout.
Measuring And Marking
Accurately measuring and marking the area for a shower system installation is a crucial step that ensures the perfect fit and proper functionality of your new shower. Taking the time to measure and mark the positions for pipes, fixtures, and drains will save you from unnecessary headaches and potential issues in the future.
Accurately measuring the area for the shower system installation
To begin, you should measure the dimensions of the space where you plan to install the shower system. Grab your measuring tape and measure the length, width, and height of the designated area. Take note of any slopes or uneven surfaces that might affect the installation process. Keeping these measurements handy will help you choose the right-sized shower system for your space.
Next, assess the available space and consider factors such as the shower door swing, proximity to other fixtures, and the convenience of movement within the shower area. This evaluation will assist you in determining the best layout and positioning for your shower system.
Once you have measured the area and assessed the space, you can move on to marking the positions for pipes, fixtures, and the drain.
Marking the positions for pipes, fixtures, and drain
Proper marking ensures that your plumber or installer knows where to place the necessary components and prevent any guesswork during the installation. Here’s how you can mark the positions:
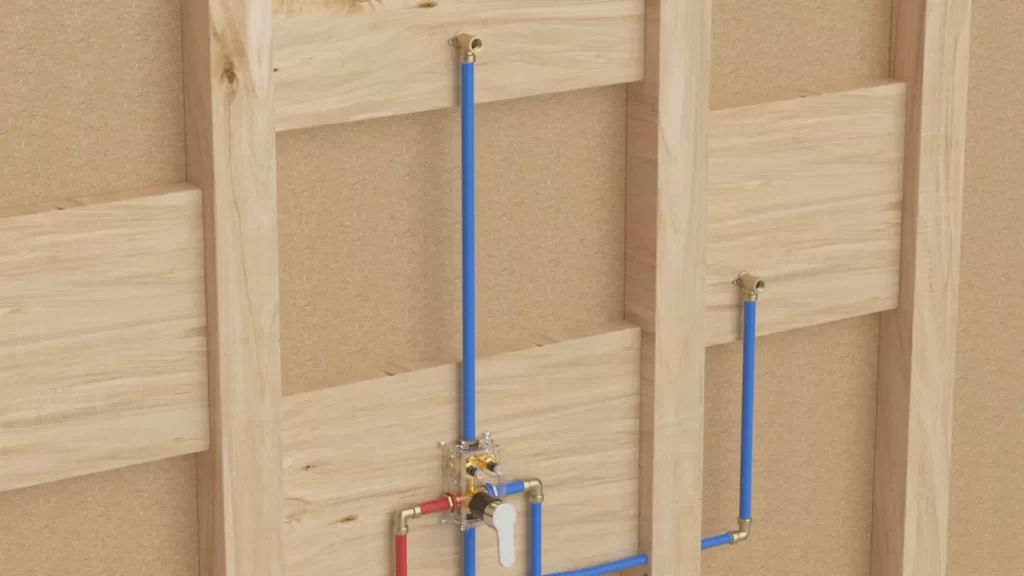
- Pipes: Start by identifying the existing water and drainage pipes. Measure and mark the locations where the pipes will connect to the shower system. Use a permanent marker or painter’s tape to clearly indicate these spots on the wall.
- Fixtures: Consider the desired placement of your showerhead, faucets, and other fixtures. Measure the distance from the floor or the recommended height from the manufacturer’s instructions. Mark these positions accurately to achieve proper alignment during installation.
- Drain: Determine the ideal location for the shower drain to ensure efficient water drainage. Measure and mark the center point of the drain hole or the area where the floor needs to be sloped towards the drain. This marking will guide the plumber or installer in creating the necessary slope for proper water flow.
Throughout the marking process, it is essential to double-check your measurements and make any adjustments as needed. Taking the time to measure accurately and mark the positions will provide you with a clear plan for your shower system installation and help ensure a successful outcome.
Now that you have accurately measured and marked the area for your shower system installation, you are ready to move on to the next step, which involves preparing the area for installation. In the upcoming section, we will guide you through the necessary preparations, including wall and floor preparations, to ensure a smooth installation process. Stay tuned!
Connecting The Plumbing
Connecting the plumbing is an essential step in installing a new shower system. It involves shutting off the water supply and draining excess water, as well as connecting the hot and cold water supply lines to the new shower system. In this section, we will guide you through each step to ensure a successful installation.
Shutting off the water supply and draining excess water
Before you begin connecting the plumbing for your new shower system, it’s crucial to shut off the water supply to avoid any accidental leaks or bursts. Locate the main water shut-off valve in your home, typically found near your water meter or next to the hot water tank. Turn the valve clockwise to close it and cut off the water supply.
Next, you’ll want to drain any excess water from the pipes to prevent a mess during the installation process. To do this, open the faucets in your home to release any remaining water from the lines. Ensure that all the water has been drained before moving on to the next step.
Connecting the hot and cold water supply lines to the new shower system
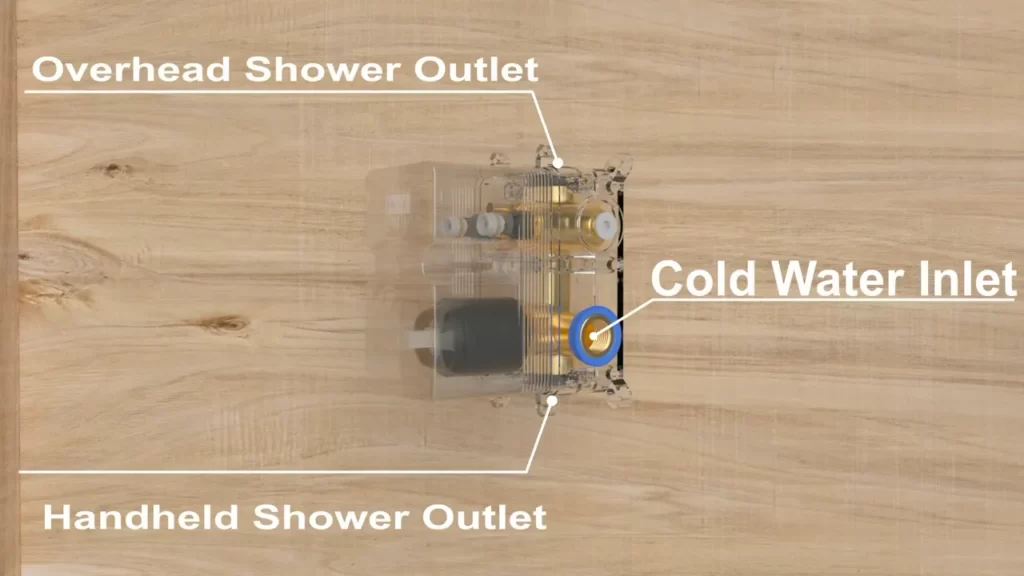
Once you have shut off the water supply and drained the excess water, it’s time to connect the hot and cold water supply lines to your new shower system. Start by identifying the hot and cold water supply lines in your bathroom. These are usually labeled or color-coded for easy identification.
Take the hot water supply line and connect it to the corresponding hot water inlet on your shower system. This connection can typically be made using a compression fitting or a threaded connection. Ensure that the connection is secure and tight to prevent any leaks.
Next, connect the cold water supply line to the cold water inlet on your shower system using the same method. Again, make sure the connection is secure and properly tightened.
Once both the hot and cold water supply lines are connected, double-check all the connections to ensure there are no leaks. It’s important to inspect them thoroughly and, if necessary, use plumber’s tape or pipe joint compound to seal any potential leaks.
Your shower system is now connected to the plumbing, ready for the next steps in the installation process. Congratulations on successfully completing this crucial phase of the project!
Mounting The Shower Fixtures
When it comes to installing a shower system, properly mounting the shower fixtures is crucial. This step ensures that the showerhead, handles, and other fixtures are securely attached and aligned correctly, providing a comfortable shower experience. In this section, we will walk you through the process of installing each shower fixture and ensuring its proper alignment and secure attachment.
Installing the Showerhead
The showerhead is a key component of any shower system. To install the showerhead, follow these steps:
- First, start by attaching the shower arm to the water supply pipe. This is typically located on the wall above the bathtub or shower area.
- Screw the shower arm onto the water supply pipe, ensuring a tight and secure connection. Use plumber’s tape if necessary to prevent any leaks.
- Next, attach the showerhead onto the shower arm. Twist it clockwise until it is securely in place.
- Ensure that the showerhead is facing downwards and is aligned with your desired shower direction. Make any necessary adjustments to achieve the desired angle.
Installing the Handles and Other Fixtures
In addition to the showerhead, you may also have handles and other fixtures that need to be installed. Here’s how to do it:
- Start by determining the desired location for the handles and fixtures. Measure and mark the positions accurately to ensure proper alignment.
- Using a drill and the appropriate drill bits, create holes for the handles and fixtures according to the manufacturer’s instructions.
- Insert the handles and fixtures into the holes and secure them in place using the provided screws or bolts.
- Tighten the screws or bolts to ensure a secure attachment, but be careful not to overtighten and risk damaging the fixtures.
It’s important to note that proper alignment is crucial for both the showerhead and the handles/fixtures. This ensures that the water flows evenly from the showerhead and that the handles operate smoothly. Additionally, ensuring a secure attachment prevents any potential leaks or accidents.
By following these steps and paying attention to detail, you can successfully mount the shower fixtures in your shower system. Take your time and double-check your work to ensure a hassle-free and enjoyable shower experience. Now that the fixtures are securely mounted, you’re one step closer to enjoying your new shower system!
Installing The Shower Pan And Drain
When it comes to installing a shower system, one of the most crucial steps is installing the shower pan and drain. The shower pan provides the base for the shower and ensures proper drainage, while the drain assembly ensures a watertight seal. In this section, we will guide you through the process of preparing and installing the shower pan base and connecting and sealing the drain assembly.
Preparing and installing the shower pan base
To begin the installation, you need to ensure that the floor is clean and level. It is recommended to place a waterproof membrane or a layer of cement backer board over the subfloor to prevent any moisture from seeping through. Additionally, check the manufacturer’s instructions for any specific requirements.
Next, position the shower pan base in the desired location, making sure it fits snugly against the walls. Use a level to ensure it is perfectly flat. Once you are satisfied with the positioning, mark the drain location on the subfloor.
Now, it’s time to apply a layer of mortar or pre-mixed cement to create a solid base for the shower pan. Spread the mortar evenly within the marked area, making sure to follow the manufacturer’s instructions for mixing and application. Place the shower pan onto the mortar bed, firmly pressing it down to create a solid bond. Use a level to recheck the pan’s position and adjust if necessary.
Allow the mortar to dry and cure as per the manufacturer’s instructions. This usually takes about 24 to 48 hours. During this time, refrain from applying any weight or pressure on the shower pan.
Connecting and sealing the drain assembly
Once the shower pan is securely in place, it’s time to connect and seal the drain assembly. Start by inserting the drain body into the drain hole on the shower pan base. Tighten the locknut to secure the drain body in place, ensuring it is aligned properly with the pan.
Next, apply a bead of waterproof sealant around the edge of the drain body where it meets the shower pan. This will create a watertight seal and prevent any leaks. Smooth out the sealant with a putty knife or your finger to ensure a uniform application.
After sealing the drain body, attach the drain strainer or grate to the drain body according to the manufacturer’s instructions. Make sure it is securely fastened to prevent any movement or water leakage.
Finally, connect the drain pipe to the drain body using appropriate fittings and secure them tightly. Inspect all connections for any signs of leaks and make necessary adjustments if needed.
In conclusion, installing the shower pan and drain assembly is an important step in the shower system installation process. By following these guidelines and adhering to the manufacturer’s instructions, you can ensure a sturdy base and a watertight seal for your shower system.
Testing For Leaks
Checking for any leaks in the plumbing connections
After installing the shower system, it’s crucial to test for leaks in the plumbing connections. Even a small leak can cause significant damage over time, leading to mold growth and water damage to your bathroom. By taking the time to check for leaks, you can address any issues before they become bigger problems.
Here’s how you can check for leaks in the plumbing connections:
- Turn on the water supply: Begin by turning on the water supply to the shower system. Start with a low flow and gradually increase the water pressure.
- Inspect the connections: Carefully examine each plumbing connection, including the showerhead, faucets, and shower handles. Look for any signs of water dripping or puddles forming around the connections.
- Check the pipes: While the water is flowing, inspect the pipes for any signs of leakage. Pay close attention to areas where the pipes are joined or where they connect to the shower system.
- Feel for moisture: Run your hand along the plumbing connections and pipes to check for any moisture. If you feel dampness or water droplets, there may be a leak that needs to be addressed.
If you find a leak during the testing process, it’s important to troubleshoot and fix the issue before finalizing the installation. Ignoring a leak can lead to long-term damage and additional repairs down the line.
Troubleshooting and fixing any issues before finalizing the installation
When addressing leaks or other plumbing issues, it’s essential to troubleshoot and fix them promptly. Here are some steps you can follow to troubleshoot and fix any problems:
- Identify the source of the leak: Carefully examine the area where you noticed the leak. Look for loose connections, damaged pipes, or any other visible issues that may be causing the leak.
- Tighten connections: If you find a loose connection, use a wrench to tighten it. Make sure not to overtighten, as it can damage the plumbing components.
- Replace damaged parts: If you find any damaged pipes, faucets, or showerhead components, replace them with new ones. This will ensure a secure and leak-free installation.
- Use plumber’s tape: Apply plumber’s tape to the threaded areas of the plumbing connections before reconnecting them. This helps create a watertight seal and prevents future leaks.
- Re-test for leaks: After troubleshooting and fixing the issue, turn on the water supply again and re-test for leaks. Confirm that any previous leaks have been successfully resolved.
By thoroughly testing for leaks and troubleshooting any issues, you can ensure a leak-free and properly functioning shower system. Taking the time to address these potential problems upfront will save you from headaches and costly repairs in the future.
Sealing And Waterproofing
Applying appropriate sealants and waterproofing materials
One of the most crucial steps in installing a shower system is sealing and waterproofing. Without proper sealing and waterproofing, your shower system may be prone to leaks, which can cause damage to your walls and floors over time. To ensure a watertight and long-lasting installation, it is essential to use the right sealants and waterproofing materials.
Choosing the right sealant
When it comes to sealing your shower system, it is important to choose the right sealant that can withstand the constant exposure to water and humidity. Silicone sealants are commonly used for this purpose as they are flexible, durable, and provide excellent adhesion to various surfaces. Look for a high-quality silicone sealant that is specifically designed for bathrooms and has excellent mold and mildew resistance properties.
Preparing the surfaces
Before applying the sealant, it is crucial to prepare the surfaces properly. Make sure to clean the surfaces thoroughly to remove any dirt, dust, or debris. Use a mild detergent and water solution to clean the surfaces, and allow them to dry completely before proceeding with the sealing process. Additionally, ensure that the surfaces are smooth and free from any cracks or damages that could compromise the effectiveness of the sealant.
Applying the sealant
Once the surfaces are prepared, it’s time to apply the sealant. Follow the manufacturer’s instructions for the specific sealant you are using. Typically, silicone sealants come in a tube, which can be easily dispensed with a caulking gun. Apply a continuous bead of sealant along the edges and joints of your shower system, ensuring complete coverage. Smooth the sealant with a caulk smoothing tool or a wet finger to achieve a neat and uniform finish. Be sure to work quickly as silicone sealants tend to dry fast.
Using waterproofing materials
In addition to sealants, waterproofing materials are also essential for ensuring a watertight shower installation. These materials create a barrier that prevents water from seeping into the walls and floors, protecting them from water damage. There are various waterproofing products available on the market, such as waterproofing membranes and liquid waterproofing coatings.
Waterproofing membranes are typically applied to the walls and floors before the tiles are installed. They form a waterproof layer that acts as a shield against water penetration. Liquid waterproofing coatings, on the other hand, are applied directly on the surface of the tiles. They provide an additional layer of protection and enhance the waterproofing properties of the shower system.
Ensure that you carefully follow the manufacturer’s instructions when using waterproofing materials. Apply the materials evenly and adequately, paying extra attention to corners, seams, and any areas where water may potentially penetrate.
Conclusion
Sealing and waterproofing is a crucial step in the installation of a shower system. By applying appropriate sealants and using waterproofing materials, you can ensure a watertight and long-lasting installation. Always choose high-quality sealants and follow the manufacturer’s instructions for the best results. Don’t forget to prepare the surfaces properly and pay attention to detail when applying the sealant and waterproofing materials. By doing so, you can enjoy a leak-free shower system that will stand the test of time.
Cleaning And Final Touches
Cleaning and Final Touches are the last steps in installing a shower system, but they are crucial for the overall appearance and functionality of your new shower. In this section, we will guide you on how to clean up any debris and residue left from the installation and add final touches and decorative elements to complete the look of your new shower system.
Cleaning up any debris and residue from the installation
After successfully installing your new shower system, it’s essential to clean up any debris and residue left behind. This ensures that your shower area is clean and ready for use. Here are a few steps you can follow to thoroughly clean up:
- Start by clearing away any construction debris, such as bits of tile, grout, or adhesive. You can use a broom or a vacuum cleaner to remove loose particles from the floor.
- Next, wipe down the walls and floor with a damp cloth or sponge to remove any remaining residue. Pay attention to the areas where the shower fixtures were installed, and make sure to remove any excess caulking or adhesive.
- If there are stubborn stains or dried grout residue, you can use a mild soap solution and a non-abrasive scrub brush to gently scrub the affected areas. Rinse well with clean water afterward to remove any soap residue.
- Lastly, dry the shower area thoroughly using a clean towel or a dry mop. This helps to prevent any moisture buildup and ensures a clean surface for the final touches.
Adding final touches and decorative elements to complete the new shower system
Once the cleaning is done, it’s time to add the final touches and decorative elements to enhance the overall look of your new shower system. Here are a few ideas to consider:
- Install a shower curtain or door: Hang a shower curtain or install a glass door to prevent water from splashing out and to add a touch of elegance to your shower area. Make sure to choose a style that complements the design of your bathroom.
- Add shelving or organizers: Utilize the space in your shower by adding shelves or organizers for storing bath products. This not only keeps your shower area neat and tidy but also adds functionality.
- Accessorize with towel bars and hooks: Install towel bars or hooks within reach of the shower area to conveniently hang your towels and robes. This adds convenience and keeps your shower space clutter-free.
- Consider decorative tiles or accents: If you want to add a unique touch to your shower, consider using decorative tiles or accents. These can be used as borders or focal points within the shower area, creating a visually appealing design.
By following these steps and adding the final touches, you can transform your ordinary shower into a beautiful and functional oasis. Enjoy the benefits of your newly installed shower system while relishing in the refreshing and soothing experience it offers.
Frequently Asked Questions
Can I Install A Shower Myself?
Yes, you can install a shower yourself following proper guidelines and safety measures. Make sure to carefully read and understand the installation instructions provided by the manufacturer. If you are unsure, it is recommended to seek professional assistance to ensure a seamless installation process.
What Is The Cheapest Way To Install A Shower?
The cheapest way to install a shower is to do it yourself. You can save money by buying a pre-fabricated shower kit and installing it on your own. Just follow the instructions carefully, and you’ll have a new shower without breaking the bank.
How Do You Install A Shower Panel?
To install a shower panel, follow these steps: 1. Start by turning off the water supply. 2. Remove the existing showerhead and arm. 3. Mount the panel securely to the wall using screws. 4. Connect the hot and cold water supply lines.
5. Finally, turn the water supply back on and test the panel for proper functioning.
Are Shower Panels Worth It?
Yes, shower panels are worth it. They offer a luxurious and convenient showering experience. They have multiple features like adjustable jets, rainfall showerheads, and digital controls. They enhance the look of your bathroom and provide a spa-like feel. Installation is easy and they are durable, making them a long-term investment.
Conclusion
To sum up, installing a shower system is a straightforward process that can greatly enhance your bathroom experience. With a little bit of planning and some basic tools, you can have a functional and stylish shower in no time. Remember to follow the manufacturer’s instructions and take your time to ensure everything is installed properly.
Whether you’re updating your current shower or starting from scratch, this guide has provided you with the necessary steps to get the job done right. Happy showering!