
To install a shower panel on an existing shower, follow these steps: remove the old showerhead and arm, attach the shower panel to the wall using screws and a level, connect the panel to the water supply using the provided hoses, and test the panel for proper functioning. Installing a shower panel on an existing shower can be a great way to upgrade your bathroom without major renovations.
Whether you’re looking for a spa-like experience or just want to enhance your showering routine, a shower panel can provide an array of features such as rainfall showerheads, adjustable jets, and temperature controls. We’ll guide you through the process of installing a shower panel on your existing shower, so you can enjoy a luxurious and rejuvenating shower experience in no time.
Understanding The Benefits Of A Shower Panel Upgrade
Showering is a daily ritual that not only refreshes your body but also revitalizes your mind. So why settle for a mediocre showering experience when you can elevate it to a whole new level with a shower panel upgrade? A shower panel is a multi-functional and stylish addition to your bathroom that can transform the way you shower. In this article, we will explore the advantages of installing a shower panel and how it can enhance your showering experience.
Exploring the Advantages of Installing a Shower Panel
Shower panels offer a range of benefits that can greatly improve your daily shower routine. Here are some key advantages to consider:
1. Versatility: A shower panel is a versatile solution that combines various showering features into one compact unit. It typically includes a showerhead, body jets, a handheld shower wand, and sometimes even a rainfall showerhead. This versatility allows you to customize your shower experience to suit your preferences and needs.
2. Convenience: With a shower panel, you no longer need to juggle multiple shower accessories. Everything you need for a refreshing shower is conveniently integrated into one sleek panel. This eliminates the clutter and hassle of dealing with separate showerheads and body jets.
3. Space-Saving: If you have a small bathroom or limited shower space, a shower panel can be a game-changer. Its compact design allows for efficient space utilization, freeing up valuable room and giving your bathroom a clean and organized look.
4. Easy Installation: Installing a shower panel on an existing shower is a hassle-free process. Most shower panels are designed to fit standard plumbing configurations, making the installation quick and straightforward. You can either hire a professional plumber or follow the manufacturer’s instructions to install it yourself.
How It Can Enhance Your Showering Experience
Now that we have explored the advantages of installing a shower panel, let’s delve into how it can enhance your showering experience:
1. Increased Water Coverage: Shower panels often come with multiple water outlets, such as body jets and rainfall showerheads. This expanded coverage ensures that every part of your body is gently cleansed and massaged, leaving you feeling refreshed and rejuvenated.
2. Therapeutic Effects: The combination of body jets and various water flow settings can provide a spa-like experience in the comfort of your own bathroom. The pulsating water massages can help alleviate stress, soothe sore muscles, and relieve tension, making your shower a therapeutic retreat after a long day.
3. Customizable Settings: Many shower panels offer adjustable water pressure, temperature, and spray patterns, giving you complete control over your showering experience. You can easily switch between a gentle mist, invigorating waterfall, or targeted body jet massage to suit your mood and preferences.
4. Aesthetically Pleasing: Apart from their functional advantages, shower panels also add a touch of elegance and modernity to your bathroom. With their sleek and stylish designs, they can instantly elevate the overall aesthetic appeal of your shower space.
In conclusion, installing a shower panel on your existing shower can offer numerous benefits, from increased versatility and convenience to improved water coverage and customizable settings. Whether you’re looking to create a spa-like experience or simply upgrade the functionality of your shower, a shower panel is undoubtedly a worthwhile investment. So why wait? Enhance your showering experience today with a shower panel upgrade.
Preparing For Installation
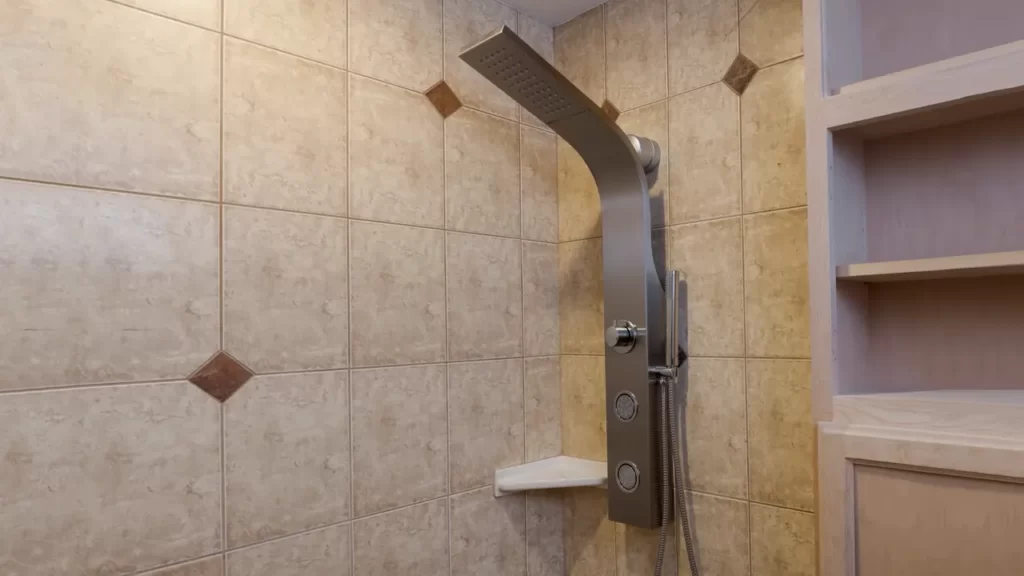
If you’re looking to upgrade your shower experience, installing a shower panel on your existing shower is a great option. Not only does it provide a modern and sleek look, but it also offers a range of features to enhance your shower time.
Assessing the current state of your existing shower
Before starting the installation process, you need to assess the current state of your existing shower. This will help you determine if any repairs or modifications are needed before proceeding.
Take a close look at the shower walls, pipes, and fixtures. Check for any signs of leaks, cracks, or damage. If you notice any issues, it’s crucial to address them beforehand to ensure a smooth installation and prevent further problems down the line.
In addition, consider the dimensions and layout of your shower. Measure the available space to ensure that the shower panel you choose will fit properly. This will help you avoid any unnecessary headaches during the installation process.
Gathering the necessary tools and materials
Once you’ve assessed the condition of your existing shower and determined that it’s suitable for installing a shower panel, it’s time to gather the necessary tools and materials. Having everything ready beforehand will streamline the installation process and minimize any delays.
Here’s a list of tools and materials you’ll likely need:
- Adjustable wrench
- Screwdriver
- Teflon tape
- Level
- Measuring tape
- Shower panel kit
- Plumber’s putty
- Drill and drill bits
- Anchors and screws
Make sure to check the specific requirements of your chosen shower panel kit as it may require additional tools or materials for a successful installation. Having everything within reach will save you from any unnecessary trips to the hardware store during the installation process.
Ensuring safety precautions are in place
Prioritizing safety during the installation process is essential. Taking a few precautions will help prevent accidents and ensure a successful and stress-free installation.
Before beginning, make sure to turn off the water supply to your shower. This will prevent any water from flowing while you’re working, reducing the risk of leaks or flooding. Additionally, use protective equipment such as gloves and safety glasses to safeguard yourself from any potential injury.
If you’re uncertain about any aspect of the installation process, it’s advisable to seek professional assistance. A licensed plumber or experienced contractor can provide expert guidance and ensure the installation is done properly and safely.
By assessing the current state of your existing shower, gathering the necessary tools and materials, and following proper safety precautions, you’ll be well-prepared to embark on the installation journey of your new shower panel. The next step is to proceed with the actual installation process, which we’ll cover in the upcoming section of this guide.
Removing The Old Shower Fixtures
When it comes to giving your existing shower a brand new look, installing a shower panel can be a game-changer. However, before you can start enjoying the benefits of a luxurious shower panel, you first need to remove the old shower fixtures. In this guide, we’ll take you through the step-by-step process of disassembling and disconnecting the old showerhead, removing the existing shower handle and spout, and properly shutting off the water supply. So, let’s dive right in!
Disassembling and Disconnecting the Old Showerhead
Removing the old showerhead is the first step in replacing your shower fixtures. Follow these simple steps to get started:
- Locate the showerhead nut which connects the showerhead to the shower arm. This ellipsis-shaped nut is usually located at the base of the showerhead.
- Using a wrench or pliers, grasp the showerhead nut and turn it counterclockwise to loosen it. Keep turning until the nut is completely removed.
- Once the nut is removed, detach the showerhead from the shower arm and set it aside.
- Ensure that the rubber washer inside the showerhead is intact and in good condition. If it appears worn out or damaged, replace it with a new one before installing the new shower panel.
Removing the Existing Shower Handle and Spout
Next up, it’s time to remove the shower handle and spout. Here’s what you need to do:
- Locate the screw or screws that secure the shower handle to the wall. These screws are commonly found under a decorative cap or cover plate.
- Use a screwdriver to remove the screws, and carefully take off the handle.
- Once the handle is off, you can access the mounting plate behind it. This plate holds the shower spout in place.
- Use a wrench or pliers to loosen and remove the mounting plate.
- Detach the shower spout by pulling it away from the wall.
Properly Shutting off the Water Supply
Before you proceed any further, it’s crucial to shut off the water supply properly to avoid any unwanted leaks or accidents. Follow these steps:
- Locate your main water supply valve. This is typically found near the water meter or where the main water line enters your home.
- Turn the valve clockwise to shut off the water supply.
- To ensure the water is completely shut off, turn on a faucet or shower valve to release any residual water pressure.
- Once you’ve confirmed that the water is no longer flowing, you can proceed with installing your new shower panel.
- Remember to double-check that the water supply is shut off before you begin the installation process.
With the old shower fixtures successfully removed and the water supply shut off, you’re now ready to install your new shower panel. Stay tuned for our upcoming guide on how to install a shower panel on an existing shower!
Installing The Shower Panel
Positioning the panel on the existing shower wall
To start the installation process, first, you need to determine the optimal position for your shower panel on the existing shower wall. It is recommended to place the panel at a convenient height that allows easy access to the controls and provides a comfortable showering experience. Consider the layout of your shower area and take accurate measurements to ensure the panel is centered and aligned properly. Pay attention to the existing plumbing and electrical outlets in the vicinity to avoid any interference or obstructed installation.
Next, mark the position for the panel on the wall using a pencil or tape measure. Make sure to align it with the existing plumbing connections, if applicable. Double-check the markings to ensure the panel will be positioned correctly.
Connecting the water supply lines
Once the panel is properly positioned on the wall, it’s time to connect the water supply lines. Firstly, turn off the water supply to the shower area to avoid any potential leaks or accidents. It is essential to follow the manufacturer’s instructions for connecting the water supply lines, as they may vary depending on the model and type of shower panel.
Carefully, attach the hot and cold water supply lines to their respective connections on the panel. Ensure that the connections are secure and leak-free. Take note of any additional fittings or adapters that may be required to connect the panel to the existing plumbing.
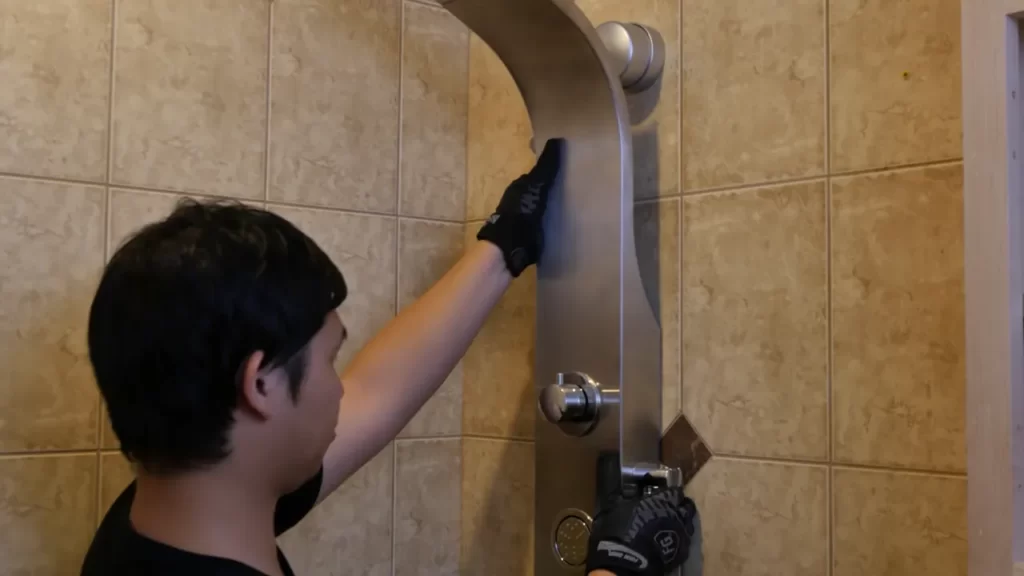
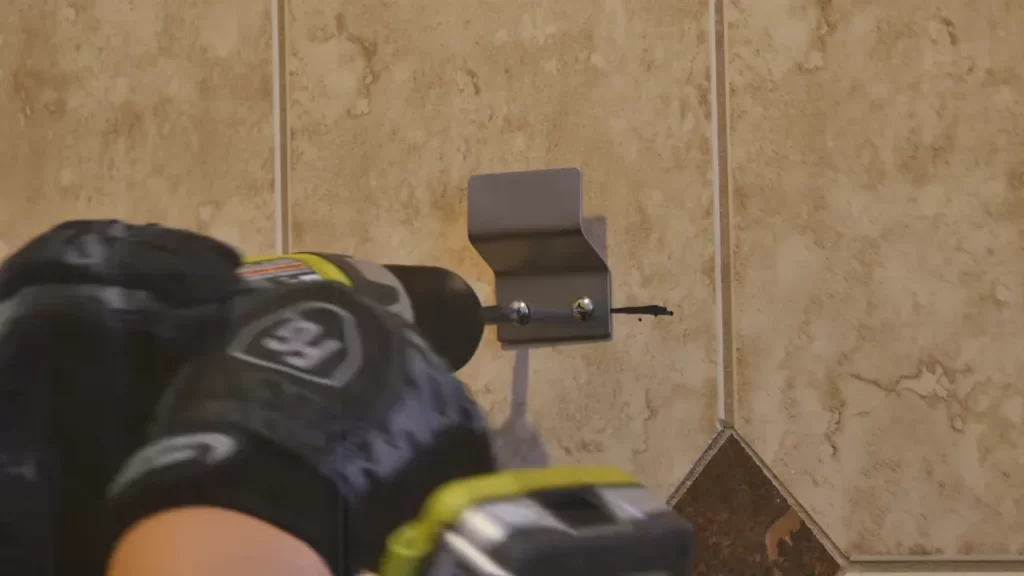
Securing the panel to the wall using appropriate mounting hardware
With the water supply lines connected, it’s time to secure the shower panel to the wall using appropriate mounting hardware. Check the manufacturer’s instructions for the specific hardware required for your panel. This may include brackets, screws, or other fasteners.
Start by positioning the mounting brackets on the wall according to the designated markings. Use a level to ensure they are straight and aligned correctly. Once positioned, secure the brackets to the wall using the provided screws or fasteners. Make sure the brackets are firmly attached to provide a sturdy base for the panel.
Finally, carefully slide or fit the shower panel onto the mounted brackets. Ensure it is properly aligned and leveled. Depending on the design and structure of the panel, you may need to secure it further with additional screws or locking mechanisms provided.
Remember to follow the manufacturer’s instructions carefully throughout the entire installation process to avoid any damages or malfunctions. Once the panel is securely mounted, turn on the water supply to check for any leaks. Test each function and control to ensure everything is in working order.
Installing a shower panel on an existing shower wall is a rewarding and straightforward process that can elevate your showering experience. By positioning the panel correctly, connecting the water supply lines securely, and using appropriate mounting hardware, you can enjoy the benefits of a luxurious and functional shower panel in no time.

Connecting The Shower Fixtures
Attaching the new showerhead to the panel
To complete the installation of your shower panel, you’ll need to attach the new showerhead. This step is crucial as it determines the water flow and direction. Follow these simple steps to ensure a secure and leak-free connection:
- Begin by removing the existing showerhead from the shower arm. This can usually be done by twisting it counterclockwise.
- Place some plumber’s tape around the threaded end of the shower arm. This will help create a watertight seal.
- Take the new showerhead and screw it onto the shower arm clockwise. Make sure it is snug but avoid overtightening, as this can cause damage.
- Once the showerhead is attached, turn on the water supply and check for any leaks. If you notice any drips, tighten the connection a little more. If the problem persists, remove the showerhead and reapply plumber’s tape before reattaching it.
Installing the new shower handle and controls
Now that the showerhead is securely attached, it’s time to install the new shower handle and controls. This part of the process will ensure you have full control over water temperature and pressure. Follow these steps to successfully install the new shower handle and controls:
- Locate the valve inside the shower panel that controls the water flow. This may vary depending on the model you have. Refer to the manufacturer’s instructions if needed.
- Connect the shower handle to the valve stem according to the instructions provided. This usually involves sliding the handle onto the stem and securing it with a screw or other fastening mechanism.
- Attach any additional controls, such as a diverter valve for switching between different shower functions. Again, follow the manufacturer’s instructions for the specific model you have.
- Once all the components are in place, turn on the water supply and test the functionality of the shower handle and controls. Ensure that you can adjust the temperature and water flow smoothly.
Testing for any leaks or issues with water flow
After installing the new showerhead and handle, it’s important to perform a final check for leaks and ensure the water flows as expected. Follow these steps to test your shower panel installation:
- Turn on the water supply and let it flow at a moderate rate.
- Inspect all connections, including the showerhead, handle, and any other fixtures, for any signs of leaking.
- If you notice any leaks, turn off the water supply and tighten the connections as needed. If the problem persists, consult a professional plumber for assistance.
- Test the water flow by adjusting the handle and controls. Ensure that the water temperature and pressure change smoothly as desired.
By following these steps and conducting a thorough test of your shower panel installation, you can rest assured that you have successfully connected the shower fixtures. Enjoy your new and improved shower experience!
Additional Considerations For A Seamless Installation
When installing a shower panel on an existing shower, there are a few additional considerations to keep in mind to ensure a seamless installation. These considerations will not only help create a visually appealing shower panel but also guarantee its proper functionality. Here are some important steps to consider:
Properly sealing gaps and joints for a watertight result
One of the key aspects of a successful shower panel installation is ensuring that all gaps and joints are properly sealed to achieve a watertight result. This step is crucial to prevent any water leakage or damage to the surrounding walls. To achieve this, follow these steps:
- Inspect the shower panel and the existing shower for any gaps or openings.
- Apply a high-quality silicone sealant to fill these gaps and joints.
- Smooth the sealant using a caulk smoothing tool or a damp cloth to create a clean and even surface.
- Allow the sealant to dry completely before testing the shower panel.
By properly sealing the gaps and joints, you can ensure that your shower panel installation is not only visually pleasing but also effectively keeps the water contained within the shower area.
Ensuring all connections are secure and leak-free
A secure and leak-free connection is vital for the optimal performance of your shower panel. To ensure this, follow these steps:
- Inspect all the connections and fittings of the shower panel.
- Tighten any loose connections using appropriate tools such as a wrench or pliers.
- Check for any signs of leakage and address it promptly.
- If there is a persistent leak, consider replacing faulty parts or seeking professional help.
By ensuring that all connections are secure and leak-free, you can maximize the efficiency and functionality of your shower panel, providing you with a satisfying shower experience.
Making any necessary adjustments to optimize the panel’s performance
To optimize the performance of your shower panel, it’s essential to make any necessary adjustments during the installation process. These adjustments can include:
- Adjusting the water pressure and temperature settings to your desired level.
- Positioning the shower panel at an appropriate height and angle for comfortable use.
- Testing the spray patterns and adjusting them according to your preference.
- Considering additional features such as built-in shelves or LED lighting, if applicable.
By making these adjustments, you can personalize your shower panel experience and ensure it meets your specific needs and preferences.
By considering these additional steps during your shower panel installation, you can achieve a seamless result that not only looks aesthetically pleasing but also functions flawlessly. Take the time to properly seal gaps and joints, ensure secure connections, and make necessary adjustments for an optimal shower panel experience.
Frequently Asked Questions
How To Install Shower Panels?
To install shower panels, follow these steps: 1. Measure and mark the desired position on the wall. 2. Prepare the surface by cleaning and ensuring it’s dry. 3. Apply adhesive to the back of the panel and press it firmly onto the wall.
4. Use screws or clips to secure the panel. 5. Caulk the edges for a waterproof seal.
What Do You Put Behind Shower Panels?
You can put waterproof materials like cement boards or moisture-resistant drywall behind shower panels for added protection against moisture and to ensure the panels stay in place.
What Is The Disadvantage Of Shower Panel?
One potential disadvantage of a shower panel is that it may not have as much water pressure as traditional showerheads.
Are Shower Wall Panels A Good Idea?
Shower wall panels are a great choice for your bathroom. They offer easy installation, durability, and a stylish look. With a variety of materials and patterns to choose from, they are a practical and cost-effective option.
Conclusion
Installing a shower panel on your existing shower can enhance your bathing experience and add a touch of luxury to your bathroom. With the simple step-by-step guide provided in this blog post, you can easily complete the installation process without the need for professional assistance.
By following these instructions, you can transform your shower into a spa-like retreat, enjoying the benefits of a refreshing and invigorating shower every day. Upgrade your shower and elevate your bathroom to new heights of comfort and style.