To install a shower pan with tile walls, ensure proper measurement and placement of the pan, apply a waterproofing membrane, install the drain, set the tiles in thinset mortar, and finish with grout and sealant. Now, let’s dive into the step-by-step process of installing a shower pan with tile walls.
A proper shower installation requires meticulous preparation and careful execution to ensure a waterproof and durable end result. From measuring and placing the pan to waterproofing and tiling, each step is crucial for a successful installation. In this guide, we will walk you through the process of installing a shower pan with tile walls, enabling you to create a beautiful and functional space in your bathroom.
So let’s get started!
Factors To Consider When Selecting A Shower Pan And Tiles
Installing a shower pan with tile walls is a great way to elevate the look and functionality of your bathroom. However, the success of your installation depends largely on the choices you make when selecting the shower pan and tiles. In this section, we’ll explore the key factors you need to consider to ensure you make the right decisions for your project.
Size and Shape of the Shower Pan
The size and shape of the shower pan are crucial considerations when selecting the right one for your bathroom. The size will depend on the available space in your bathroom and your personal preferences. It’s important to measure the area accurately to ensure you choose a shower pan that fits perfectly, allowing for comfortable movement within the shower.
When it comes to the shape of the shower pan, you have a variety of options to choose from, including rectangular, square, neo-angle, and round. The shape you choose should complement the overall design and layout of your bathroom while ensuring optimal functionality.
Material of the Shower Pan
The material of the shower pan plays a significant role in its durability and longevity. Here are a few popular options:
| Material | Pros | Cons |
|---|---|---|
| Acrylic | Economical, lightweight, easy to install | May scratch or discolor over time |
| Fiberglass | Affordable, durable, easy to maintain | Can crack if not properly installed |
| Tileable | Allows for a seamless, custom-tiled look | Requires more labor-intensive installation |
Consider your budget, aesthetic preferences, and maintenance requirements when choosing the material for your shower pan.
Tile Options for the Walls
The tiles you select for the walls of your shower should not only enhance the overall design but also provide durability and water resistance. Some popular tile options include:
- Ceramic: Durable, affordable, and available in a wide range of designs and styles.
- Porcelain: Resistant to stains, scratches, and moisture, making it ideal for shower walls.
- Natural stone: Adds a luxurious and timeless look to your shower, but may require more maintenance.
- Glass: Creates a sleek and modern appearance, but can be more prone to water spots.
Water Resistance and Durability of the Tiles
When selecting the tiles for your shower walls, it’s essential to choose ones that are water-resistant and highly durable. Look for tiles specifically designed for wet areas, such as those with a high PEI (Porcelain Enamel Institute) rating or those with a water absorption rate of less than 0.5%. These tiles will better withstand the constant exposure to water and steam, ensuring longevity and minimizing the risk of mold or mildew growth.
In conclusion, when installing a shower pan with tile walls, it’s important to consider factors such as the size and shape of the shower pan, the material of the shower pan, tile options for the walls, and the water resistance and durability of the tiles. By carefully considering these factors, you can create a beautiful and functional shower that will stand the test of time.

Removing The Existing Shower Pan And Tiles
Removing the existing shower pan and tiles is an essential step when installing a new shower pan with tile walls. This process ensures a clean and stable base for the new shower pan and tiles. In this section, we will discuss the proper tools needed for the removal process, as well as the steps to safely remove the old materials. We will also cover the importance of cleaning and leveling the subfloor before proceeding with the installation.
Tools needed for the removal process
Before you begin removing the existing shower pan and tiles, it’s important to gather the necessary tools for a smooth and efficient process. Here are the tools you’ll need:
- Hammer: A hammer will be used to gently tap and break away the tiles and shower pan.
- Pry bar: A pry bar will help in lifting and removing the tiles and shower pan.
- Chisel: A chisel will be useful in carefully chipping away any remaining adhesive or grout.
- Goggles and gloves: Goggles and gloves will protect your eyes and hands from any debris or potential injuries during the removal process.
- Dust mask: Wearing a dust mask will help prevent inhalation of dust and debris generated during removal.
Proper steps to safely remove the old materials
Once you have gathered all the necessary tools, it’s time to start removing the existing shower pan and tiles. Follow these steps to ensure a safe and successful removal process:
- Step 1: Turn off the water supply: Before you begin any removal process, always turn off the water supply to avoid any potential leaks or accidents.
- Step 2: Remove the shower pan: Start by removing the shower pan. Use a hammer and pry bar to gently break away the surrounding tiles and remove the pan from its position. Take care not to damage the subfloor during this process.
- Step 3: Remove the tiles: Once the shower pan is removed, it’s time to focus on removing the tiles. Carefully use a hammer and chisel to break away the tiles, starting from the bottom row and working your way up. Take your time to avoid damaging the walls or subfloor.
- Step 4: Clean the subfloor: After all the tiles and shower pan are removed, clean the subfloor thoroughly. Remove any adhesive or grout residues using a chisel or scraper. Ensure the subfloor is free from any debris or loose materials.
- Step 5: Level the subfloor: Take a level and check the subfloor for any unevenness. If there are any low or high spots, use a leveling compound or patching material to smooth out the surface. A level subfloor is crucial for a stable and properly installed shower pan.
Cleaning and leveling the subfloor
After the removal process, it’s important to clean and level the subfloor before proceeding with the installation of the new shower pan and tiles. Cleaning the subfloor ensures that the new materials adhere properly, while leveling eliminates any imperfections that could affect the stability or appearance of the shower area. Take your time to thoroughly clean the subfloor, removing any dust, dirt, or debris. Then, use a leveling compound or patching material to ensure the subfloor is completely level, allowing for a seamless installation of the new shower pan and tiles.
Measuring And Marking The Shower Area
Determining the size and dimensions of the shower pan
Before you can install a shower pan with tile walls, it’s important to accurately determine the size and dimensions of the shower area. This will ensure a perfect fit for your shower pan and allow for seamless tile installation. To begin, measure the length, width, and height of the shower area using a tape measure. Take note of these measurements as you will need them later. Consider the dimensions of your desired shower pan and ensure it will fit within the designated area. Take into account any obstructions such as plumbing fixtures or walls that may affect the size of the shower pan. Once you have determined the appropriate size, double-check your measurements to ensure accuracy.
Marking the layout for the tiles on the walls
With the size and dimensions of the shower area determined, it’s time to mark the layout for the tiles on the walls. This step is crucial for achieving a professional and visually appealing finished result. Start by finding the center point of each wall and mark it with a pencil or marker. This will serve as a reference point for your tile layout. Next, measure the width of each wall and divide it into equal sections, depending on the size of your tiles. Use a level or straight edge to draw horizontal lines across the walls, ensuring they are aligned with the center point. Repeat this process for the height of the walls, creating vertical lines that intersect with the horizontal lines. These intersecting lines will guide the placement of your tiles and ensure a straight and symmetrical design.
Ensuring proper alignment and symmetry
Proper alignment and symmetry are crucial when installing a shower pan with tile walls. This will create a visually pleasing result and ensure that each tile fits seamlessly with the others. Start by laying out a few rows of tiles along the horizontal and vertical lines you marked earlier. This will give you a visual representation of how the tiles will look once installed. Adjust the layout as necessary to achieve a balanced and symmetrical design. Pay attention to the placement of corner tiles and make sure they are aligned properly. Use a level to ensure that each tile is straight and even. Take your time during this step to make any adjustments needed before moving forward with the installation process.
Preparing The Subfloor For The Shower Pan
Before installing a shower pan with tile walls, proper preparation of the subfloor is crucial for a durable and watertight installation. This involves applying a waterproofing membrane to the subfloor, installing the drain assembly, and ensuring proper slope for drainage.
Applying a waterproofing membrane to the subfloor
One of the most important steps in preparing the subfloor is applying a waterproofing membrane. This membrane acts as a barrier, preventing water from seeping into the subfloor and causing leaks and damage over time. To apply the membrane:
- Clean the subfloor thoroughly, removing any debris, dust, or loose particles.
- Ensure the subfloor is dry before proceeding with the application of the waterproofing membrane.
- Use a paint roller or brush to apply the membrane evenly over the entire subfloor surface.
- Prioritize applying an extra layer of membrane around the corners and edges for added protection against leaks.
- Allow the waterproofing membrane to dry completely before proceeding with the next steps of the installation process.
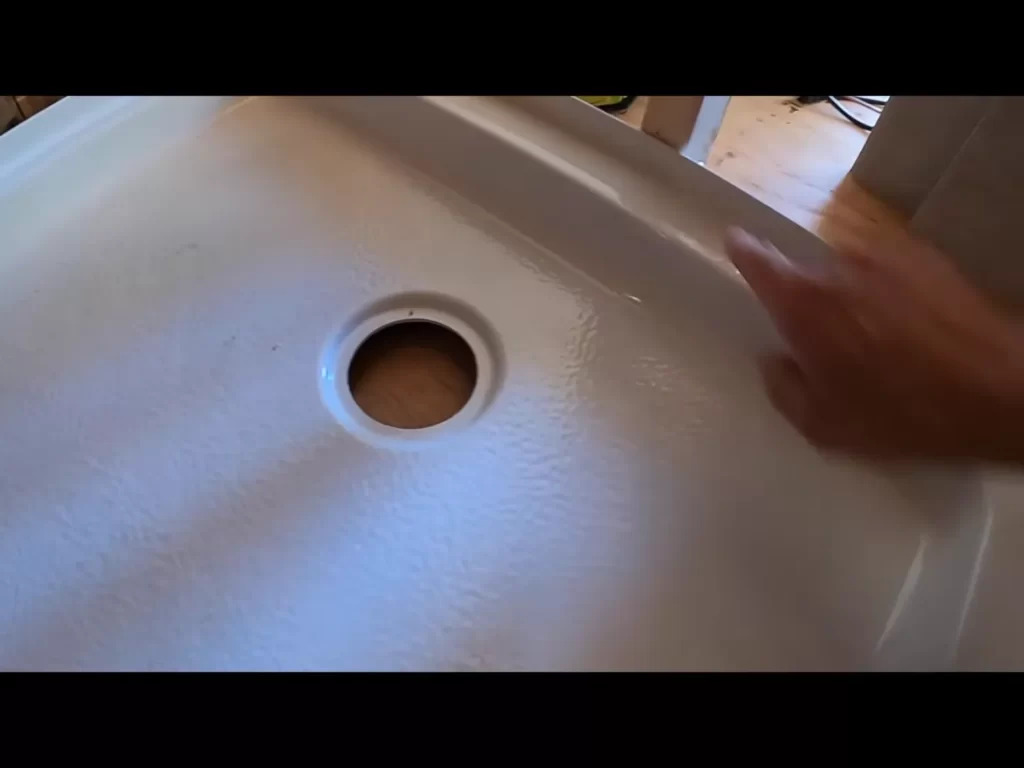
Installing the drain assembly
The drain assembly is a critical component of a shower pan installation, as it ensures proper water drainage. To install the drain assembly:
- Locate the center of the shower area and mark it on the subfloor.
- Measure the diameter of the drain hole in the shower base and use a spade bit or hole saw to create a hole of the same size in the subfloor.
- Insert the drain assembly into the hole, ensuring it fits securely.
- Apply plumber’s putty or silicone sealant to the underside of the drain flange to create a watertight seal.
- Tighten the drain flange from the top using a wrench, making sure it is snug and level with the shower base.
Ensuring proper slope for drainage
To prevent water from pooling in the shower pan, ensuring proper slope is essential. This allows water to flow towards the drain efficiently. To achieve the right slope:
- Check the manufacturer’s guidelines for the recommended slope percentage.
- Measure and mark the desired slope on the subfloor.
- Use a leveling compound or mortar mix to create a gradual slope from the outer edges towards the drain.
- Use a long level or straightedge to ensure the slope is smooth and consistent throughout the shower pan area.
- Allow the leveling compound or mortar to dry thoroughly before proceeding with the tile installation.
By following these steps and properly preparing the subfloor, you’ll set the stage for a successful shower pan installation with tile walls.
Placing And Securing The Shower Pan
Now that you’ve prepared the subfloor and applied the waterproof membrane, it’s time to move on to the next crucial step: placing and securing the shower pan. This step ensures that the shower pan is securely positioned, level, and ready for the tile walls.
Applying mortar or adhesive to the subfloor
The first step in placing the shower pan is to apply mortar or adhesive to the subfloor. This provides a solid base and helps to keep the shower pan in place. Here’s how to do it:
- Carefully spread the mortar or adhesive on the subfloor using a trowel or a notched trowel. Make sure to cover the entire area where the shower pan will sit.
- Ensure that the layer of mortar or adhesive is even and of the specified thickness according to the manufacturer’s instructions.
- Once the mortar or adhesive is applied, wait for the recommended curing time before proceeding to the next step. This ensures that the mortar or adhesive is fully set and ready to support the weight of the shower pan.
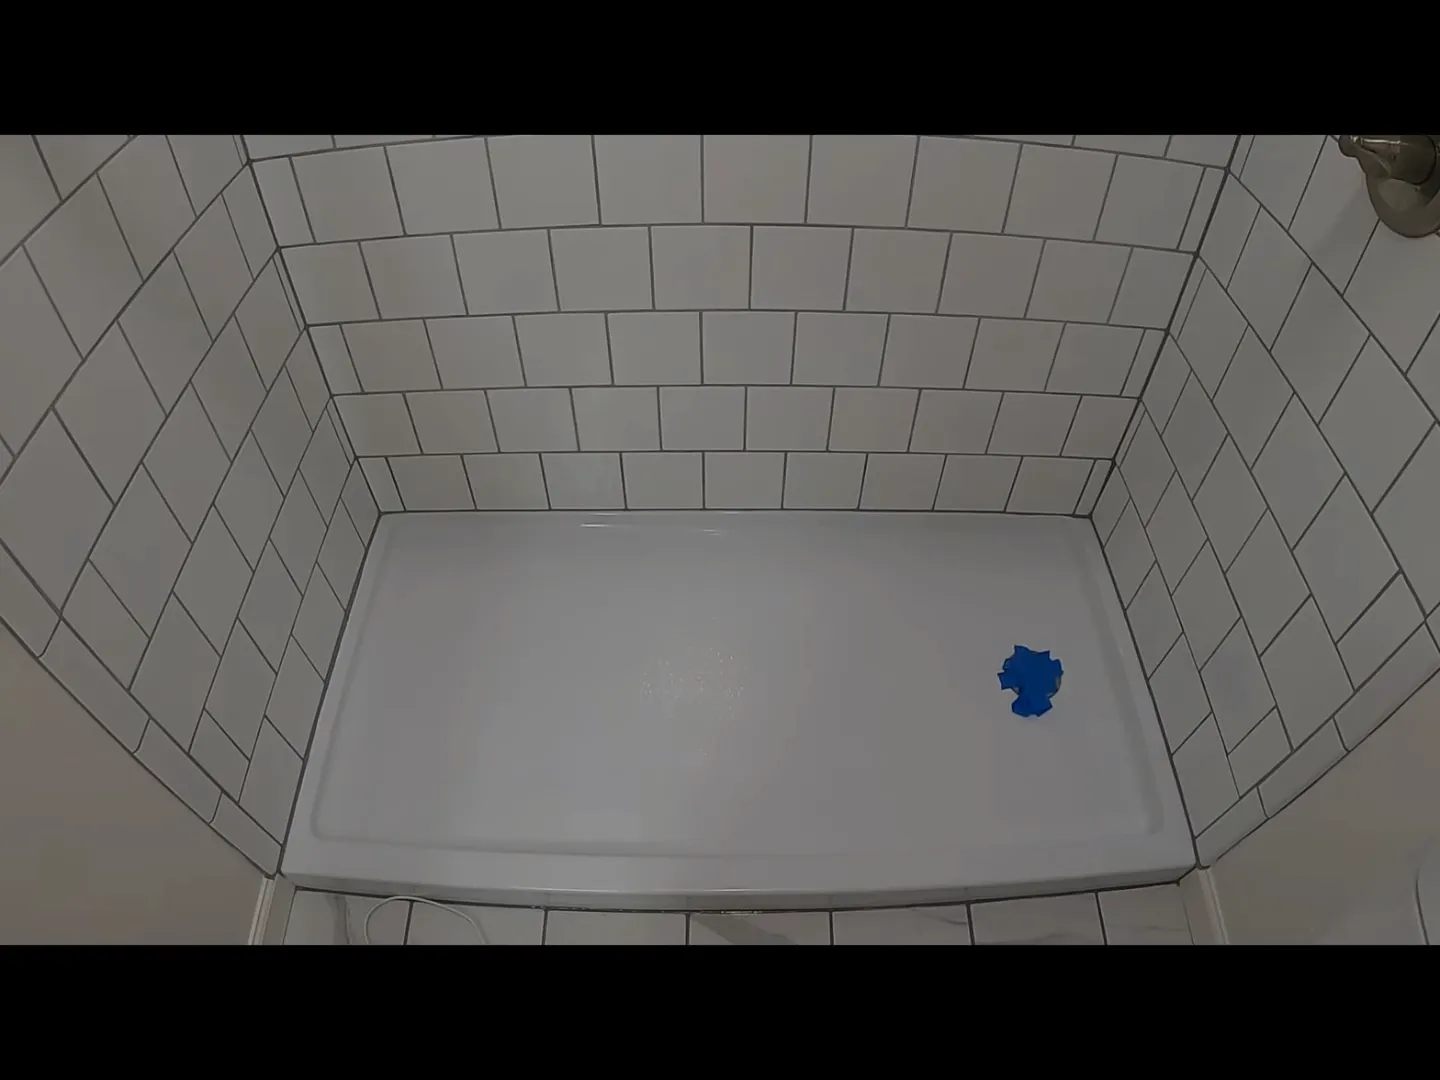
Setting the shower pan firmly in place
After the mortar or adhesive has cured, it’s time to set the shower pan firmly in place. Follow these steps to ensure proper installation:
- Carefully lower the shower pan into the prepared space, aligning it with the drainpipe. Take your time to position it accurately.
- Press down firmly on the shower pan to ensure it sits snugly on the subfloor and adheres to the mortar or adhesive. Applying even pressure will help create a secure bond.
- Check that the shower pan is sitting level by using a carpenter’s level. Place the level in multiple directions, making sure there are no areas where the pan is uneven.
Checking for level and making adjustments if needed
After setting the shower pan in place and checking for level, it’s important to assess if any adjustments are needed. Here’s how to do it:
- If you find that the shower pan is not level, you can make adjustments by adding or removing mortar or adhesive to achieve the desired levelness.
- Use the carpenter’s level to recheck the level once adjustments have been made. Continue making adjustments until the shower pan is perfectly level in all directions.
- Ensure that the shower pan is firmly secured to the subfloor, and there are no gaps or loose areas.
Remember, properly placing and securing the shower pan is essential for a successful installation. Taking the time to follow these steps will result in a sturdy and reliable foundation for your tile walls, ensuring a beautiful and long-lasting shower space.
Waterproofing And Sealing The Shower Pan
Applying a Waterproofing Barrier to the Shower Pan and Walls
Proper waterproofing is essential when installing a shower pan with tile walls. This step ensures that water doesn’t seep through the walls and pan, causing damage to the structure behind. To begin, gather all the necessary materials:
- Waterproofing membrane
- Waterproofing primer
- Paintbrush or roller
- Trowel or putty knife
- Caulk gun
Start by preparing the surface for waterproofing. Clean the shower pan and walls to remove any dirt, debris, or loose material. Once clean, apply a layer of waterproofing primer to the shower pan using a paintbrush or roller. Make sure to follow the manufacturer’s instructions for application and drying time. This primer creates a strong bond between the pan and the waterproofing membrane, enhancing the effectiveness of the barrier.
Next, cut a piece of waterproofing membrane to fit the dimensions of the shower pan. Make sure to leave an overlap of about 2 inches on the walls. This overlap will ensure that any water that hits the walls will be directed into the shower pan. Apply the membrane to the pan, pressing it firmly into place using a trowel or putty knife. Smooth out any bubbles or wrinkles that may form.
| Tip: | For corner areas, fold the membrane to create a crease that allows it to conform to the shape of the corner. |
|---|
Once the pan is fully covered, move on to the walls. Use the same technique to apply the waterproofing membrane to the walls, overlapping it with the membrane on the pan. Pay special attention to areas that are prone to water splashes, such as the corners and edges. Use a trowel or putty knife to firmly press the membrane into place, ensuring a secure bond.
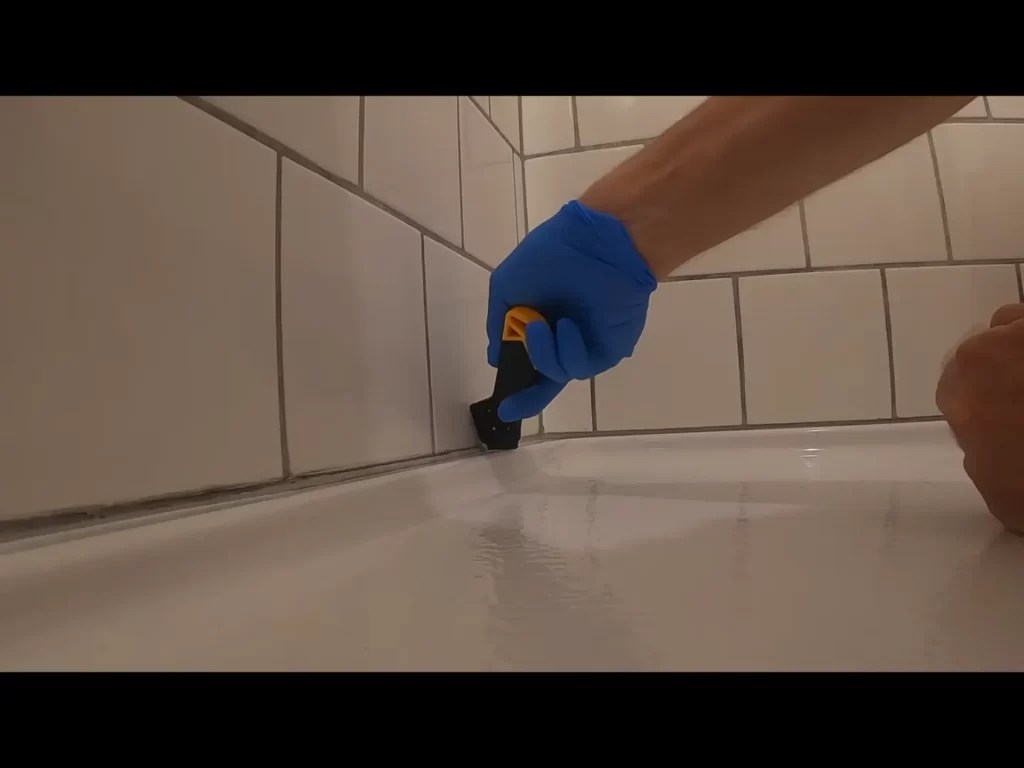
Sealing Any Gaps or Cracks to Prevent Water Leakage
To further enhance the waterproofing of your shower pan, it is crucial to seal any gaps or cracks that may exist. Even the smallest opening can allow water to seep through and cause damage over time. To seal these gaps effectively, follow these steps:
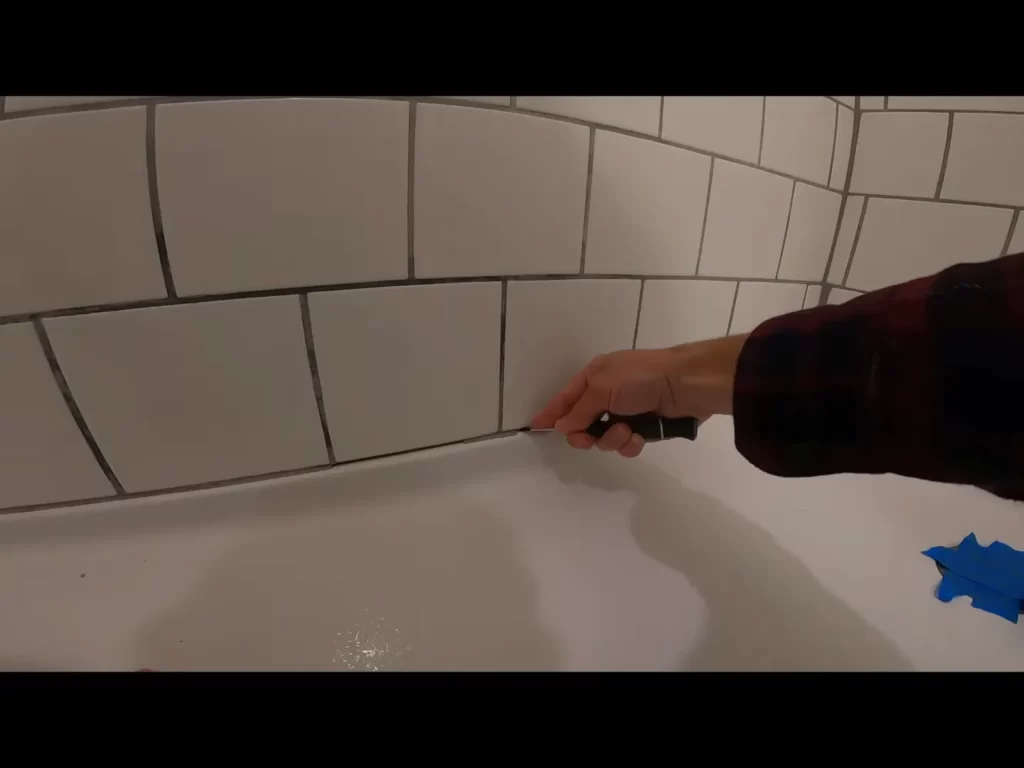
- Inspect the shower pan and walls for any visible gaps or cracks. Focus on areas where the walls meet the pan, corners, and seams.
- Use a caulk gun to apply a bead of waterproof caulk along these areas. Ensure that the caulk fully fills the gaps or cracks.
- Smooth the caulk using a caulk smoothing tool or your finger, ensuring a flush and even finish. This step helps to create a watertight seal.
- Allow the caulk to dry completely before moving on to the next step. Refer to the manufacturer’s instructions for the recommended drying time.
Sealing any gaps or cracks provides an additional layer of protection against water leakage, leaving you with a secure and durable shower installation.
Allowing the Waterproofing Material to Cure Properly
Patience is key in the installation process, especially when it comes to allowing the waterproofing material to cure properly. The curing time ensures the effectiveness and longevity of the waterproof barrier. Follow these guidelines to ensure optimal curing:
- Refer to the manufacturer’s instructions for the recommended curing time. Different waterproofing materials may have different time requirements.
- Avoid using the shower or exposing it to water until the curing process is complete.
- Keep the area well-ventilated to promote faster drying and curing.
- Once the recommended curing time has passed, test the waterproofing by pouring water over the shower pan and walls. Check for any signs of leakage, and if none are present, proceed with tiling the walls.
By allowing the waterproofing material to cure properly, you can have peace of mind knowing that your shower pan and tile walls are protected against water damage for years to come.
Choosing The Right Tile Adhesive And Grout
Considering the type of tile and the surface it will be applied to
When it comes to choosing the right tile adhesive and grout for your shower pan, it is important to consider the type of tile you will be using as well as the surface it will be applied to. Different tiles require different adhesives and grouts, so it’s crucial to match them appropriately for a successful installation.
If you are using ceramic or porcelain tiles, an epoxy adhesive is a popular choice. Epoxy adhesives are strong and durable, making them suitable for areas that are likely to be exposed to moisture, such as showers. On the other hand, if you are using natural stone tiles like marble or granite, a polymer-modified mortar adhesive is recommended. These adhesives provide better flexibility, helping to prevent cracks in the tiles.
Selecting the appropriate adhesive for the shower area
Once you have determined the type of tile you will be using, you need to select the appropriate adhesive for the shower area. This involves considering both the location and the conditions the tiles will be exposed to.
If you are tiling the walls of your shower area, a waterproof adhesive is essential to prevent water from seeping behind the tiles. Look for adhesives that are specifically designed for wet areas, as they will provide extra protection against moisture. Additionally, if you are tiling over an existing tiled surface, it’s important to choose an adhesive that is suitable for tile-on-tile installations.
To make the installation process easier, some adhesives come in pre-mixed form, while others require you to mix them yourself. Both options have their advantages, so choose based on your level of experience and personal preference.
Choosing a grout color that complements the tiles
When it comes to selecting a grout color for your shower pan, you want to choose one that complements the tiles and enhances the overall aesthetic of the space. Bold and contrasting grout colors can create a striking effect, while matching the grout color to the tiles can give a seamless and cohesive look.
Consider the color and pattern of your tiles. If you have intricate and detailed tiles, a neutral-toned grout can help highlight their beauty. On the other hand, if you have plain and simple tiles, a darker grout color can add depth and dimension.
Remember to always consider the overall style and design of your bathroom when choosing a grout color. You want the grout to enhance the tiles without overpowering the space. Take samples of your tiles and try different grout colors next to them to see which combination works best for you.
In conclusion, choosing the right tile adhesive and grout is crucial for a successful shower pan installation. By considering the type of tile and the surface it will be applied to, selecting the appropriate adhesive for the shower area, and choosing a grout color that complements the tiles, you can ensure a beautiful and long-lasting result in your bathroom.
Applying The Adhesive And Setting The Tiles
One of the most crucial steps in installing a shower pan with tile walls is applying the adhesive and setting the tiles. This process ensures that your tiles are securely attached to the walls, creating a durable and water-resistant surface. In this section, we will discuss how to apply the adhesive to the walls using a notched trowel and how to properly place the tiles on the adhesive, ensuring proper alignment, spacing, and leveling.
Applying the adhesive to the walls using a notched trowel
Applying the adhesive to the walls is a key step in ensuring that the tiles stay in place and adhere properly. To start, you will need a notched trowel, which helps create ridges in the adhesive for better tile adhesion. Begin by mixing the adhesive according to the manufacturer’s instructions, making sure to achieve a smooth and lump-free consistency.
Once your adhesive is ready, start at the bottom of the shower pan and work your way up. Begin by applying a layer of adhesive to a small section of the wall using the flat side of the trowel. Then, hold the notched side of the trowel at a 45-degree angle and comb through the adhesive, creating grooves. Ensure that the grooves are consistent in size and depth, as this will allow for better tile adhesion.
Placing the tiles on the adhesive, starting from the bottom and working upward
Once the adhesive is applied and grooved, it’s time to start placing the tiles. Begin at the bottom of the wall and work your way upward. This helps prevent any excess weight from damaging the tiles below. Take one tile at a time and press it firmly into place on the adhesive, using a slight twisting motion to ensure proper adhesion. Ensure that the tiles are level and aligned correctly, checking with a level or a straight edge.
Continue placing tiles in this manner, making sure to leave a small gap between each tile for grout. This gap will allow for expansion and contraction of the tiles due to temperature changes. Use tile spacers to ensure a consistent gap between tiles.
Ensuring proper alignment, spacing, and leveling of the tiles
Proper alignment, spacing, and leveling of the tiles are essential for a professional-looking finish. As you place each tile, use a level or a straight edge to ensure that they are aligned both vertically and horizontally. Adjust as necessary to achieve a straight and uniform appearance.
In addition to alignment, spacing between tiles is equally important. Place tile spacers between each tile to maintain a consistent gap. These spacers will also help to ensure that the tiles are evenly spaced and will allow for proper grout application later on.
Lastly, make sure that each tile is level with its neighboring tiles. You can adjust the height of the tiles by adding or removing adhesive as necessary. A level surface is not only aesthetically pleasing but also critical for proper water drainage in the shower.
By following these steps and paying careful attention to each detail, you can achieve a beautiful and long-lasting tile installation on your shower walls. Taking the time to properly apply the adhesive and set the tiles will result in a professional-looking finish that you can enjoy for years to come.
Grouting And Finishing The Tile Installation
Once you have successfully installed the shower pan and tile walls, the next step is to grout and finish the tile installation. This crucial step will not only enhance the appearance of your shower but also ensure its long-term durability.
Filling the gaps between tiles with grout
To achieve a professional and seamless finish, it is important to fill the gaps between your tiles with grout. Grout is a dense fluid that helps bond the tiles together and prevents debris and moisture from penetrating the spaces in between. Here’s how to fill the gaps:
- Carefully prepare the grout mixture according to the manufacturer’s instructions. Make sure to choose a grout color that complements your tile design.
- Using a rubber float, spread the grout diagonally across the tile surface, ensuring that the gaps are completely filled.
- Work the grout into the joints by holding the float at a 45-degree angle and applying gentle pressure.
- Use a grout float or a damp sponge to remove the excess grout from the tile surface while smoothing the joints.
Removing excess grout and cleaning the tiles
After allowing the grout to dry for about 15-30 minutes, it’s time to remove the excess grout and clean the tiles:
- Gently wipe the tile surface with a damp sponge, being careful not to disturb the grout in the joints.
- Rinse the sponge frequently and continue wiping until the tiles are free from grout haze and residue.
- For stubborn grout haze, use a haze remover or a mixture of vinegar and water to clean the tiles.
- Once the tiles are clean, allow the grout to cure for the recommended time before proceeding to the next step.
Applying a sealant to protect the tiles and grout from moisture
To ensure the longevity of your tile installation and protect it from moisture damage, it is crucial to apply a sealant:
- Select a high-quality tile and grout sealant suitable for your installation type and follow the manufacturer’s instructions.
- Using a foam brush or a roller, apply the sealant to the entire tiled surface, ensuring complete coverage.
- Allow the sealant to dry for the recommended time, typically 24 hours, before using the shower.
- Regularly inspect the sealant and reapply as necessary to maintain its effectiveness.
By following these steps to fill the gaps with grout, remove excess grout, and apply a sealant, you can achieve a polished and waterproof finish for your shower walls. It’s important to pay attention to detail during this final phase of the tile installation to ensure a flawless and long-lasting result.
Installing Shower Fixtures And Accessories
When it comes to installing a shower pan with tile walls, properly attaching shower fixtures and accessories is a crucial step in creating a functional and stylish bathroom. From showerheads and faucets to shelves and soap dishes, each element plays a vital role in enhancing the overall shower experience. In this section, we will guide you through the process of attaching showerheads, faucets, and other fixtures, as well as installing shelves, soap dishes, or other accessories to ensure that your shower not only looks great but also meets your specific needs.
Attaching showerheads, faucets, and other fixtures
When it comes to attaching showerheads, faucets, and other fixtures, it’s important to follow the manufacturer’s instructions carefully. Here are the general steps to ensure a successful installation:
- Start by turning off the water supply to the shower area. This can usually be done by shutting off the main water valve.
- Remove any existing fixtures or hardware from the shower area, such as the old showerhead or faucet.
- Take the new showerhead or faucet and apply plumber’s tape to the threaded end. This will help create a watertight seal.
- Gently screw the showerhead or faucet onto the shower arm or pipe, being careful not to overtighten.
- Test for any leaks by turning on the water supply and checking for any water seeping out around the connections. If you notice leaks, tighten the connections slightly until they are secure.
- Once everything is secure and leak-free, move on to the next step of installing the tile walls.
Installing shelves, soap dishes, or other accessories
When it comes to installing shelves, soap dishes, or other accessories in your shower, there are a few options available. Here are a couple of methods you can consider:
- Using adhesive: Some accessories, such as soap dishes or small shelves, can be installed using a strong adhesive designed for use in wet areas. Clean the surface where you want to install the accessory, apply the adhesive according to the manufacturer’s instructions, and press the accessory firmly against the wall. Allow the adhesive to dry completely before using the accessory.
- Installing with screws: For heavier accessories or if you prefer a more secure installation, you can use screws to attach shelves or other fixtures. Begin by marking the desired location for the accessory on the wall. Next, use a drill to create pilot holes for the screws, being careful not to damage any plumbing behind the wall. Finally, attach the accessory using screws and a screwdriver, ensuring it is firmly secured.
By following these steps and using the recommended methods, you can confidently install shower fixtures and accessories that will enhance the functionality and aesthetics of your shower space. Remember to always consult the manufacturer’s instructions for specific guidance tailored to your chosen fixtures and accessories. With the right tools and a little bit of patience, you’ll be well on your way to enjoying a beautifully finished shower that meets all your needs.
Testing For Leaks And Proper Drainage
Once you have completed the installation of your shower pan and tile walls, it’s important to test for any potential leaks or drainage issues before the final completion. Testing for leaks will ensure that your shower is properly sealed and will prevent any water damage from occurring in the future. Additionally, checking for proper drainage will ensure that water flows out of the shower efficiently and does not create any pooling or standing water.
Run water in the shower to check for any leaks or drainage issues
To test for any leaks or drainage issues, simply run water in the shower and closely inspect all areas for potential leaks. It is recommended to perform this test for at least 10-15 minutes to thoroughly check for any water leakage. Look for any signs of water seeping through the tiles or any abnormal pooling of water in certain areas. If you notice any leaks or issues, take note of the specific locations for further investigation.
Making any necessary adjustments or repairs
If you identify any leaks or drainage issues during the testing process, it is crucial to make the necessary adjustments or repairs promptly. Start by identifying the source of the problem, whether it’s a loose tile, a cracked grout line, or improper sealing. Once you have pinpointed the issue, take the following steps to rectify it:
- Remove any loose tiles or damaged grout that may be contributing to the leakage or drainage problem.
- Clean and thoroughly dry the affected area before applying new grout or sealant.
- Apply a high-quality waterproof sealant to ensure proper sealing and prevent any future leaks.
- If necessary, replace any damaged tiles with new ones to restore the integrity of the shower pan and walls.
By making these necessary adjustments or repairs, you will be able to address any leaks or drainage issues effectively and ensure the longevity and functionality of your newly installed shower pan and tile walls.
Regular Maintenance And Cleaning Tips
Proper Cleaning Techniques for Tiles, Grout, and Shower Fixtures
Keeping your shower pan with tile walls clean and well-maintained is essential for its longevity and aesthetics. Regular cleaning not only helps to remove dirt and grime but also prevents the growth of mold and mildew. Here are some proper cleaning techniques that you should follow:
- Tiles: Start by sweeping or vacuuming the tile surface to remove loose dirt. Then, use a mild tile cleaner or a mixture of warm water and vinegar to wipe down the tiles. Scrub gently with a soft brush or sponge, paying extra attention to any stains or stubborn spots. Rinse the tiles thoroughly with clean water and dry them with a soft cloth.
- Grout: Grout is porous and prone to staining, so it requires regular cleaning to keep it looking fresh. Create a paste using baking soda and water, apply it to the grout lines, and scrub with a toothbrush or grout brush. For more stubborn stains, you can use a grout cleaner or a mixture of hydrogen peroxide and baking soda. Rinse the grout thoroughly with clean water and dry it with a cloth.
- Shower Fixtures: The fixtures in your shower, such as the showerhead, faucet, and handles, also need regular cleaning. Mix equal parts of water and vinegar and use a soft cloth or sponge to wipe down the fixtures. For harder-to-reach areas, use a toothbrush or an old toothbrush dipped in the vinegar solution. Rinse the fixtures with clean water and dry them to prevent water spots.
Regular Inspection and Maintenance to Prevent Water Damage
Performing regular inspections and maintenance on your shower pan with tile walls can help identify potential water damage issues before they become major problems. Here are some tips to keep in mind:
- Check for leaks: Inspect the areas around the shower pan, tiles, and fixtures for any signs of leaks or water damage. Look for discolored grout, soft spots, or mold growth. If you notice any issues, address them immediately to prevent further damage.
- Re-caulk when necessary: Over time, the caulk around your shower pan and tiles may deteriorate or become cracked, allowing water to seep through. Regularly check the caulking and re-apply it as needed to maintain a watertight seal.
- Keep the drainage clear: Ensure that the shower drain is free from debris and hair buildup. Regularly remove any blockages to prevent water from pooling and potentially causing damage to the shower pan or walls.
Tips for Keeping the Shower Area Hygienic and Mold-Free
Maintaining a hygienic and mold-free shower area is crucial for your overall health and well-being. Follow these helpful tips to keep your shower clean and fresh:
- Ventilate the bathroom: Proper ventilation helps to reduce moisture, preventing mold growth. Use an exhaust fan while showering and keep the bathroom door or window open to promote airflow.
- Dry the shower after use: Use a squeegee or a soft towel to remove excess water from the shower walls and floor after each use. This helps to prevent the accumulation of moisture, which can lead to mold and mildew growth.
- Regularly disinfect: Use a bathroom cleaner or a mixture of bleach and water to periodically disinfect the shower area. Pay attention to frequently touched areas, such as shower handles and knobs.
- Address mold promptly: If you notice any mold growth, act quickly to remove it. Use a mold cleaner or a mixture of vinegar and water to scrub the affected areas. Ensure proper ventilation and maintain dry conditions to prevent mold from reappearing.
Remember to incorporate these regular maintenance and cleaning tips into your shower pan with tile wall care routine. By following proper cleaning techniques, conducting regular inspections, and implementing good hygiene practices, you can enjoy a clean, safe, and inviting shower space for years to come.
Frequently Asked Questions
Can You Use A Shower Pan With Tile Walls?
Yes, a shower pan can be used with tile walls. The shower pan provides a waterproof base for the shower floor, while the tile walls create a decorative and functional surface for the shower enclosure.
Does A Shower Pan Go Over Tile?
Yes, a shower pan can be installed over tile. It serves as a waterproof base for the shower floor, ensuring proper drainage. This allows for easy installation and replacement.
Do You Tile Up To Or Under A Shower Tray?
You tile up to a shower tray to ensure a waterproof seal and a neat finish.
What Goes Between Tile And Shower Pan?
Use a waterproof membrane or cement backer board between the tile and shower pan. These options prevent water damage and provide a stable surface for tile installation.
Conclusion
Installing a shower pan with tile walls can be a challenging but rewarding DIY project. By following the step-by-step instructions outlined in this blog post, you can create a beautiful and functional bathroom feature. Remember to properly prepare the subfloor, choose the right materials, and take your time during the installation process to ensure a durable and long-lasting result.
With patience and attention to detail, you can successfully complete this project and enjoy your new shower for years to come.