
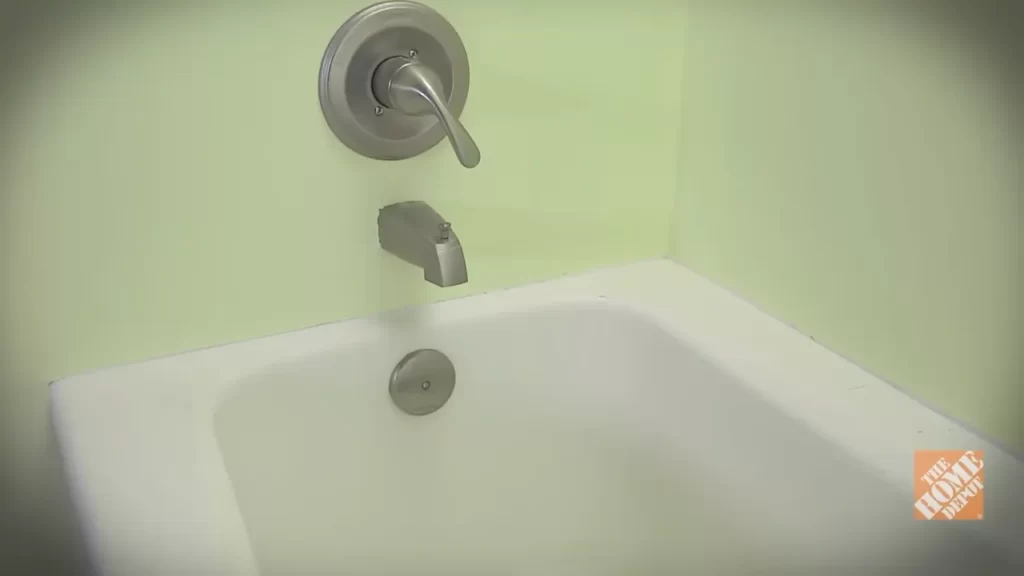
To install a shower in a bathtub, you need to remove the existing bathtub spout and cover the drain, then install a shower arm and showerhead on the wall above the bathtub. This process allows you to have both a bathtub and a shower in one.
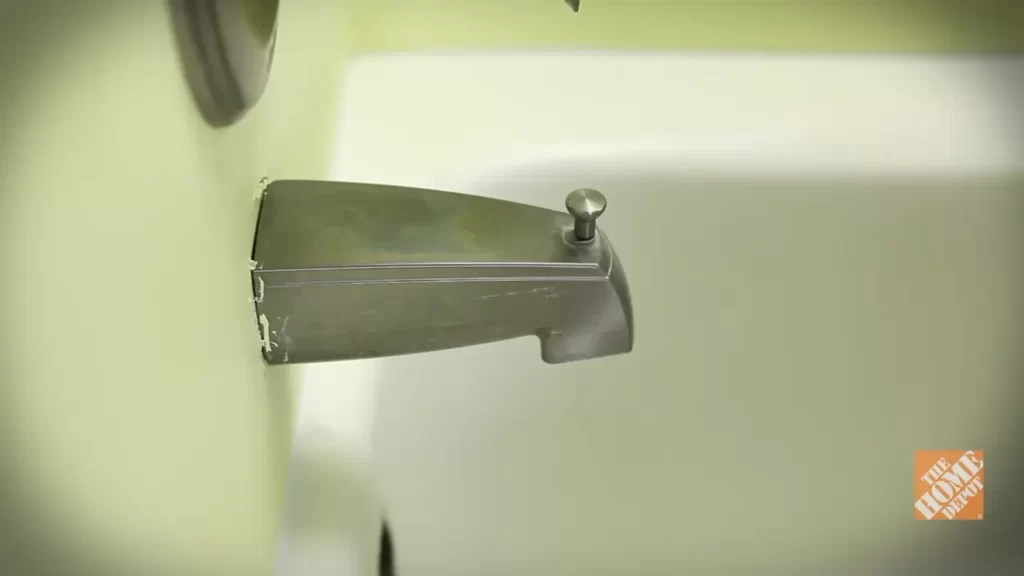
So, let’s dive into the steps needed to install a shower in your bathtub. First, remove the existing bathtub spout by turning it counterclockwise or using a wrench. Next, cover the drain with a drain cover or insert to prevent any debris from falling into it.
Then, install a shower arm on the wall above the bathtub, making sure it is securely fastened. Finally, attach a showerhead to the shower arm, ensuring it is tightly connected. Now, you can enjoy the convenience of having a shower in your bathtub.
Benefits Of Installing A Shower In A Bathtub
There are several benefits to installing a shower in your bathtub. Not only does it save space in your bathroom, but it also provides versatility in bathing options and offers convenience for individuals with mobility issues. Let’s explore each of these benefits in more detail.
Saves space in your bathroom
One of the main advantages of installing a shower in your bathtub is that it helps save space in your bathroom. As bathrooms are often one of the smallest rooms in the house, maximizing space is crucial. By combining your bathtub and shower into one unit, you can free up valuable square footage.
A conventional setup with a separate bathtub and shower enclosure can feel cramped and cluttered. However, by incorporating a shower into your bathtub, you can create a more open and spacious bathroom. This is particularly beneficial for smaller bathrooms or those in apartments or condos where space is limited.
Provides versatility in bathing options
Another advantage of installing a shower in your bathtub is the versatility it provides in terms of bathing options. With a shower, you have the flexibility to choose between a quick refreshing shower or a leisurely soak in the tub.
If you lead a busy lifestyle, having the option to take a quick shower can be a time-saving convenience. On the other hand, if you enjoy soaking and relaxation, the bathtub allows you to indulge in a long, soothing bath to unwind after a tiring day.
Offers convenience for individuals with mobility issues
Installing a shower in your bathtub also offers convenience for individuals with mobility issues. For those who have difficulty stepping into a traditional standalone shower, a shower in a bathtub provides an accessible solution.
The presence of a bathtub allows individuals with mobility issues to enter the shower area without the need for extra steps or a high shower threshold. It provides stability and support, making it easier to bathe safely and independently.
Additionally, if you have family members or guests with mobility challenges, installing a shower in a bathtub ensures that everyone can use the bathroom without any obstacles. This promotes inclusivity and improves the overall functionality of your bathroom space.
In conclusion, installing a shower in a bathtub offers several benefits, including saving space, providing versatility in bathing options, and offering convenience for individuals with mobility issues. Whether you’re looking to optimize your bathroom space or enhance accessibility, incorporating a shower in your bathtub is a practical and functional solution.
Factors To Consider Before Installing A Shower In A Bathtub
Installing a shower in a bathtub can be a great way to enhance the functionality and convenience of your bathroom. Before embarking on this project, there are several important factors to consider to ensure a successful installation. By assessing the available space, checking the plumbing and water pressure, and considering the location and accessibility of the bathtub, you can make informed decisions that will lead to a satisfying shower installation. Let’s look at each of these factors in detail:
Assessing the available space in your bathroom
One of the first things to consider before installing a shower in a bathtub is the available space in your bathroom. Take accurate measurements of the bathtub area to determine if it can accommodate a shower. Consider the height, width, and depth of the bathtub, as well as the space needed for a shower curtain or door. Ensure there is enough room for comfortable movement when the shower is in use.
Checking the plumbing and water pressure
Another important factor to consider is the plumbing and water pressure in your bathroom. It is crucial to ensure that the existing plumbing system can support the installation of a shower. Check if there are enough water supply lines and drainage outlets in the vicinity of the bathtub. Additionally, evaluate the water pressure in your home to ensure it is sufficient for a satisfying shower experience. If needed, consider consulting a professional plumber to assess and address any plumbing issues before proceeding with the installation.
Considering the location of the bathtub and its accessibility
The location of the bathtub in your bathroom is another crucial factor to consider before installing a shower. Evaluate the practicality and accessibility of the location. Think about the proximity to other fixtures, such as the toilet or vanity, and ensure there is enough space for comfortable usage. Consider the overall aesthetic and flow of the bathroom as well.
Additionally, think about the accessibility of the bathtub for individuals with mobility issues or disabilities. If necessary, consult with an expert to explore options for making the shower installation more accessible, such as adding grab bars or a handheld showerhead.
By carefully considering these factors before installing a shower in a bathtub, you can ensure a successful and satisfying project. Assessing the available space, checking the plumbing and water pressure, and considering the location and accessibility will help you make informed decisions and create a functional and enjoyable shower experience in your bathroom.
Essential Tools
Before you begin installing a shower in your bathtub, it’s important to gather the essential tools that will make the process smoother and more efficient. Having the right tools at hand will save you time and ensure a successful installation. Here are the essential tools you will need:
Adjustable wrench
An adjustable wrench is a versatile tool that will come in handy during the installation process. It allows you to tighten or loosen nuts and bolts of different sizes, providing the flexibility needed to work on various components of the shower. Make sure to have a quality adjustable wrench that fits comfortably in your hand, allowing you to apply the necessary torque while maintaining a secure grip. This tool is vital when connecting the showerhead, faucets, and other plumbing fixtures.
Screwdriver
A reliable screwdriver is a must-have tool when installing a shower in a bathtub. It will be used to tighten or loosen screws, which are common fasteners in shower installation. A screwdriver with interchangeable tips is recommended, as it allows you to handle different types of screws. Ensure that you choose the appropriate size and type (flathead or Phillips) based on the specific screws you will encounter during the installation process.
Pipe cutter
A pipe cutter is an essential tool for working with pipes during a shower installation. This tool allows you to cut through copper, PVC, or other types of pipes with precision. When installing a shower in a bathtub, you may need to modify or extend existing pipes to accommodate the new fixtures. A pipe cutter will enable you to make clean, straight cuts on the pipes, ensuring a proper fit. Be sure to select a pipe cutter that is suitable for the pipe material you are working with.
Caulking gun
To achieve a watertight seal around the edges of your shower installation, you will need a caulking gun. This tool dispenses caulk, which is a flexible sealant that prevents water from leaking into unwanted areas. Use a caulk that is specifically designed for bathroom use to ensure it withstands the moisture and humidity commonly found in showers. The caulking gun helps you apply a smooth and uniform bead of caulk, resulting in a professional-looking finish and enhanced durability.
Gathering these essential tools will ensure that you are well-prepared for installing a shower in your bathtub. Having the right equipment at your disposal will not only save you time and effort but also contribute to the overall success and longevity of your shower installation.
Required Materials
Showerhead
When it comes to installing a shower in a bathtub, having the right materials is crucial to ensure a smooth and efficient process. The first item on our required materials list is a showerhead. This is the part of the shower that sprays water and allows you to adjust the flow and temperature. It’s important to choose a showerhead that suits your needs and preferences, whether you prefer a rain shower effect or a handheld option for added flexibility. Make sure to select a showerhead that is compatible with your existing plumbing setup.
Shower curtain or glass door
Next on the list is a shower curtain or glass door. This serves as a barrier to prevent water from splashing out of the tub and onto the bathroom floor. A shower curtain offers an affordable and versatile option, allowing you to choose from a variety of colors and designs to match your bathroom decor. On the other hand, a glass door provides a more modern and open feel to your shower space. Whichever option you choose, it’s essential to properly measure the width and height to ensure a proper fit.
Shower valve
A shower valve is a crucial component that controls the flow and temperature of the water. It allows you to easily switch between hot and cold water and adjust the water pressure to your liking. When selecting a shower valve, it’s important to consider the type of valve that will work best with your existing plumbing system. Common types include single-handle valves, double-handle valves, and thermostatic valves, each offering different functionalities and benefits.
Shower arm and flange
To connect the showerhead to the water supply, you’ll need a shower arm and flange. The shower arm is the pipe that extends from the wall and holds the showerhead in place, while the flange covers the hole in the wall where the shower arm is installed. When choosing a shower arm and flange, consider the length and style that will work best with your shower design. It’s important to ensure a secure and leak-free connection by using plumbing tape to wrap the threaded ends of the shower arm before installation.
Showerhead diverter
If you wish to have the option of both a shower and a bathtub faucet, a showerhead diverter is an essential component. This device allows you to divert the water flow between the showerhead and the bathtub faucet, ensuring easy switching between the two. There are various types of showerhead diverters available, including three-way diverters and tub spout diverters. Make sure to choose a diverter that is compatible with your existing plumbing setup and meets your preferences.
Plumbing tape
When it comes to plumbing installations, plumbing tape is a handy tool to have on hand. Also known as Teflon tape, this thin and flexible tape is used to create a watertight seal between threaded pipe fittings. It helps to prevent leaks by lubricating the threads and filling any gaps or imperfections. To apply plumbing tape, simply wrap it clockwise around the threaded end of the pipe, overlapping the tape as you go. Be sure to wrap it tightly and evenly for a secure and effective seal.
Plumbers putty or silicone caulk
Last but not least, we have plumbers putty or silicone caulk. These sealing materials are used to prevent water from leaking through gaps and joints in the shower installation. Plumbers putty is a soft, moldable substance that is typically used to seal the area around the shower drain and any other areas where water might seep through. Silicone caulk, on the other hand, is a flexible and waterproof sealant that is ideal for sealing joints and seams between surfaces such as the shower arm and flange. Apply plumbers putty or silicone caulk as directed for a watertight shower installation.
Step 1: Prepare The Bathtub Area
Preparing the bathtub area is the first crucial step towards installing a shower in your bathtub. It involves removing any existing fixtures or shower doors and cleaning and prepping the bathtub surface. Following these steps will ensure a smooth and successful installation process.
Remove any existing fixtures or shower doors
The first task in preparing the bathtub area is to remove any existing fixtures or shower doors that might be in the way. These could include old faucets, handles, spouts, or any other components that need to be replaced or rearranged to accommodate the new shower.
To remove these fixtures, you’ll need some basic tools like a wrench, screwdriver, or Allen wrench, depending on the type of fixtures you have. Carefully follow the manufacturer’s instructions or consult a professional if you’re unsure about the removal process.
Clean and prep the bathtub surface
Once you have removed the existing fixtures or shower doors, it’s time to clean and prep the bathtub surface. This step is essential to ensure proper adhesion of the new shower components and to create a clean and hygienic space for your showering needs.
Begin by thoroughly cleaning the bathtub with a mild cleanser or soap and warm water. Pay special attention to any areas that may have accumulated soap scum, grime, or mold. Use a scrub brush or sponge to scrub away any stubborn dirt and rinse the surface thoroughly.
Next, make sure the bathtub surface is completely dry before proceeding. Moisture can interfere with the adhesion process, so use a clean towel or cloth to remove any remaining water droplets. It’s also a good idea to allow the bathtub to air dry for a few hours, if possible.
Once the surface is clean and dry, inspect it for any cracks, chips, or damage. If you notice any, you may need to repair or replace the bathtub before proceeding with the shower installation. Consult a professional if you’re uncertain about the condition of your bathtub.
Finally, protect the surrounding areas of the bathtub with masking tape or plastic sheeting to prevent any accidental damage during the installation process.
By following these steps to prepare the bathtub area, you are now ready to move on to the next step in installing your shower. With a clear and clean surface, you can proceed with confidence, knowing that you have set a solid foundation for a successful shower installation.
Step 2: Install The Shower Valve
Once you have shut off the water supply and removed the old valve (if applicable), it’s time to install the new shower valve. Follow these steps, adhering to the manufacturer instructions, to ensure a successful installation.
Shut off the water supply
The first step in installing a shower valve is to shut off the water supply. This will prevent any water from flowing while you work on the installation. Locate the main water shut-off valve in your home and turn it off. Depending on the layout of your plumbing system, you may have a separate shut-off valve for the bathroom. If you do, turn that off as well.
Remove the old valve (if applicable)
If you’re replacing an existing shower valve, you’ll need to remove it before installing the new one. Start by turning off the water supply, as mentioned in the previous step. Next, remove the handle or trim plate covering the valve, exposing the valve body. Use a wrench or pliers to disconnect the valve from the water pipes. Be careful not to damage any surrounding pipes or fittings during this process.
Install the new valve according to manufacturer instructions
Now it’s time to install the new shower valve. Carefully read and follow the manufacturer instructions that came with the valve to ensure proper installation. These instructions may vary depending on the type of valve you’re installing. Generally, you’ll need to connect the valve to the hot and cold water pipes using fittings or connectors. Use a wrench to tighten the connections, making sure they are secure. Once the valve is in place, attach the handle or trim plate according to the manufacturer’s instructions.
Remember to test the shower valve after installation to ensure that it is working properly. Turn on the water supply and check for any leaks or issues. If everything looks good, congratulations! You have successfully installed a new shower valve in your bathtub, bringing you one step closer to enjoying a refreshing shower experience.
Step 3: Connect The Shower Arm And Flange
Attach the shower arm to the valve
Once you have successfully installed the shower valve and flange, it is time to move on to connecting the shower arm. The shower arm is what supports the showerhead and allows for the water to flow from the valve to the showerhead. Follow these steps to properly attach the shower arm to the valve:
- Locate the outlet port on the shower valve. This is where the shower arm will connect.
- Gently screw the threaded end of the shower arm into the outlet port. Ensure that it is securely attached, but be careful not to overtighten as this could cause damage.
- Check the manufacturer’s instructions to determine if they recommend the use of plumbing tape or putty to create a watertight seal. Apply the recommended material to the threads of the shower arm.
- Tightly connect the shower arm to the valve, ensuring that the sealant material creates a tight and secure connection.
- If you are using plumbing tape, wrap it around the threads in a clockwise direction to prevent it from unraveling when you tighten the connection.
Secure it with plumbing tape or putty
Ensuring a watertight seal is essential when connecting the shower arm to the valve. Commonly, plumbing tape or putty is used to create this seal. Here’s how to secure the shower arm using these materials:
- If using plumbing tape, start by wrapping it around the threads of the shower arm in a clockwise direction. Continue wrapping until you have covered all the threads, being careful not to overlap the tape.
- Ensure that the tape is pressed firmly against the threads to create a tight seal. This will help prevent any leaks.
- If you are using putty, take a small amount and roll it into a rope-like shape. Gently press the putty onto the threads of the shower arm, ensuring complete coverage.
- Insert the shower arm into the outlet port on the shower valve, making sure to create a snug fit.
- Tighten the connection by rotating the shower arm in a clockwise direction. Be careful not to overtighten, as this could cause damage.
By using plumbing tape or putty, you can ensure a secure and leak-free connection between the shower arm and the valve, allowing you to enjoy a relaxing shower without any water escaping.
Step 4: Install The Showerhead Diverter
Now that you have successfully attached the shower arm, the next step is to install the showerhead diverter. This handy device allows you to switch the water flow between the bathtub faucet and the showerhead, giving you the flexibility to enjoy a refreshing shower whenever you desire.
Connect the diverter to the shower arm
Begin by attaching one end of the showerhead diverter to the shower arm. To do this, simply screw the end of the diverter onto the threaded portion of the shower arm. Make sure to tighten it securely, ensuring a leak-free connection. You can use a wrench or pliers, if necessary, to ensure a tight fit.
Ensure a tight and secure fit
It is important to ensure that the diverter is tightly secured to the shower arm to prevent any water leakage. Any loose connections can result in water dripping or spraying from the showerhead, which can be both frustrating and wasteful. Take the time to check and double-check the tightness of the connection to ensure a secure fit.
If you notice any signs of water leakage after installation, such as dripping or pooling water, it is crucial to address the issue immediately. This may require adjusting the connection or using plumbing tape to create a watertight seal. By promptly resolving any leaks, you can avoid potential water damage and maintain optimal functionality of your shower setup.
Once you have confirmed that the diverter is securely connected to the shower arm, you can proceed to the next step of your bathtub shower installation. You are one step closer to enjoying a luxurious shower experience right in the comfort of your own home.
In the following step, we will guide you through the process of installing the showerhead and making the necessary adjustments to achieve the perfect water flow for your bathing pleasure.
Step 5: Attach The Showerhead
Screw the showerhead onto the diverter
Now that you have successfully installed the diverter in the previous step, it’s time to attach the showerhead to it. This is the final step in installing a shower in a bathtub, and it’s crucial to ensure a proper attachment to prevent any leaks or issues later on.
To screw the showerhead onto the diverter, follow these simple steps:
- Take the showerhead and locate the connecting nut at the bottom.
- Hold the showerhead with one hand and use your other hand to screw the connecting nut onto the threaded end of the diverter.
- Tighten the connection using a wrench or pliers, ensuring it is securely fastened.
Be careful not to overtighten the showerhead, as it can cause damage to the plumbing fixtures. Once the showerhead is securely attached to the diverter, you can move on to the next step.
Use plumber’s tape to prevent leaks
Before you fully complete the installation, it is essential to use plumber’s tape to ensure a watertight connection and prevent any leaks. Plumber’s tape, also known as Teflon tape, is a thin, white tape that helps create a tight seal between threaded plumbing connections.
To use plumber’s tape:
- Begin by wrapping the plumber’s tape clockwise around the threaded end of the diverter.
- Wrap the tape around the threads two to three times, making sure to cover the entire threaded section.
- Press the tape firmly as you wrap to ensure secure adhesion.
- Once the tape is applied, it’s time to reattach the showerhead to the diverter.
By using plumber’s tape, you’ll prevent potential leakage at the connection point between the showerhead and the diverter. This simple step ensures a watertight seal and peace of mind when using your new shower.
Step 6: Install The Shower Curtain Or Glass Door
Now that the shower walls and fixtures are in place, it’s time to add the finishing touch to your bathtub shower combo – the shower curtain or glass door. This step not only enhances the appearance of your bathroom but also prevents water from splashing out and creating a mess. In this section, we will discuss how to hang a shower curtain or mount a glass door, as well as how to ensure a waterproof seal for maximum functionality.
Hang the shower curtain or mount the glass door according to instructions
Whether you’ve opted for a shower curtain or a glass door, it’s essential to follow the manufacturer’s instructions for installation. These instructions can vary depending on the specific design and materials of your chosen option. Make sure to read through the provided manual carefully and gather all the necessary tools before starting the installation process.
Ensure a waterproof seal around the edges
Regardless of whether you choose a shower curtain or a glass door, it’s crucial to create a waterproof seal around the edges to prevent water leakage. This step is vital in maintaining the integrity of your bathroom and avoiding any potential water damage. Here are a few tips to ensure a tight and secure seal:
- Apply silicone caulk: Before fitting the shower curtain or glass door, apply a bead of silicone caulk along the edges where the fixture will be attached. Allow the caulk to dry completely before proceeding.
- Tighten all screws and fittings: Double-check that all screws and fittings are securely tightened, ensuring a snug fit. Loose screws or fittings can compromise the effectiveness of the seal, so be thorough in this step.
- Inspect for gaps: After installing the shower curtain or glass door, carefully inspect the edges for any visible gaps. If you spot any, use additional silicone caulk to fill them in and create a watertight seal.
By following these steps, you can ensure a waterproof seal around the edges of your shower curtain or glass door, minimizing the risk of any water leakage and maintaining the functionality of your bathtub shower combo.
Proper Maintenance And Cleaning
Once you have successfully installed a shower in your bathtub, it is important to establish a regular maintenance and cleaning routine. This will not only keep your shower in good working condition but also ensure a pleasant and hygienic bathing experience. In this section, we will discuss two important aspects of maintaining and cleaning your shower: regularly cleaning the showerhead to prevent mineral buildup and checking for leaks and repairing any damage promptly.
Regularly clean the showerhead to prevent mineral buildup
The showerhead is an integral part of your shower, and over time, it can become clogged with mineral deposits from hard water. This can reduce water flow and lead to an unsatisfactory shower experience. To prevent mineral buildup, it is crucial to clean your showerhead regularly.
You can follow these steps to clean your showerhead:
- Detach the showerhead from the shower arm.
- Soak the showerhead in a solution of white vinegar and water for about 30 minutes. The vinegar will help dissolve the mineral deposits.
- Scrub the showerhead with a soft brush to remove any remaining buildup.
- Rinse the showerhead thoroughly with water.
- Reattach the showerhead to the shower arm.
By regularly cleaning your showerhead, you can maintain optimal water flow and ensure a refreshing shower experience.
Check for leaks and repair any damage promptly
Another essential aspect of maintaining your shower in a bathtub is checking for leaks and promptly repairing any damage that may occur. Even a small leak can lead to water wastage and potential water damage to your bathroom.
To check for leaks, follow these steps:
- Inspect the areas around the showerhead, faucet handles, and bathtub spout for any signs of water leakage.
- If you notice any leaks, tighten the connections or replace worn-out gaskets, O-rings, or washers.
- If the leakage persists or if you are unsure how to fix it, consult a professional plumber for assistance.
Remember, prompt repairs and maintenance can prevent more significant issues down the line and prolong the lifespan of your shower in the bathtub.
Safety Precautions
Install Grab Bars for Added Stability and Safety
When installing a shower in a bathtub, one of the most important safety precautions to consider is the installation of grab bars. These bars provide added stability and support for individuals while they are using the shower. To ensure proper installation, it is recommended to follow these steps:
- Choose the Right Location: Identify the suitable spot to install the grab bars. Ideally, they should be placed in areas where they can be easily reached and used for support, such as near the entrance of the bathtub and along the wall.
- Securely Attach the Grab Bars: Use a stud finder to locate the wall studs behind the bathtub. Once found, mark the positions where the grab bars will be installed. Drill pilot holes on the marked spots and then use screws or mounting brackets to securely attach the bars to the wall.
- Ensure Sufficient Weight Capacity: Check the weight capacity of the grab bars to ensure they can support the intended users. It is important to choose bars that can handle the weight of individuals and provide a sturdy grip.
Use Non-Slip Mats or Adhesive Strips in the Bathtub
In addition to grab bars, using non-slip mats or adhesive strips in the bathtub can significantly enhance safety during shower installation. These non-slip solutions help prevent slipping and falling on the wet surface. Here are some guidelines to follow:
- Choose High-Quality Non-Slip Mats or Adhesive Strips: Look for mats or strips that are specifically designed for use in bathtubs. These products are typically made with materials that offer excellent traction even in wet conditions.
- Clean and Prepare the Bathtub Surface: Before applying the non-slip solution, make sure the surface of the bathtub is clean and dry. Remove any dirt or residue that may affect the adhesion of the mats or strips.
- Position Mats or Strips Strategically: Place the non-slip mats or adhesive strips in areas where slipping is more likely to occur, such as the bottom of the bathtub and near the entrance. Make sure they are properly aligned and secure.
- Regularly Inspect and Replace: Over time, non-slip mats or adhesive strips may wear out or lose their effectiveness. Regularly inspect them for signs of wear and tear, and replace them as needed to maintain optimal safety.
Hiring A Professional
When in doubt, consult a professional plumber for assistance
While installing a shower in a bathtub may seem like a straightforward task, there are several crucial factors to consider. Hiring a professional plumber can ensure proper installation and address any plumbing issues that may arise during the process. The expertise and experience of a professional can save you time, money, and potential headaches down the line.
Here are some key reasons why consulting a professional plumber is the right choice:
- Accurate Assessment: Professional plumbers have an eye for detail and can accurately assess the existing plumbing system in your bathroom. They can identify potential challenges or limitations that could affect the installation process. This assessment ensures that the shower is installed correctly and functions optimally.
- Expertise and Knowledge: Plumbers are trained and experienced in handling different types of plumbing installations. They have the knowledge necessary to navigate complex plumbing systems. Additionally, professionals stay updated with the latest techniques and technologies, enabling them to provide the best solutions for your specific needs.
- Proper Tools and Equipment: Installing a shower requires specialized tools and equipment. Professional plumbers are equipped with the right tools to ensure flawless installation. Attempting to install a shower without the proper tools can lead to subpar results and potential damage to your plumbing system.
- Compliance with Building Codes: When it comes to plumbing installations, following building codes and regulations is essential. Hiring a professional ensures that your shower installation meets all relevant building codes and standards. This not only avoids potential legal issues but also ensures the safety and functionality of your shower.
- Timely Completion: Professional plumbers have the experience to complete the installation efficiently and within a reasonable timeframe. They are well-versed in the necessary steps and can execute them swiftly while adhering to high standards of quality.
No matter how confident you may feel in your DIY skills, entrusting the shower installation to a professional plumber is the wisest choice. Their expertise, knowledge, and attention to detail will result in a successful installation that meets your expectations. By consulting a professional, you can enjoy a functional and beautiful shower in your bathtub for years to come.
Frequently Asked Questions
How Much Does It Cost To Install A Shower In An Existing Tub?
The cost of installing a shower in an existing tub can vary, but you can expect to pay around $1,000 to $3,000. Factors like the type of shower system, materials, labor, and any necessary plumbing modifications can affect the final cost.
How Do You Connect A Bathtub To A Shower?
To connect a bathtub to a shower, you’ll need a showerhead, a diverter valve, and a shower curtain or door. Attach the showerhead to the bathtub faucet and install the diverter valve to control the flow between the tub and shower.
Use a curtain or door to prevent water from splashing.
Can I Install Shower For Drop In Tub?
Yes, you can install a shower for a drop-in tub. It is a practical and convenient option that allows you to have both a shower and a tub in one unit. The installation process may vary depending on the specific model of the tub and shower, so it is advisable to consult a professional plumber for guidance.
Where Do You Put A Shower Head In A Bathtub?
Install a shower head above the bathtub to enjoy the benefits of a shower.
Conclusion
Installing a shower in a bathtub can be a simple and cost-effective way to improve your bathroom’s functionality. By following the step-by-step instructions outlined in this blog post, you can easily transform your bathtub into a dual-purpose space. Remember to gather the necessary tools and materials, consult a professional if needed, and always prioritize safety.
With a newly installed shower, you can enjoy the convenience and luxury of a refreshing shower while still having the option for a relaxing bath. Upgrade your bathroom today and enhance your daily routine.