To install a shower handle, start by turning off the water supply, removing the old handle, aligning the new handle, and securing it in place using the provided screws or clips. Then, turn the water supply back on and test the handle for proper functionality.
When it comes to installing a shower handle, the process is relatively simple and can be done in a few steps. By following these steps, you can easily replace your old handle with a new one and have a fully functional and stylish shower in no time.
In this guide, we will walk you through the process of installing a shower handle, from turning off the water supply to testing the new handle’s functionality. So, without further ado, let’s get started on upgrading your shower handle.
Choosing The Right Shower Handle
When it comes to installing a new shower handle, selecting the right one is paramount. The shower handle not only adds to the aesthetic appeal of your bathroom but also plays a crucial role in delivering the perfect shower experience. With a wide array of options available in the market, selecting the right shower handle can seem daunting. There are a few key factors to consider when making this decision and popular types of shower handles to explore. Let’s dive in and find out what you should keep in mind when choosing the perfect shower handle for your bathroom.
Factors to Consider When Selecting a Shower Handle
Several factors should influence your decision when it comes to choosing the right shower handle. By considering these factors, you can ensure that the handle you select meets both your functional and aesthetic requirements. Here are some key factors to keep in mind:
- Compatibility: Ensure that the shower handle you select is compatible with your existing shower system. Consider factors such as the valve type and the size and shape of the handle.
- Style: The shower handle should complement the overall design and style of your bathroom. Whether you prefer a modern, minimalistic look or a traditional, ornate design, choose a handle that fits seamlessly with your bathroom decor.
- Ergonomics: A shower handle should be easy to use and comfortable to grip. Consider factors such as the handle shape and size, ensuring it provides a secure and convenient grip for everyone in your household.
- Durability: Invest in a shower handle made of high-quality materials that can withstand the daily wear and tear of regular use. Look for handles that are corrosion-resistant and built to last.
- Budget: Set a budget for your shower handle purchase. With a wide range of options available, you can find a handle that fits your budget without compromising on quality.
Popular Types of Shower Handles in the Market
Now that you know what factors to consider, let’s explore some of the popular types of shower handles available in the market:
| Type | Description |
|---|---|
| Single-handle | A single-handle shower handle allows you to control both the water temperature and flow rate with one handle. It offers convenience and simplicity. |
| Two-handle | A two-handle shower handle separates the control for hot and cold water, providing more precise temperature adjustment. It is a classic choice for those who prefer traditional designs. |
| Thermostatic | A thermostatic shower handle maintains a consistent water temperature, even if someone else in your household uses water elsewhere. It is perfect for ensuring a comfortable shower experience. |
| Pressure-balancing | A pressure-balancing shower handle balances the hot and cold water supply to prevent sudden temperature changes. It is a safety feature that is especially important in households with young children or older adults. |
These are just a few of the popular types of shower handles available. Each type offers its own benefits and features, so consider your specific needs and preferences when making a decision.
When selecting a shower handle, remember to take into account compatibility, style, ergonomics, durability, and budget. By considering these factors and exploring the various types available, you can find the perfect shower handle that enhances both the functionality and visual appeal of your bathroom.

Understanding The Components Of A Shower Handle
When it comes to installing a shower handle, it’s important to have a good understanding of the various components that make up this vital part of your shower. By familiarizing yourself with these components, you’ll be better equipped to not only install a new handle but also troubleshoot any problems that may arise. In this section, we’ll break down each part of a shower handle and explain their importance in the installation process.
Breakdown of the Parts that Make Up a Shower Handle
To successfully install a shower handle, you need to be familiar with its individual components. Here’s a breakdown of the main parts that make up a typical shower handle:
| Component | Description |
|---|---|
| Handle | The part you grip and turn to control the water flow and temperature. |
| Escutcheon | The decorative plate that covers the hole in the wall where the handle is installed. |
| Valve Trim | The outer casing that houses the valve mechanism and connects to the handle. |
| Cartridge | The internal component that regulates the flow and temperature of the water. |
Each of these components plays a crucial role in the proper functioning of your shower handle. Now, let’s delve into the importance of each component in the installation process.
Importance of Each Component in the Installation Process
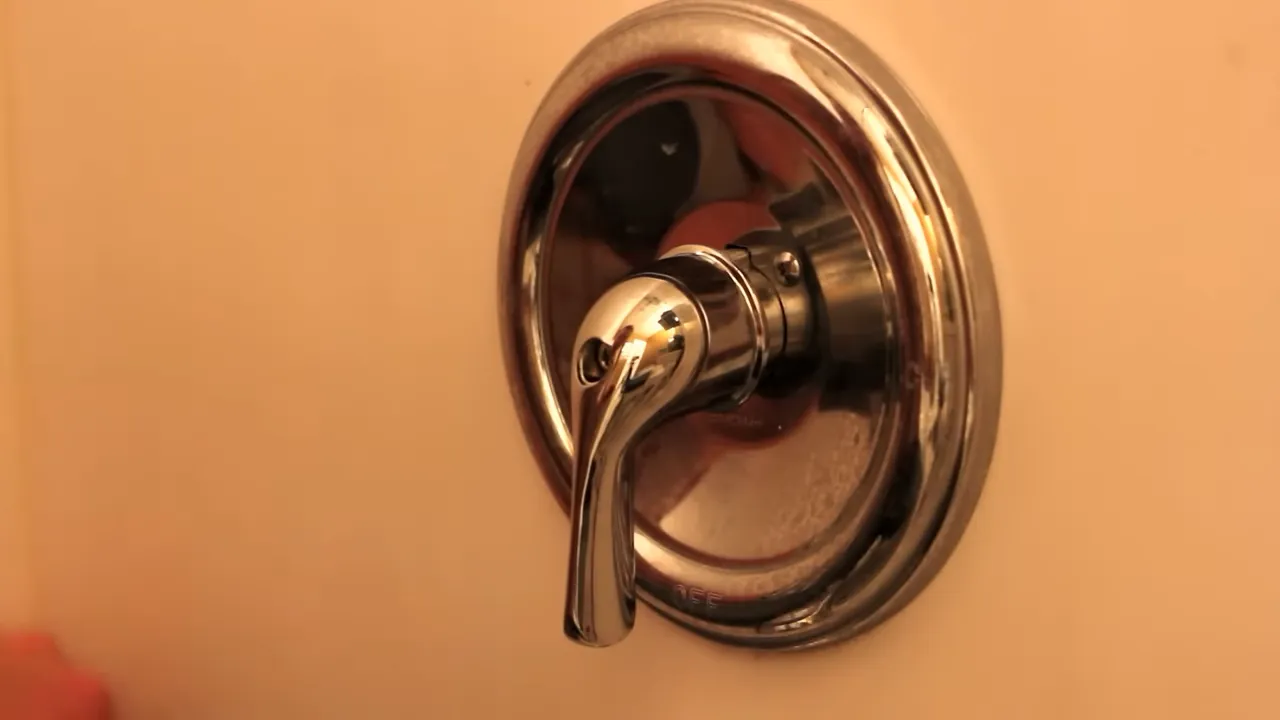
Handle: The handle is the most visible part of the shower handle and serves as the means of controlling the water. During installation, you need to ensure that the handle is securely attached to the valve mechanism, allowing for smooth and easy operation.
Escutcheon: The escutcheon not only enhances the aesthetics of your shower but also covers the hole in the wall where the plumbing connections are located. It provides a clean and finished look, preventing any water leakage from behind the wall.
Valve Trim: The valve trim encloses the valve mechanism and is responsible for connecting the handle to the cartridge. It acts as a protective cover while also providing structural support to the handle. Proper installation of the valve trim ensures that the handle operates smoothly and securely.
Cartridge: The cartridge is the heart of the shower handle, regulating the water flow and temperature. It’s crucial to install the cartridge correctly to ensure optimal performance and prevent any issues such as leaks or inconsistent water temperature. Follow the manufacturer’s instructions carefully when installing or replacing the cartridge.
In conclusion, understanding the components of a shower handle is essential for a successful installation. Each component has its own significance, contributing to the overall functionality and appearance of your shower. By paying attention to each part and ensuring proper installation, you can enjoy a reliable and enjoyable showering experience
Tools And Materials Needed For Installing A Shower Handle
Before you begin installing a shower handle, it’s important to gather all the necessary tools and materials. Having everything on hand will make the installation process smoother and ensure a successful outcome. Below, you will find a list of essential tools and materials required for this task.
Essential tools required for a successful installation:
- Adjustable wrench
- Phillips screwdriver
- Flathead screwdriver
- Hex key (Allen wrench)
- Pliers
- Tape measure
- Utility knife
- Caulking gun
- Plumber’s tape
These tools are essential for removing the old shower handle, preparing the area for installation, and securing the new handle in place. Having a diverse range of tools will ensure you have everything necessary to handle different types of screws, bolts, and connections that may be encountered during the process.
List of materials needed to complete the installation:
- New shower handle
- Screws
- Bolts
- Nuts
- Washers
- Gaskets or O-rings
- Waterproof plumber’s putty
- Caulk
These materials are necessary for securely installing the new shower handle. Make sure to choose high-quality materials that are compatible with your shower hardware. You may also need additional materials depending on the specific shower handle you are installing, so be sure to consult the manufacturer’s instructions.
Now that you have a comprehensive list of the tools and materials required for installing a shower handle, you’re ready to start the installation process. By having everything prepared in advance, you’ll be able to complete the task efficiently and enjoy the improved functionality and aesthetic appeal of your updated shower handle.
Step-By-Step Guide To Installing A Shower Handle
Installing a shower handle may seem like a daunting task, but with a little patience and the right tools, you can easily do it yourself. In this step-by-step guide, we will walk you through each stage of the installation process, from preparation to testing the functionality of the installed shower handle. So, let’s get started!
Preparation before installation:
Before you begin installing the shower handle, it’s important to gather all the necessary tools and materials. Here’s a list of what you’ll need:
- Adjustable wrench
- Screwdriver (Philips or flathead, depending on the screw type)
- New shower handle and trim kit
- Pipe thread sealant tape
Turning off the water supply:
Before you start working on the shower handle, it’s crucial to turn off the water supply to avoid any unwanted leaks or accidents. Locate the main water shut-off valve in your home and turn it off to stop the water flow to the bathroom.
Removing the old shower handle:
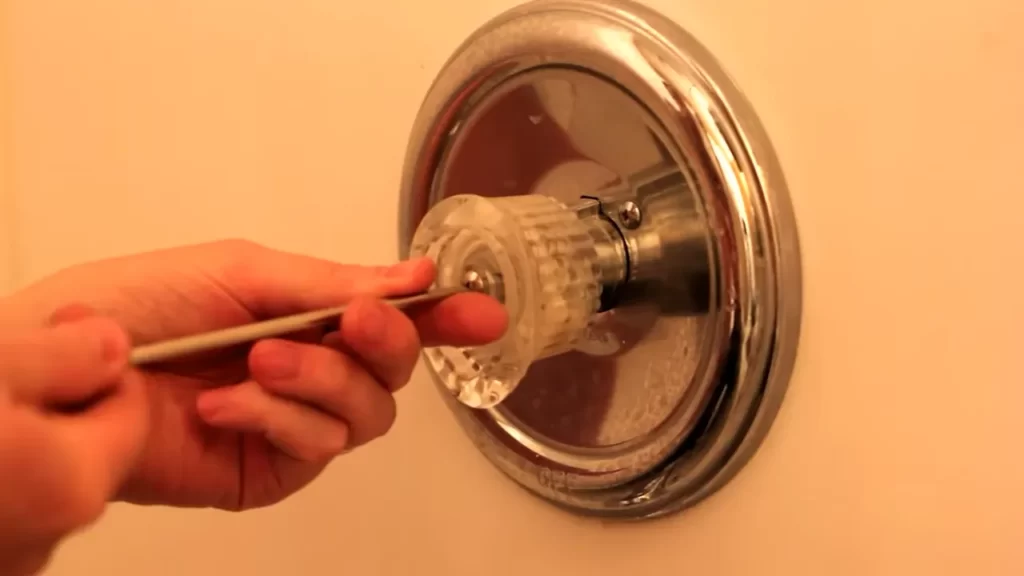
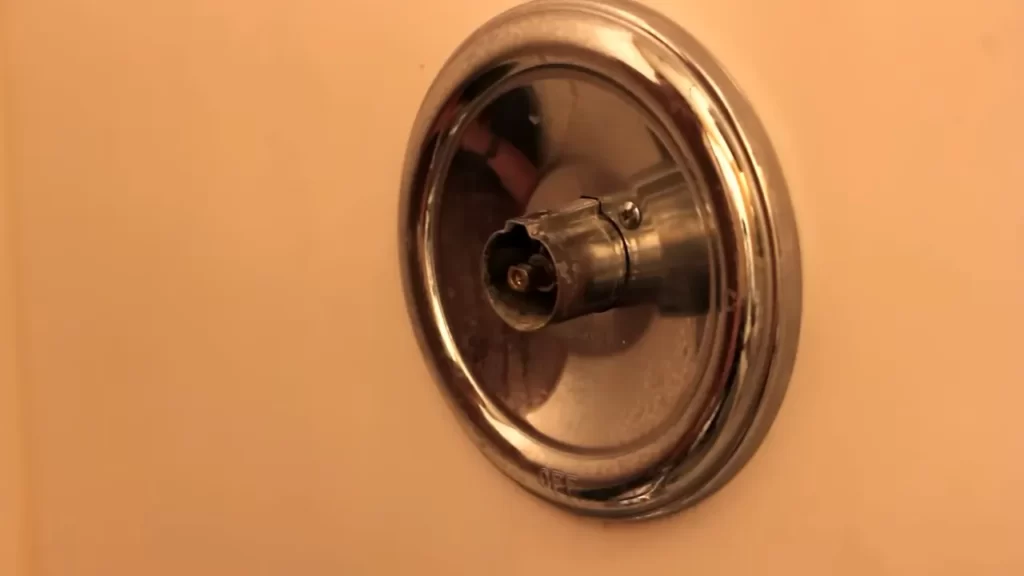
Use a screwdriver to remove the screws holding the old shower handle in place. Once the screws are removed, carefully pull the handle away from the wall, exposing the valve stem.
Installing the handle base and trim:
Take the new handle base and trim and position it over the valve stem. Make sure it fits snugly and aligns properly with the screw holes.
Aligning and securing the handle base:
Once the handle base is in place, use the screws provided with the new handle kit to secure it to the valve stem. Tighten the screws using an adjustable wrench or a screwdriver, ensuring the base is firmly attached.
Attaching the trim to the handle base:
Align the trim with the handle base and use the provided screws to fasten it securely. Verify that the trim is straight and level before tightening the screws.
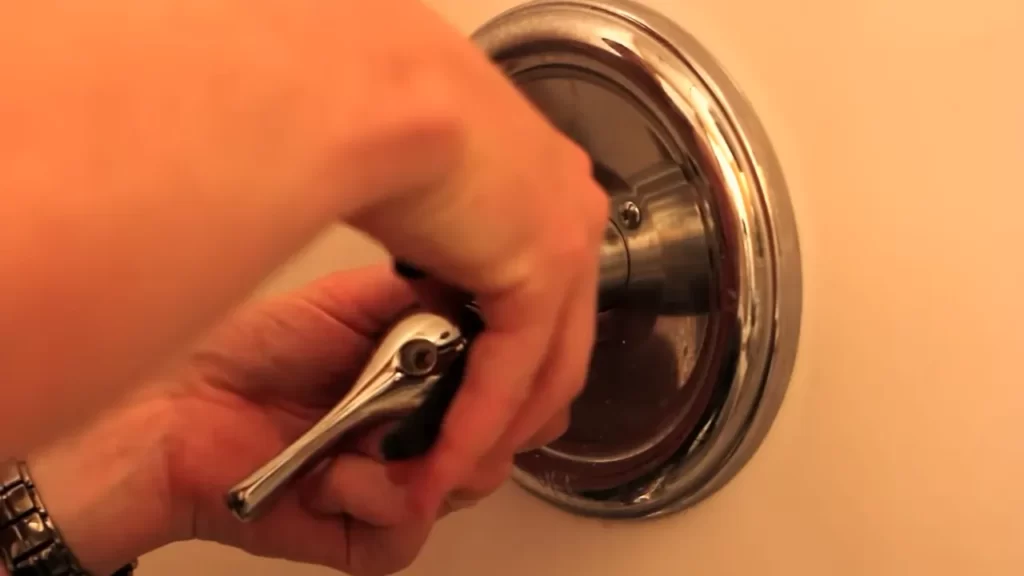
Securing the handle to the valve:
Slide the handle onto the valve stem, ensuring it fits properly. Use the appropriate screwdriver to tighten the screw on the handle, securing it in place.
Connecting the handle to the valve stem:
Depending on the type of shower handle you have, it may require connecting the handle to the valve stem. Refer to the manufacturer’s instructions for guidance on this step.
Adjusting the handle alignment:
Once the handle is attached, check if it aligns correctly and operates smoothly. Make any necessary adjustments by loosening the screws and repositioning the handle until it’s aligned properly. Then, tighten the screws to secure the handle in the desired position.
Testing the functionality of the installed shower handle:
Finally, turn on the water supply and test your newly installed shower handle. Check if it operates smoothly and adjust the handle as needed. Verify that the hot and cold water settings are working correctly.
With these simple steps and a little effort, you can successfully install a shower handle and enjoy a refreshing shower experience. Just remember to proceed with caution, ensuring the water supply is turned off before starting the installation.
Troubleshooting Common Issues During Shower Handle Installation
Installing a shower handle can be a relatively simple task, but sometimes issues can arise that make the process a bit more challenging. In this section, we will discuss some common problems that may occur during shower handle installation and offer solutions to help you troubleshoot and fix them.
Identifying and fixing leaks
One of the most frustrating problems you may encounter during shower handle installation is a leak. Leaks can occur for various reasons, such as improper installation or worn-out parts. Here are some steps you can take to identify and fix leaks:
- Check the connections: Start by inspecting the connections between the handle, valve, and pipe. Ensure that all connections are tight and secure, using a wrench if necessary.
- Inspect the O-rings and washers: Leaks can also be caused by worn-out O-rings or washers. Remove the handle and check these parts for any signs of damage or wear. If needed, replace them with new ones.
- Apply plumber’s tape: Another way to prevent leaks is by applying plumber’s tape to the threads of the connections. This helps create a watertight seal and minimizes the chances of leakage.
- Test for leaks: After making any necessary adjustments or replacements, turn on the water supply and test for leaks. Keep an eye out for any drips or moisture around the handle and connections. If you still notice leaks, consider seeking professional help.
Handling loose or wobbly handle issues
A loose or wobbly handle can be not only irritating but also a potential safety hazard. Here are some steps to help you fix this issue:
- Tighten the handle: Start by tightening the handle itself. Depending on the type of handle, this may involve using a screwdriver or an Allen wrench. Make sure to tighten the handle firmly but not excessively.
- Inspect the set screw: Some handles have set screws that secure them to the valve stem. If your handle has a set screw, check to see if it is loose. If so, tighten it using an appropriate tool.
- Check for worn-out parts: A loose handle could also be a sign of worn-out parts. Inspect the handle and valve stem for any signs of damage or wear. If necessary, replace any worn-out parts with new ones.
- Consider using adhesive: In situations where tightening and replacing parts are not effective, you may want to apply a small amount of adhesive between the handle and valve stem. This can provide additional stability and prevent further wobbling.
By following these troubleshooting steps, you should be able to address common issues that may arise during shower handle installation. Remember to always exercise caution and, if needed, consult a professional for assistance.
Maintenance Tips For A Functional Shower Handle
A well-functioning shower handle is essential for a satisfying shower experience. To ensure your shower handle stays in optimal condition, it is important to perform regular cleaning and maintenance. By following these simple tips, you can preserve the longevity of the handle’s finish and avoid any potential issues.
Regular Cleaning and Maintenance
Cleaning your shower handle on a regular basis not only keeps it looking sparkling clean but also prevents the accumulation of dirt, soap scum, and mildew that can affect its functionality. Here are a few key steps to follow:
- Start by removing the shower handle. Consult the manufacturer’s instructions or seek professional help if you are uncertain about the proper removal process.
- Once the handle is removed, clean it thoroughly using a mild soap or detergent and warm water. Avoid using abrasive cleaners or scouring pads as they can damage the handle’s finish.
- Rinse the handle thoroughly to remove any residual soap or cleaning solution. Pay attention to hard-to-reach areas and corners to ensure a thorough cleaning process.
- Dry the handle completely using a soft, lint-free cloth. This step is crucial to prevent the accumulation of moisture that can lead to corrosion or tarnishing of the handle’s surface.
- As part of your maintenance routine, check for any signs of wear and tear. Inspect the handle for loose screws, cracks, or any other damage that may affect its functionality. Address any issues promptly to prevent further damage.
- Finally, reassemble the shower handle following the manufacturer’s instructions. Ensure that it is securely positioned and functions smoothly before using the shower.
Preserving the Longevity of the Handle’s Finish
Whether your shower handle is made of chrome, brass, or any other material, taking steps to preserve its finish can extend its lifespan and maintain its aesthetic appeal. Consider the following tips:
- Avoid using abrasive cleaners, harsh chemicals, or rough cleaning tools that can scratch or strip the handle’s finish. Opt for mild soaps or specialized cleaners designed for the specific material of your handle.
- Regularly apply a protective coating, such as a clear sealant or wax, to shield the handle’s finish from moisture and mineral deposits. Follow the manufacturer’s instructions for the recommended frequency of application.
- After showering, use a soft cloth to wipe down the handle and remove any water spots or residue. This simple step can help prevent the buildup of mineral deposits that could dull the finish over time.
- Consider using a gentle metal polish or a homemade solution, such as a mixture of vinegar and water, to restore the shine of your handle. Apply the solution using a soft cloth and buff gently for best results.
- If you live in an area with hard water, you may want to install a water softener or use a showerhead attachment that reduces mineral buildup. This can significantly reduce the amount of cleaning required for your shower handle.
With proper cleaning and maintenance, your shower handle can remain functional and visually appealing for years to come. By following these tips, you can ensure a pleasant and hassle-free shower experience every time.
Safety Considerations During Shower Handle Installation
When it comes to installing a shower handle, it’s important to prioritize safety. Taking the necessary precautions can help prevent accidents and ensure a smooth installation process. In this section, we’ll discuss the safety measures you should consider when working with plumbing fixtures and how to ensure a safe and secure installation.
Precautions to take when working with plumbing fixtures
- Always turn off the water supply before starting any installation work. This will prevent any unexpected water flow and potential water damage.
- Wear protective gloves to protect your hands from sharp edges and potential injuries.
- Use caution when working with sharp tools, such as wrenches or screwdrivers. Ensure proper handling to avoid any accidents.
- Be mindful of the surroundings. Clear the area you’re working in to avoid tripping hazards and ensure easy access.
- Respect electricity. If your shower is connected to an electrical system, make sure to turn off the power supply before starting the installation. If in doubt, consult a professional electrician.
Ensuring a safe and secure installation process
- Read the manufacturer’s instructions carefully before starting the installation. Ensure that you understand the steps involved and any specific safety precautions mentioned.
- Inspect the shower handle and its accompanying parts for any defects or damage. If you notice anything, do not proceed with the installation and contact the manufacturer for assistance.
- Make sure you have the necessary tools and equipment ready before starting the installation. This will prevent any delays and allow you to focus on the task at hand.
- Follow the proper installation procedure step by step. Avoid taking shortcuts or improvising, as this may compromise the safety and functionality of the shower handle.
- Double-check the tightness of connections and fittings to ensure everything is secure. This will minimize the risk of leaks and potential water damage.
Frequently Asked Questions
Can You Replace A Shower Handle Yourself?
Yes, you can replace a shower handle yourself. Just follow the instructions carefully and use the right tools.
How Do You Fix A Shower Handle That Fell Off?
To fix a shower handle that fell off, start by turning off the water supply. Then, locate the set screw on the handle and tighten it using an Allen wrench. If the set screw is missing, replace it with a new one.
Reattach the handle and test it to ensure it’s secure.
Are All Shower Handles Universal?
No, shower handles are not universal. Different brands and models have different sizes and designs that may not fit interchangeably. It’s important to check the specifications or consult a professional to ensure compatibility when replacing or installing a new shower handle.
How Do You Install A Shower Handle Cartridge?
To install a shower handle cartridge, follow these steps: 1. Shut off the water supply to your shower. 2. Remove the handle cover and unscrew the handle. 3. Take out the old cartridge by pulling it straight out. 4. Insert the new cartridge, making sure it aligns correctly.
5. Screw the handle back on and turn the water supply back on.
Conclusion
Installing a shower handle doesn’t have to be a daunting task. By following our step-by-step guide, you can quickly and efficiently complete the installation process. Remember to gather all the necessary tools and materials beforehand and to carefully follow the manufacturer’s instructions.
With a little patience and attention to detail, you’ll have your new shower handle installed in no time. Happy showering!