To install a shower grab bar on tile, first, determine the placement and mark the spots for mounting. Then, drill holes into the tile using a masonry bit and screw the grab bar securely into place.
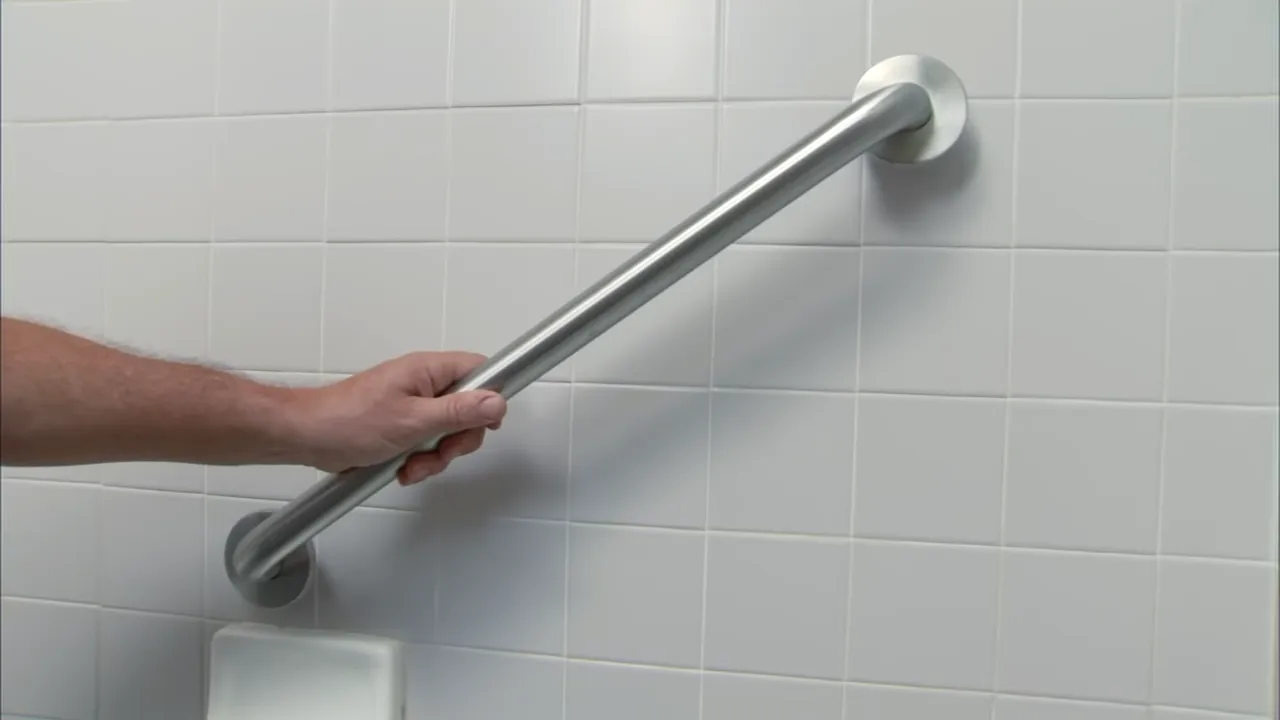
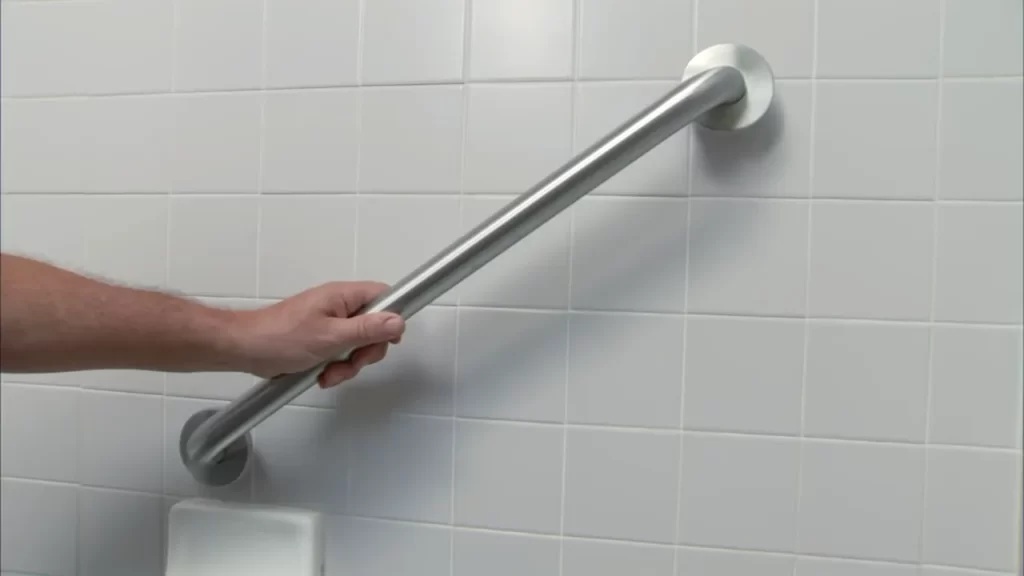
Installing a shower grab bar on tile is an important safety measure, especially for older adults or individuals with mobility issues. These sturdy bars provide support and stability, reducing the risk of slips and falls in the shower. However, the process of installing a grab bar on tile requires careful execution to ensure it remains securely mounted.
In this guide, we will walk you through the steps of installing a shower grab bar on tile, enabling you to enhance bathroom safety and peace of mind for yourself or your loved ones. By following the instructions below, you can easily and effectively install a grab bar in your shower without damaging the tile.
Choosing The Right Shower Grab Bar
When it comes to installing a shower grab bar on tile, one of the key aspects to consider is choosing the right grab bar. The right grab bar not only enhances safety but also provides support and stability for individuals when showering. In this section, we will explore the different types of shower grab bars, such as straight bars and angled bars, as well as fixed and adjustable bars. We will also discuss how to determine the ideal location for the grab bar and understand the safety considerations that come into play. Moreover, we will delve into assessing user needs and preferences, ensuring a well-informed decision is made.
Different Types of Shower Grab Bars
When selecting a shower grab bar, it is essential to understand the different types available. Below, we discuss two primary types:
| Straight Bars | Angled Bars |
|---|---|
| Straight bars have a linear design and are typically installed horizontally or vertically. These bars provide a simple yet sturdy grip for users. | Angled bars, on the other hand, have a diagonal shape that allows for multiple hand positions. They are especially beneficial for individuals who require added flexibility or have limited mobility. |
Fixed vs. Adjustable Bars
An additional aspect to consider when choosing a shower grab bar is whether to opt for a fixed or adjustable bar. Here’s an overview of both options:
- Fixed Bars: Fixed bars are securely mounted to the wall and do not have any moving parts. They provide a sturdy support system and are ideal for individuals who require a permanent and stable grab bar.
- Adjustable Bars: Adjustable bars offer flexibility as they can be repositioned or removed as needed. These bars are suitable for individuals who may have changing needs or those who prefer not to have a permanent fixture.
Determining the Ideal Location for the Grab Bar
When installing a shower grab bar, it is crucial to determine the ideal location in terms of safety and usability. Here are a few key factors to consider:
- The height of the grab bar should be easily reachable for the user.
- The distance between the bar and surrounding walls should allow for a comfortable grip.
- The location should support the individual’s movement and provide assistance when entering, exiting, or maneuvering within the shower.
Understanding Safety Considerations
Safety should always be a top priority when installing a shower grab bar. Below are some crucial safety considerations to keep in mind:
- The grab bar should be made of high-quality materials that are durable and resistant to moisture.
- Ensure proper installation by securely attaching the bar to stud framing or using reliable mounting anchors designed for tile.
- Regularly inspect the grab bar for any signs of wear or damage, and promptly address any issues.
Assessing User Needs and Preferences
When selecting a shower grab bar, it is essential to consider the specific needs and preferences of the individual who will be using it. This includes:
- Considering the person’s height, mobility, and any additional support requirements.
- Consulting with the user to determine their preferred grip style or any other specific features they may require.
- Ensuring the design of the grab bar complements the overall aesthetics of the shower area.
By carefully considering the different types of grab bars, the ideal location, safety considerations, and user needs, you can choose the right shower grab bar that provides optimal support and enhances the showering experience.
Preparing The Tile Surface For Installation
Before you can install a shower grab bar on tile, it is important to properly prepare the tile surface. This involves gathering the necessary tools and materials, measuring and marking the placement of the grab bar, and determining the appropriate height and positioning. By following these steps, you can ensure a secure and sturdy installation that will provide added safety and stability in your shower.
Gathering the Necessary Tools and Materials
Before you begin, it is essential to gather all the tools and materials you will need for the installation. Having everything on hand will make the process smoother and more efficient. The following list outlines the tools and materials you will need:
| Tools | Materials |
|---|---|
|
|
Measuring and Marking the Placement of the Grab Bar
Once you have gathered the necessary tools and materials, it is time to measure and mark the placement of the grab bar. This step is crucial for ensuring that the bar is installed at the optimal height and positioning for maximum safety and comfort. To accurately measure and mark the placement, follow these steps:
- Using a tape measure, determine the desired height for the grab bar. It is recommended to position the bar between 33 and 36 inches from the floor.
- Using a level, mark a horizontal line at the desired height using a pencil. This line will serve as a guide for the placement of the grab bar.
- If you have a stud finder, locate the studs within the tile. It is ideal to install the grab bar into studs for added strength and stability. Mark the location of the studs with masking tape.
- If you cannot secure the grab bar into studs, you will need to use plastic anchors. With the level, mark points on the horizontal line where you will install the anchors.
Determining the Appropriate Height and Positioning
When installing a grab bar on tile, it is important to determine the appropriate height and positioning to ensure optimal safety and accessibility. The grab bar should be within easy reach and provide support for individuals of all heights and abilities. To determine the appropriate height and positioning, consider the following guidelines:
- The grab bar should be installed so that it is parallel to the shower floor.
- The height at which the grab bar is installed will depend on the needs of the individual using it. However, a general rule of thumb is to install it between 33 and 36 inches from the floor.
- Consider the height and reach of the primary user. The grab bar should be positioned so that it is easily accessible and provides support when entering and exiting the shower.
- Ensure that the grab bar does not obstruct any other fixtures or fittings in the shower.
Marking the Exact Points for Screw Placement
Before you start drilling into the tile, it is important to mark the exact points where the screws will be placed. This will ensure accurate installation and prevent any damage to the tile. To mark the exact points for screw placement, follow these steps:
- Hold the grab bar against the marked line on the tile, aligning it with the desired positioning.
- Using a pencil, mark the screw holes on the tile through the pre-drilled holes in the grab bar.
- Double-check the placement and alignment of the grab bar before proceeding.
By following these steps and properly preparing the tile surface, you are well on your way to installing a shower grab bar that will provide added safety and stability in your shower.
Installing The Shower Grab Bar
Adding a grab bar to your shower can provide an extra level of safety and support, especially for individuals with limited mobility or balance issues. While installing a shower grab bar on tile may seem like a daunting task, with the right tools and techniques, it can be a manageable DIY project. In this section, we will guide you through the step-by-step process of installing a shower grab bar on tile, ensuring a safe and secure installation.
Drilling the Holes in the Tile
The first step in installing a shower grab bar on tile is drilling the holes. This requires precision and caution to prevent any damage to the tile surface. Follow these steps to drill the holes effectively:
- Using a permanent marker, mark the spots where you want to install the grab bar. Ensure the marks are level and aligned properly.
- Choose a drill bit suitable for drilling into tile. For ceramic tiles, a carbide-tipped masonry bit is recommended. For harder tiles like porcelain or natural stone, a diamond-tipped bit works best.
- Secure the tile with masking tape to minimize the risk of cracking or chipping during drilling.
- Attach the chosen drill bit to your drill and set it to a slow speed. Begin drilling at the marked spot, applying steady pressure.
- Drill straight and gradually increase the speed as the drill bit penetrates the tile. Do not push too hard, let the drill do the work.
- Repeat the process for all the marked spots, ensuring each hole is clean and smooth without any jagged edges.
Choosing the Right Drill Bit
When drilling into tile, it is crucial to use the appropriate drill bit to prevent damage and achieve clean holes. Here are some factors to consider when choosing the drill bit:
- Tile material: Different tile materials require different types of drill bits. Ceramic tiles work well with carbide-tipped masonry bits, while diamond-tipped bits are more suitable for porcelain or natural stone tiles.
- Size: The size of the drill bit should match the diameter of the shower grab bar’s screws. It is recommended to check the manufacturer’s instructions for the recommended size.
- Quality: Opt for high-quality drill bits that are specifically designed for tile drilling. They may be slightly more expensive but provide better results and last longer.
Proper Technique to Avoid Tile Damage
To avoid damaging the tile while drilling, follow these best practices:
- Start drilling at a slow speed to prevent the drill bit from skidding or slipping on the tile surface.
- Apply steady, even pressure while drilling. Excessive force can crack or chip the tile.
- Use a piece of tape or a sticky note on the marked spot to provide added traction for the drill bit.
- Regularly check the progress of the drilling to ensure the bit is penetrating the tile smoothly.
- Remove any debris or dust from the holes to prevent interference during the next steps.
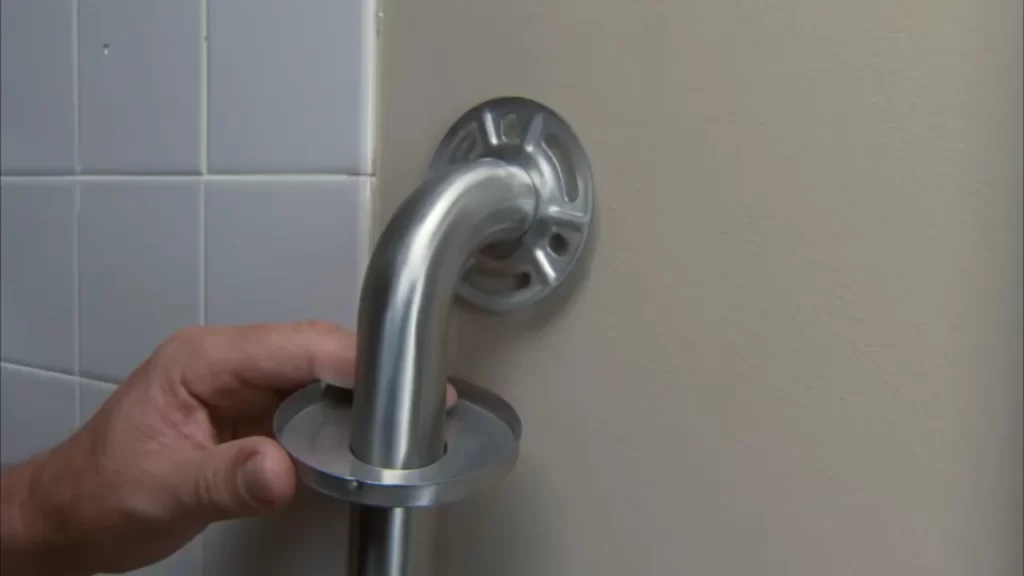
Securing the Grab Bar to the Tile
Once the holes have been drilled, it’s time to secure the grab bar to the tile. There are two common methods for attaching the grab bar:
- Using Anchors: Insert plastic or metal anchors into the drilled holes. These anchors provide extra stability for the grab bar by distributing the weight more evenly.
- Using Mounting Brackets: Mounting brackets are another option to secure the grab bar. They typically require screws to attach the bracket to the wall or tile surface.
Step-by-Step Screw Installation Process
- Place the grab bar over the drilled holes, ensuring it aligns properly with the marks on the tile.
- Attach the screws through the grab bar and into the anchors or mounting brackets.
- Tighten the screws using a screwdriver or drill, making sure they are secure but not overly tightened.
Testing the Sturdiness and Stability of the Installed Grab Bar
After securing the grab bar, it is essential to test its sturdiness and stability to ensure it can withstand the intended weight and provide the necessary support. Apply pressure in various directions to check for any wobbling or movement.
Confirming a Safe and Secure Installation
Before considering the installation complete, it is crucial to confirm that the grab bar is safely and securely attached to the tile. Double-check the screws, anchors, or mounting brackets to ensure they are tight and secure. Confirm that the grab bar does not move or shift when weight is applied.
Addressing any Adjustments or Residual Movement
If there are any adjustments or residual movement in the grab bar after testing, it indicates that the installation may not be secure. In such cases, it is advisable to reevaluate the installation process, revisit the drilling and anchoring steps, and make necessary adjustments to achieve a safe and stable installation.
By following these guidelines and adhering to the proper techniques, you can successfully install a shower grab bar on tile, promoting safety and convenience in your bathroom.
Frequently Asked Questions
Can Grab Bars Be Installed Over Tile?
Yes, grab bars can be installed over tile.
How Do You Install Grab Bars On Tile Without Studs?
To install grab bars on tile without studs, you can use adhesive mounting brackets specifically designed for tile. First, clean the wall and tile surface thoroughly. Then, mark the desired location for the grab bar and attach the brackets using the adhesive.
Finally, slide the grab bar onto the brackets and let the adhesive dry according to the manufacturer’s instructions.
Can You Install Grab Bars On Porcelain Tile?
Yes, you can install grab bars on porcelain tile. Carefully follow the proper installation steps to ensure secure attachment.
Where Is The Best Place To Put Grab Bars In A Shower?
The best place to put grab bars in a shower is near the entrance, inside the shower, and along the back wall. These strategic positions provide stability and support to prevent slips and falls while getting in and out of the shower, as well as during bathing.
Conclusion
Installing a shower grab bar on tile is a simple and effective way to enhance safety and accessibility in your bathroom. By following the step-by-step instructions in this blog post, you can ensure proper installation and create a secure and stable grab bar.
Remember to choose the right type of grab bar for your needs and use the appropriate tools for a successful installation. With a little effort, you can improve the functionality and safety of your bathroom for yourself and your loved ones.
Take action today and enjoy the benefits of a shower grab bar.