
To install a shower floor pan, first, prepare the subfloor by removing any existing flooring. Then, apply a layer of mortar or a pre-formed shower pan liner to create a watertight seal.
Gather Materials And Tools
Before you embark on installing a shower floor pan, it’s essential to gather all the necessary materials and tools. This will not only make the installation process smooth and efficient but also ensure that you have everything you need within reach as you work. Below are the required materials and essential tools you’ll need for installing a shower floor pan:
Required materials for shower floor pan installation
When it comes to the materials for installing a shower floor pan, it’s important to choose high-quality and durable options. This will guarantee the longevity and performance of your shower pan. Here is a list of the materials you’ll need:
| Shower Pan | A pre-formed or custom-made shower pan that fits your specific measurements. |
| Waterproofing Membrane | A waterproofing membrane that provides a reliable barrier against water damage. |
| Thinset Mortar | A special type of mortar used for adhering the shower pan and tiles. |
| Grout | A cement-based material used to fill the gaps between tiles and prevent water leakage. |
| Tile | Choose tile options suitable for your shower floor, such as ceramic or stone tiles. |
| Grout Sealer | A sealer to protect the grout from stains and moisture penetration. |
| Tile Spacers | Small plastic or rubber pieces used to maintain consistent spacing between tiles. |
Essential tools for the installation process
Having the right tools for the job will make the installation process much easier and more efficient. Here are the essential tools you’ll need:
- Tape Measure: Used to measure and ensure accurate dimensions for the shower floor pan installation.
- Level: Ensures that the shower pan is installed horizontally and prevents any unevenness.
- Notched Trowel: Used to spread the thinset mortar evenly and create ridges for proper tile adhesion.
- Rubber Mallet: Helps to firmly set the shower pan in place and remove any air bubbles.
- Tile Cutter: Used to cut the tiles to fit around edges and corners of the shower floor.
- Grout Float: Used to apply and smooth the grout into the gaps between the tiles.
- Sponge: Used to clean excess grout from the tiles and give them a polished finish.
- Bucket and Mixing Paddle: Required for mixing the thinset mortar and grout.
- Utility Knife: Used for cutting and trimming the waterproofing membrane and other materials.
- Safety Glasses and Gloves: Protect your eyes and hands while handling materials and tools.
- Dust Mask: Recommended when cutting tiles to minimize inhalation of dust particles.
By gathering these materials and tools before starting the installation process, you’ll be well-prepared to tackle the project and achieve professional-looking results. Remember to follow safety guidelines and manufacturer’s instructions throughout the installation process for optimal results. In the next section, we will walk you through the process of preparing the shower floor for the pan installation.
Prepare The Shower Area
Before you start installing a shower floor pan, it’s essential to properly prepare the shower area. This means clearing out the existing space to ensure a clean and blank canvas for your new shower. Additionally, you should inspect the plumbing to address any potential issues and take the necessary steps to ensure proper drainage. Let’s break down each of these steps:
Clear the existing shower area
Begin by removing any old shower fixtures, such as the showerhead, handles, and drain cover. Use a wrench or pliers to carefully detach them from the existing plumbing. Next, clean the walls and floor of the shower area, removing any dirt, grime, or mold. A mixture of warm water and mild soap should suffice for this task. It’s important to ensure that the surface is thoroughly dry before proceeding.
Inspect and address any plumbing issues
Now that the area is clear, it’s time to inspect the plumbing for any potential issues. Check for leaks, cracks, or damaged pipes that may need repair. If you notice any problems, it’s best to consult a professional plumber to address them before moving forward with the installation. Taking care of plumbing issues now will prevent any future complications and ensure the longevity of your shower.
Ensure proper drainage
Proper drainage is crucial to prevent water buildup and potential damage. Start by clearing any debris or sediment from the drain. You can use a small brush or your fingers to remove any obstructions. Next, ensure that the drainpipe is securely attached and free from leaks. This will prevent any water leakage into the subfloor, which can lead to mold and structural damage over time. Adequate drainage will also help to maintain a clean and hygienic shower environment.
Once you have followed these steps and are satisfied with the cleared shower area, inspected the plumbing, and ensured proper drainage, you’re ready to move on to the next steps of installing a shower floor pan. Taking the time to prepare the shower area thoroughly will help ensure a smooth installation process and a durable and functional shower in the long run.
Measure And Cut The Shower Floor Pan
Installing a shower floor pan is an essential part of creating a leak-proof and sturdy shower base. One of the crucial steps in this process is measuring and cutting the shower floor pan to fit your shower area perfectly. Accurate measurements and precise cuts ensure a smooth and seamless installation, preventing any future issues with your shower pan.
Take accurate measurements for the shower floor pan
Before cutting the shower floor pan, it’s important to take accurate measurements of your shower area. This will help you determine the size and shape of the pan you’ll need.
To do this, start by measuring the length and width of the shower area. Use a tape measure to get the most precise measurements possible. Measure from wall to wall, ensuring that you account for any corners or irregularities in the space. Write down these measurements to refer to when cutting the pan.
Note: It’s always a good idea to measure twice to ensure accuracy. Taking multiple measurements will help you avoid any mistakes and save time in the long run.
Cut the pan to fit the shower area
Once you have your measurements, it’s time to cut the shower floor pan to fit your shower area. This requires careful precision to ensure a perfect fit.
Start by placing the shower floor pan on a stable and sturdy surface, such as a workbench or sawhorses. Make sure you have the necessary safety equipment, including goggles and gloves, before beginning the cutting process.
Using your measurements as a guide, mark the dimensions on the pan with a pencil or marker. Double-check your measurements one last time before proceeding.
Tip: It’s always a good idea to cut the shower floor pan slightly smaller than the actual measurements. This allows room for adjustments and ensures a snug fit.
Next, use a sharp utility knife or a circular saw with a fine-tooth blade to make the cuts. Slowly and carefully follow the marked lines, keeping the blade steady and straight. Take your time to ensure clean and precise cuts.
Caution: Be mindful of your safety when cutting the pan. Remember to follow all safety guidelines and avoid rushing the process.
Once you have finished cutting the pan, place it back into the shower area to check the fit. Make any necessary adjustments if the pan is too large or too small. The goal is to achieve a perfect fit that covers the entire shower area with minimal gaps.
Important: If you are installing a shower pan with a built-in slope or curb, make sure to cut those areas accordingly to maintain proper drainage and water flow.
Install The Drain And Pre-Slope
When it comes to installing a shower floor pan, one of the crucial steps is to properly install the drain and create a pre-slope. This ensures effective drainage and prevents any pooling of water. In this section, we will guide you through the process of positioning and securing the shower drain, as well as creating a proper pre-slope.
Position and Secure the Shower Drain
Before you can start creating the pre-slope, you need to position and secure the shower drain. The shower drain is a critical component that allows the water to flow out of the shower area. Here’s how you can do it:
- Locate the center point of the shower area where the drain will be installed. This is usually determined by the plumbing layout.
- Place the shower drain assembly over the center point, ensuring that it aligns properly with the plumbing drainpipe.
- Tighten the locking ring to secure the shower drain in place. Make sure it is securely fastened to prevent any movement or leaks.
- Apply a layer of waterproof sealant around the edges of the shower drain to provide an additional barrier against any potential water damage.
Create a Proper Pre-Slope for Effective Drainage
Once the shower drain is installed and secured, it’s time to create a proper pre-slope. This is an essential step that allows the water to flow towards the drain efficiently. Follow these steps to create an effective pre-slope:
- Start by cleaning the subfloor to ensure it is free from any debris or dirt.
- Apply a layer of waterproof membrane over the subfloor using a trowel or a brush. This will provide an additional layer of protection against water damage.
- Mix a batch of mortar according to the manufacturer’s instructions. Ensure that the consistency of the mortar is suitable for creating a slope.
- Pour the mortar onto the subfloor and use a trowel to spread it evenly, sloping it towards the drain. The slope should be approximately 1/4 inch per foot for effective drainage.
- Smooth out the surface of the mortar to eliminate any high spots or ridges.
Creating a proper pre-slope is crucial for achieving effective drainage in your shower. It allows the water to flow towards the drain, preventing any water accumulation or potential damage. Once the pre-slope is complete, you can proceed with the installation of the shower floor pan.

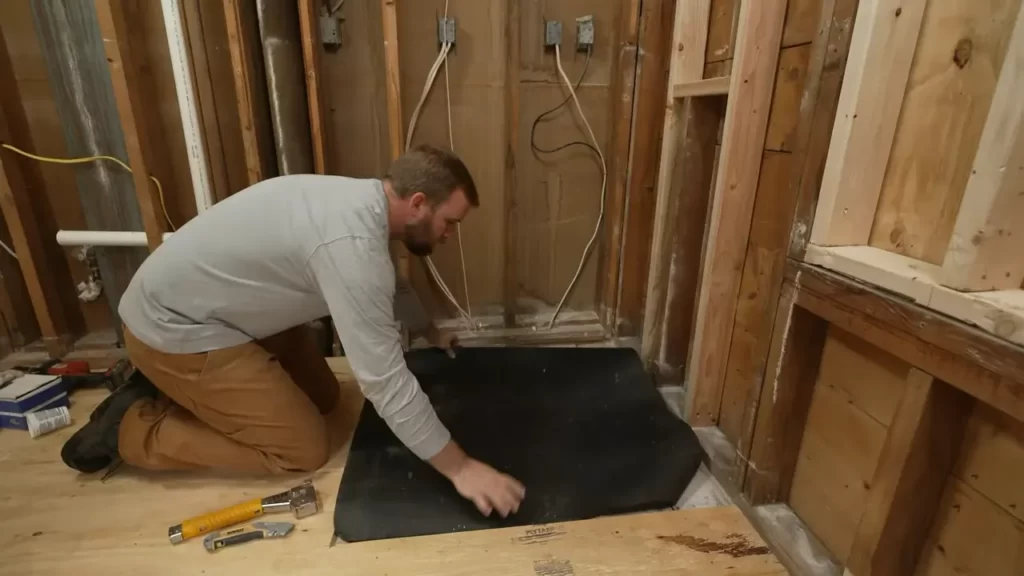
Apply The Waterproofing Membrane
One crucial step in installing a shower floor pan is applying the waterproofing membrane. This membrane is a protective barrier that prevents water from seeping through your shower floor and causing leaks. By properly applying the waterproofing membrane, you can ensure the longevity of your shower and avoid any potential water damage.
Prepare the surface for the waterproofing membrane
Before applying the waterproofing membrane, it’s essential to prepare the surface of your shower floor adequately. Follow these steps to get the surface ready:
- Thoroughly clean the shower floor: Remove any debris or dirt from the floor. Ensure that the surface is clean, dry, and free from any contaminants.
- Fill any cracks or holes: Inspect the shower floor for any cracks or holes. Use an appropriate filler or sealant to patch up these imperfections. Allow the filler to dry completely before moving on to the next step.
- Smooth out the surface: Check for any uneven areas on the shower floor. If you notice any high or low spots, sand them down to create a smooth and level surface.
- Remove excess dust: After sanding, remove any excess dust or particles from the shower floor. You can use a vacuum or a damp cloth to ensure a clean surface.
Apply the waterproofing membrane to protect against leaks
Once the surface is prepared, it’s time to apply the waterproofing membrane. This step involves carefully spreading the membrane on the shower floor to form a secure barrier against water leaks. Follow these guidelines for a successful application:
- Choose the right membrane: There are various waterproofing membrane options available, such as liquid-applied or sheet membranes. Research and select the one that suits your specific needs and preferences.
- Start at the drain: Begin the application process at the drain and work your way outwards. Ensure that you cover the entire shower floor surface, including the corners and edges.
- Use a paint roller or a brush: Apply the waterproofing membrane using a paint roller or a brush. Move in smooth, even strokes to ensure an even and consistent application.
- Apply multiple coats: Depending on the manufacturer’s instructions, you may need to apply multiple coats of the waterproofing membrane. Allow each coat to dry thoroughly before applying the next.
- Inspect for any gaps or missed spots: After applying the membrane, inspect the shower floor for any gaps or missed areas. Touch up any incomplete sections to ensure complete coverage and maximum protection.
By following these steps, you can successfully apply the waterproofing membrane to your shower floor pan. This crucial process will minimize the risk of leaks, providing you with a durable and long-lasting shower. Remember, taking the time to properly protect your shower floor will save you from potential headaches and expenses in the future.+
Mix And Pour The Mortar Bed
One of the most crucial steps in installing a shower floor pan is mixing and pouring the mortar bed. The mortar bed provides a sturdy base for your shower floor, ensuring stability and preventing any movement or cracks over time. To ensure a successful installation, it’s important to follow the specific instructions for mixing the mortar and pouring the bed.
Mix the mortar following specific instructions:
Before you begin mixing the mortar, it’s essential to read and understand the specific instructions provided by the manufacturer. Different brands and types of mortar may have varying mixing ratios and requirements. By following the instructions carefully, you can ensure that the mortar is mixed properly, ultimately leading to a strong and durable shower floor pan.
Note: Wearing protective gloves and a mask is recommended during the mortar mixing process to avoid any potential skin irritation or inhalation of dust particles.
Pour and level the mortar bed for the shower floor pan:
Once the mortar is mixed according to the manufacturer’s instructions, it’s time to pour and level the mortar bed for the shower floor pan. Follow these steps for a successful installation:
- Start by pouring the mixed mortar onto the shower floor area.
- Use a trowel to spread the mortar evenly, ensuring that it covers the entire surface area and reaches the desired thickness.
- When spreading the mortar, use a level to check for any uneven areas. Adjust and smooth the mortar as needed to create a level and uniform surface.
- Pay close attention to the drain area, ensuring that the mortar slopes toward the drain for proper water drainage.
- Allow the mortar bed to dry and cure according to the manufacturer’s instructions. This typically takes 24-48 hours, but may vary depending on the specific type of mortar used.
Tip: During the drying and curing process, it’s important to keep the area free from foot traffic or any heavy objects that could disrupt the drying process. This will ensure that the mortar bed sets properly and provides a solid foundation for your shower floor pan.
By following these steps and paying attention to the specific instructions for mixing and pouring the mortar bed, you’ll be well on your way to successfully installing a shower floor pan. A properly installed mortar bed will provide a solid foundation for your shower, ensuring long-lasting durability and functionality.
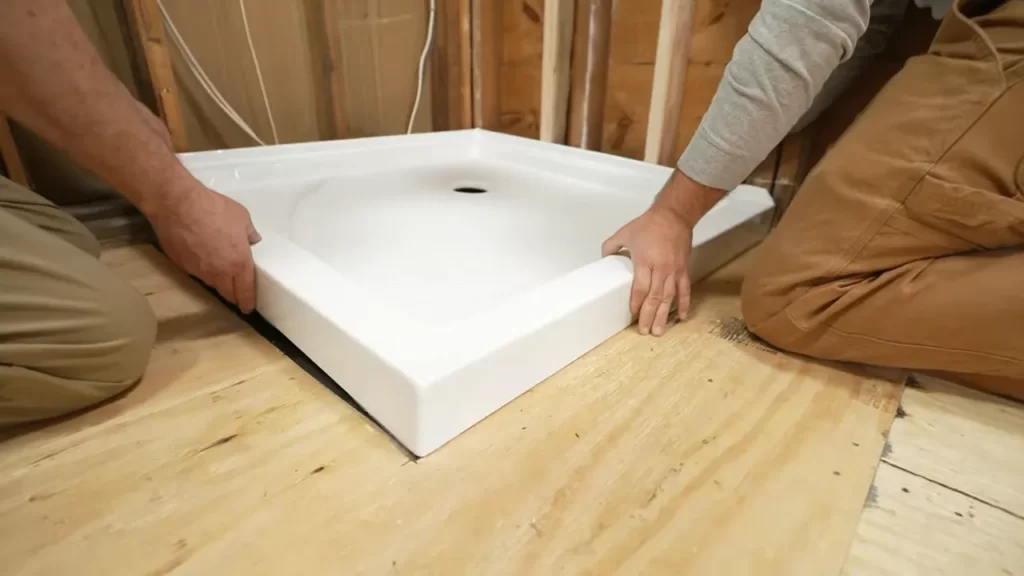
Place And Secure The Shower Floor Pan
Once you have prepared the mortar bed for your shower floor pan, it’s time to carefully position and secure the pan in place. This step is crucial to ensure a proper and long-lasting installation, so make sure to follow these instructions closely.
Carefully position the shower floor pan in the mortar bed
To begin, gently lower the shower floor pan into the mortar bed, ensuring that it fits snugly and aligns with the drain hole. Take your time to make any necessary adjustments to ensure a perfect fit.
It is important to note that different shower floor pans may require different installation techniques. Refer to the manufacturer’s instructions for specific guidance on placing and securing the pan.
Ensure the pan is properly aligned and level
Once the pan is in place, use a level to ensure it is perfectly aligned and level. This is crucial to prevent water pooling and to ensure proper drainage. Adjust the position of the pan as needed until it is completely level.
Remember, a level floor pan is essential for the overall stability and functionality of your shower. The last thing you want is a wobbly or uneven surface when you step in!
When leveling the shower floor pan, pay special attention to the edges, corners, and the area around the drain. These are the key areas that need to be properly aligned for the entire pan to be level.
Once the pan is level, you can proceed to secure it in place. Again, refer to the manufacturer’s instructions for the recommended method of securing the pan. Most commonly, this involves using screws or clips to attach the pan to the subfloor.
By properly placing and securing the shower floor pan, you are setting the foundation for a sturdy and reliable shower. Taking the time to get this step right will ensure that your shower not only looks great but functions flawlessly as well.
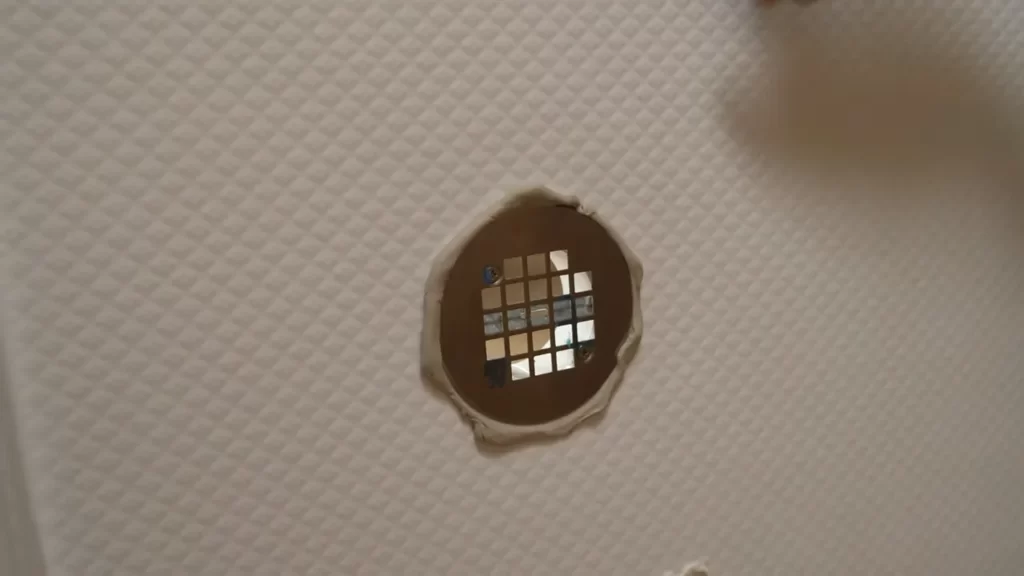
Connect The Drain To The Shower Floor Pan
Connecting the drain components to the shower floor pan is a crucial step in the installation process. By ensuring a secure and leak-free connection, you can prevent any potential water damage and maintain a functional shower for years to come. In this section, we will guide you through the necessary steps to attach the drain components to the shower floor pan.
Attach the Drain Components to the Shower Floor Pan
To begin, gather all the necessary drain components such as the drain body, clamping ring, and rubber gasket. Place the rubber gasket on top of the drain body, ensuring that it fits securely.
Next, position the drain body in the designated drain hole on the shower floor pan. Make sure it aligns properly with the hole and sits flush against the surface. This will create a tight seal and prevent any water from seeping through.
Now, take the clamping ring and thread it onto the drain body. Tighten it securely using a wrench or pliers, ensuring that it is snugly attached to the shower floor pan. This will provide additional stability and reinforce the connection.
Verify a Secure and Leak-Free Connection
Once you have attached the drain components to the shower floor pan, it is crucial to verify the connection
- Fill a bucket with water and carefully pour it into the shower floor pan, avoiding any splashing or spillage.
- Observe the drain area closely for any signs of leakage or water seeping through the connection.
- If you notice any leaks, try tightening the clamping ring further until the connection is watertight.
Additionally, you can run water directly into the drain once the installation is complete to further ensure a secure connection. This will give you peace of mind, knowing that your shower floor pan is leak-free and functioning properly.
By following these steps to connect the drain to the shower floor pan, you can complete this important installation task with ease. A secure and leak-free connection will not only protect your bathroom from water damage but also provide a sturdy foundation for your shower. Take the time to double-check the connection and make any necessary adjustments to avoid future issues. Now that your drain is properly connected, you can move on to the next steps in your shower installation project.
Test The Shower Floor Pan For Leaks
Conduct a thorough leak test to ensure proper installation
After successfully installing the shower floor pan, the next crucial step is to conduct a thorough leak test. This will help you ensure that your installation is watertight and prevent any future issues or damage. Testing the shower floor pan for leaks is an essential part of the installation process that should not be overlooked.
Address any leaks or issues before proceeding
If you detect any leaks or issues during the leak test, it is imperative to address them immediately before proceeding with the installation. Ignoring or neglecting these problems can lead to significant water damage and expensive repairs in the future. It is always better to address leaks or issues promptly to ensure a seamless and worry-free shower pan installation.
Here are a few steps to address any leaks or issues:
- Identify the source of the leak: Carefully inspect the shower pan and the surrounding areas to determine where the leak is originating from. Look out for any visible cracks, gaps, or damaged seals.
- Re-seal the affected area: If you find any cracks or gaps, use an appropriate sealant or adhesive to reseal the affected area. Make sure to follow the manufacturer’s instructions for the best results. Ensure that the sealant is applied evenly and covers the entire affected area.
- Test the area again: Once you have resealed the affected area, perform another leak test to ensure that the issue has been resolved. Fill the shower floor pan with water and check for any signs of leakage.
- Repeat the process if necessary: If you still detect leaks after resealing, repeat the process by identifying the source, resealing, and testing again. It may be necessary to seek professional assistance or consult with an experienced contractor if the problem persists.
Remember, addressing any leaks or issues before proceeding with the installation is crucial to ensure the longevity and functionality of your shower floor pan. Taking the time to conduct a thorough leak test and promptly address any problems will save you from future headaches and potential water damage.
Finish The Shower Floor Installation
In order to complete the installation of your shower floor pan, you need to apply the final layer of mortar to level the shower floor. This step is crucial to ensure the stability and longevity of your shower. Here’s a step-by-step guide on how to apply the final layer of mortar:
Apply the final layer of mortar to level the shower floor
- Clean the surface: Start by making sure the surface of the shower floor is clean and free of any debris. Use a scraper or a broom to remove any loose particles, and then wipe it with a damp cloth to remove any remaining dirt or dust. This will help the mortar bond better with the shower floor.
- Mix the mortar: Follow the instructions on the mortar packaging to mix the mortar properly. Use a trowel to combine the mortar mix with water until you achieve a smooth consistency. Make sure to wear gloves during this step to protect your hands.
- Apply the mortar: Once the mortar is mixed, start applying it to the shower floor. Begin at one corner and work your way towards the drain, using a trowel to spread the mortar evenly. Make sure to maintain a consistent thickness throughout the shower floor. Use a level to check if the floor is perfectly level.
- Smooth the surface: After applying the mortar, use the flat side of the trowel to smooth the surface, removing any excess mortar and creating a level finish. Pay special attention to the edges and corners to ensure a seamless transition between the shower floor and the walls.
- Allow for curing time: Once the final layer of mortar is applied, it’s important to allow sufficient curing time before using the shower. Refer to the manufacturer’s instructions on the mortar packaging to determine the exact curing time. During this period, ensure the shower floor is protected from any traffic or moisture.
By following these steps, you can successfully finish the installation of your shower floor pan. Remember to take your time and pay attention to detail in order to achieve a flawless and functional shower floor. Once the mortar has cured, you can proceed with the rest of your shower installation.
Finalize The Shower Area
Install the shower wall backerboard or waterproofing material
Now that you have successfully installed the shower floor pan, it’s time to focus on finalizing the shower area. One important step in this process is installing the shower wall backerboard or waterproofing material. This will not only provide a durable base for your shower walls but also prevent any water damage in the future.
To install the shower wall backerboard, follow these simple steps:
- Cut the backerboard sheets to fit the shower walls using a utility knife or a backerboard scoring tool.
- Apply thin-set mortar directly onto the wall studs using a notched trowel.
- Press the backerboard sheets firmly onto the mortar, making sure they are level and plumb.
- Secure the backerboard sheets to the studs using backerboard screws, spaced about 6 to 8 inches apart.
- Repeat the process for each wall, ensuring that the edges of the backerboard sheets are properly aligned.
- Use fiberglass mesh tape to reinforce the seams between the backerboard sheets, and apply a layer of thin-set mortar over the tape.
- Allow the thin-set mortar to dry completely before moving on to the next step.
Prepare for further shower area finishes, such as tiling
With the shower wall backerboard or waterproofing material in place, it’s time to prepare for further shower area finishes, such as tiling. Whether you prefer the timeless elegance of ceramic tiles or the sleek modern look of glass mosaics, proper preparation is essential to ensure a seamless and long-lasting shower installation. Follow these steps to prepare for tiling:
- Inspect the backerboard or waterproofing material for any imperfections or loose areas. Repair as necessary.
- Apply a coat of primer designed for use with the specific type of wall finish you will be using. This will help improve adhesion and ensure a smooth surface.
- Allow the primer to dry according to the manufacturer’s instructions.
- Plan the layout of your tiles, taking into consideration any architectural features or design preferences.
- Apply thin-set mortar to the backerboard or waterproofing material using a notched trowel.
- Press the tiles into the mortar, starting from the bottom and working your way up.
- Use tile spacers to ensure even spacing between tiles.
- Allow the thin-set mortar to dry completely before grouting.
By following these steps, you can effectively finalize the shower area and prepare it for further finishes such as tiling. Remember, proper installation and preparation are key to a successful and long-lasting shower installation. Take your time and pay attention to detail, and you’ll be rewarded with a beautiful and functional shower space.
Regular Maintenance And Care Tips
Maintain the shower floor pan to prevent damage and leaks
Regular maintenance and care are crucial when it comes to ensuring the longevity and performance of your shower floor pan. By following some simple maintenance routines, you can prevent damage and leaks, keeping your shower area in top condition. Here are some essential tips to maintain your shower floor pan:
Follow recommended cleaning and maintenance routines
To keep your shower floor pan in pristine condition, it is vital to adhere to the recommended cleaning and maintenance routines. Here are a few steps you can take:
1. **Regularly clean the surface**: Use a mild, non-abrasive cleaner specifically designed for your shower floor pan material. Avoid harsh chemicals or abrasive scrubbing tools that can damage the surface. Gently wipe the pan with a soft cloth or sponge, removing any soap scum, hard water stains, or mildew.
2. **Prevent soap build-up**: Soap residues can accumulate over time, leading to a slippery and dull appearance. After each shower, rinse the pan thoroughly to remove any soap residue. This simple step can prevent the build-up of grime and ensure a clean, fresh-looking shower floor pan.
3. **Inspect the caulk seal regularly**: The caulk sealant around the edges of your shower floor pan plays a crucial role in preventing water leaks. Periodically inspect the caulk seal to ensure its integrity. If you notice any cracks or gaps, replace the caulk immediately to maintain an effective seal.
4. **Check for signs of damage or wear**: Regularly inspect your shower floor pan for any signs of damage, such as cracks, chips, or discoloration. Address these issues promptly to prevent further damage or leaks. Consult a professional if you encounter significant damage that requires repair or replacement.
5. **Avoid excessive weight**: Shower floor pans are designed to withstand normal usage, but excessive weight can cause damage over time. Avoid placing heavy objects or excessive pressure on the pan’s surface, as this can lead to cracks or sagging.
In addition to these regular maintenance routines, there are a few more tips to keep in mind to ensure the longevity of your shower floor pan:
– **Keep the drain clear**: Prevent clogs and potential water damage by keeping the shower drain clear of hair, debris, and soap residue. Use a drain cover or strainer to catch any loose hairs or larger particles.
– **Use a shower mat**: Consider using a non-slip shower mat or adhesive strips to prevent slipping and minimize the impact on your shower floor pan’s surface.
– **Monitor humidity levels**: Excess humidity and moisture can contribute to mold and mildew growth. Ensure proper ventilation in your bathroom to maintain a healthy environment and reduce the risk of damage to your shower floor pan.
By following these regular maintenance and care tips, you can keep your shower floor pan in excellent condition, prevent leaks, and enjoy a comfortable and safe showering experience for years to come.
Conclusion And Additional Considerations
Installing a shower floor pan is a crucial step in creating a functional and durable shower space. By following the step-by-step process outlined in this guide, you can ensure a successful installation that will stand the test of time. However, there are a few additional tips and considerations to keep in mind to enhance the overall quality and longevity of your shower floor pan.
Summary of the Shower Floor Pan Installation Process
- Prepare the shower base by cleaning and leveling the floor surface.
- Install a waterproofing membrane to protect against leaks.
- Apply a bed of mortar to create a solid foundation for the pan.
- Place the shower floor pan onto the mortar bed, ensuring it is level and properly aligned.
- Secure the pan in place using screws or nails.
- Attach the drain assembly according to manufacturer instructions.
- Allow the mortar to cure and set for the specified time.
- Apply a layer of waterproofing membrane to further protect the shower floor pan.
- Install tile or another preferred flooring material over the shower floor pan.
- Seal the edges and joints with caulk or another suitable sealant.
Additional Tips and Suggestions for a Successfully Installed Shower Floor Pan
- Ensure the shower floor pan is properly sloped to allow for proper drainage. Use a level or slope-indicating tool to verify the slope before proceeding with the installation.
- Consider using a pre-formed shower floor pan for easier installation and a guaranteed waterproof barrier.
- Choose a high-quality, waterproofing membrane to add an extra layer of protection against leaks and moisture damage.
- Follow manufacturer instructions and recommended curing times for the mortar and waterproofing materials to achieve optimal results.
- Regularly inspect the shower floor pan for any signs of damage or wear and address any issues promptly to prevent further damage or leaks.
- Consult a professional if you are unfamiliar with the installation process or if you encounter any challenges along the way.
Frequently Asked Questions
Do You Need Concrete Under Shower Pan?
Yes, concrete is needed under the shower pan for stability and support. It helps prevent the pan from shifting or cracking over time. This ensures a durable and long-lasting shower installation.
Do You Need To Put Anything Under A Shower Pan?
No, you do not need to put anything under a shower pan. The shower pan is designed to be installed directly on the subfloor or concrete slab. It provides a waterproof barrier and supports the weight of the shower floor tiles.
Ensure proper installation to prevent water leakage.
Can You Install A Shower Pan Directly On Subfloor?
Yes, you can install a shower pan directly on the subfloor.
Do You Have To Glue Down A Shower Pan?
No, you don’t have to glue down a shower pan.
Conclusion
To sum up, installing a shower floor pan is a relatively simple process that can make a big difference in the overall functionality and aesthetics of your bathroom. By following the steps outlined in this blog post, you can ensure a successful installation that will provide years of reliable use.
Remember to thoroughly prepare the area, choose the right materials, and take your time during the installation process. With a little patience and attention to detail, you can achieve a professional-looking shower floor that adds value and appeal to your home.