To install a shower faucet handle, first, turn off the water supply, then detach the old handle and valve assembly before installing the new handle and reattaching the supply lines. Installing a shower faucet handle can be a simple and straightforward process if you follow the right steps.
The handle is an essential component of your shower, allowing you to control the flow and temperature of the water. Whether you are replacing a broken handle or upgrading to a new design, this guide will provide you with the necessary instructions to complete the installation.
By carefully following these steps and using the right tools, you can easily install a shower faucet handle and enjoy a refreshing and comfortable shower experience. Remember to turn off the water supply before starting the installation process and take your time to ensure a secure and watertight connection.
Choosing The Right Shower Faucet Handle
When it comes to installing a new shower faucet handle, choosing the right one is key. The faucet handle not only adds aesthetic appeal to your shower, but it also plays a crucial role in controlling the water flow and temperature. With so many options available in the market, it can be overwhelming to narrow down your choices. In this section, we will discuss various factors to consider when selecting a shower faucet handle to help you make an informed decision.
Factors to Consider When Selecting a Shower Faucet Handle
Before purchasing a shower faucet handle, there are several important factors you should take into consideration:
1. Design and Style
Ensure the design and style of the faucet handle match the overall aesthetic of your bathroom. Whether you prefer a sleek and modern handle or a more traditional look, the design should complement your existing fixtures and décor.
2. Material and Durability
The material of the faucet handle should be durable and resistant to corrosion. Common options include brass, chrome, stainless steel, and plastic. Choose a material that can withstand frequent use and is easy to clean and maintain.
3. Ergonomics
The handle should feel comfortable to grip and operate. Consider the size and shape of the handle to ensure it is easy to use, especially for individuals with limited hand strength or mobility.
4. Valve Compatibility
Check the compatibility of the faucet handle with your existing shower valve. Different valves may require specific types of handles, so it is crucial to ensure they are compatible to avoid any installation issues.
5. Functionality
Consider the functionality of the faucet handle. Do you prefer separate handles for controlling water temperature and flow or a single lever design? Choose a handle that fits your personal preference and provides convenience in daily use.
6. Budget
Lastly, consider your budget when selecting a faucet handle. Determine the amount you are willing to spend and explore options within that range. Remember, it is important to strike a balance between quality and affordability to ensure long-term satisfaction.
By considering these factors, you can confidently choose the right shower faucet handle that enhances the overall functionality and style of your bathroom.
Tools And Materials Required
Installing a shower faucet handle is a relatively simple process that can be done with just a few basic tools and materials. To ensure a smooth and hassle-free installation, it is essential to gather all the necessary items before getting started. In this section, we will provide you with a comprehensive list of the tools and materials required for the installation process.
List of tools needed for the installation process:
- Adjustable wrench
- Screwdriver (Phillips or flathead)
- Allen wrench set
- Plumber’s tape
- Plumber’s putty
- Replacing parts (if necessary)
List of materials needed for the installation process:
- Shower faucet handle
- Shower valve
- Mounting hardware
- Extension kit (if required)
- Replacement cartridge (if necessary)
- Thread seal tape (also known as Teflon tape)
- Plumber’s grease
- Waterproof silicone sealant
Having these tools and materials on hand will make the installation process much smoother and more efficient. Before you begin, it is important to double-check that you have everything you need, as this will save you time and frustration during the installation. Make sure the tools are in good working order, and the materials are of high quality to ensure a long-lasting result.
Step 1: Shut Off The Water Supply
Before starting the installation process of a new shower faucet handle, it is crucial to shut off the water supply. This ensures a safe and hassle-free experience, allowing you to work without the risk of water leakage or damage. Follow the steps below to locate the main water valve and turn off the water supply to your shower.
Locate the main water valve
The main water valve is the primary control point for the water supply in your home. It is typically located near your water meter or in the basement/crawl space of your house. Here’s how you can locate the main water valve:
- Start by checking the perimeter of your house for an exterior water line.
- If you can’t find the valve outside, move indoors and carefully inspect the basement or crawl space walls. The main water valve is commonly found along the foundation walls or where the water line enters your house.
- Once you locate the main water valve, it is essential to mark its location for future reference.
Turn off the water supply to the shower
Once you have located the main water valve, it’s time to turn off the water supply specifically for your shower. Follow these steps:
- Using a wrench or pliers, turn the valve handle clockwise to shut off the water supply.
- Ensure that the valve is fully closed, preventing any water from flowing into the shower.
- Test the water supply by turning on the shower faucets. If no water comes out, you have successfully shut off the water supply to the shower.
Remember, shutting off the water supply is a crucial step to avoid any potential accidents or water damage during the installation process. By following these simple steps, you can proceed with confidence in installing your new shower faucet handle.
Step 2: Remove The Existing Handle
Once you have identified the type of handle you have, it’s time to move on to the next step—removing the existing handle. This step is crucial before you proceed with installing a new shower faucet handle. Let’s go through the process step by step:
Identify the type of handle
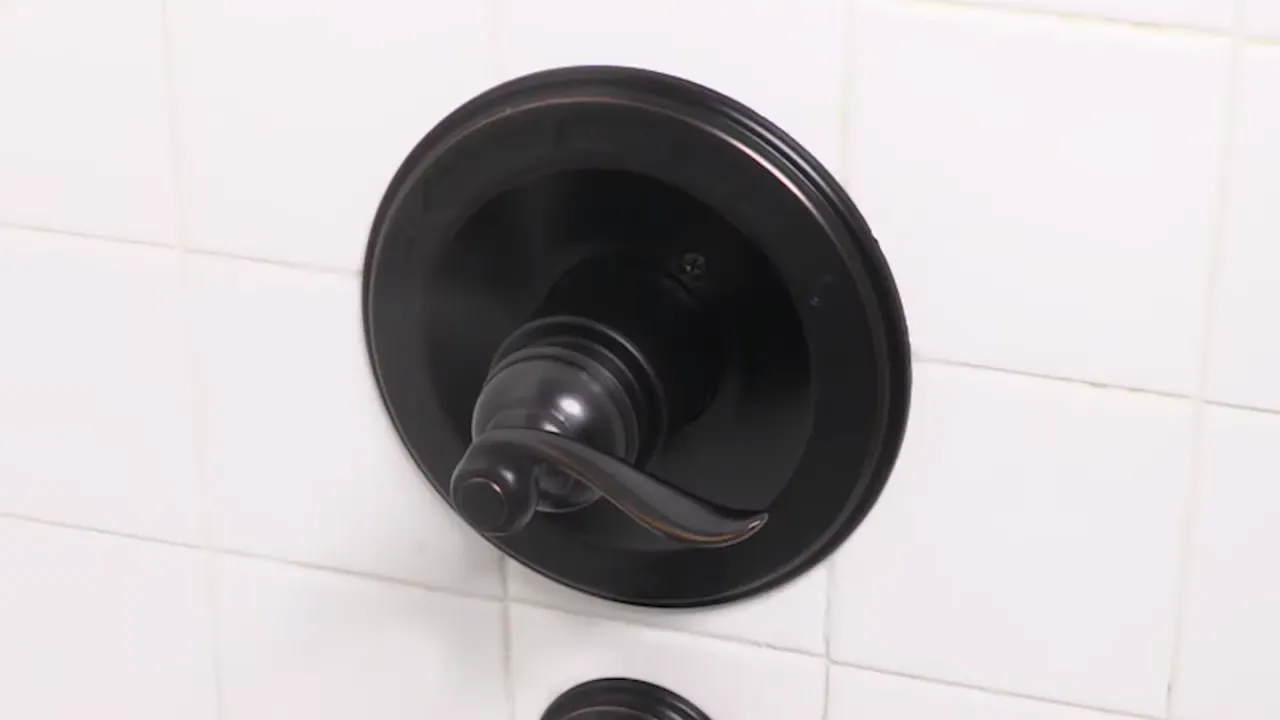
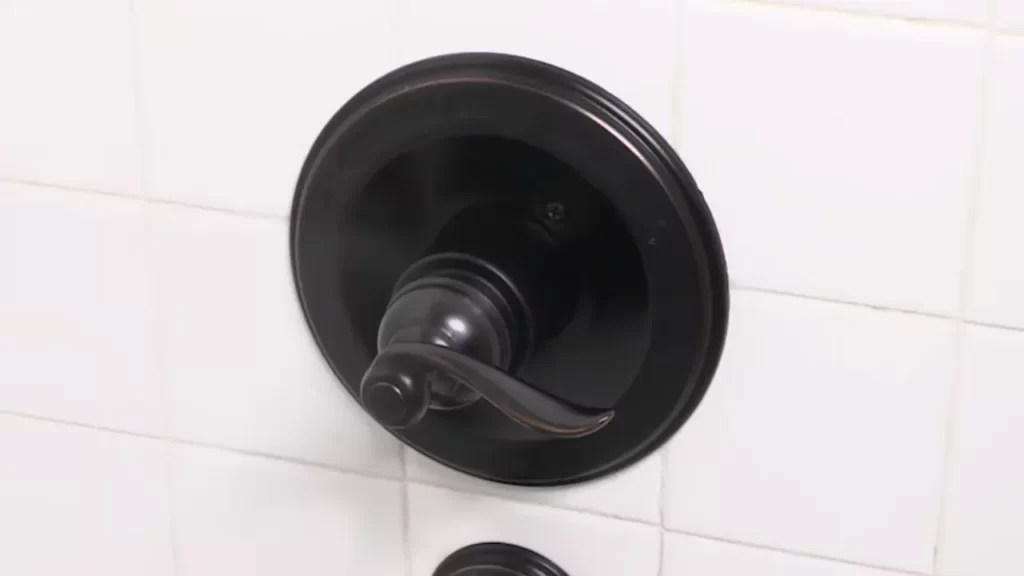
The first thing you need to do is determine the type of handle you have. Shower faucet handles typically come in two types: knob handles and lever handles. Knob handles are rounded and turn clockwise or counterclockwise to control the water flow and temperature. On the other hand, lever handles are rectangular or cylindrical and are lifted up or pushed down to control the flow and moved left or right to adjust the temperature.
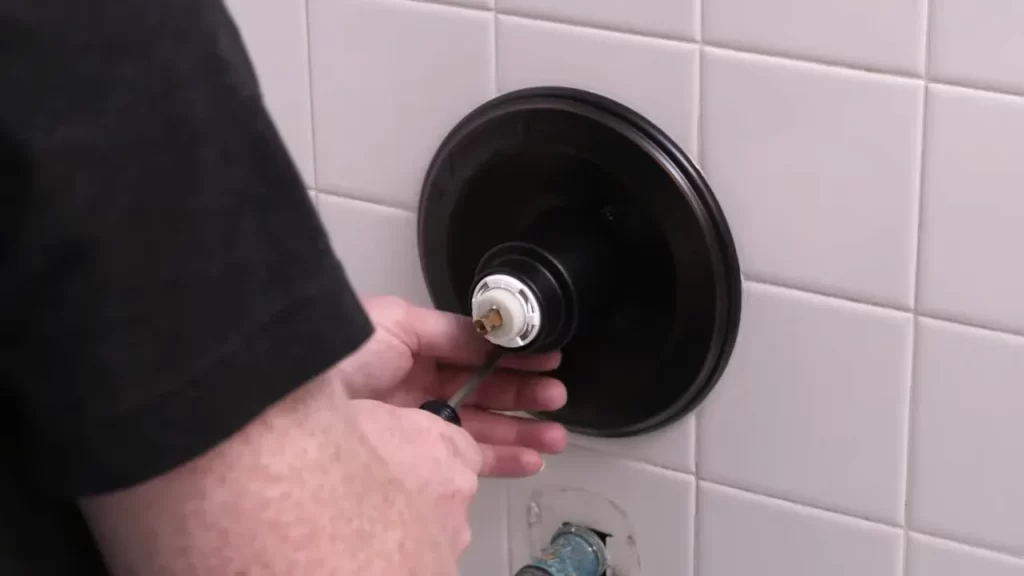
Remove the decorative cap or cover
Now that you know what type of handle you have, it’s time to remove the decorative cap or cover that conceals the screw holding the handle in place. This cap or cover can be made of various materials, such as plastic or metal. To remove it, use a small flathead screwdriver or a utility knife to carefully pry it off. Be gentle to avoid scratching or damaging the surface.
Unscrew the handle
Once the decorative cap or cover is removed, you will see the screw that holds the handle in place. Use an appropriate screwdriver, such as a Phillips or flathead, to unscrew the handle. Turn the screw counterclockwise until it is loose enough to remove the handle completely. Keep the screw in a safe place, so you don’t lose it or have trouble finding it later.
Remove any remaining components
After removing the handle, you may notice some remaining components, such as an escutcheon plate or trim ring. These components can vary depending on your shower faucet model. Carefully examine the area to determine if there are any additional screws, clips, or fasteners holding the remaining components in place. If so, remove them using the appropriate tools, such as a screwdriver or pliers.
Once you have successfully removed the existing handle and any remaining components, you are ready to move on to the next step of installing your new shower faucet handle. In the following section, we’ll guide you through the process of selecting and preparing a replacement handle.
Pro Tip: Troubleshooting Common Challenges
In the process of installing a shower faucet handle, you may encounter some common challenges that can hinder the smooth completion of the task. However, with the right troubleshooting techniques, you can overcome these obstacles and continue with the installation without any hassle. In this section, we will discuss two of the most common challenges that people often face: dealing with stuck or stubborn handles and ensuring proper alignment. Let’s dive in!
How to Deal with Stuck or Stubborn Handles
If you come across a shower faucet handle that refuses to budge despite your efforts, don’t panic! This is a common problem that can be resolved with a few simple steps. Follow these troubleshooting tips:
- Start by turning off the main water supply to prevent any leaks or accidents.
- Use a wrench or pliers to grip the stuck handle firmly.
- Apply a lubricant, such as WD-40 or a penetrating oil, to the handle and surrounding area.
- Gently tap the handle with a rubber mallet to loosen any stuck components.
- Once loosened, try turning the handle again using the wrench or pliers.
- If the handle still doesn’t move, repeat the lubrication and tapping process until it loosens.
By following these steps, you should be able to overcome the challenge of stuck or stubborn handles without causing any damage to the faucet or surrounding fixtures.
Ensuring Proper Alignment
Another common challenge that many people face while installing a shower faucet handle is ensuring proper alignment. A misaligned handle can lead to difficulties in turning the water on or off. To address this issue, consider the following tips:
- Before proceeding with the installation, double-check the alignment of the handle’s mounting hardware.
- If the handle is misaligned, use a screwdriver or wrench (depending on the fastening mechanism) to adjust the mounting hardware accordingly.
- Ensure that the handle is perpendicular to the shower wall and securely tightened to prevent any wobbling or slippage.
- Test the handle’s functionality by turning the water on and off multiple times to verify smooth operation.
- If the handle is still misaligned or problematic after these steps, consult the manufacturer’s instructions or seek professional assistance.
By addressing alignment issues promptly, you can ensure a sturdy and functional shower faucet handle that will serve you reliably for years to come.
Step 3: Prepare The Shower Valve
Before installing your new shower faucet handle, it’s crucial to properly prepare the shower valve to ensure a smooth and functional installation. This step involves inspecting the valve for any damage or debris and cleaning and lubricating it if necessary. By following these simple steps, you’ll be well on your way to enjoying a refreshing shower experience.
Inspect the Valve for Any Damage or Debris
The first thing you’ll want to do is closely examine the shower valve for any signs of damage or debris. Look for any cracks, chips, or rust that may affect the performance of the valve. It’s important to catch these issues early on to prevent any water leaks or malfunctions down the line.
If you spot any damage, you may need to replace the shower valve entirely. However, if it’s just a minor issue like debris build-up, you can proceed to clean and lubricate the valve to restore its proper functioning.
Clean and Lubricate the Valve if Necessary
If your shower valve is in good condition but could benefit from a little cleaning and lubrication, follow these steps to ensure smooth operation:
- Start by turning off the water supply to the shower. This prevents any accidents or water leaks during the cleaning process.
- Use a soft cloth or brush to gently remove any dirt, grime, or mineral deposits from the valve. Make sure to reach all the nooks and crannies to ensure a thorough cleaning.
- Next, apply a small amount of silicone-based lubricant to the valve’s moving parts. This lubricant will help reduce friction and ensure smooth handle operation.
- After applying the lubricant, turn the shower handle or knob back and forth a few times to distribute the lubricant evenly.
By cleaning and lubricating the shower valve, you’re ensuring that the handle will function properly and provide you with easy control over the water flow and temperature.
Once you’ve completed these steps, you’re ready to move on to the exciting part – installing your new shower faucet handle. Remember, proper preparation is key to a successful installation and a satisfying shower experience.
Pro Tip: Ensuring A Proper Sealing
One of the crucial steps in installing a shower faucet handle is ensuring a proper sealing. A tight and secure seal not only prevents water leakage but also ensures that the valve functions effectively for a long time. In this section, we will discuss how to check if the valve needs to be sealed and how to properly seal the valve for a foolproof installation.
How to check if the valve needs to be sealed
Before proceeding with the installation, it is essential to check if the valve needs to be sealed. Here are the steps to follow:
- Make sure the water supply to the shower is turned off to avoid any accidents.
- Remove the existing shower faucet handle by unscrewing the screws or prying off the cover, depending on the model.
- Inspect the valve area for any signs of corrosion, rust, or moisture. These can indicate a potential sealing issue.
- Turn on the water supply briefly and observe if there are any leaks around the valve area. Even a small drip can suggest a faulty seal.
- If you notice any signs of damage or leaks, it is crucial to seal the valve before proceeding with the installation.
How to properly seal the valve
To ensure a proper sealing for the shower faucet handle valve, follow these steps:
- Clean the valve area thoroughly with a mild cleaner and a cloth to remove any dirt, grime, or old sealant. This will help create a better bonding surface for the new seal.
- Apply a thin and even layer of plumber’s putty or silicone sealant around the valve opening. Make sure to cover the entire circumference to prevent any water from seeping through.
- Insert the new shower faucet handle over the valve, pressing it firmly to create a tight seal.
- Tighten the screws or secure the cover to ensure the handle is securely in place.
- Wipe off any excess sealant or putty with a damp cloth for a neat and clean finish.
Following these steps will ensure that your shower faucet handle valve is properly sealed and ready for use. Taking the time to check and seal the valve will save you the trouble of dealing with potential leaks or water damage in the future.
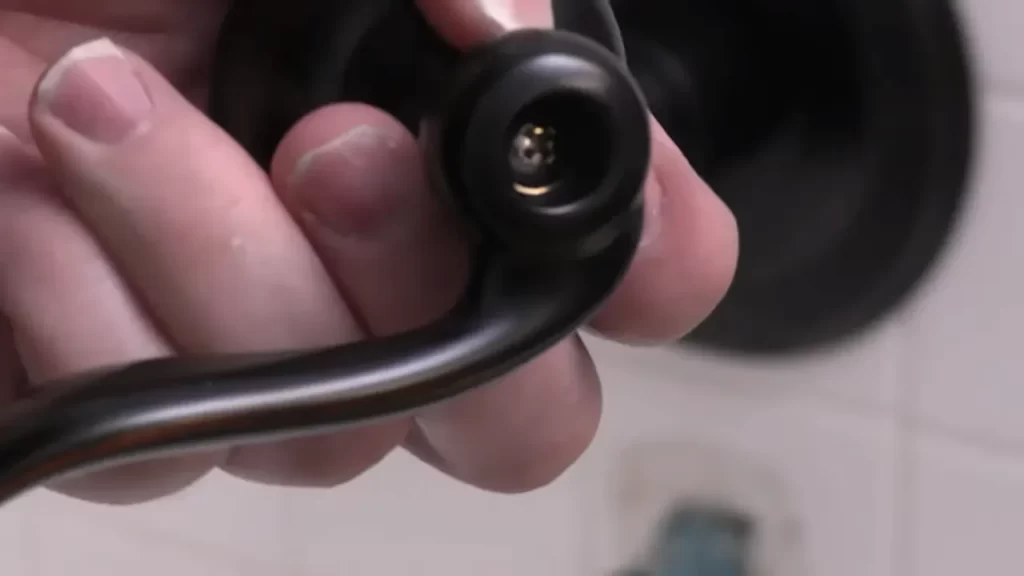
Step 4: Install The New Handle
Now that you have successfully removed the old shower faucet handle, it’s time to install the new one. Follow these simple steps to ensure a smooth and secure installation.
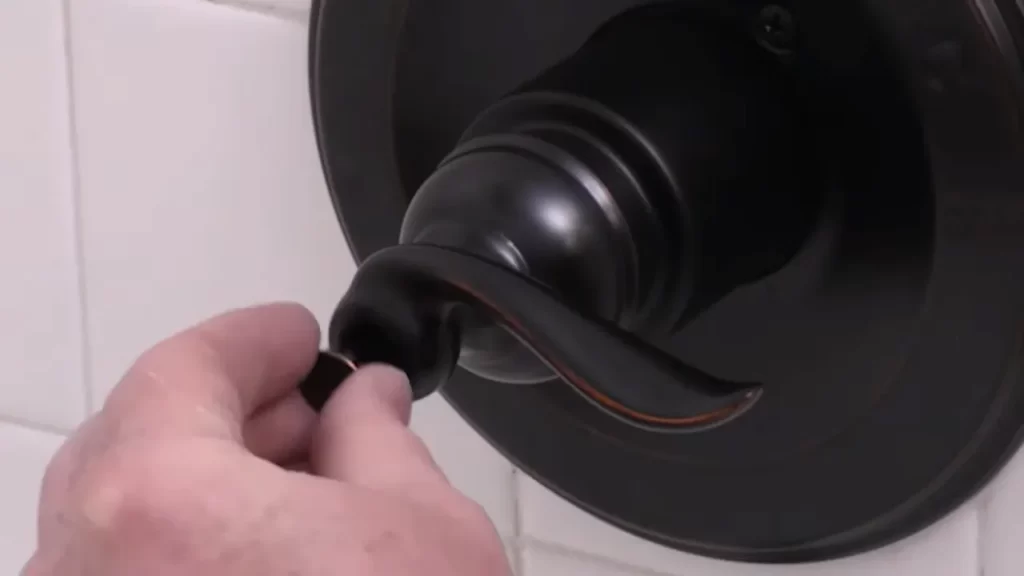
Align the new handle with the valve stem
Take the new shower faucet handle and align it with the valve stem. The valve stem should be protruding from the wall, ready to receive the new handle. Pay attention to any markings or indicators on the handle that indicate the correct alignment. Once you have aligned the handle, make sure it fits snugly over the valve stem.
Secure the handle in place
Once the handle is aligned with the valve stem, it’s time to secure it in place. Depending on the type of shower faucet handle you have, this step may vary slightly. In most cases, you will need to tighten a screw or set screw to hold the handle securely. Use a screwdriver or an Allen wrench to tighten the screw or set screw, ensuring that the handle is firmly attached to the valve stem. Be careful not to overtighten, as it may cause damage to the handle or the valve stem.
Test the handle for proper functioning
With the new handle securely attached, it’s crucial to test it for proper functioning. Turn on the water and check if the handle operates smoothly. Ensure that it easily turns on and off, and that the water flow and temperature can be adjusted without any issues. If you notice any problems, such as leaks or difficulty in operation, double-check the installation and make any necessary adjustments. Proper functioning of the handle is essential for a satisfying and hassle-free shower experience.
Installing a new shower faucet handle can be a simple and rewarding DIY project. Just follow these steps, align the new handle with the valve stem, securely attach it in place, and test for proper functioning. In no time, you’ll have a shiny new shower faucet handle that not only enhances the aesthetic of your bathroom but also provides smooth and efficient water control for your showers.
Pro Tip: Adjusting Water Temperature And Pressure
When it comes to enjoying a comfortable and relaxing shower experience, having the ability to adjust the water temperature and pressure to your liking is essential. With the right knowledge and tools, you can easily fine-tune these settings to create the perfect shower every time. In this section, we’ll walk you through the step-by-step process of adjusting the temperature and pressure of your shower faucet handle.
How to Adjust the Temperature
Adjusting the temperature of your shower faucet handle is relatively straightforward. Here’s how you can achieve the perfect balance of hot and cold water:
- Start by turning on the shower and allowing the water to reach the desired temperature.
- Once the water is at the desired temperature, remove the shower faucet handle cover.
- Locate the temperature adjustment valve, which is typically a small screw or knob located just behind the handle.
- Using a screwdriver or your fingers, rotate the temperature adjustment valve clockwise to decrease the temperature or counterclockwise to increase it.
- Make small adjustments and test the water temperature each time until you find the perfect balance for your comfort.
- Once you’re satisfied with the temperature, replace the shower faucet handle cover and enjoy your perfectly customized shower experience.
How to Adjust the Pressure
Adjusting the water pressure of your shower faucet handle is just as important as adjusting the temperature. Here are the steps to follow:
- Begin by turning on the shower and taking note of the current water pressure.
- If the pressure is too low, locate the pressure adjustment valve, which is typically a screw or knob near the shower handle.
- Using a screwdriver or your fingers, turn the pressure adjustment valve clockwise to increase the pressure or counterclockwise to decrease it.
- Make small adjustments and test the water pressure each time until you reach your desired level.
- If the pressure is too high, you may need to adjust the water pressure at the main supply valve for your home. Consult a professional plumber if you’re unsure how to do this.
- Once you’ve achieved the perfect water pressure, you’re ready to enjoy a refreshing shower at just the right intensity.
Step 5: Reconnect The Water Supply
Now that you have successfully installed the shower faucet handle, it’s time to reconnect the water supply. This step is crucial to ensure that your shower is ready to use. Follow the steps below to complete this process:
Turn on the main water valve
Locate the main water valve in your house. It is typically located near the water meter or in the basement. Turn the valve clockwise to open it and allow water to flow into the pipes. This will provide water supply to the shower faucet handle.
Check for any leaks or drips
Inspect the area around the shower faucet handle for any signs of leaks or drips. Look for water puddles, wet spots, or any unusual sounds. If you notice any leaks, it’s important to address them immediately to prevent further damage or water wastage. Tighten any loose connections or replace faulty parts if necessary.
Verify the proper functioning of the handle
Before considering the installation process complete, it’s crucial to ensure that the handle is functioning correctly. Turn on the shower faucet handle and check if the water flows smoothly without any issues. Test both the hot and cold water settings to ensure they operate as expected. Pay attention to any unusual sounds or vibrations and address any concerns promptly.
By following these steps, you have successfully reconnected the water supply for your shower faucet handle. Now, you can enjoy a refreshing and comfortable shower experience in your newly installed bathroom fixture. Remember to regularly check for any leaks or drips to maintain the performance and longevity of your shower faucet handle.
Pro Tip: Additional Safety Measures
Pro Tip: Additional Safety Measures
When installing a shower faucet handle, taking additional safety measures is essential to ensure that the handle is properly installed and safe to use. By following these steps, you can have peace of mind knowing that your shower handle is secure and won’t cause any accidents.
How to ensure the handle is properly installed and safe to use
Ensuring that your shower faucet handle is properly installed is crucial for its functionality and safety. Here are a few important steps to follow:
- Step 1: Gather the necessary tools
- Step 2: Shut off the water supply
- Step 3: Remove the old handle
- Step 4: Install the new handle
- Step 5: Test the handle
Before you begin, make sure you have all the required tools handy. These may include an adjustable wrench, a screwdriver, plumber’s tape, and a flashlight.
Before you start any installation work, it’s imperative to shut off the water supply to your shower. This will prevent any leaks or water damage during the process.
Using a screwdriver, carefully remove the screws holding the old handle in place. Once removed, detach the handle from the faucet stem.
Take the new handle and align it with the faucet stem. Secure it in place using the provided screws and tighten them appropriately.
After installation, turn on the water supply and test the handle to ensure it functions properly. Check for any leaks and make sure the handle is easy to grip and operate.
Additional safety measures
In addition to the installation steps above, here are a few extra safety measures to consider:
- Use plumber’s tape: Applying plumber’s tape to the threads can help prevent leaks and ensure a tighter seal.
- Secure the handle tightly: Make sure to tighten the screws on the handle securely to avoid any wobbling or loosening over time.
- Regular maintenance: Periodically check the handle for any signs of wear or damage. Replace any worn-out or broken parts promptly to prevent accidents.
- Ensure good lighting: Proper lighting in the shower area can help prevent slips and falls. Consider installing additional lighting if necessary.
By following these additional safety measures along with the proper installation steps, you can ensure that your shower faucet handle is not only functional but also safe to use. Remember, safety should always be a top priority when working with plumbing fixtures.
Troubleshooting And Faqs
Common problems and solutions during the installation process
Installing a shower faucet handle may seem like a simple task, but sometimes issues can arise. Here are some common problems that you may encounter during the installation process and their solutions:
-
Leaking faucet handle
If you notice water dripping from the faucet handle even when it’s turned off, the most likely cause is a loose connection. To fix this, turn off the water supply, disassemble the handle, and tighten any loose connections using pliers or a wrench. Once everything is secure, reassemble the handle and test for leaks.
-
Difficulties in removing the old handle
Removing the old faucet handle can sometimes be a challenge, especially if it has been on for many years. If it’s stuck, use a penetrating oil or a lubricant to help loosen it. If that doesn’t work, you may need to use a handle puller tool specifically designed for this purpose. Be careful not to apply too much force, as it can damage the plumbing.
-
Incompatibility between the new handle and valve
In some cases, the handle you’ve purchased may not be compatible with the existing valve. To avoid this issue, it’s essential to check the specifications of both the handle and the valve before purchasing. If you’ve already encountered this problem, you may need to return the handle and find a suitable replacement. Contacting the manufacturer or seeking professional advice can help you find the right match.
Frequently asked questions about shower faucet handle installation
Here are some frequently asked questions about shower faucet handle installation:
-
1. Can I install a shower faucet handle on my own?
Yes, installing a shower faucet handle can be a DIY project. However, it’s essential to have some basic plumbing knowledge and the right tools. If you’re unsure or uncomfortable with the installation process, it’s always best to consult a professional plumber.
-
2. How long does it take to install a shower faucet handle?
The time required for installation can vary depending on factors such as the complexity of the handle and any unforeseen complications. On average, it can take anywhere from 30 minutes to a couple of hours. If you’re an experienced DIYer, the process may be quicker.
-
3. Do I need to turn off the water supply before installing the faucet handle?
Yes, it’s crucial to turn off the water supply before installing or removing the faucet handle. This will prevent any unwanted water leakage and potential damage.
-
4. What tools do I need for installing a shower faucet handle?
- Adjustable wrench
- Phillips or flat-head screwdriver (depending on the handle design)
- Penetrating oil or lubricant
- Handle puller (in case the old handle is stuck)
Frequently Asked Questions
How Do You Install Shower Handles?
To install shower handles, follow these steps: 1. Start by turning off the water supply to avoid any leaks. 2. Remove any existing handles and trim plates from the shower valve. 3. Attach the new handles onto the valve stems, ensuring they align properly.
4. Secure the handles by tightening the screws or nuts provided. 5. Turn on the water supply and test the handles for proper functionality.
How Do You Fix A Shower Handle That Fell Off?
To fix a shower handle that fell off, follow these steps: 1. Shut off water supply to the shower. 2. Remove the handle’s decorative cap and unscrew the screw underneath. 3. Reattach the handle to its stem and tighten the screw.
4. Replace the decorative cap and turn on the water supply. 5. Test the handle to ensure it’s secure and functioning properly.
How Do You Install A Set Screw In A Shower Handle?
To install a set screw in a shower handle, follow these steps: 1. Locate the set screw on the handle. 2. Use an Allen wrench or screwdriver that fits the screw head. 3. Insert the tool and turn clockwise until it is secure.
4. Test the handle to ensure it is tightly secured. 5. If needed, make adjustments until it is secure.
Are All Shower Handles Universal?
No, shower handles are not universal. They come in different sizes and styles, depending on the brand and type of shower system you have. It’s important to check the specifications and measurements to ensure compatibility before purchasing a new shower handle.
Conclusion
Learning how to install a shower faucet handle doesn’t have to be daunting. With a few simple steps and the right tools, you can successfully replace your old handle and upgrade the look of your shower. Remember to turn off the water supply, follow the manufacturer’s instructions, and test for leaks before completing the process.
By taking the time to do it right, you’ll be enjoying your new shower faucet handle in no time.