To install a shower door on a tub, measure the dimensions, select a suitable door, attach the hinges, and secure the door in place.
Considerations For Tub-Shower Door Installation
Installing a shower door on a tub is a great way to enhance the aesthetics and functionality of your bathroom. However, before diving into the installation process, there are several important considerations to keep in mind. Here, we will walk you through the key factors you should consider when installing a tub-shower door, including determining the type of door, evaluating the size and dimensions of your tub, assessing the existing shower enclosure, and budgeting for the installation process.
Determining the type of tub-shower door
When it comes to tub-shower doors, there are various types to choose from, including sliding doors, pivot doors, and bi-fold doors. Each type offers its own unique advantages and disadvantages, so it’s crucial to consider your specific needs and preferences before making a decision. Sliding doors are ideal for smaller spaces as they do not swing open, while pivot doors provide a more traditional and elegant look. Bi-fold doors are perfect for maximizing space and are a great option for smaller bathrooms.
Evaluating the size and dimensions of your tub
The size and dimensions of your tub are crucial elements to consider when installing a shower door. Measure the width, height, and depth of your tub accurately to ensure a proper fit for the door. Keep in mind that some tubs have unique shapes or features that may affect the choice of door type. Additionally, consider any obstructions or obstacles, such as showerheads or faucets, that may impact the installation process. Taking precise measurements will help you choose the right door that fits perfectly onto your tub.
Assessing the existing shower enclosure
Before installing a tub-shower door, it’s essential to evaluate your existing shower enclosure. Check for any signs of damage or wear and tear, such as cracked tiles or leaky pipes, that may need to be fixed before proceeding with the installation. Additionally, ensure that the enclosure is sturdy enough to support the door’s weight and withstand daily use. If any repairs or reinforcements are necessary, address them before installing the new door to ensure a long-lasting and secure installation.
Budgeting for the installation process
Another crucial consideration is budgeting for the tub-shower door installation. Determine how much you are willing to spend on the door itself, as well as any additional supplies or tools required for installation. Research the market to find options that fit within your budget without compromising on quality. It’s also advisable to consider hiring a professional installer if you are unsure about tackling the installation process yourself. Remember to account for any additional costs, such as repairs or modifications, when setting your budget to ensure a smooth and cost-effective installation.
By considering these key factors, you can ensure a successful and hassle-free tub-shower door installation. Take your time to evaluate your options, measure accurately, assess the existing enclosure, and budget wisely. With the right considerations in place, you can transform your bathroom into a comfortable and stylish space that meets all your showering needs.
Gathering The Necessary Tools And Materials
Before installing a shower door on a tub, it is essential to gather all the necessary tools and materials to ensure a smooth and successful installation process. By having everything you need at hand, you can avoid delays and potential frustration. Below are the essential items you will need:
Shower Door Kit
First and foremost, you will require a shower door kit. This kit usually includes all the components necessary for the installation, including the door, frame, hinges, handles, and any required hardware. Make sure to check if the kit you choose is compatible with a tub installation.
Measuring Tape and Level
A measuring tape and level are essential tools for ensuring precise measurements and a straight installation. With the measuring tape, you can accurately measure the width and height of your tub, along with the distance between the walls. The level will help you confirm that the door will hang straight.
Screwdriver and Drill
A screwdriver and drill will be necessary for securing the door frame and hinges to the tub walls. Depending on the type of shower door kit you choose, you may need either a Phillips or flathead screwdriver. The drill will be needed for creating pilot holes and ensuring a secure fit.
Caulk and Sealant
Using caulk and sealant is crucial for preventing water leakage and maintaining the integrity of your tub and shower area. Be sure to choose a waterproof caulk specifically designed for bathroom use. This will ensure a water-tight seal.
Safety Goggles and Gloves
Lastly, do not forget to prioritize your safety during the installation process. Wearing safety goggles will protect your eyes from any potential debris or flying particles. Gloves will provide your hands with a layer of protection against sharp edges or accidental slips.
By gathering all the necessary tools and materials mentioned above, you can proceed with confidence knowing that you have everything required for a successful shower door installation on your tub.
Preparing The Tub And Surrounding Area
Before installing a shower door on a tub, it’s crucial to properly prepare the tub and the surrounding area. This involves several essential steps, including removing any existing shower doors or curtains, cleaning the tub and walls thoroughly, and repairing any damage or leaks in the shower enclosure. By taking the time to prepare the tub and surrounding area correctly, you can ensure a smooth and successful installation process.
Removing any existing shower doors or curtains
If your tub currently has shower doors or curtains, the first step in preparing the area is to remove them. This will provide a clean surface for the new shower door installation. Follow these steps to remove existing shower doors or curtains:
- Begin by carefully unscrewing any screws or bolts that attach the shower door frame to the walls or tub.
- Gently lift the door or curtain out of its track or rod and set it aside.
- Inspect the area for any remaining hardware or residue and remove it completely using a screwdriver or utility knife.
- Clean the track or rod with a mild detergent and warm water to remove any built-up grime or soap scum.
Cleaning the tub and walls thoroughly
Once the existing shower doors or curtains have been removed, it’s important to clean the tub and walls thoroughly. This will ensure a clean surface for the new shower door installation. Follow these steps to clean the tub and walls:
- Start by filling the tub with warm water and adding a small amount of mild detergent.
- Use a sponge or soft cloth to scrub the tub surface, paying special attention to any stains or residue.
- Rinse the tub thoroughly with clean water to remove any soap or detergent.
- Next, mix a solution of equal parts water and white vinegar.
- Dip a clean cloth or sponge into the vinegar solution and wipe down the walls and any tiled surfaces.
- Rinse the walls with clean water to remove any vinegar residue.
- Allow the tub and walls to air dry completely before proceeding with the installation.
Repairing any damage or leaks in the shower enclosure
Before installing a new shower door, it’s important to inspect the shower enclosure for any damage or leaks. Addressing these issues beforehand will prevent further problems down the line. Follow these steps to repair any damage or leaks:
- Check for any cracks or chips in the tub or surrounding walls.
- If you find any, use a bathtub repair kit or epoxy adhesive to fill in the damaged areas.
- Allow the repaired areas to dry and cure completely according to the manufacturer’s instructions.
- If there are any leaks or gaps in the shower enclosure, use a waterproof caulk to seal them.
- Apply the caulk to the areas where the tub and walls meet, as well as any other potential leak points.
- Smooth the caulk with a caulk smoothing tool or your finger to ensure a tight, waterproof seal.
- Allow the caulk to dry completely before continuing with the shower door installation.
By following these steps to prepare the tub and surrounding area, you can ensure that your shower door installation goes smoothly and that you have a solid foundation for a beautiful and functional shower enclosure.
Measuring The Height And Width For The Door
Taking accurate measurements of the tub height and width
Before you can install a shower door on your tub, it’s crucial to take accurate measurements of the tub height and width. This ensures that your door will fit perfectly and function properly. To start, gather the following tools:
- Measuring tape
- Pencil or marker
Begin by measuring the height of your tub. Position the measuring tape on the inside edge of the tub, at the bottom. Extend the tape measure all the way to the top edge of the tub, taking note of the measurement.
Next, measure the width of the tub. Place the measuring tape across the widest part of the tub, starting from one edge to the other. Make sure to measure from the inside edge of the tub.
Write down both measurements, as you will need them in the next step.
Determining the appropriate door height and width
With the measurements of your tub in hand, you can now determine the appropriate door height and width. This requires taking into account several factors:
- The height of your tub
- The desired water containment level
- Personal preference
To determine the door height, subtract a few inches from the tub height measurement. This allows for proper clearance and ensures that water will be contained within the shower area. For example, if your tub height is 60 inches, you might choose a door height of 57 inches.
When it comes to the door width, it should be slightly wider than the tub width measurement. This creates a snug fit and prevents water from escaping. For instance, if your tub width is 35 inches, a door width of 36 inches or more might be suitable.
Considering these factors will help you choose the appropriate door height and width for your specific needs.
Marking the desired location for the shower door on the tub and walls
Now that you have determined the ideal door height and width, it’s time to mark the desired location for the shower door on the tub and walls. This will ensure that the door is installed correctly and aligns with your bath space.
Using a pencil or marker, mark the height measurement on the walls adjacent to the tub. Make sure the marks are even and level, as this will ensure a straight installation. Additionally, mark the location on the tub where the door will be mounted, taking into account the door width measurement.
Before proceeding with installation, double-check your measurements and marks to ensure accuracy. This step cannot be emphasized enough, as any inaccuracies can lead to a faulty installation and water leakage.
Now that you have successfully measured the height and width for the door, and marked the desired locations, you are ready to move on to the next step in installing your shower door on the tub.

Ensuring Proper Alignment With A Level
When it comes to installing a shower door on a tub, one crucial aspect that should not be overlooked is ensuring proper alignment with a level. This step is essential to ensure that your shower door fits correctly and functions properly. In this section, we will discuss how to check for levelness on the top and sides of the tub, how to adjust the alignment if necessary, and the importance of double-checking the levelness before proceeding.
Checking for levelness on the top and sides of the tub
Before starting the installation of the shower door, it is important to check the levelness of the top and sides of the tub. This can be done by using a level tool, which is readily available at most hardware stores. Simply place the level on the top edges of the tub and check if it is perfectly horizontal. Repeat the process on the sides of the tub, ensuring that both sides are level as well. If any unevenness is detected, make a note of it for adjustment.
Adjusting the alignment if necessary
If you find that the top or sides of the tub are not level, adjustments will be needed to ensure proper alignment. One way to address this issue is by using shims, which are thin pieces of material that can be inserted between the tub and the wall to even out any unevenness. Start by placing the shim under the lowest corner of the tub, gradually adding more shims as needed until the tub is level. Be sure to use a level tool throughout the process to check the alignment regularly. Once the tub is level, you can proceed to the next step of installing the shower door.
Double-checking the levelness before proceeding
Before moving forward with the installation of the shower door, it is essential to double-check the levelness to ensure accuracy. This step helps to avoid any future issues, such as leaks or improper functioning of the door. Once again, use the level tool to verify that the top and sides of the tub are perfectly level. Take your time during this step to make any necessary adjustments if needed. By doing so, you can ensure a smooth installation process and a shower door that fits perfectly.
In conclusion, ensuring proper alignment with a level is a crucial step when installing a shower door on a tub. By checking for levelness on the top and sides of the tub, adjusting the alignment if necessary, and double-checking the levelness before proceeding, you can achieve a seamless installation that results in a well-functioning shower door.
Marking The Screw Hole Locations
Positioning the door frame on the marked location
Once you have marked the location for your shower door on the tub and walls, it’s time to position the door frame. Ensure that the door frame is lined up with the marked location on the tub and walls. This step is crucial for a proper and secure installation. The door frame should be positioned in such a way that it is centered and level on the tub opening. This will ensure that the door operates smoothly and efficiently. Take your time to ensure accurate alignment before proceeding to the next step.
Marking the screw hole locations on the tub and walls
With the door frame accurately positioned, it’s time to mark the screw hole locations on both the tub and walls. You will need a pencil or marker to mark the spots where the screws will go. Start by marking the locations on the tub first. Carefully drill into the tub at each marked spot to create pilot holes. This will ensure that the screws go in easily and securely. Next, move on to the walls and mark the screw hole locations in the same manner. Make sure to take accurate measurements and double-check your markings to ensure proper alignment.
Ensuring proper spacing and alignment for the screws
Proper spacing and alignment of the screws are vital for a sturdy and secure shower door installation. To ensure this, measure and mark the distances between each screw hole on both the tub and walls. Use a level to ensure that the markings are aligned horizontally and vertically. It’s important to maintain equal spacing between the screws to ensure the door frame is held securely in place. Double-check the measurements and alignment before proceeding to the next step.
Example Table:
| Location | Screw Hole Spacing | Alignment |
|---|---|---|
| Tub | 6 inches | Level |
| Walls | 4 inches | Level |
By following these steps, you can ensure that the screw hole locations for your shower door on the tub and walls are accurately marked. Proper positioning, marking, and alignment are essential for a successful installation. Take your time and double-check your measurements to achieve a secure and attractive shower door that will enhance your bathroom space.
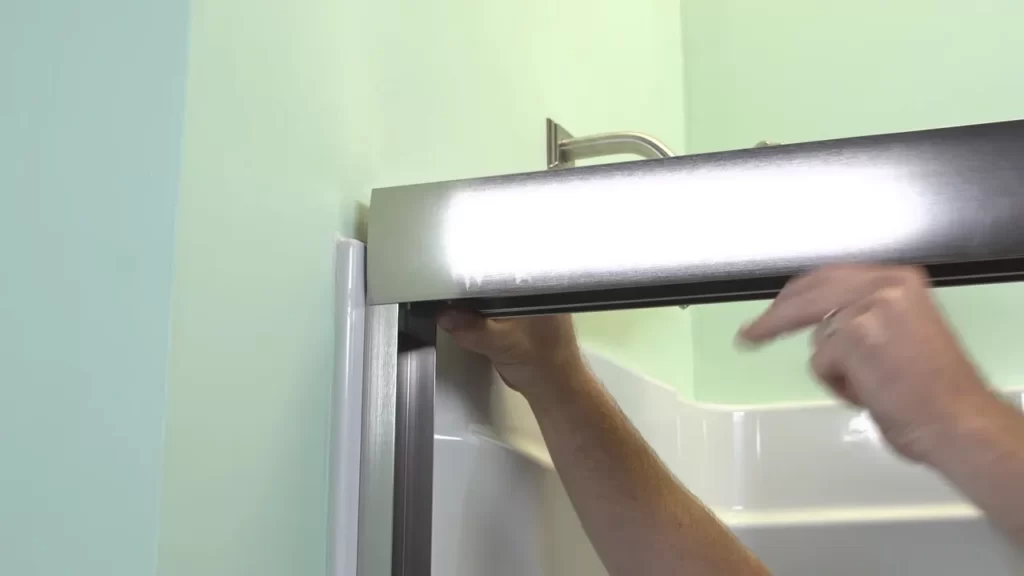
Attaching The Rail And Door Frame
Once you have prepared the tub and walls for the installation of a shower door, the next step is attaching the rail and door frame. This crucial step ensures that the shower door is secure and properly aligned, allowing for a smooth and functional operation.
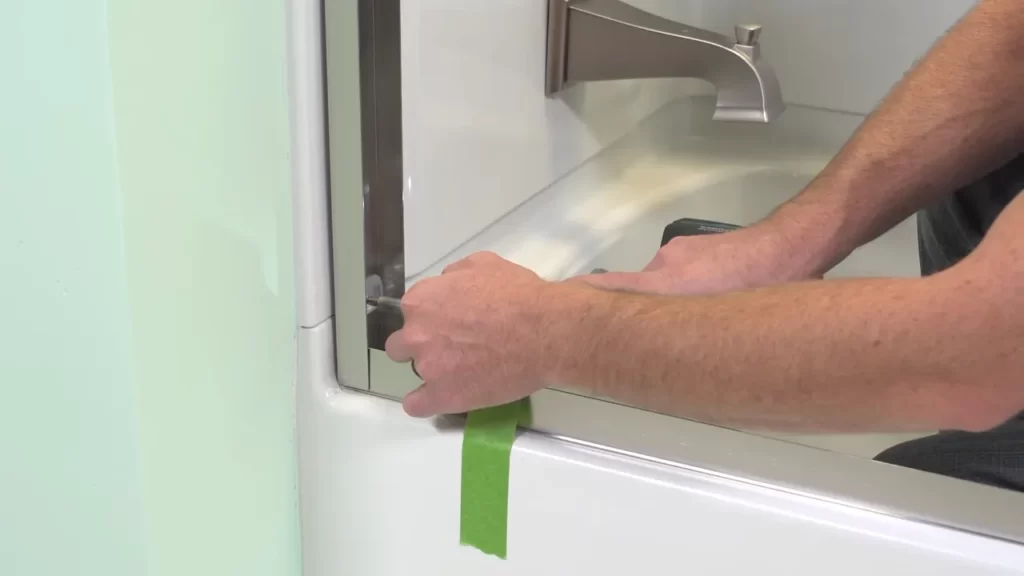
Installing the bottom rail on the tub
The first part of attaching the shower door is installing the bottom rail on the tub. The bottom rail serves as a guide and support for the door, preventing any sagging or misalignment. Here’s how you can do it:
- Measure the length of the tub and cut the bottom rail to fit using a hacksaw or a suitable cutting tool. Make sure to account for any unevenness or curves in the tub surface.
- Clean the tub surface thoroughly to remove any debris or residue that may interfere with the attachment of the rail.
- Apply a generous amount of adhesive or caulk on the underside of the rail and carefully position it onto the tub surface. Press down firmly to ensure a strong bond.
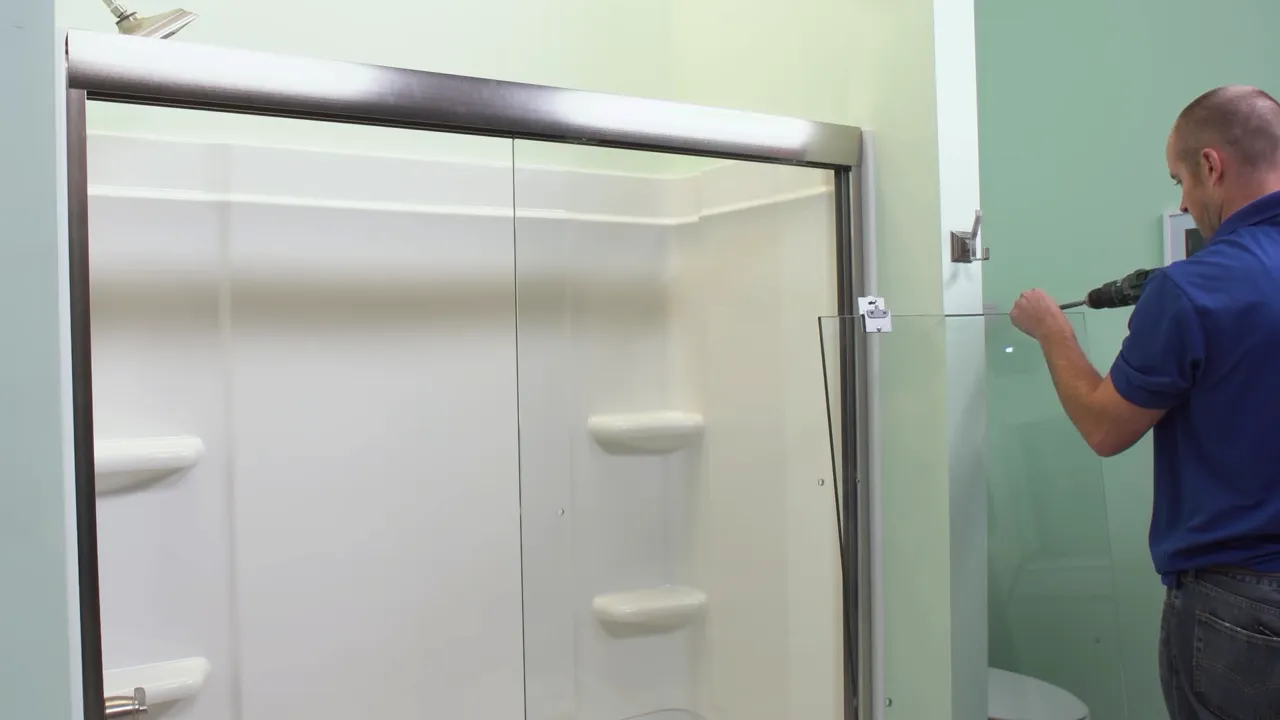
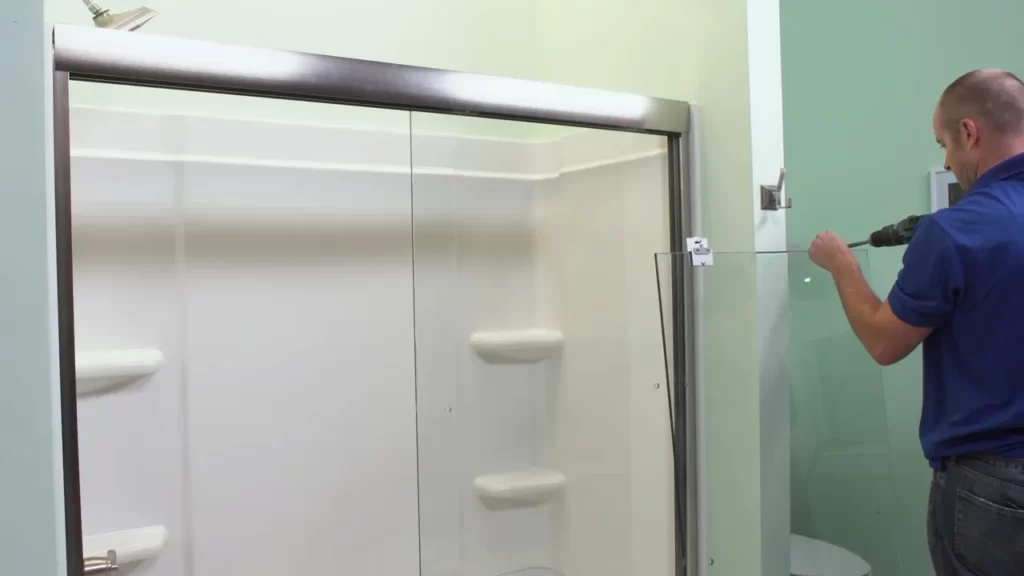
Securing the door frame to the walls
After installing the bottom rail, the next step is securing the door frame to the walls. This step ensures that the shower door is securely attached and provides stability during use. Here’s how you can do it:
- Measure and mark the desired height for the door frame on the walls using a level. This will ensure that the door is aligned with the tub and the surrounding walls.
- Attach the vertical frame pieces to the walls using screws or anchors, depending on the wall material. Make sure to use a suitable drill bit and follow the manufacturer’s instructions for fastening.
- Once the vertical frame pieces are securely attached, attach the horizontal frame piece to connect them. Use screws or connectors provided with the shower door kit, ensuring a tight and stable fit.
Adjusting the frame for proper alignment
Proper alignment of the shower door frame is essential for its smooth operation. After securing the frame to the walls, you need to adjust it to ensure everything is perfectly aligned. Here’s how you can do it:
- Check the levelness of the door frame using a level. Adjust the screws or anchors if necessary to achieve a horizontal position.
- Make sure the frame is plumb by using a level vertically along each side. Adjust as needed to achieve a straight and upright position.
- Check the clearance between the door frame and the tub surface. Ensure there is enough space for the door to open and close without rubbing against the tub or any obstructions.
By following these steps and properly attaching the rail and door frame, you are one step closer to enjoying a beautiful and functional shower door on your tub. Remember to double-check the measurements and consult the manufacturer’s instructions for any specific requirements or recommendations. With careful installation, your shower door will provide years of seamless showering experience.
Mounting The Door Panels
Mounting the door panels is a crucial step in installing a shower door on a tub. This process involves inserting the door panels into the frame, securing them with screws or brackets, and ensuring the smooth operation of the door. Following the proper steps and techniques is essential to ensure a secure and functional shower door.
Inserting the door panels into the frame
The first step in mounting the door panels is to insert them into the frame. This typically involves placing the bottom of the door panels into the bottom track of the frame and then gradually tilting them into position. Make sure to align the panels properly and check if they fit snugly within the frame. The use of shims may be necessary to achieve a tighter fit.
Securing the panels with screws or brackets
Once the door panels are inserted into the frame, the next step is to secure them using screws or brackets. This helps to ensure that the panels are held firmly in place. Start by drilling pilot holes into the frame at the designated locations. Then, use the screws or brackets provided with the shower door kit to fasten the panels to the frame. Properly tightening the screws or securing the brackets is crucial to prevent any movement or wobbling of the door panels.
Checking the door operation and smoothness
After securing the panels, it is important to check the door operation and smoothness. Open and close the door several times to ensure that it moves smoothly along the track and that there are no obstructions or binding. If necessary, make adjustments to the screws or brackets to achieve optimal alignment and smooth operation. This step is critical to ensure a functional and hassle-free shower door.
Applying Caulk And Sealant
Applying Caulk along the Edges of the Door Frame
Applying caulk along the edges of the shower door frame is an important step in ensuring a proper seal and preventing any water leakage. This process helps to create a watertight barrier between the door and the tub, keeping your bathroom dry and free from potential water damage.
To apply caulk along the edges of the door frame, follow these steps:
- Prepare the surface by cleaning the area thoroughly with a mild cleaner and wiping it dry. This will ensure that the caulk adheres well.
- Using a caulk gun, cut off the tip of the tube at a 45-degree angle. Insert the tube into the gun and squeeze the trigger until a small amount of caulk is visible at the tip.
- Starting from one corner, apply a smooth and consistent bead of caulk along the edge of the door frame. Ensure that the caulk fills any gaps between the frame and the tub.
- Continue applying the caulk along the remaining edges, overlapping the ends slightly for a seamless finish.
- Once the caulk is applied, use a caulk smoothing tool or your finger to create a neat and even line. Smooth out any excess caulk to achieve a professional-looking result.
Sealing Any Gaps or Joints with Silicone Sealant
Sealing any gaps or joints with silicone sealant is crucial for maintaining the water integrity of your shower door installation. Silicone sealant provides a flexible and durable seal, ensuring that water does not penetrate through gaps and joints, which could potentially cause damage to the surrounding walls and flooring.
To seal any gaps or joints with silicone sealant, follow these steps:
- Clean the surfaces to be sealed thoroughly to remove any dirt, dust, or debris.
- Using a caulk gun, cut off the tip of the silicone sealant tube at a 45-degree angle. Insert the tube into the gun and squeeze the trigger until the sealant is visible at the tip.
- Apply a generous amount of silicone sealant into the gaps or joints, making sure to completely fill them.
- Smooth out the sealant using a caulk smoothing tool or your finger to create a neat finish. This will help to ensure a watertight seal and prevent any water infiltration.
Remember, it’s important to select a high-quality silicone sealant that is specifically designed for use in wet areas, such as bathrooms. This will ensure maximum durability and resistance to mold and mildew.
Allowing the Caulk to Cure According to Manufacturer Instructions
After applying the caulk and silicone sealant, it’s crucial to allow sufficient time for them to cure. Curing time can vary depending on the caulk and sealant brands, so it’s important to read and follow the manufacturer’s instructions closely.
Typically, caulk and silicone sealant require at least 24 hours to cure properly. During this time, it’s important to avoid any contact or disturbance to allow the sealant to set and create a strong bond.
Once the recommended curing time has elapsed, you can confidently use your newly installed shower door on the tub without worrying about leaks or water damage.
Testing The Door For Proper Functioning
Opening and closing the door to check for smooth operation
A crucial step in installing a shower door on a tub is testing the door for proper functioning. After all the hard work and effort put into the installation process, it’s essential to ensure that the door operates smoothly and efficiently. By thoroughly testing the door’s opening and closing mechanism, you can identify any issues or adjustments needed to guarantee a seamless shower experience.
The first thing to do is to open and close the door multiple times. Pay close attention to how smoothly the door glides along the track and if it aligns properly with the tub. A well-installed shower door should move effortlessly without any resistance or grinding sounds. If you notice any difficulties or friction, it’s essential to troubleshoot the problem before proceeding.
Check the door’s alignment by observing whether it closes securely and evenly against the tub. Any gaps or misalignment can lead to water leakage, diminishing the effectiveness of the shower enclosure. Make sure the door aligns properly with the tub and walls, ensuring a tight seal that keeps water from seeping out.
Ensuring the door seals properly against the tub and walls
An important aspect of testing the shower door’s proper functioning is ensuring that it seals effectively against the tub and walls. Without a proper seal, water can escape from the shower, potentially causing damage to the surrounding areas.
Start by carefully inspecting the door’s seals and gaskets for any signs of wear or damage. These components play a vital role in creating a watertight barrier. If you notice any deterioration, it’s important to replace them before proceeding with the installation.
Next, close the door and examine the gaps between the door and the tub/walls. Ideally, there should be minimal or no gaps at all. An effective seal prevents water from leaking out during showers and helps to maintain a clean and dry bathroom.
A simple trick to ensure a proper seal is to run water over the shower door while it’s closed. Observe if any water manages to leak through the seal. If there are any leaks, you may have to readjust the door or replace worn-out seals.
Properly testing the shower door for functionality and sealing is crucial to avoid any issues down the line. By following these steps, you’ll ensure a seamless shower experience without any leaks or operational problems. Take the time to thoroughly inspect and test the door before considering the installation complete.
Cleaning And Finishing Touches
Cleaning and Finishing Touches
Once the shower door has been successfully installed on your tub, it’s time to focus on the important step of cleaning and adding those finishing touches. This not only adds a polished look to your newly installed shower door but also ensures that the door functions properly and stays in good condition for years to come.
Removing any excess caulk or sealant
Before you start the cleaning process, make sure to remove any excess caulking or sealant that may have accumulated during the installation. This will ensure a clean and neat appearance.
Cleaning the shower door and surrounding area
Now that the excess caulk or sealant has been taken care of, it’s time to give your shower door and the surrounding area a thorough cleaning. Follow these steps to achieve a sparkling result:
- Start by removing any dust, dirt, or grime that may have accumulated on the shower door. Use a non-abrasive cleaning solution and a soft cloth to gently wipe the door, ensuring that you cover all surfaces.
- Pay special attention to the tracks and other areas where dirt and debris tend to accumulate. A small brush or toothbrush can be used to scrub these areas and remove any stubborn buildup.
- Rinse the entire shower door with clean water to remove any cleaning solution residue.
- Finally, use a dry cloth or towel to thoroughly dry the door, preventing water spots and streaks from forming.
Adding optional accessories such as towel bars or handles
Once the shower door is clean and dry, you can consider enhancing its functionality and aesthetics by adding optional accessories, such as towel bars or handles. Ensure that each accessory is installed securely and aligned properly using the following tips:
- Measure the desired location for the accessory and mark it with a pencil.
- Drill pilot holes into the marked spots to prevent any potential damage to the shower door.
- Align the accessory with the pilot holes and use screws or other fasteners provided to secure it firmly in place.
- Double-check the stability and alignment of each accessory before putting it to use.
The cleaning and finishing touches are crucial steps to complete the installation process of your shower door on a tub. By ensuring that any excess caulk or sealant is removed, thoroughly cleaning the shower door and surrounding area, and adding optional accessories with care, you can achieve a beautiful and functional addition to your bathroom.
Troubleshooting Common Issues
While installing a shower door on a tub can be a rewarding project, it’s not uncommon to encounter some common issues along the way. In this section, we’ll address how to troubleshoot and resolve problems related to door alignment or gaps, leaks, and water seepage around the door. By following these steps, you can ensure a seamless installation and enjoy a leak-free shower experience.
Addressing issues with door alignment or gaps
If you notice that your shower door isn’t aligning properly or there are noticeable gaps, don’t panic. This issue can usually be resolved with a few adjustments. Here’s what you can do:
- Start by checking the hinges and screws. Tighten any loose screws and ensure that the hinges are securely attached to the wall.
- Inspect the bottom sweep or vinyl strip at the base of the door. If it appears damaged or worn out, it may be causing the misalignment. Replace it with a new one to improve the door’s fit.
- Next, check the door guides and rollers. Make sure they are clean and free from debris. Lubricate them if necessary to ensure smooth movement.
By following these steps, you can effectively address door alignment issues and ensure a snug fit without any noticeable gaps.
Repairing any leaks or water seepage around the door
Dealing with leaks or water seepage around your shower door can be frustrating. However, with a little investigation and proper sealing, you can prevent these problems. Here’s what you should do:
- Inspect the silicone sealant around the edges and corners of the door. If you notice any cracks or gaps, remove the old sealant and apply a fresh bead of silicone caulk to create a watertight seal.
- Check the shower door sweeps or seals. Over time, these seals can wear out and cause leaks. Replace any damaged or worn-out seals with new ones.
- Examine the grout or tile surrounding the tub area. If you notice any cracks or missing grout, repair it promptly to prevent water from seeping through.
By addressing these potential sources of leaks and water seepage, you can ensure that your shower door installation remains dry and problem-free for years to come.
Seeking professional assistance if needed
In some cases, troubleshooting and resolving issues with your shower door installation may require professional expertise. If you find yourself facing persistent problems or encounters any challenges beyond your DIY capabilities, it’s best to seek assistance from a professional. They have the knowledge and tools to tackle complex issues and ensure a successful installation without compromising on quality and safety.
Remember, proper installation and addressing any issues promptly will help you enjoy a beautiful and functional shower door for a long time. By following these troubleshooting tips and seeking professional help when needed, you can ensure a smooth and satisfying shower experience every day.
Frequently Asked Questions
Can You Add A Shower Door To An Existing Tub?
Yes, you can add a shower door to an existing tub. It is a straightforward process that can be done to enhance your bathroom’s functionality and aesthetics.
Can You Put A Shower Glass Door On A Tub?
Yes, a shower glass door can be installed on a tub. It enhances the appearance of the bathroom, provides a barrier to contain water, and adds functionality for both showering and bathing.
How Is A Shower Door Attached?
A shower door is attached using hinges, brackets, or track systems that secure it to the surrounding walls. These attachments ensure stability and allow for smooth sliding or swinging motions when opening or closing the door.
Can You Use A Sliding Shower Door On A Tub?
Yes, you can use a sliding shower door on a tub. It’s a convenient and space-saving option for your bathroom.
Conclusion
Installing a shower door on a tub is a straightforward process that can significantly enhance the functionality and aesthetics of your bathroom. By following the step-by-step instructions outlined in this blog post, you can confidently undertake this project on your own.
Remember to gather all the necessary tools and materials, measure accurately, and ensure proper alignment and sealing for a successful installation. With these tips in mind, you can transform your tub into a stylish and practical shower space that meets your needs.