To install a shower door, first measure the space accurately and purchase a door that fits. Then, follow the manufacturer’s instructions to assemble and attach the door securely.
Finish by sealing any gaps to prevent leaks. Welcome to our guide on how to install a shower door. Whether you’re renovating your bathroom or simply upgrading your shower enclosure, adding a shower door can enhance both the functionality and aesthetics of your space.
This comprehensive step-by-step tutorial will walk you through the process of installing a shower door, from measuring the space to sealing any gaps. By following these instructions, you’ll be able to confidently tackle this DIY project and enjoy the benefits of a beautiful and functional shower door. So let’s dive in and get started!
Assessing The Shower Space And Measuring For The Door
Before installing a shower door, it is essential to assess the shower space and accurately measure the dimensions. This will ensure a proper fit and efficient installation process. By determining the door type based on the shower layout and measuring the width and height of the shower space accurately, you can avoid common installation issues and create a functional and visually appealing shower area.
Determining the door type based on the shower layout
When it comes to shower door installations, the first step is to determine the door type based on the shower layout. There are various door styles available, such as pivot doors, sliding doors, and hinged doors. Each type has its own advantages and considerations, so it’s crucial to assess your shower space and determine the most suitable option.
For example, a small bathroom with limited clearance might benefit from a sliding door that doesn’t require extra space to swing open. On the other hand, a larger shower area with more room to maneuver might accommodate a hinged door, which provides a wider opening and a more elegant look. Consider the layout of your bathroom and the functionality you desire to select the right door type.
Measuring the width and height of the shower space accurately
Once you have determined the door type, it’s time to measure the width and height of the shower space accurately. This step is crucial to ensure that the shower door fits perfectly and operates smoothly. To measure the width, use a tape measure to determine the distance between the walls where the door will be installed. Be sure to account for any unevenness or protrusions that may affect the door’s fit.
Similarly, measure the height of the shower space from the floor to the top of the opening. Take measurements at multiple points to ensure accuracy, as floors and walls may not be perfectly level or straight. It is always recommended to measure at least twice and use the larger measurements to avoid any issues during installation.
Considering factors like clearance, slope, and layout restrictions
When measuring for a shower door, it’s important to consider factors like clearance, slope, and layout restrictions. Clearance refers to the space needed for the door to open and close smoothly without hitting any obstacles. Measure the distance from the walls to any fixtures, such as toilets, vanities, or cabinets, to ensure sufficient clearance.
Additionally, consider the slope of the shower floor. Some shower spaces have a slope built-in to allow proper water drainage. Measure the slope and consider its impact on the door installation. If there is a significant slope, you may need to choose a door with adjustable hinges or install additional hardware to compensate for the slope.
Layout restrictions, such as limited wall space or structural elements, should also be taken into account. Measure and note any restrictions that might affect the door’s installation. This will help you choose a shower door and plan the installation process accordingly.
In conclusion, assessing the shower space and measuring for the door are crucial steps in the shower door installation process. By determining the door type based on the shower layout, measuring the width and height of the shower space accurately, and considering factors like clearance, slope, and layout restrictions, you can ensure a successful installation and enjoy a functional and aesthetically pleasing shower area.

Preparing The Shower Area For Installation
Removing the existing shower door or curtain
The first step in preparing the shower area for the installation of a new shower door is to remove the existing shower door or curtain. This is an important step as it clears the way for the installation of the new door and ensures a clean and fresh start. To remove the existing shower door or curtain, follow these simple steps:
- Start by removing any screws or bolts that are holding the door or curtain in place. Use a screwdriver or a wrench to loosen and remove these fasteners.
- Once the fasteners have been removed, gently lift the door or curtain out of its mounting brackets or tracks.
- Set aside the old door or curtain and inspect the mounting brackets or tracks for any damage or signs of wear. If necessary, replace these components before proceeding with the installation of the new door.
Cleaning and inspecting the shower area for any necessary repairs
After removing the old shower door or curtain, it’s important to thoroughly clean and inspect the shower area before proceeding with the installation of the new door. Follow these steps to ensure a clean and well-prepared surface:
- Start by cleaning the shower area with a mild detergent or cleaning solution. Use a sponge or cloth to scrub away any dirt, grime, or soap scum.
- Pay special attention to the corners and crevices of the shower area, as these areas can often be neglected during regular cleaning.
- Once the shower area is clean, inspect it for any signs of damage or wear. Look for cracks, chips, or any areas that may need repair.
- If you notice any damage, consult a professional for repairs before proceeding with the installation of the new shower door.
Applying waterproofing membrane to prevent leaks
To ensure a watertight seal and prevent leaks, applying a waterproofing membrane is crucial before installing the new shower door. Follow these steps to apply the membrane:
- Start by thoroughly cleaning the shower area and allowing it to dry completely. Any moisture or dirt can prevent proper adhesion of the membrane.
- Next, apply the waterproofing membrane according to the manufacturer’s instructions. This may involve spreading a liquid or pasty membrane directly onto the shower walls or using adhesive-backed sheets of membrane.
- Make sure to cover the entire shower area, including corners and seams, to ensure maximum protection against leaks.
- Once the waterproofing membrane is applied, allow it to dry and cure according to the manufacturer’s instructions before proceeding with the installation of the new shower door.
Selecting The Right Shower Door And Gathering Materials
Installing a shower door can transform the look and functionality of your bathroom, giving it a sleek, modern appearance. However, before you dive into the installation process, it’s important to choose the right shower door and gather the necessary tools and materials. Understanding the different types of shower doors available, considering factors like style, glass type, and hardware options, and gathering the necessary tools and materials are crucial steps in ensuring a successful installation.
Understanding the different types of shower doors available
When it comes to shower doors, there are several options to choose from. Understanding the different types and their features can help you make an informed decision that meets your specific needs. Here are some popular types of shower doors:
- Frameless Shower Doors: Frameless shower doors offer a clean and modern look, as they are made of tempered glass without any metal framing. These doors are perfect for showcasing decorative tile work or intricate shower interiors.
- Semi-Frameless Shower Doors: Semi-frameless shower doors combine the sleekness of frameless doors with the stability of framed doors. They feature minimal metal framing, typically around the edges or handles, providing both style and stability.
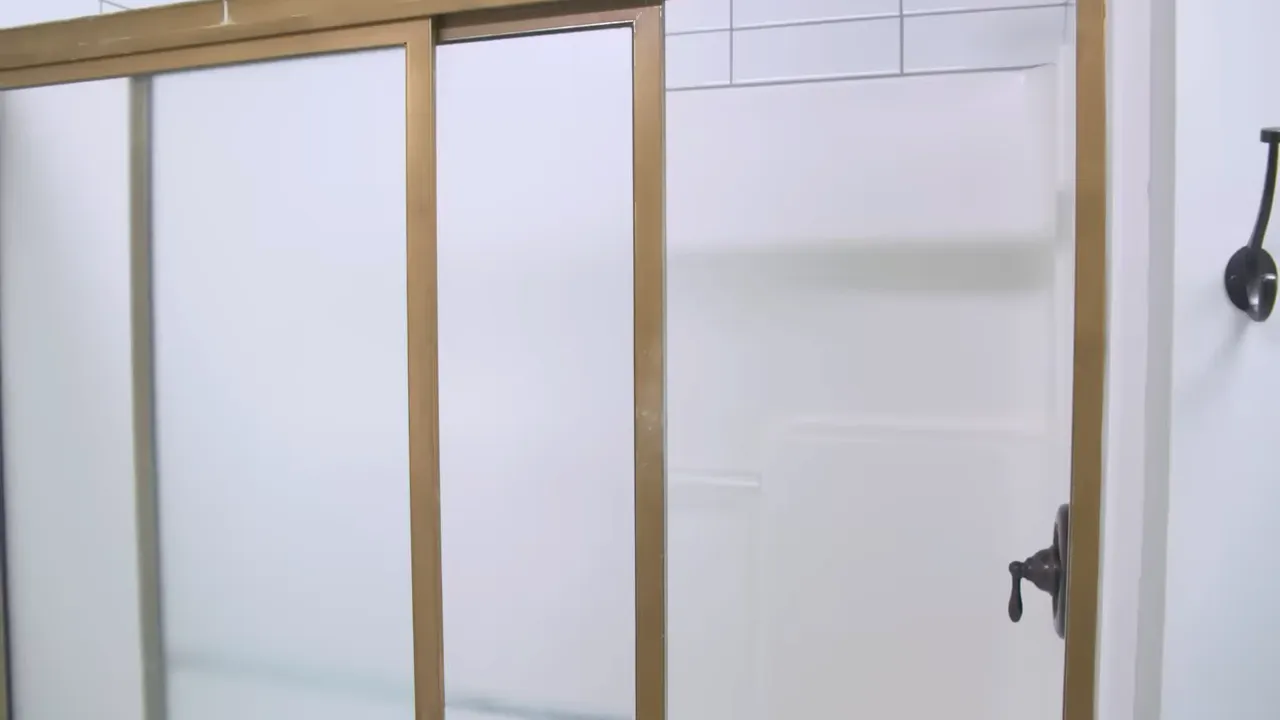
- Framed Shower Doors: Framed shower doors are constructed with metal framing around the edges and panels, offering excellent stability and durability. These doors are available in a variety of finishes to match your bathroom decor.
- Sliding Shower Doors: Sliding shower doors are an ideal choice for bathrooms with limited space. These doors have one fixed panel and another that slides along a track, saving space and adding convenience.
Considering factors like style, glass type, and hardware options
When selecting your shower door, it’s important to consider the overall style of your bathroom and your personal preferences. Additionally, take a close look at the glass and hardware options available. Here are some factors to consider:
- Style: Choose a shower door style that complements the existing design of your bathroom. Whether you prefer a minimalist look or a more decorative style, there are options to suit every taste.
- Glass type: Consider the thickness and transparency of the glass. Thicker glass offers better durability, while transparency options range from clear to frosted or textured for added privacy.
- Hardware options: Pay attention to the hardware finishes and designs available. From sleek chrome to warm brass, select hardware that matches your bathroom fixtures and enhances the overall aesthetic.
Gathering the necessary tools and materials for the installation process
Before starting the installation, gather all the necessary tools and materials to ensure a smooth process. Here’s a list of the essentials:
| Tools | Materials |
|---|---|
| Measuring tape | Shower door kit |
| Level | Shims (if necessary) |
| Screwdriver | Sealant/caulk |
| Drill | Mounting hardware |
| Hammer | Glass cleaner |
Having these tools and materials ready will save you time and ensure you have everything you need to complete the installation.
Selecting the right shower door and gathering the necessary tools and materials are crucial steps in ensuring a successful installation. Understanding the different types of shower doors, considering factors like style, glass type, and hardware options, and gathering the essential tools and materials will help you achieve a stunning and functional shower door that enhances the beauty of your bathroom.

Installing A Frameless Shower Door: Step-By-Step Guide
Installing a frameless shower door can be a stylish and functional addition to any bathroom. With its sleek design and clean lines, a frameless shower door can instantly elevate the look of your shower space. However, the installation process may seem daunting if you’ve never done it before. Fear not! In this step-by-step guide, we will break down the installation process for you, ensuring that you have all the necessary information to successfully install a frameless shower door.
Preparing the glass panels and hardware for installation
Before you begin the installation process, it is essential to prepare the glass panels and hardware. This step ensures that everything is in order and ready to be installed. Here are the key steps to follow:
- Place the glass panels on a flat surface, ensuring that they are clean and free from any dirt or debris.
- Check the hardware to ensure that all the necessary components are included and in good condition. This includes hinges, handles, screws, and any other hardware specified by the manufacturer.
- If necessary, apply any protective coatings or treatments recommended by the manufacturer to the glass panels. This step will help to prevent water spots and make cleaning easier in the future.
Anchoring the fixed glass panel securely to the shower walls
The next step in installing a frameless shower door is anchoring the fixed glass panel securely to the shower walls. This step is crucial for stability and safety. Here’s how to do it:
- Measure and mark the desired height of the fixed glass panel on the shower walls.
- Using a level, ensure that the marked line is perfectly horizontal. This step is crucial for proper alignment.
- Securely attach wall anchors to the marked spots on the shower walls. Make sure to use anchors that are suitable for the material of your shower walls (e.g., tile, fiberglass, etc.).
- Gently place the fixed glass panel onto the wall anchors, ensuring that it is level and aligned with the marked line.
- Securely tighten the screws on the wall anchors, making sure that the panel is firmly anchored to the shower walls.
Installing the door hinges and handle according to the manufacturer’s instructions
Proper installation of the door hinges and handle is essential for the functionality and longevity of your frameless shower door. Follow these steps to ensure a correct installation:
- Refer to the manufacturer’s instructions to determine the precise location and positioning of the door hinges and handle.
- Using a pencil, mark the spots where the hinges and handle will be installed on the glass panel.
- Attach the hinges and handle to the glass panel according to the manufacturer’s instructions. Ensure that they are securely fastened.
Adjusting and aligning the door for proper functionality
Once the door hinges and handle are installed, it is crucial to adjust and align the door for proper functionality. Follow these steps to ensure a smooth operation:
- Check that the door swings open and close smoothly without any obstructions.
- If necessary, make adjustments to the hinges to ensure that the door is properly aligned and centered.
- Double-check that the door closes tightly and forms a watertight seal to prevent any leaks.
By following this step-by-step guide, you can successfully install a frameless shower door in your bathroom. Remember to refer to the manufacturer’s instructions for any specific requirements related to your shower door model. With a careful installation process, you’ll be able to enjoy the beauty and functionality of your new frameless shower door for years to come.
Installing A Framed Shower Door: Step-By-Step Guide
Installing a shower door is an important step in completing your bathroom renovation project. A framed shower door offers both functionality and style to your shower enclosure. In this step-by-step guide, we will walk you through the process of installing a framed shower door, ensuring a secure attachment to the shower walls and proper alignment for smooth operation. Let’s get started!
Assembling the frame and preparing it for installation
Before we begin the installation process, you need to assemble the shower door frame. This typically involves connecting the frame pieces using the provided hardware and following the manufacturer’s instructions. Here’s how you can assemble the frame and prepare it for installation:
- Refer to the manufacturer’s instructions to identify the individual frame pieces.
- Lay out the frame pieces in the order they will be assembled.
- Using the provided hardware, attach the frame sections together.
- Ensure that all connections are secure and tightened properly.
- Check for any defects or damages in the frame and contact the manufacturer if necessary.
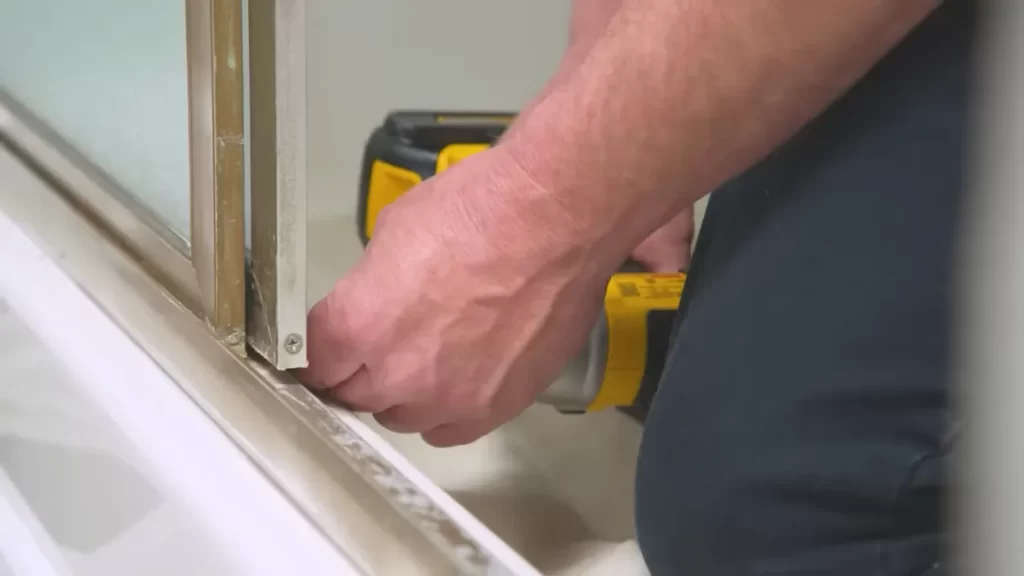
Attaching the frame securely to the shower walls
Once you have assembled the frame, it’s time to attach it securely to the shower walls. Follow these steps to ensure a stable attachment:
- Measure and mark the desired height for the shower door frame on both shower walls.
- Use a level to ensure the marks are level and adjust if necessary.
- Drill pilot holes at the marked locations using an appropriate drill bit for your shower wall material.
- Insert wall anchors into the pilot holes for added stability.
- Align the frame with the pilot holes and secure it to the shower walls using screws provided.
- Tighten the screws firmly but be cautious not to overtighten and damage the frame or shower walls.
Installing the door hinges, handle, and other hardware components
With the frame securely attached, it’s time to install the door hinges, handle, and other hardware components. Follow these steps:
- Refer to the manufacturer’s instructions to identify the exact location of the door hinges, handle, and other hardware components.
- Start by attaching the hinges to the frame using the provided screws or fasteners.
- Attach the handle and any additional hardware components following the manufacturer’s instructions.
- Ensure that all hardware components are tightened securely, but avoid overtightening to prevent damage.
Ensuring proper alignment and functionality of the door
Once all the components are installed, it’s crucial to ensure proper alignment and functionality of the shower door. Here’s what you need to do:
- Close the shower door and check for any gaps between the door and the frame.
- If necessary, adjust the hinges or hardware components to eliminate any gaps and ensure a proper seal.
- Test the door’s operation by opening and closing it several times.
- Ensure that the door opens and closes smoothly without sticking or jamming.
- If there are any issues, refer to the manufacturer’s instructions or contact their customer support for assistance.
By following this step-by-step guide, you can install a framed shower door with confidence. Enjoy your newly transformed shower enclosure and the enhanced functionality and aesthetic appeal it brings to your bathroom.
Installing A Sliding Shower Door: Step-By-Step Guide
In this step-by-step guide, we will walk you through the process of installing a sliding shower door for your bathroom. Sliding shower doors are a popular choice for their sleek design and space-saving functionality. With some basic tools and a little know-how, you can easily install a sliding shower door yourself and upgrade the look of your bathroom.
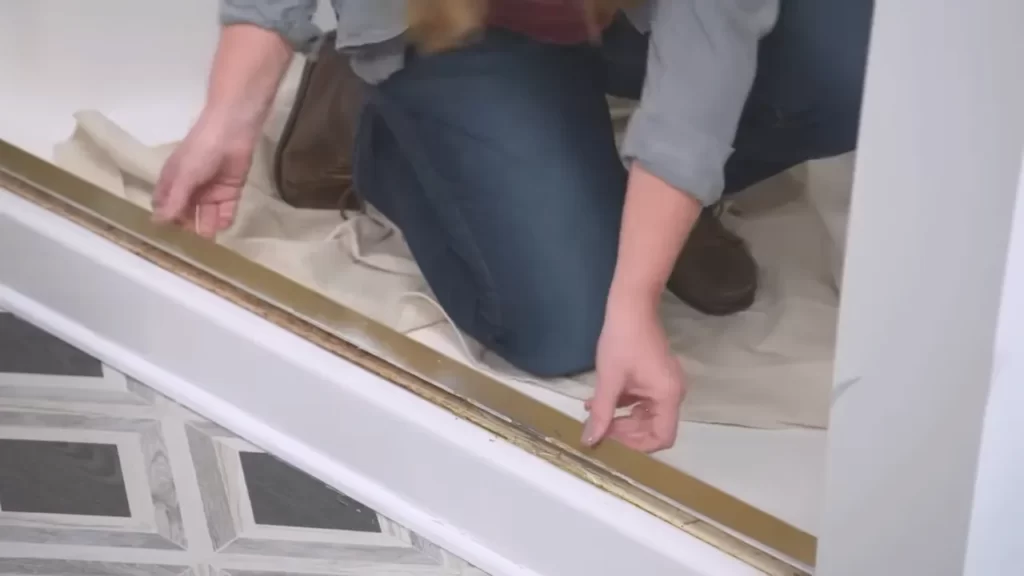
Installing the Bottom Track and Ensuring it is Level
The first step in the process is to install the bottom track of the sliding shower door. The bottom track provides a stable foundation for the door panels and ensures smooth operation. Follow these steps to install the bottom track:
- Measure the width of the opening where the shower door will be installed.
- Cut the bottom track to the measured width, ensuring it fits snugly.
- Use a level to ensure the bottom track is straight and level. This is an important step to ensure the door panels slide smoothly.
- Attach the bottom track to the shower pan or floor using screws or adhesive, following the manufacturer’s instructions.
Mounting the Top Track and Aligning it with the Bottom Track
Once the bottom track is installed, the next step is to mount the top track of the sliding shower door. The top track provides support and ensures the door panels align with the bottom track. Follow these steps to mount the top track:
- Measure and cut the top track to the same width as the bottom track.
- Position the top track on the wall, aligning it with the bottom track.
- Use a level to ensure the top track is straight and level.
- Secure the top track to the wall using screws or adhesive, following the manufacturer’s instructions.
Installing the Sliding Door Panels and Testing their Smooth Operation
With the bottom and top tracks in place, it’s time to install the sliding door panels and ensure they operate smoothly. Follow these steps to install the sliding door panels:
- Measure the height of the opening and cut the door panels to the proper height.
- Install the rollers or wheels at the bottom of each door panel, following the manufacturer’s instructions.
- Hang the door panels on the top track, making sure they fit securely.
- Test the smooth operation of the sliding door panels by sliding them back and forth. Make any necessary adjustments to ensure they glide effortlessly.
Once you have completed these steps, your sliding shower door installation is complete. Enjoy the upgraded look and functionality that the sliding door provides for your bathroom.
Finishing Touches And Maintenance Tips
Sealing the shower door edges and hardware for water protection
One of the essential finishing touches when installing a shower door is ensuring proper sealing of the edges and hardware. This step helps to prevent water leakage, keeping your bathroom clean and dry. Here are a few key points to remember:
- Clean and dry the edges of the shower door frame thoroughly before applying sealant.
- Choose a high-quality silicone sealant that is specifically designed for bathroom use. This will ensure long-lasting water protection.
- Apply the sealant along the edges of the shower door frame, paying close attention to the corners and joints.
- Smooth out the sealant with a caulking tool to create a neat finish and remove any excess product.
- Allow the sealant to dry completely before using the shower. Refer to the manufacturer’s instructions for the recommended drying time.
Note: Regularly check the condition of the sealant and reapply if necessary to maintain its effectiveness.
Cleaning and maintaining the shower door regularly
Regular cleaning and maintenance are essential to keep your shower door looking sleek and functioning properly. By following these tips, you can extend the lifespan of your shower door:
- Use a non-abrasive cleaner specifically designed for shower doors. Avoid harsh chemicals as they can damage the door’s surface.
- Wipe the door after each use to remove soap scum, water spots, and any buildup.
- To prevent mineral deposits, use a squeegee or a microfiber cloth to dry the door.
- Clean the door’s hardware regularly, such as handles and hinges, using a mild soap and warm water solution. Dry them thoroughly to prevent rusting.
- Inspect the door’s rollers or tracks for any dirt or debris. Clean them using a soft brush or cloth to ensure smooth operation.
Note: Regular maintenance will not only keep your shower door in excellent condition but also help prevent the development of mold and mildew.
Troubleshooting common issues and seeking professional help if needed
Despite proper installation and maintenance, shower doors may encounter certain issues over time. Here are some common problems and steps to troubleshoot them:
- Door not closing properly: Check if the door is aligned correctly. Adjust the hinges or rollers if needed.
- Water leakage: Inspect the sealant and replace if damaged. Ensure the door is closing tightly.
- Sticky or noisy rollers: Clean the rollers and tracks. Apply lubricant if necessary.
- Cracked or shattered door: If the door is severely damaged, it is best to seek professional help for repair or replacement.
If you encounter any persistent issues or are unsure how to fix them, it is recommended to seek assistance from a professional. They have the expertise to diagnose and resolve any complex problems with your shower door.
By following these finishing touches, maintenance tips, and troubleshooting techniques, you can enjoy a properly sealed, clean, and functional shower door for years to come.
Frequently Asked Questions
Can I Install A Shower Door By Myself?
Yes, you can install a shower door by yourself. It’s a straightforward process that requires basic tools and careful following of instructions. Proper planning, measurement, and alignment are necessary for a successful installation.
Is It Easy To Install Shower Glass Door?
Installing a shower glass door is a straightforward process. With the right tools and instructions, it can be done easily. The process involves measuring, drilling, attaching hinges, and sealing. Proper care and attention to detail ensure successful installation.
How Is A Shower Door Attached?
A shower door is attached using hinges or a track system. Hinges secure the door to the shower frame, allowing it to swing open and closed. Tracks are installed at the top and bottom of the door, guiding it as it slides open and closed.
Do You Need A Stud For Shower Door?
Yes, a stud is needed for a shower door. It provides stability and support for the door, ensuring it stays securely in place. Without a stud, the door may not function properly and could become loose or wobbly.
Conclusion
Installing a shower door may seem like a daunting task, but with the right guidance, it can be a straightforward process that improves the functionality and aesthetics of your bathroom. By following the step-by-step instructions outlined in this blog post, you can confidently tackle the installation yourself.
Remember to measure accurately, gather the necessary tools, and take your time during the process. With a little patience and attention to detail, you’ll soon be enjoying your newly installed shower door hassle-free. So go ahead, give it a try and transform your bathroom into a stylish and functional space.