To install a shower diverter, first, shut off the water supply. Then, remove the old spout and replace it with the new diverter, making sure to tighten it securely.
Now you can turn the water back on and test the diverter. Would you like to upgrade your shower with a diverter to easily switch between the showerhead and handheld shower? Installing a shower diverter is a simple task that can be completed in just a few steps.
By following the instructions below, you will be able to install a shower diverter in no time and enjoy the convenience of a versatile shower system. In this guide, we will walk you through the process of installing a shower diverter, from turning off the water supply to testing the newly installed diverter. So, let’s get started and upgrade your shower experience!
What Is A Shower Diverter And Why Is It Important?
If you’re looking to upgrade your bathroom experience, one essential component you need to familiarize yourself with is the shower diverter.
In simple terms, a shower diverter is a valve mechanism that helps control the flow of water between different shower outlets. It allows you to switch between showerheads, hand-held showers, and other shower options effortlessly.
Definition and purpose of a shower diverter
In the realm of bathroom fixtures, a shower diverter is an essential device that ensures water is directed to the desired outlet. It acts as a switch between various shower options and regulates the flow from one outlet to another. By diverting the water in the desired direction, it allows you to enjoy different shower experiences conveniently.
Importance of a properly functioning shower diverter
A properly functioning shower diverter plays a crucial role in maintaining a pleasant and efficient showering experience. It ensures that the water is directed to the right outlet, avoiding any unnecessary wastage or leakage. Moreover, a functional shower diverter enables you to switch between different shower options seamlessly, enhancing your overall bathing experience.
Without a functioning diverter, you may find yourself stuck with a fixed showerhead, limiting your bathing options. Therefore, it is essential to maintain and repair your shower diverter periodically to ensure optimal performance and avoid inconveniences.
Common problems with shower diverters and signs of malfunction
Like any plumbing fixture, shower diverters may encounter problems over time. It is important to be aware of the signs of malfunction so that you can address issues promptly. Here are some common problems to watch out for:
- Leakage: If you notice water dripping from the diverter, it indicates a potential issue with the valve or seals. This can lead to water wastage and must be addressed to prevent further damage.
- Difficulty in Switching: If you find it challenging to switch between different shower options, such as from the showerhead to the hand-held shower, it may signal a problem with the valve mechanism. This can hinder your bathing experience and should be rectified promptly.
- Reduced Water Pressure: A poorly functioning diverter can result in reduced water pressure from the desired shower outlet. If you notice weak water flow, it may be time to check and repair the diverter.
- Constant Dripping: Continuous dripping from the showerhead even when the diverter is properly turned off indicates a malfunctioning diverter. This not only wastes water but can also lead to higher utility bills if not addressed in a timely manner.
By paying attention to these signs, you can identify the need for repairs or replacements promptly, ensuring a smooth and enjoyable shower experience.

Different Types Of Shower Diverters
Overview of the various types of shower diverters
Shower diverters are essential components of any shower system, allowing users to control the flow of water between different outlets. There are several types of shower diverters available on the market, each with its own unique features and functionality. Understanding the different types can help you make an informed decision when it comes to installing a shower diverter in your bathroom.
Comparison of their features and functionality
To better understand the various types of shower diverters, let’s take a closer look at their features and functionality.
1. Valve Diverter: This type of diverter is the most common and is typically found in regular shower systems. It is a simple valve that diverts water flow from the bathtub spout to the showerhead when engaged. Valve diverters are cost-effective and easy to install, making them a popular choice for homeowners.
2. Three-Way Diverter Valve: Similar to the valve diverter, the three-way diverter valve allows users to switch the water flow between two different outlets. For example, you can divert water between a fixed showerhead and a handheld showerhead. This type of diverter offers more versatility and flexibility in controlling water flow.
3. Diverter Cartridge: This type of diverter is often found in single-handle shower faucets. The diverter cartridge enables users to control the flow of water between the showerhead, tub spout, and additional shower accessories. It operates by rotating the handle or knob to divert water to the desired outlet.
4. Tub Spout Diverter: Tub spout diverters are commonly found in bathtub and shower combinations. They are built into the tub spout itself and allow water to be diverted from the tub spout to the showerhead when the diverter is engaged. This type of diverter is easy to use and requires minimal installation effort.
Choosing the right type of shower diverter for your needs
When selecting a shower diverter, it’s important to consider your specific needs and preferences. Here are a few factors to keep in mind:
1. Budget: Consider your budget when choosing a shower diverter. Valve diverters are typically the most affordable option, while more advanced diverter systems may come at a higher cost.
2. Functionality: Determine the level of control and flexibility you desire. If you prefer the ability to switch between multiple outlets, consider a three-way diverter valve or a cartridge diverter.
3. Bathroom Design: Take into account the design and layout of your bathroom. If you have a bathtub and shower combination, a tub spout diverter may be the most suitable option.
By considering these factors, you can choose the right type of shower diverter that meets your needs and ensures a comfortable and efficient showering experience. Remember to follow the manufacturer’s instructions for installation and maintenance to prolong the lifespan of your diverter.

Essential Tools For The Installation Process
When installing a shower diverter, it is important to have the right tools on hand. These tools will not only make the installation process smoother but also ensure that the job is done correctly. In this section, we will discuss the essential tools needed for installing a shower diverter and briefly describe their functions.
List of tools required for the installation
To successfully install a shower diverter, you will need the following tools:
- Adjustable wrench – to tighten and loosen nuts and bolts.
- Plumber’s tape – also known as Teflon tape, this helps create a watertight seal on threaded connections.
- Phillips head screwdriver – for removing and installing screws.
- Utility knife – to cut through sealant or caulking.
- Adjustable pliers – for grabbing and holding onto pipes and fittings.
- Pipe cutter – to cut through pipes and create precise cuts.
- Rag or towel – to wipe away any excess water or debris during the installation process.
- Hacksaw – for cutting through pipes if a pipe cutter is unavailable.
- Level – to ensure the shower diverter is installed straight and level.
Brief description of each tool and its function
Let’s take a closer look at each tool and understand their functions in the shower diverter installation process:
| Tool | Function |
|---|---|
| Adjustable wrench | This tool allows you to tighten or loosen nuts and bolts, making it essential for securing connections during the installation. |
| Plumber’s tape | Plumber’s tape is used to create a watertight seal on threaded connections, preventing leaks and ensuring a proper fit. |
| Phillips head screwdriver | This tool is necessary for removing and installing screws that hold various components of the shower diverter in place. |
| Utility knife | A utility knife helps cut through sealant or caulking, allowing you to remove old fixtures or create clean cuts for a neat installation. |
| Adjustable pliers | These pliers are useful for grabbing and holding onto pipes and fittings, providing a firm grip when making adjustments or connections. |
| Pipe cutter | A pipe cutter is used to cut through pipes, ensuring precise cuts for accurate connections during the installation process. |
| Rag or towel | Having a rag or towel on hand is essential for wiping away any excess water or debris that may accumulate during the installation. |
| Hacksaw | If a pipe cutter is unavailable, a hacksaw can be used to cut through pipes. Though not as precise, it still gets the job done. |
| Level | A level helps ensure that the shower diverter is installed straight and level, preventing any potential issues with water flow or functionality. |
Having these tools readily available when installing a shower diverter will save you time and frustration, allowing for a smooth and successful installation process. Now that you are familiar with the essential tools required and their functions, you can confidently proceed with the installation of your shower diverter.

Necessary Materials For The Installation
When it comes to installing a shower diverter, you’ll need several necessary materials to ensure a successful installation. Choosing the right materials is essential for the longevity and functionality of your shower diverter. Below, we have listed the required materials for a successful installation and provided recommendations for high-quality products.
Required materials for a successful installation:
1. Shower Diverter Valve: The shower diverter valve is the essential component that allows you to divert water flow between your showerhead and other fixtures, such as a handheld shower or bathtub faucet. It is important to choose a durable and reliable diverter valve that can withstand frequent use.
2. Adjustable Wrench: An adjustable wrench is necessary for loosening and tightening the connections during the installation process. Make sure to choose a wrench that fits the size of the fittings to ensure a secure and leak-free connection.
3. Plumbers Tape: Also known as Teflon tape, plumbers tape is used to create a watertight seal between threaded connections. It helps prevent leaks and ensures a tight fit between the shower diverter valve and other plumbing components. Apply the tape in a clockwise direction to the threaded connections before screwing them together.
4. Pipe Cutter or Hacksaw: If you need to modify existing pipes or install new ones, a pipe cutter or hacksaw will come in handy. These tools allow you to cut the pipes to the desired length accurately. Remember to deburr the cut ends to ensure a smooth connection.
5. Pipe Fittings and Connectors: Depending on your specific plumbing setup, you may need various pipe fittings and connectors to complete the installation. Common types include elbows, couplings, tees, and adapters. It is crucial to choose the right size and type of fittings that match your existing pipes.
Recommendations for high-quality materials and products:
1. Shower Diverter Valve: Look for a diverter valve made of durable materials such as brass or stainless steel. These materials provide excellent corrosion resistance and ensure long-lasting performance.
2. Adjustable Wrench: Opt for an adjustable wrench with a comfortable grip and smooth adjustment mechanism. A high-quality wrench will make it easier to tighten and loosen connections without damaging the fittings.
3. Plumbers Tape: Choose a high-density plumbers tape that provides a reliable and tight seal. Look for tape that is specifically designed for plumbing applications to ensure compatibility and effectiveness.
4. Pipe Cutter or Hacksaw: Invest in a pipe cutter with a sharp cutting wheel or a hacksaw with fine teeth for clean and precise cuts. A quality cutting tool will make the installation process smoother and reduce the risk of leaks.
5. Pipe Fittings and Connectors: Always select pipe fittings and connectors that are compatible with your plumbing system. Opt for products from reputable manufacturers known for their quality and reliability.

Preparing For The Installation Process
Before you dive into installing a shower diverter, it’s essential to prepare the area and ensure a smooth and hassle-free process. This involves turning off the water supply, removing the old shower diverter (if applicable), and making necessary arrangements for the installation. In this section, we will cover each step in detail, so let’s get started.
Importance of Turning off the Water Supply
Turning off the water supply is a crucial step to prevent any mishaps during the installation process. By shutting off the water, you ensure that no water flows while you work on the diverter. This step is vital because working on a live water supply can lead to leaks, water damage, or even personal injury. So, before you begin the installation, locate the main water shutoff valve in your home and turn it off.
Removing the Old Shower Diverter (if applicable)
If you have an existing shower diverter that needs to be replaced, it is essential to remove it before installing the new one. Here are the steps you’ll need to follow to remove the old diverter:
- Start by locating the access panel or the wall behind your shower.
- Remove the screws or fasteners that hold the access panel in place.
- Inspect the diverter for any screws or bolts holding it to the plumbing system.
- Using appropriate tools such as pliers or wrenches, carefully loosen and remove any connections.
- Gently pull out the old diverter, ensuring not to damage any surrounding pipes or fittings.
By following these steps, you’ll successfully remove the old shower diverter and make way for the installation of a new one.
Preparing the Area for Installation
Once you have turned off the water supply and removed the old diverter (if applicable), it’s time to prepare the area for the installation of the new shower diverter. Here are a few key steps to ensure a smooth installation process:
- Thoroughly clean the exposed area to remove any debris, dirt, or old sealant.
- Inspect the plumbing connections and ensure they are in good condition.
- Apply plumber’s tape to the threads of the diverter and any other connecting points to create a watertight seal.
- Check the new diverter for any manufacturer-specific instructions or additional preparations.
By preparing the area properly, you set the stage for a successful installation and ensure optimal performance of your new shower diverter.
In conclusion, preparing for the installation of a shower diverter involves turning off the water supply, removing the old diverter (if applicable), and preparing the area for installation. By following these steps and adhering to proper procedures, you can ensure a smooth and efficient installation process, ultimately enjoying a well-functioning shower diverter.
Installing The New Shower Diverter
Once you have removed the old shower diverter, it’s time to install the new one. This step-by-step guide will walk you through the process, ensuring a successful installation.
Positioning and attaching the new shower diverter
Start by positioning the new shower diverter in the desired location on the shower wall. Make sure it aligns with the existing pipes and water supply. Use a pencil to mark the spots where the diverter will be attached.
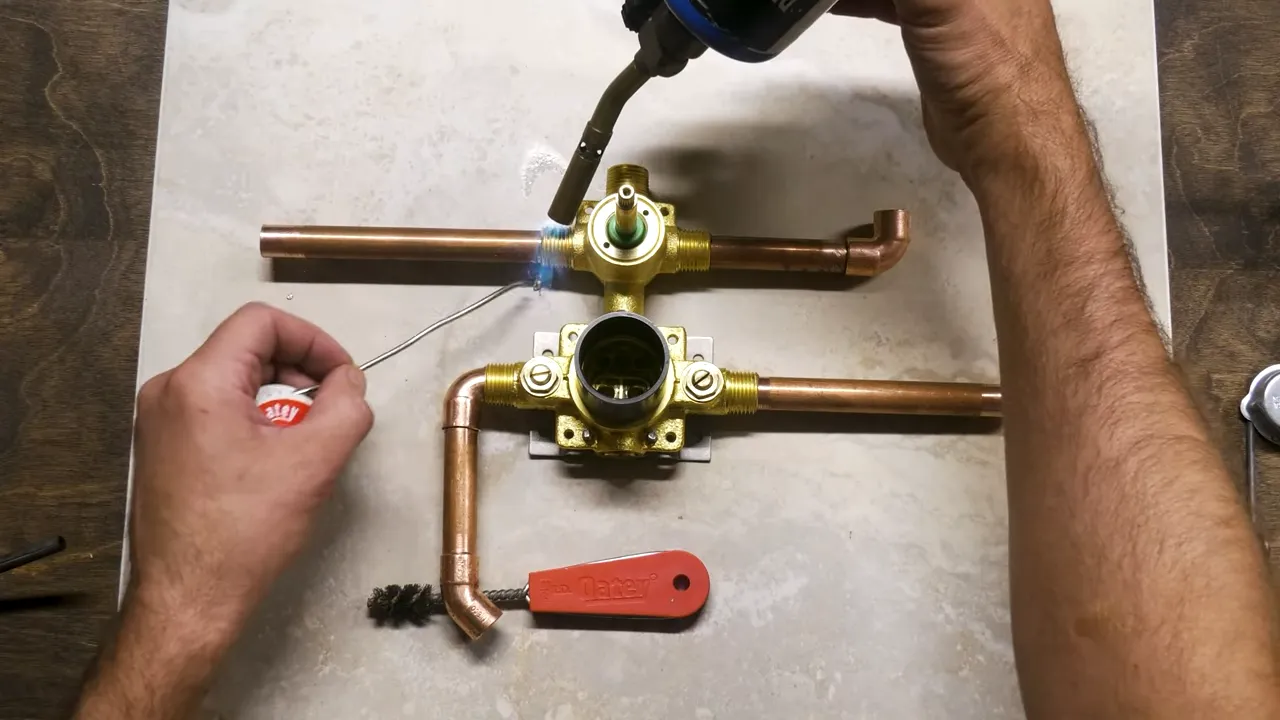
Next, attach the diverter to the water supply pipes. Use a wrench to connect the diverter to the existing pipes, making sure the connections are tight and secure. This will ensure proper water flow and prevent any leaks.
If necessary, use plumbing tape to seal the connections and prevent any water leakage. Wrap the tape around the threaded ends of the pipes before attaching the diverter.
Connecting the diverter to the water supply
Once the diverter is in place, it’s time to connect it to the water supply. Locate the water supply valve and turn it off to prevent any water flow during the installation process.
Take the necessary length of a pipe and connect one end to the diverter and the other end to the water supply valve. Use a wrench to ensure the connections are tight and secure. This will ensure a proper water supply to the diverter.
Note: If your shower diverter requires specific instructions for connecting to the water supply, refer to the manufacturer’s guidelines.
Securing and sealing the diverter in place
Once the diverter is connected to the water supply, it’s essential to secure it in place. Use screws or brackets (as recommended by the manufacturer) to fasten the diverter to the shower wall.
| Step | Action |
|---|---|
| 1 | Position the diverter |
| 2 | Attach the diverter to the water supply |
| 3 | Connect the diverter to the water supply valve |
| 4 | Secure the diverter in place |
| 5 | Seal the connections |
Ensure that the diverter is tightly secured to prevent any movement during use. This will help maintain a consistent water flow and prevent any potential leaks.
Finally, seal the connections and edges of the diverter to prevent any water leakage. Use a waterproof sealing compound or silicone caulk to create a watertight seal.
By following these steps, you can successfully install a new shower diverter, saving you time and money on professional assistance.
Testing And Troubleshooting The Installation
Once you have successfully installed your shower diverter, it is important to test and troubleshoot the installation to ensure that everything is in working order. This step is crucial to ensure that your shower diverter is functioning as intended and to avoid any potential problems in the future. In this section, we will discuss how to turn on the water supply and check for leaks, troubleshoot common issues that may arise during the testing phase, and the proper way to adjust the shower diverter for optimal use.
Turning on the water supply and checking for leaks
Before you can start testing the installation of your shower diverter, it is important to turn on the water supply. To do this, locate the main water shut-off valve in your home and ensure that it is fully open. This will allow water to flow through the pipes and into your shower diverter.
Once the water supply is turned on, it’s time to check for leaks. Start by visually inspecting the connections between the shower diverter and the water pipes. Look for any signs of water leakage, such as dripping or puddles around the connections. If you spot a leak, tighten the connections using a wrench or call a professional plumber for assistance.
Troubleshooting common issues during the testing phase
During the testing phase, you may encounter some common issues with your shower diverter. Here are a few troubleshooting tips to help you resolve these issues:
- Water flow issues: If you notice that the water pressure is low or uneven when using the shower diverter, remove the diverter cartridge and clean any debris that may be obstructing the water flow. Reinstall the cartridge and test the water flow again.
- Water temperature issues: If the water temperature is too hot or too cold when using the shower diverter, check the temperature control valve or the hot/cold water supply valves. Adjust these valves as needed to achieve the desired water temperature.
- Improper sealing: If you find that the shower diverter is not sealing properly, causing water to leak or spray when using the shower, inspect the rubber gaskets or O-rings for any signs of damage or wear. Replace these seals if necessary to ensure a proper seal.
- Strange noises: If you hear unusual noises, such as banging or vibrating sounds, when using the shower diverter, it may be due to water hammer. Water hammer occurs when the flow of water is abruptly stopped or redirected, causing pipes to shake or vibrate. Install water hammer arrestors to alleviate this issue.
Properly adjusting the shower diverter for optimal use
Once you have tested and resolved any issues with your shower diverter, it’s time to adjust it for optimal use. Proper adjustment will ensure that the water is effectively redirected between the showerhead and other water outlets, such as a tub faucet or hand shower. Follow these steps to properly adjust your shower diverter:
- Identify the different water outlets that your shower diverter controls, such as the showerhead and tub faucet. Turn on the water supply and test each outlet individually to ensure that the water is being directed properly.
- If the water is not flowing as desired, adjust the shower diverter handle or knob to divert more or less water to the desired outlet. Take note of how the handle or knob moves and functions to ensure that you can easily adjust it in the future.
- Continue making small adjustments until the water flow is diverted exactly how you want it. This may take some trial and error, but with patience and persistence, you will find the optimal settings for your shower diverter.
By following these testing and troubleshooting steps and properly adjusting your shower diverter, you can ensure that it functions flawlessly for an enjoyable showering experience. Remember to periodically inspect and maintain your shower diverter to address any potential issues before they become major problems.
Regular Cleaning And Upkeep
Regular cleaning and upkeep are essential for maintaining the smooth operation of your shower diverter. Over time, dirt, soap scum, and mineral deposits can build up, causing the diverter to become clogged or leading to leaks. By following these simple tips and regularly cleaning your shower diverter, you can ensure it works efficiently for years to come.
Importance of keeping the diverter clean
Keeping your shower diverter clean is crucial for its proper functioning. The diverter is responsible for controlling the flow of water between your showerhead and the bathtub faucet or hand-held shower. If it becomes clogged or dirty, it can affect the water pressure and impede the switch between different water outlets.
Regular cleaning also helps prevent the accumulation of mineral deposits caused by hard water. These deposits can block the water flow and reduce the effectiveness of the diverter. Moreover, a clean diverter ensures the water is directed to the desired outlet, allowing you to enjoy a refreshing shower experience.
Tips for maintaining a smooth operation
Maintaining a smooth operation of your shower diverter is easy with these helpful tips:
- Inspect and clean the diverter regularly: Check the diverter for any visible signs of dirt, grime, or mineral buildup. If you notice any, use a mild cleaning solution or white vinegar diluted with water to remove them. Wipe the diverter with a soft cloth or sponge, ensuring all the crevices are thoroughly cleaned. This simple maintenance routine will help keep your diverter in top condition.
- Use a toothbrush for hard-to-reach areas: Some parts of the diverter, such as the spout or the valve, may be difficult to clean with a cloth or sponge alone. In such cases, use a soft toothbrush to reach into those tight spaces and remove any stubborn deposits.
- Check for leaks: Regularly inspect the diverter for any leaks or drips. A leaking diverter can lead to water wastage and potential damage to your bathroom. If you notice any leaks, it’s important to address them promptly by replacing any worn-out parts or calling a professional plumber for assistance.
- Apply a protective coating: Consider applying a protective coating to your shower diverter to prevent future mineral buildup. This can be done using a water- or mineral-resistant sealant. Follow the manufacturer’s instructions and apply the coating evenly to the surface of the diverter for long-lasting protection.
By following these maintenance tips and regularly cleaning your shower diverter, you can ensure a smooth operation and extend the lifespan of your diverter. Keeping it clean and well-maintained will allow you to enjoy a rejuvenating shower experience every time.
Troubleshooting Common Problems
Installing a shower diverter can sometimes come with its fair share of headaches. However, with a little know-how and some troubleshooting skills, you can easily address common issues that may arise during the process.
Identifying and Resolving Issues with the Shower Diverter
The shower diverter is responsible for controlling the flow of water between the showerhead and the tub faucet. If you encounter problems with your diverter, it’s essential to identify and resolve them promptly to ensure optimal performance.
Here are a few common issues you may encounter with your shower diverter:
| Problem | Cause | Solution |
|---|---|---|
| Leaking Diverter | Worn out or damaged seals | Replace the worn-out seals with new ones. Make sure to turn off the water supply before disassembling the diverter. |
| Stiff or Difficult Diverter | Mineral deposits or debris buildup | Remove the diverter and clean it thoroughly using a vinegar solution. Scrub away any buildup or deposits. |
| Poor Water Flow | Clogged diverter or waterline | Disassemble the diverter and check for any clogs. Use a small brush or toothpick to remove any debris that may be blocking the flow of water. Additionally, check the waterline for clogs or restrictions. |
Steps to Take When Encountering Leaks or Poor Water Flow
It’s essential to address leaks or poor water flow immediately to prevent further damage and to ensure a satisfying shower experience. Before proceeding with any troubleshooting steps, be sure to turn off the water supply to avoid any accidents.
For Leaking Diverter:
- Start by unscrewing the diverter handle or trim plate, depending on your specific setup.
- Inspect the seals for any signs of wear or damage. If necessary, replace the seals with new ones.
- Tighten any loose connections and ensure everything is properly aligned.
- Once you have resolved the issue, reassemble the diverter and turn on the water supply to test for leaks.
For Poor Water Flow:
- Remove the diverter handle or trim plate to access the diverter assembly.
- Inspect the diverter for any clogs or debris. Clean the diverter thoroughly to remove any buildup using a vinegar solution or a suitable cleaning agent.
- Examine the waterline for any blockages or restrictions. Use a small brush or toothpick to remove any obstructions.
- Reassemble the diverter and turn on the water supply to check if the water flow has improved.
By following these troubleshooting steps, you can effectively address common problems with your shower diverter and restore proper functionality. Remember to take caution and seek professional help if you encounter any complex issues that you are unsure how to fix.
Upgrade Options And Considerations
When it comes to enhancing your shower experience, upgrading your shower diverter can make a significant difference. Whether you are looking to replace an old diverter or simply want to explore advanced features, there are several factors to consider before making your decision. In this section, we will explore some of the upgrade options available and highlight key considerations to ensure that you choose the best shower diverter for your needs.
Exploring advanced shower diverter features
If you are looking to take your shower to the next level, exploring advanced shower diverter features is a great option. These innovative features can transform your daily routine into a spa-like experience. Here are some of the advanced features you may want to consider:
- Multiple water outlets: With this feature, you can switch between different water outlets such as a rain shower head, handheld showerhead, or body jets. This allows you to customize your shower experience based on your preferences.
- Thermostatic temperature control: This feature ensures that your shower water stays at a consistent temperature, eliminating sudden temperature changes. You can set your desired temperature and enjoy a comfortable and safe shower every time.
- Digital controls: Some shower diverters come with digital controls that allow you to adjust water pressure, temperature, and even set personalized shower presets. These intuitive controls make it easy to create your perfect shower setting with just a touch of a button.
- LED lighting: Adding LED lights to your shower can create a soothing ambiance and enhance your shower experience. Some diverters offer built-in LED lights that change color based on water temperature, adding a touch of luxury to your daily routine.
Factors to consider when upgrading your shower diverter
Before choosing a shower diverter upgrade, it’s essential to consider specific factors to ensure that it meets all your requirements. Here are some factors you should keep in mind:
- Budget: Set a budget for your shower diverter upgrade. Determine how much you are willing to invest in your shower experience and look for options that fit within your budget.
- Bathroom space: Consider the size and layout of your bathroom. Some advanced shower diverters may require additional space for installation, so make sure you have enough room to accommodate the diverter.
- Compatibility: Check the compatibility of the shower diverter with your existing plumbing system. Ensure that the new diverter is compatible with your shower fixtures to avoid any compatibility issues during installation.
- Installation process: Evaluate the installation process of the shower diverter. If you are not familiar with plumbing work, it might be best to hire a professional to ensure a proper and secure installation.
- Maintenance and cleaning: Consider the maintenance requirements of the shower diverter. Look for options that are easy to clean and maintain, as it will ensure the longevity and efficiency of your diverter.
By considering these factors and exploring advanced features, you can make an informed decision when upgrading your shower diverter. Remember to choose a diverter that fits your needs, enhances your shower experience, and provides long-lasting satisfaction.
Frequently Asked Questions
How Do You Replace A Shower Diverter?
To replace a shower diverter, turn off the water supply and remove the handle and trim plate. Unscrew the diverter and replace it with a new one, making sure it’s secure and aligned correctly. Then, reassemble the handle and trim plate and turn the water supply back on.
Where Do You Mount A Shower Diverter?
The shower diverter is typically mounted on the wall of the shower. It is usually located at a convenient height, within easy reach for adjusting the water flow between the showerhead and other water outlets.
Do You Need To Turn Off Water To Replace Shower Diverter?
Yes, you need to turn off the water to replace the shower diverter.
How Do You Install A Tub Diverter?
To install a tub diverter, follow these steps: 1. Turn off the water supply to the tub. 2. Remove the old spout by unscrewing it. 3. Apply plumber’s tape to the threads of the new diverter spout. 4. Screw the new spout onto the pipe, hand-tightening it.
5. Turn on the water supply and test the diverter by pulling up on the spout.
Conclusion
Installing a shower diverter is a simple yet important task that can greatly enhance your shower experience. By following the step-by-step guide provided in this blog post, you can easily replace or install a new shower diverter with ease. Remember to gather all the necessary tools and materials and take your time to ensure a proper and secure installation.
Enjoy the convenience and functionality of your newly installed shower diverter!