To install a shower arm, begin by turning off the water supply. Next, unscrew the existing shower arm from the wall and clean the threads.
Then, apply thread seal tape to the new shower arm and screw it into the wall. Tighten it firmly using a wrench, making sure it is straight. Turn on the water supply to check for leaks.
Preparing The Necessary Tools And Materials
When it comes to installing a shower arm, it is important to have the right tools and materials on hand. Without the proper equipment, the installation process can become difficult and time-consuming. To ensure a smooth and successful installation, here is a list of tools and materials that you will need:
Tools:
- Adjustable wrench
- Plumber’s tape
- Hacksaw
- Screwdriver
- Thread sealant
- Teflon tape
- Pipe cutter
- Drill
- Level
- Tape measure
Materials:
- Shower arm
- Showerhead
- Mounting bracket
- Anchors
- Screws
- Pipe fittings
- Pipe dope
Having these tools and materials ready before you start the installation process can save you both time and frustration. It is important to note that the specific tools and materials required may vary depending on the type of shower arm you are installing and the existing plumbing setup in your bathroom.
Before you begin, it is also a good idea to check the installation instructions provided by the manufacturer of your shower arm. These instructions may include additional tools or materials that are recommended or required for the installation.

Turning Off The Water Supply
Shutting off the Water Valve
Before you can start installing a shower arm, it is crucial to turn off the water supply. This ensures that you won’t have water flowing while working on the installation, minimizing the risk of water damage and accidents. Follow these steps to shut off the water valve:
- Locate the main water valve in your home. This is typically found near the water meter or where the main water line enters your property.
- Turn the valve clockwise until it is fully closed. This will stop the flow of water to the entire house.
Draining Remaining Water
Even after shutting off the water valve, there may still be some water left in the pipes. Draining this remaining water is an important step to ensure a smooth installation process. Here’s how you can do it:
- Open the highest faucet in your home, such as a bathroom sink or tub, to allow air into the plumbing system.
- Open the lowest faucet in your home, such as a basement sink or outdoor spigot, to let the water drain out.
- Wait for a few minutes until the water stops flowing completely.
- Once the water has fully drained, you can proceed to install the shower arm without any water interference.
Remember, turning off the water supply and draining the remaining water are vital steps to take before installing a shower arm. By following these precautions, you can ensure a smooth and successful installation process without the risk of water damage or accidents.
Detaching The Shower Head
Unscrewing the Shower Head
Detaching the shower head is an essential first step in the process of installing a shower arm. To successfully remove the shower head, follow these simple steps:
1. Turn off the water supply: Begin by turning off the water supply to prevent any excess water from spraying out once you start working on the shower head. Locate the shut-off valve and firmly close it to stop the flow of water.
2. Inspect the shower head: Before unscrewing the shower head, take a moment to inspect it for any signs of damage or wear. If you notice any issues, such as leaks or cracks, it might be best to consider replacing the shower head altogether.
3. Protect the shower head: To ensure that you don’t accidentally scratch or damage the shower head while unscrewing it, use a soft cloth or a wrench with a rubber coating. This will provide a protective barrier and help maintain the quality of your shower head.
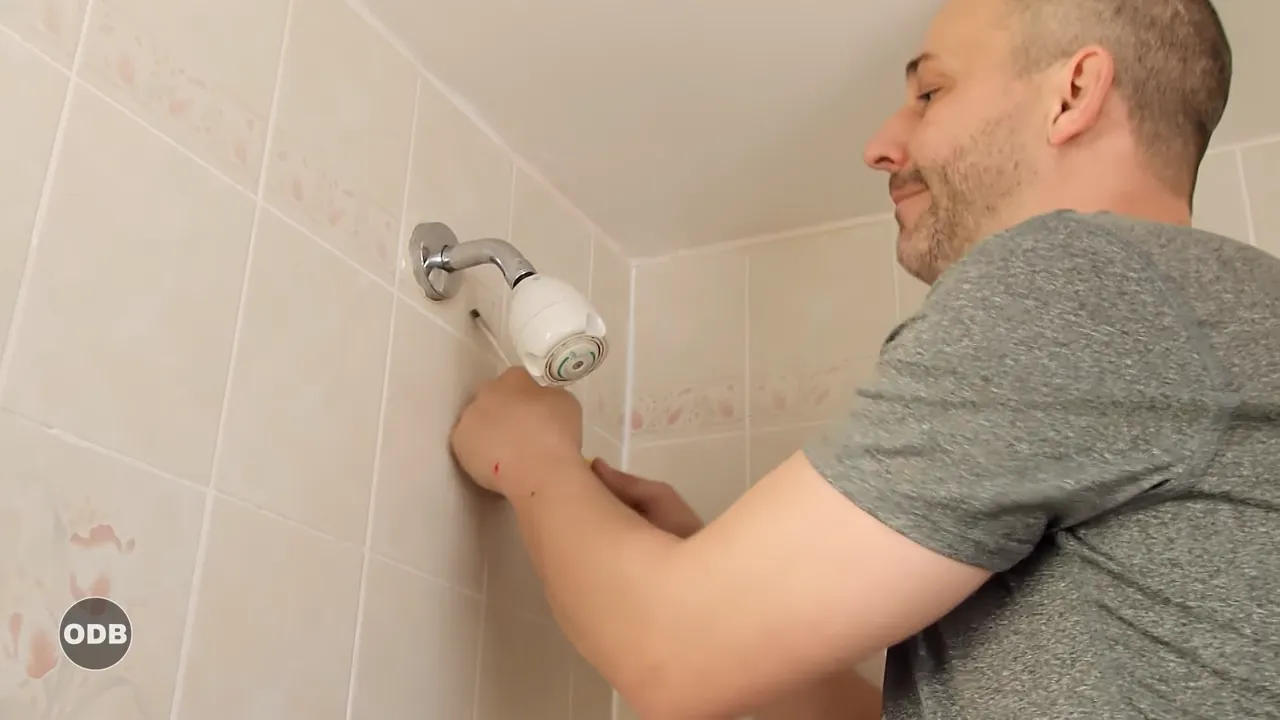
4. Gently unscrew the shower head: With a firm grip, start unscrewing the shower head in a counterclockwise direction. Apply steady pressure while turning until the shower head becomes loose enough for you to remove it by hand.
5. Clean the threading: Once you have detached the shower head, take a moment to inspect the threading on both the shower head and the shower arm. If there is any dirt or debris present, clean it off using a soft brush or cloth. This will ensure a smooth installation of the new shower arm.
By following these steps and unscrewing the shower head carefully, you will be ready to move on to the next step in installing your shower arm. Remember, taking the time to detach the shower head properly will not only make the installation process easier but also help maintain the longevity and functionality of your shower system.
Removing The Old Shower Arm
Removing the old shower arm is an essential step when installing a new shower arm. With the right tools and techniques, this process can be accomplished smoothly. In this section, we will guide you through the steps to remove the old shower arm, ensuring a seamless transition to the new one.
Using a Pipe Wrench to Loosen the Shower Arm
To begin, you will need a pipe wrench, which is a valuable tool for loosening and tightening pipes. Follow these steps:
1. Start by wrapping a thick cloth around the shower arm to protect its surface from scratches and damage.
2. Position the pipe wrench around the shower arm, ensuring a firm grip.
3. Use the leverage provided by the pipe wrench to turn it counterclockwise, exerting steady pressure.
4. As you apply pressure, you will feel the shower arm loosening. Continue twisting until it is completely loose.
5. Once loosened, remove the pipe wrench and set it aside.
Removing the Shower Arm from the Wall
The shower arm is connected to the wall through a threaded connection. By following these steps, you can safely remove the shower arm from the wall:
1. With the shower arm now loosened, gently twist it counterclockwise by hand. If it does not easily come off, reapply the cloth and use the pipe wrench for additional leverage.
2. Slowly unscrew the shower arm until it is completely detached from the wall.
3. Once removed, inspect the wall for any remnants of old sealant or threads. Cleaning this area thoroughly will ensure a proper fit for the new shower arm.
4. Dispose of the old shower arm responsibly.
It is worth noting that some older shower arms may require additional steps or tools for removal. If you encounter challenges or are uncertain about the process, it is recommended to consult a professional plumber.
By carefully following these steps and utilizing the necessary tools, you can effectively remove the old shower arm, making way for the installation of your new one. In the next section, we will discuss how to install a new shower arm, ensuring a secure and leak-free connection. Stay tuned!
Selecting The Right Shower Arm
Choosing the Proper Length and Style
When it comes to selecting the right shower arm, there are a few factors to consider. One of the most crucial aspects is choosing the proper length and style that suits your needs and preferences.
The length of the shower arm generally depends on the height of the individuals using the shower. If you have a tall family member or prefer a rainfall shower experience, a longer shower arm might be the ideal choice. On the other hand, if you have a small bathroom or prefer a more compact look, a shorter shower arm may be more suitable.
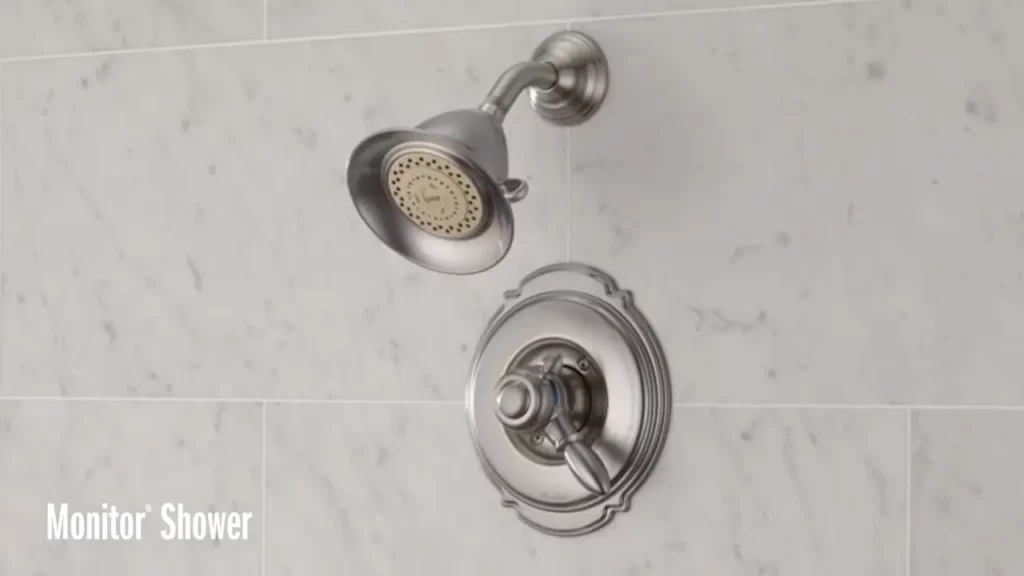
When selecting the style of the shower arm, you’ll want to think about the aesthetic of your bathroom and the type of showerhead you plan to install. There are various styles available, such as straight, curved, adjustable, and ceiling-mounted. Each style offers a different look and functionality, so it’s important to choose one that complements your overall bathroom design.
In addition to length and style, it’s also worth considering the material of the shower arm. Common options include chrome, stainless steel, brass, and brushed nickel. Each material has its own advantages in terms of durability, resistance to corrosion, and overall aesthetics. Take into account the other fixtures and hardware in your bathroom to ensure a cohesive look.
Installation and Maintenance Tips
Once you’ve chosen the right shower arm, installing it is a relatively straightforward process. Follow these steps:
- Start by turning off the main water supply to your shower.
- Use a wrench to unscrew the existing shower arm from the wall pipe.
- Apply plumber’s tape to the threads of the new shower arm to ensure a watertight seal.
- Screw the new shower arm into the wall pipe and tighten it securely.
- Double-check the alignment and make any necessary adjustments.
- Turn the water supply back on and test the shower for any leaks.
Regular maintenance of your shower arm is essential to ensure its longevity and performance. To keep it clean, use a mild soap or vinegar solution to remove any mineral buildup or soap scum. Avoid harsh chemicals or abrasive cleaning tools that could damage the finish. Inspect the shower arm periodically for any signs of leakage or corrosion, and address any issues promptly to prevent further damage.
By selecting the proper length and style of shower arm and following the installation and maintenance tips, you can enjoy a refreshing and functional shower experience for years to come.
Applying Plumbing Tape
Once you have chosen the perfect shower arm for your bathroom, it’s time to start the installation process. One important step in this process is applying plumbing tape. Plumbing tape, also known as thread seal tape or Teflon tape, is a thin white tape that is used to create a watertight seal between threaded connections. This tape is essential to prevent leaks and ensure a secure and efficient connection between the shower arm and the plumbing system. In this section, we’ll cover the steps involved in wrapping plumbing tape around the threaded end of the shower arm to achieve a reliable seal.
Wrapping Plumbing Tape Around the Threaded End of the Shower Arm
Before you begin wrapping the plumbing tape, it’s important to make sure that the threaded end of the shower arm is clean and free of any debris or old tape. A clean surface will allow the tape to adhere properly and create a tight seal.
- Start by holding the shower arm in one hand and the roll of plumbing tape in the other.
- Unroll a length of plumbing tape, typically around 6-8 inches, from the roll.
- Hold the end of the plumbing tape against the threaded end of the shower arm, ensuring that it covers the entire length of the threads.
- Begin wrapping the tape around the threads in a clockwise direction. Make sure to apply moderate pressure as you wrap to ensure a secure seal.
- Continue wrapping the tape until you reach the end of the threads, making sure to overlap the previous layer slightly as you go.
- Tear or cut the tape to separate it from the roll once you have completely wrapped the threads.
- Press down firmly with your fingers to ensure that the tape adheres to the threads and forms a tight seal.
Remember, it’s important not to over-tighten the shower arm during installation, as this can damage the plumbing system. Once you have applied the plumbing tape correctly, you are ready to move on to the next step in the installation process, which is attaching the shower arm to the plumbing system.
By following these simple steps for applying plumbing tape, you can ensure a secure and leak-free connection for your shower arm. Take your time and be thorough during this process to maximize the effectiveness of the plumbing tape.
Attaching The New Shower Arm To The Wall
Properly attaching the new shower arm to the wall is crucial for a functional and leak-free shower installation. In this section, we will guide you through the steps of inserting the shower arm into the wall and tightening it with a pipe wrench.
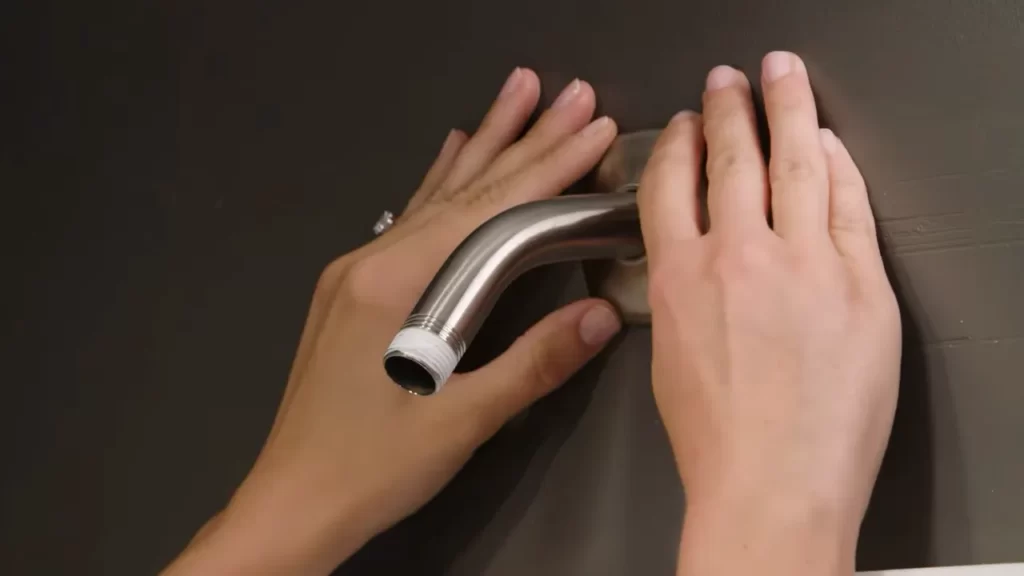
Inserting the Shower Arm into the Wall
Before inserting the shower arm into the wall, make sure you have the necessary tools handy, including a tape measure, a pencil, and pipe sealant tape. Following these steps will ensure a secure and solid attachment:
- Measure and mark the desired height for the new shower arm on the wall.
- Using a pencil, make a vertical line at the marked height to guide the insertion of the shower arm.
- Apply a few wraps of pipe sealant tape onto the threaded end of the shower arm. This will help create a watertight seal.
- Gently insert the threaded end of the shower arm into the wall, following the marked vertical line. Apply firm yet careful pressure until the shower arm is fully inserted.
- Optional: Use a level to ensure the shower arm is perfectly straight. Adjust if necessary.
Tightening the Shower Arm with a Pipe Wrench
Once the shower arm is inserted into the wall, you’ll need to tighten it securely using a pipe wrench. Follow these instructions to achieve a tight and secure connection:
- Wrap the threaded connection of the shower arm with a rag or a thin towel to protect the finish from scratches.
- Place the pipe wrench on the exposed end of the shower arm, ensuring a firm grip.
- Apply steady and controlled pressure in a clockwise direction to tighten the shower arm. Be cautious not to overtighten, as this could damage the plumbing connections.
- Check for any leaks by turning on the water supply temporarily. If you notice any leaks, use the pipe wrench to tighten the shower arm further until the leaks stop.
- Once the shower arm is securely attached and there are no leaks, wipe off any excess pipe sealant tape with a clean cloth.
By following these steps, you can successfully attach a new shower arm to the wall. Remember to use the appropriate tools and take your time to ensure a proper installation. Now that you have completed this crucial step, you are one step closer to enjoying a refreshing and functional shower!
Applying Plumbing Tape To The Shower Head
Wrapping Plumbing Tape Around the Threaded End of the Shower Head
Applying plumbing tape is an essential step to ensure a leak-free installation of your shower arm. The plumbing tape, also known as Teflon tape or thread seal tape, helps to create a tight seal between the shower head and the shower arm. Follow these steps to correctly apply plumbing tape to the threaded end of the shower head:
- Make sure the threaded end of the shower head is clean and free from any debris.
- Take the roll of plumbing tape and unwind a small portion of it, roughly about six inches or so.
- Hold the loose end of the plumbing tape against the threads of the shower head, making sure it is positioned at the base of the threads.
- Begin wrapping the plumbing tape around the threaded end of the shower head in a clockwise direction, applying slight tension as you go. Make sure the tape covers the entire threaded portion, overlapping each layer slightly.
- Continue wrapping the tape around the threads until you have completely covered them with at least three to four layers of tape.
- Once you have wrapped the threads, tear or cut the plumbing tape, ensuring a clean edge.
- Press the end of the tape firmly against the threads to secure it in place.
By properly wrapping plumbing tape around the threaded end of the shower head, you create a watertight seal that prevents any potential leaks. This simple yet crucial step ensures a successful installation of your shower arm. Remember, a few extra minutes of applying plumbing tape can save you from future headaches of dealing with water leakage.
Attaching The Shower Head To The New Shower Arm
Once you have successfully installed the shower arm, it’s time to attach the shower head to it. This is a crucial step as it ensures that water flows effectively and provides a satisfying shower experience. Follow the steps below to screw the shower head onto the shower arm:
Screw the Shower Head onto the Shower Arm
To attach the shower head, you’ll need to locate the threading on both the shower arm and the shower head. Most shower heads have a female threading, while the shower arm usually has a male threading. Make sure the threading on the shower head matches the threading on the shower arm.
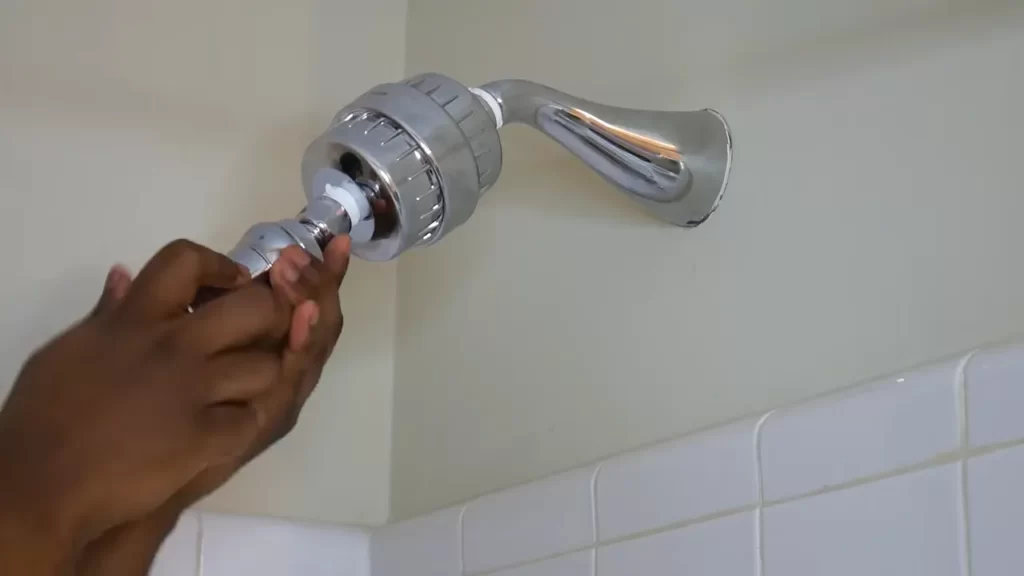
Start by holding the shower head with one hand and the shower arm with the other. Align the threading on both ends, ensuring they fit together properly.
Tighten the Shower Head
Using your hands, start screwing the shower head onto the shower arm in a clockwise direction. Be careful not to cross-thread, as this can cause leaking or damage to the threads.
Once the shower head is hand-tightened, grab an adjustable wrench or pliers to give it an additional quarter-turn. This will provide a secure and tight fit, preventing any water leakage.
Test for Leaks
After securing the shower head, turn on the water supply to check for any leaks. If you notice any drips or water escaping from the connection, use the adjustable wrench or pliers to tighten the shower head further until the leak stops. Be cautious not to overtighten, as this can damage the shower head or shower arm.
By following these simple steps, you can easily attach the shower head to your new shower arm. Once completed, you’re all set to enjoy a refreshing and invigorating shower experience.
Turning On The Water Supply
Slowly Turning on the Water Valve
After successfully attaching the shower arm, the next step is to turn on the water supply. It is crucial to proceed with caution to avoid any possible leaks or damage. Slowly turning on the water valve ensures a smooth and controlled flow of water. Here’s how to do it:
- Locate the main water valve in your bathroom. This valve is typically found near the shower or bathtub area.
- Once you’ve located the valve, make sure it is in the closed position. This prevents any water from flowing through the pipes while you work on the installation.
- Carefully turn the water valve counterclockwise to gradually open it. Remember to take it slow to avoid any sudden pressure changes that could lead to leaks or pipe damage.
- Observe the shower arm and connections for any signs of leaks as you gradually open the valve. If you notice any leaks, stop immediately and tighten the connections using an adjustable wrench or pliers. It’s better to address any leaks now rather than after the shower arm is fully installed.
- Once the water valve is fully open, check for any additional leaks or drips. Pay close attention to the fittings and connections to ensure a watertight installation.
Congratulations! You’ve successfully turned on the water supply for your newly installed shower arm. Now you can proceed to test the water flow and enjoy a refreshing shower experience.
Checking For Leaks
Checking for leaks is an important step in the process of installing a shower arm. By ensuring that there are no leaks, you can prevent water damage to your walls and ceilings, as well as conserve water. In this section, we will discuss how to inspect the connection points for any leaks, and what to do if leaks are found.
Inspecting the Connection Points
Once you have installed the shower arm, it is crucial to check for any leakage. Start by examining the connection points between the shower arm and the wall pipe, as well as the shower head and the shower arm. These are the areas where leaks are most likely to occur.
Here is a step-by-step guide on how to inspect the connection points:
- Run water through the shower head and observe the areas around the connection points.
- Check for any signs of water dripping or pooling.
- Feel around the connection points for any moisture.
- If the area feels damp or wet, it is an indication of a leak.
It is important to be thorough during this inspection, as even a small leak can lead to bigger problems if left unaddressed.
Fixing any Leaks if Found
If you discover any leaks during the inspection, it is crucial to fix them promptly to prevent further damage. Here are some steps to follow:
- Turn off the water supply to the shower.
- Using an adjustable wrench, gently tighten the connection points to ensure a secure fit. Be careful not to overtighten, as it can damage the threads.
- Inspect the rubber washer or O-ring inside the connection points. If it is damaged or worn out, replace it with a new one.
- Apply plumber’s tape to the threads of the connection points before reassembling them. The tape helps create a watertight seal.
- Turn on the water supply and check for any leaks. If the leaks persist, repeat the steps above or consider consulting a professional plumber.
By fixing any leaks promptly, you can ensure that your newly installed shower arm functions properly without any water wastage or potential damage to your bathroom. Take the time to inspect the connection points thoroughly and address any leaks immediately for a hassle-free showering experience.
Frequently Asked Questions
What Does Shower Arm Thread Into?
The shower arm threads into the shower wall or pipe, allowing the attachment of the shower head.
Do You Put Plumbers Tape On Shower Arm?
Yes, you should put plumber’s tape on the shower arm. It helps create a secure and watertight seal between the arm and the showerhead, preventing leaks and ensuring proper functioning.
Do Shower Arms Fit All Shower Heads?
Shower arms do not fit all shower heads. Compatibility depends on the shower arm’s size and connection type. Always check the specifications of both the shower arm and shower head before purchasing.
Do I Need To Turn Off Water To Replace Shower Arm?
Yes, you need to turn off the water before replacing the shower arm. This is to prevent any water leakage or damage while removing and installing the new arm. Ensure the water supply is shut off before proceeding with the replacement.
Conclusion
To sum up, installing a shower arm doesn’t have to be a daunting task. With the right tools and step-by-step guidance, anyone can successfully accomplish this DIY project. By following our instructions and ensuring the proper alignment and tightness, you’ll have a sturdy and functional shower arm in no time.
Soon, you can enjoy a relaxing, refreshing shower experience. Get started today and transform your bathroom into a luxurious oasis.