
To install a shower, first measure the space, purchase the necessary materials like a shower pan, shower valves, and tiles, and then follow the instructions for installation. Planning and proper measurement are essential for a successful shower installation.
Renovating your bathroom and installing a new shower can be a rewarding project that adds value to your home. Whether you want to replace an outdated shower or create a spa-like oasis, a proper installation is crucial for both functionality and aesthetics.
This guide will walk you through the process of installing a shower, from measuring the space and gathering the necessary materials to the actual installation. By following these steps, you can have a beautiful, functional shower in no time. So let’s get started!
Understanding The Shower Installation Process
Installing a shower may seem like a daunting task, but with the right knowledge and preparation, it can be a rewarding project to tackle. Understanding the shower installation process is essential to ensure a successful and efficient installation. In this section, we will take a closer look at the key steps involved in installing a shower, from preparing for the installation to shutting off the water supply.
Preparing for the Installation
Before diving into the installation process, it is crucial to prepare the area where the shower will be installed. Start by removing any existing fixtures or fittings that may be in the way. This includes removing old tiles, shower doors, and any other obstructions. Clearing the area will provide a clean slate to work with and ensure a seamless installation.
Additionally, it is essential to inspect the plumbing and ensure it is in good condition before proceeding. Look for any signs of leaks or damage and address them promptly. This step will help prevent any issues down the line and ensure that the shower installation goes smoothly.
Gathering the Necessary Tools and Materials
Once the preparation is complete, gather all the necessary tools and materials for the installation. Having everything ready beforehand will save time and ensure a seamless workflow. Here is a list of the essential tools and materials you will need:
| Tools | Materials |
|---|---|
| Screwdriver | Shower pan |
| Adjustable wrench | Tile adhesive |
| Measuring tape | Grout |
| Plumber’s putty | Shower valve |
| Pipe cutter | Showerhead |
Make sure you have all the required tools and materials on hand before starting the installation. This will help streamline the process and avoid delays.
Shutting Off the Water Supply
Before beginning any work on the shower installation, it is crucial to shut off the water supply to avoid any mishaps. Locate the main water shut-off valve, usually found near the water meter or where the main water line enters your home. Turn the valve clockwise to shut off the water supply.
Once the water supply is shut off, open a faucet to drain any remaining water in the lines. This step is vital to prevent any water pressure during the installation process, which could lead to leaks or spills. Take your time to ensure the water supply is completely turned off before proceeding.
Understanding the shower installation process is essential for a successful and hassle-free installation. By following the proper steps, from preparing the installation area to shutting off the water supply, you can ensure that your shower installation goes smoothly and efficiently.

Removing The Existing Shower
Before you can install a new shower, you will need to remove the existing one. This process involves several steps, including taking out the shower enclosure, disconnecting the plumbing, and removing the shower base. In this post, we will guide you through each of these steps, ensuring a smooth and trouble-free shower removal process.
Removing the Shower Enclosure
The first step in removing the existing shower is to take out the shower enclosure. This typically consists of the shower walls and doors. Follow these steps to remove the shower enclosure:
- Start by removing any screws or nails securing the enclosure to the walls or floor. Use a screwdriver or hammer to carefully remove them.
- Once the hardware is removed, gently pry the enclosure away from the walls using a pry bar. Be cautious not to damage the walls or surrounding tiles.
- If the enclosure is caulked or sealed, use a utility knife to carefully cut through the caulk or sealant. This will loosen the enclosure and make it easier to remove.
- Finally, lift the enclosure out of place and set it aside. Be mindful of its weight and any sharp edges.
Disconnecting the Plumbing
After removing the shower enclosure, the next step is to disconnect the plumbing. This includes disconnecting the water supply lines and the drain. Follow these instructions to disconnect the plumbing:
- Start by turning off the water supply to the shower. Locate the shut-off valve, usually located near the shower or in the basement.
- Once the water is off, use a wrench to loosen and remove the connections between the water supply lines and the shower. Have a bucket or towel ready to catch any remaining water.
- Next, remove the drain cover from the shower floor. Using a wrench, unscrew the drain fittings to disconnect the drain from the plumbing system.
- Double-check to ensure all connections are completely disconnected before proceeding to the next step.
Removing the Shower Base
The final step in removing the existing shower is to take out the shower base. The shower base is the bottom part of the shower where you stand. Here’s how to remove it:
- Carefully inspect the shower base for any screws, nails, or adhesives securing it to the floor. Remove them using the appropriate tools.
- If the base is caulked or sealed, use a utility knife to cut through the caulk or sealant. This will help loosen the base and make it easier to lift.
- With the screws removed and caulk cut, lift the shower base out of place. It may require some force, so be prepared to exert some physical effort.
- Set the shower base aside or dispose of it properly, depending on its condition.
By following these steps, you can successfully remove the existing shower and prepare the space for a new one. Make sure to take your time and work carefully to avoid any damage or unnecessary complications. In the next section, we will discuss the process of installing a new shower in detail.
Installing The New Shower
When it comes to bathroom renovations, installing a new shower can be a game-changer. Not only does it enhance the overall appearance of your bathroom, but it also improves the functionality. However, installing a new shower may seem like a daunting task if you’re not familiar with the process. In this guide, we’ll walk you through the steps to effortlessly install a brand-new shower in your bathroom. Let’s get started with the first step!
Measuring and Marking the Layout
The first step in installing a new shower is to accurately measure and mark the layout. This step is crucial as it ensures that your shower enclosure and base are positioned correctly.
To measure and mark the layout, follow these simple steps:
- Start by measuring the dimensions of the shower enclosure. Use a measuring tape to measure the width, height, and depth of the enclosure.
- Next, use a pencil and a level to mark the layout on the walls. Start by marking the top edge of the shower enclosure. Then, mark the vertical lines on the walls to indicate the position of the enclosure.
- Use a stud finder to locate the wall studs. Mark the locations of the studs on the walls, as these will be essential for securely attaching the shower enclosure later on.
By ensuring precise measurements and markings, you’ll create a solid foundation for the rest of the installation process.
Assembling the Shower Enclosure
Once you have measured and marked the layout, it’s time to assemble the shower enclosure. This step may vary depending on the type of shower enclosure you have chosen, such as a framed or frameless enclosure.
Follow these general steps to assemble your shower enclosure:
- Take out all the components of the shower enclosure from their packaging and lay them out in the order of assembly.
- Follow the manufacturer’s instructions to assemble the enclosure. This may involve attaching the side panels, door, and any additional components.
- Ensure each component is properly aligned and securely fastened together. Use the necessary tools, such as a screwdriver or wrench, to tighten any screws or bolts.
Assembling the shower enclosure is a crucial step in the installation process, as it sets the stage for the final step: installing the shower base.
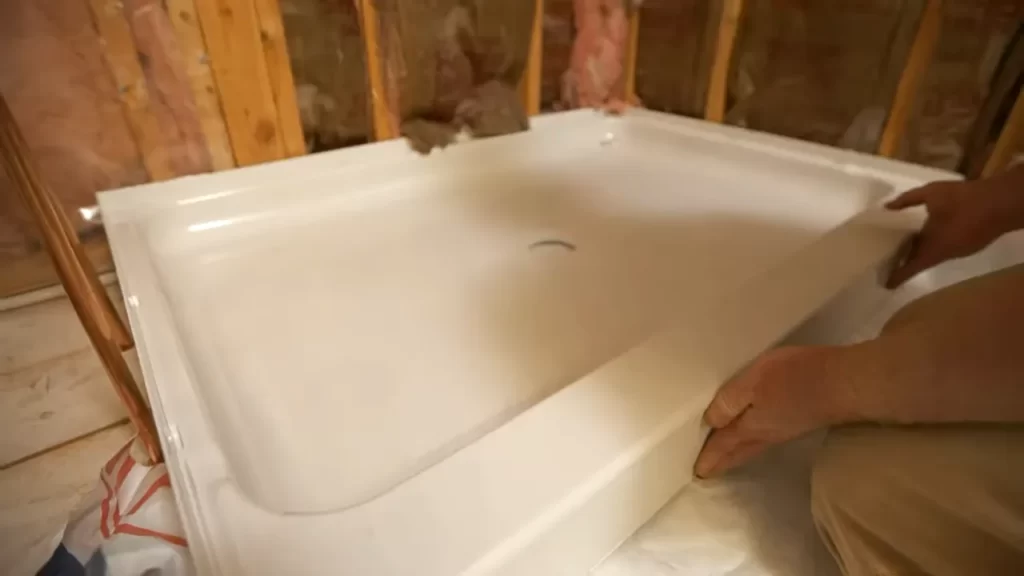
Installing the Shower Base
The final step in installing a new shower is to install the shower base. The shower base provides a solid and waterproof foundation for your shower, ensuring durability and preventing leaks.
Follow these steps to install the shower base:
- Place the shower base in the marked layout, aligning it with the walls and studs.
- Use a level to ensure that the shower base is perfectly level. Adjust the base if necessary.
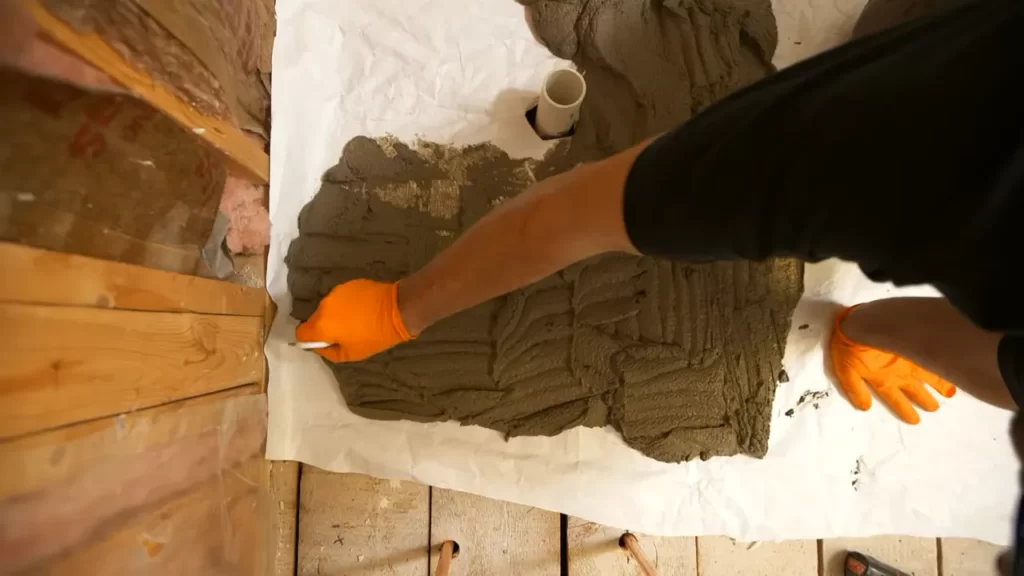
- Securely attach the shower base to the studs using screws or other recommended methods as specified by the manufacturer.
- Apply a waterproof sealant around the edges of the shower base to create a watertight seal.
By following these steps, you’ll successfully install a new shower and create a functional and stylish addition to your bathroom.
Connecting The Plumbing
Once you have successfully installed the shower base and walls, it’s time to connect the plumbing. This critical step ensures proper functionality and a leak-free shower experience. In this section, we will guide you through connecting the shower head and faucet, attaching the drain pipe, and testing for leaks.
Attaching the Shower Head and Faucet
Now that the shower walls are in place, it’s time to install the shower head and faucet. Follow these steps:
- Start by wrapping plumber’s tape around the shower arm threads to prevent leaks.
- Hand-tighten the shower head onto the shower arm, ensuring a snug fit.
- Next, attach the faucet handles and spout to the shower wall according to the manufacturer’s instructions. Use an adjustable wrench to secure them in place.
- Ensure all connections are tight and properly aligned.
By following these simple steps, you will have successfully attached the shower head and faucet.
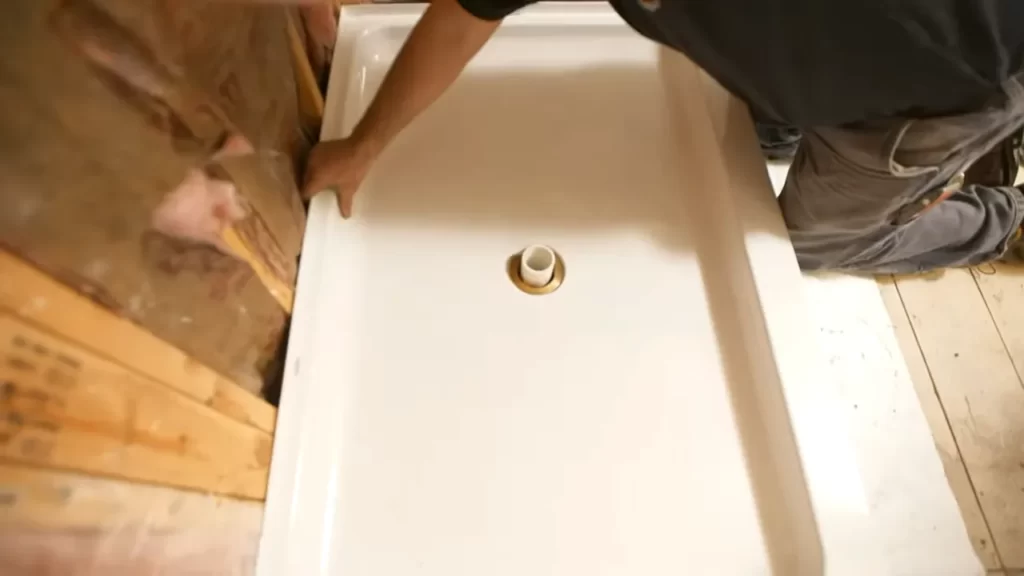
Connecting the Drain Pipe
The next step in connecting the plumbing for your shower is attaching the drain pipe. Here’s how to do it:
- Insert the drain flange into the drain hole in the shower base.
- Apply plumber’s putty or silicone caulk around the edge of the flange to create a watertight seal.
- Secure the flange in place by tightening the retaining nut underneath. Be careful not to overtighten.
- Connect the drain pipe to the flange by attaching the compression gasket and tightening the compression nut using pliers. Ensure a secure fit.
With these steps complete, the drain pipe for your shower is now connected.
Testing for Leaks
Before you can fully enjoy your new shower, it’s essential to test for any potential leaks. Follow these steps to ensure a watertight installation:
- Turn on the water supply to the shower.
- Inspect all connections, including the shower head, faucet handles, spout, and drain pipe.
- Look for any signs of leaking, such as drips or water pooling.
- If you notice any leaks, carefully tighten the corresponding connections until the leak stops.
It’s crucial to perform this leak test to avoid any water damage or unnecessary repairs in the future. Once you have confirmed that your shower is leak-free, you are ready to enjoy your newly installed shower.
Finishing Touches
Now that you have successfully installed your new shower, it’s time to focus on those final touches that will ensure a polished and professional look. Taking the time to properly seal and caulk the shower enclosure, as well as giving it a thorough cleaning, will not only enhance the aesthetics but also help to prevent water damage and leakage in the long run.
Sealing the Shower Enclosure
When it comes to sealing the shower enclosure, it is important to pay attention to the seams and joints to create a watertight barrier. Silicone caulk is the preferred choice for this task, as it is flexible, waterproof, and long-lasting. Before applying the caulk, make sure to clean the surfaces thoroughly to remove any dirt or debris that may hinder adhesion.
To start, run a caulk gun along the seams where the shower walls meet the floor and the shower door frame. Apply steady pressure and move the gun smoothly for an even bead of caulk. It is recommended to work in small sections at a time to ensure precise application. Once you have applied the caulk, use a caulk smoothing tool or a wet finger to smooth out the bead and remove any excess caulk.
Applying Caulk
After sealing the shower enclosure, it is time to focus on applying caulk to areas that require extra protection, such as around fixtures and soap dishes. This additional step will help prevent water from seeping into these vulnerable areas and causing damage over time. As with the previous step, be sure to clean the surfaces before applying the caulk.
Apply a thin and even line of caulk around fixtures, ensuring that you cover all gaps and joints. Use the caulk smoothing tool or a wet finger to smooth out the caulk and create a neat finish. Take care not to use excessive force while smoothing, as it may cause the caulk to dislodge. Let the caulk dry fully before using the shower to allow for proper curing.
Cleaning and Finalizing the Installation
With the sealing and caulking complete, it’s time to give your shower a final cleaning to remove any residue or smudges that may have accumulated during the installation process. Use a mild cleansing solution or a mixture of warm water and vinegar to gently clean the shower walls, floor, and fixtures. Avoid using abrasive cleaners or tools that may cause damage.
After cleaning, take a moment to inspect the shower installation for any gaps or imperfections that may need attention. Check for any loose screws or fittings and tighten them if necessary. Give the shower a final wipe-down and dry any residual moisture to prevent the growth of mold or mildew.
By following these finishing touches, you can ensure that your newly installed shower not only functions perfectly but also looks impeccable. Don’t rush through this step, as attention to detail will pay off in the long run by extending the life and beauty of your new shower enclosure.
Frequently Asked Questions
Can You Install A Shower By Yourself?
Yes, you can install a shower by yourself. However, it is important to have the proper knowledge and skills to ensure a successful installation. Take into account local codes and regulations and make sure you have the necessary tools and materials.
If you’re unsure, it’s best to hire a professional for help.
What Is Needed To Install A Shower?
To install a shower, you will need a shower pan or base, showerhead, faucet handles, plumbing pipes, waterproofing materials, and a drain. Additionally, you may need a shower valve, wallboard, tile or shower surround, and a shower curtain or door for enclosure.
What Is The Least Expensive Way To Install A Shower?
The least expensive way to install a shower is by opting for a prefabricated shower unit or a shower kit. These ready-to-install options come with all the necessary components, saving you time and money on plumbing and construction costs.
Is Installing A New Shower Easy?
Yes, installing a new shower can be easy. With the right tools and instructions, you can successfully complete the installation process without professional help.
Conclusion
Overall, installing a shower is a task that requires careful planning, proper tools, and attention to detail. By following the step-by-step instructions outlined in this blog post, you can successfully install a shower in your own bathroom. Remember to always prioritize safety and consult professionals when needed.
With the right approach and a little patience, you’ll soon be enjoying a refreshing and rejuvenating shower experience in your newly installed bathroom fixture. Happy shower installation!