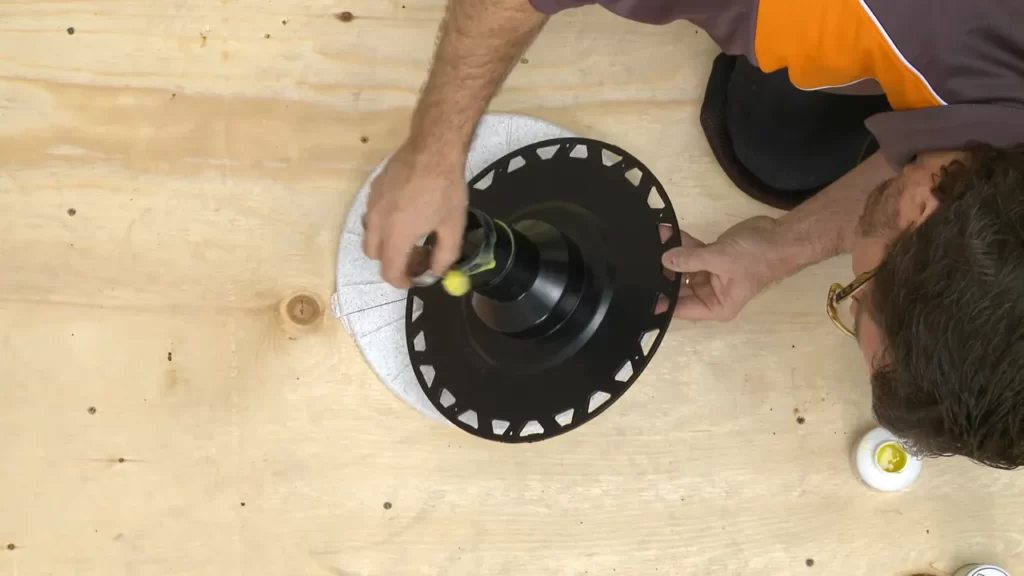
To install a Schluter shower system, start by preparing the shower surface, applying mortar, setting the drain assembly, waterproofing the walls, and finally installing the tile. Now let’s dive into the details of each step.
Building a shower that is durable, waterproof, and visually appealing can be a challenging task. However, by following the proper installation methods, you can achieve a professional-quality result. One popular solution for creating a long-lasting and leak-free shower is by using a Schluter shower system.
Schluter Systems offers a comprehensive range of products designed to simplify and enhance the installation process. In this guide, we will walk you through the step-by-step instructions on how to install a Schluter shower system, ensuring your project is a success.
Understanding Schluter Shower Systems
Understanding Schluter Shower Systems
A Schluter shower system is a comprehensive, reliable, and innovative solution designed to ensure a watertight and durable shower installation. With its cutting-edge technology and attention to detail, Schluter shower systems have become the gold standard for professionals in the tiling industry.
What is a Schluter shower system?
A Schluter shower system comprises various components that work together seamlessly to create a watertight and aesthetically pleasing shower enclosure. These components include a waterproofing membrane, drains, shower trays, and other accessories. Each element is expertly engineered to prevent water penetration and provide long-lasting performance.
Why choose a Schluter shower system?
When it comes to shower installations, it’s essential to choose a system that guarantees exceptional results. Here’s why Schluter shower systems are the go-to choice for professionals and homeowners alike:
1. Unmatched Waterproofing:
Schluter shower systems feature a high-performance waterproofing membrane specifically designed to prevent water from seeping through the walls or floor. This ensures that your shower remains leak-free, protecting your home from costly water damage and mold growth.
2. Versatile Design Options:
Schluter offers a wide range of design options, allowing you to create a shower that matches your unique style and preferences. Whether you prefer a traditional or modern look, Schluter has the perfect products and accessories to bring your vision to life.
3. Easy Installation:
Installing a Schluter shower system is straightforward and hassle-free, making it an ideal choice for both DIY enthusiasts and professionals. The system’s user-friendly components and detailed installation guides ensure that you can achieve professional-level results without the need for specialized training.
Advantages of using a Schluter shower system
Using a Schluter shower system offers numerous advantages that set it apart from traditional shower installation methods. Here are some key benefits:
1. Enhanced Durability:
The use of high-quality materials and advanced manufacturing techniques ensures that Schluter shower systems are built to last. This means you can enjoy a shower that remains in pristine condition even after years of use.
2. Leak-Free Performance:
With its waterproofing membrane and integrated drainage system, a Schluter shower system offers unparalleled protection against leaks. This gives you peace of mind and eliminates the need for frequent repairs or maintenance.
3. Time and Cost Savings:
By eliminating the risk of water damage and the need for extensive repairs, a Schluter shower system helps you save time and money in the long run. Additionally, its easy installation process reduces labor costs, making it a cost-effective choice compared to traditional methods.
In conclusion, if you’re looking for a shower installation that combines reliability, durability, and aesthetics, a Schluter shower system is the perfect choice. Its innovative design, easy installation process, and numerous advantages make it the go-to solution for professionals and homeowners seeking a high-performance shower enclosure. With a Schluter shower system, you can create a beautiful and lasting shower that will withstand the test of time.
Preparing For Installation
Before installing a Schluter shower system in your bathroom, it’s important to properly prepare the area. This includes gathering the necessary tools and materials, measuring and planning the installation, and ensuring the shower area is ready for the new system. Taking these steps will help ensure a successful and efficient installation process.
Gathering the necessary tools and materials
To get started, it’s essential to gather all the tools and materials you’ll need for the installation. This will help streamline the process and prevent unnecessary delays. Here is a list of the key tools and materials you’ll need:
| Tools | Materials |
|---|---|
|
|
Measuring and planning the installation
Accurate measurements and careful planning are crucial for a successful Schluter shower system installation. Start by measuring the dimensions of your shower area, including the length, width, and height. Use a level and pencil or marker to mark the areas where the Schluter profiles, waterproofing membrane, and tile will be installed.
Once you have precise measurements, consider the layout and design of your shower. Decide how you want the tiles to be arranged and determine the size and placement of any niches or benches. This will help you calculate the amount of tile and other materials needed.
Preparing the shower area for installation
Before installing the Schluter shower system, it’s essential to prepare the shower area properly. This ensures a clean and stable surface for the system to be installed on. Here are the steps:
- Remove any existing tile or flooring materials.
- Inspect the subfloor and make any necessary repairs or replacements.
- Clean the shower area thoroughly, removing any dirt, dust, or debris.
- Apply a layer of underlayment to create a smooth and level surface.
By following these steps, you’ll be well-prepared to install the Schluter shower system in your bathroom. Remember to refer to the manufacturer’s instructions for specific guidelines and recommendations during the installation process.
Installing The Schluter Shower System
Installing the Schluter Shower System
If you’re planning a bathroom renovation or building a new home, the Schluter Shower System offers an innovative and reliable solution for creating a fully waterproof and leak-free shower. It’s a comprehensive system that includes everything you need, from waterproofing membranes and shower trays to shower walls and tile installation accessories. In this guide, we’ll walk you through the step-by-step process of installing the Schluter Shower System, ensuring a successful and long-lasting result.
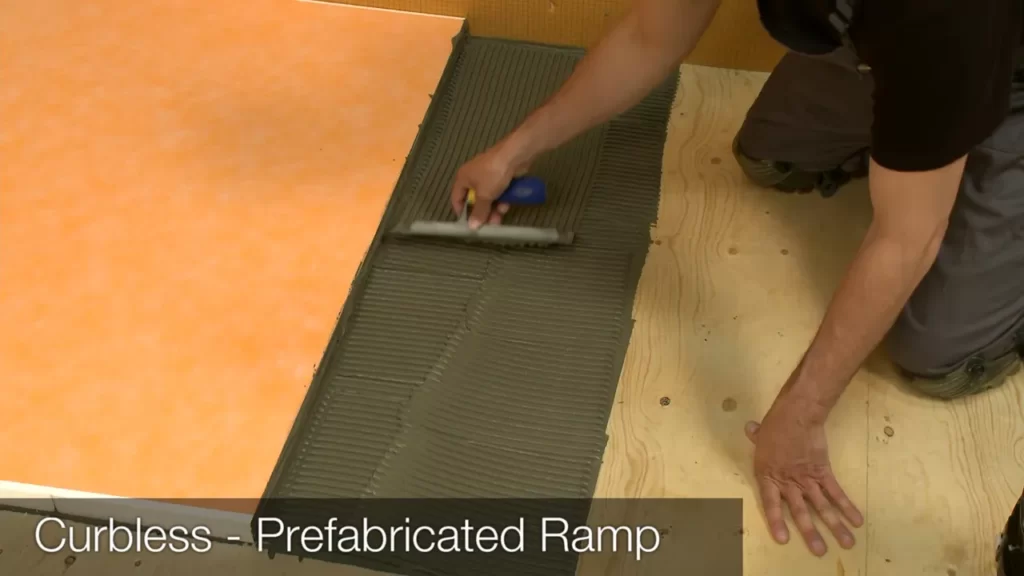
Applying the waterproofing membrane
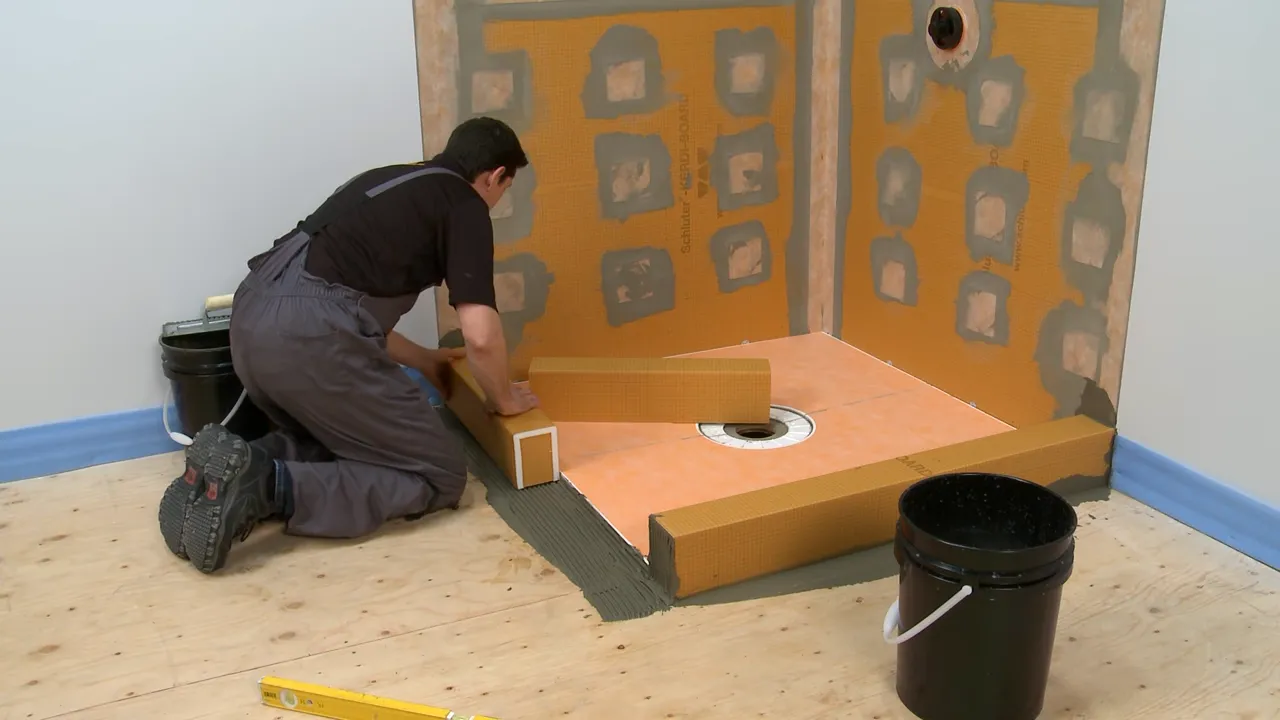
Before getting started with the installation, it’s important to prepare the substrate by thoroughly cleaning and removing any debris. This will ensure proper adhesion of the waterproofing membrane. Using a trowel or a roller, apply a layer of Schluter waterproofing membrane evenly on the shower floor and walls. Be sure to follow the manufacturer’s instructions for application techniques and drying times.
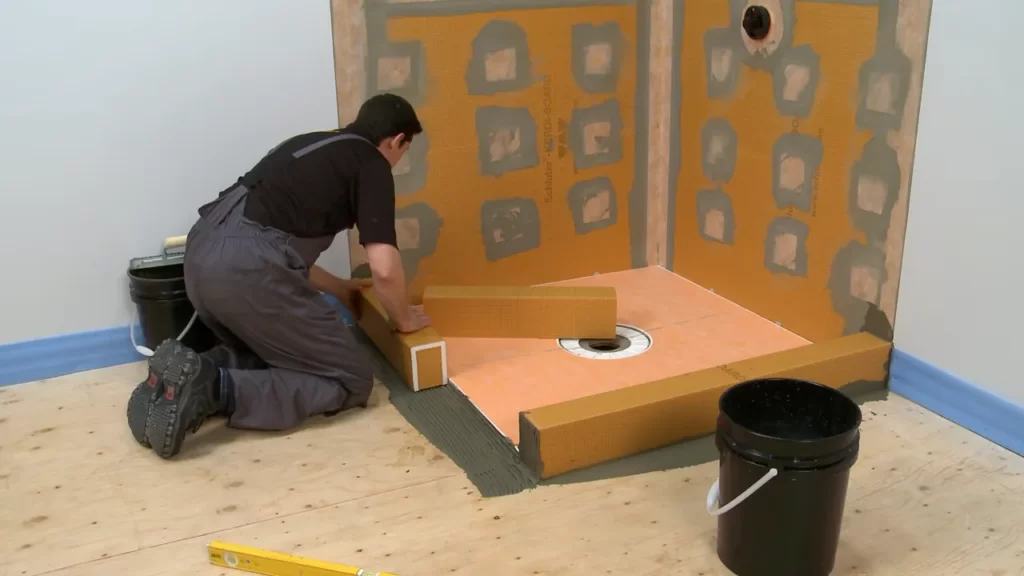
Installing the shower tray
The next step is to position the shower tray in the designated area. Make sure it is level and stable by using a level and adjusting the feet if necessary. Once in place, secure the tray by following the manufacturer’s instructions. This will typically involve using screws or adhesive to ensure a secure and stable installation.
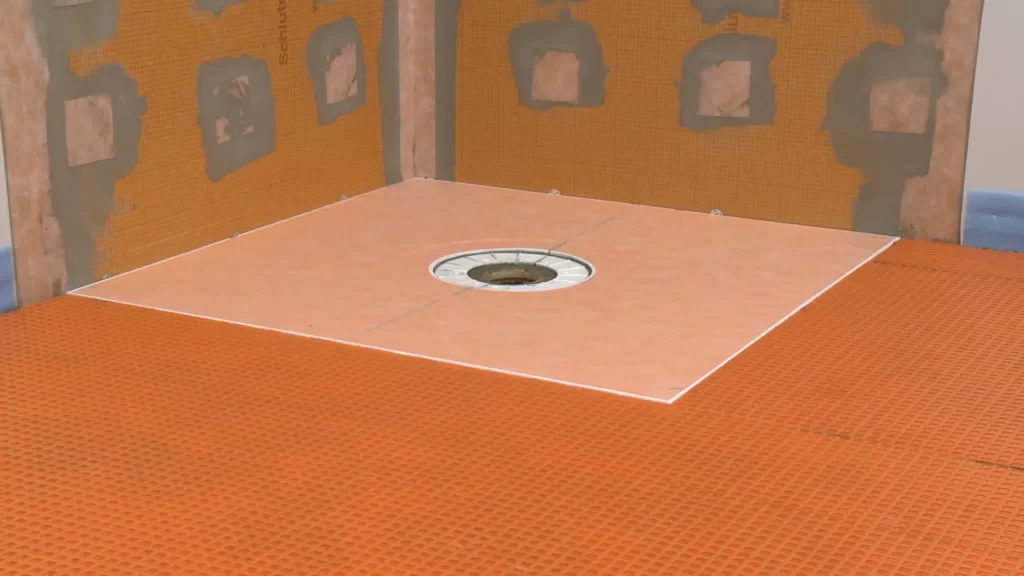
Installing the shower walls
With the shower tray in place, it’s time to install the shower walls using Schluter panels. Measure and cut the panels to fit your shower area, making sure to account for any cutouts needed for fixtures and outlets. Attach the panels to the walls using the recommended adhesive or fastening system. Pay close attention to the manufacturer’s instructions for proper installation techniques.
Installing the shower niche
If you want to add a convenient storage space in your shower, consider installing a Schluter shower niche. Before proceeding, prepare the shower niche area by ensuring it is clean and free of any debris. Install the niche by following the manufacturer’s instructions, making sure it is properly aligned and attached securely to the wall. Once installed, waterproof and seal the niche to prevent any water damage or leakage.
Installing the tile
Now that the shower system is in place, it’s time to prepare the tile for installation. Make sure the tiles are clean and free of any dust or debris. Apply a thin-set mortar or adhesive to the shower walls and floor using a trowel, ensuring even coverage. Then, carefully set the tiles into the mortar, pressing them firmly for proper adhesion. Use tile spacers to maintain consistent grout lines, and allow the mortar to cure according to the manufacturer’s instructions.
Grouting and sealing the tile
Once the tiles are set and the mortar has cured, it’s time to grout the tile joints. Use a grout float to apply the grout, working it into the joints at a 45-degree angle. Gently remove any excess grout with a damp sponge before it dries. Allow the grout to cure as per manufacturer’s instructions. Finally, seal the tile and grout using a high-quality sealer to protect against moisture and stains.
By following these steps, you can confidently install the Schluter Shower System and create a beautiful, functional, and waterproof shower space. Enjoy your new shower!
Finishing Touches And Maintenance
Once you have successfully installed the Schluter Shower System, there are a few important finishing touches and maintenance steps to consider. These steps will ensure that your shower fixtures are properly installed and that your system remains in optimal condition over time.
Installing the shower fixtures
Before you can enjoy your new shower, you’ll need to install the necessary fixtures. This includes drilling holes for plumbing fixtures, such as the showerhead, faucets, and other accessories. Make sure to measure and mark the appropriate locations before drilling.
Drilling holes for plumbing fixtures
To install the shower fixtures, you will need to drill holes in the appropriate locations. Use a drill with a suitable drill bit to create the holes. Make sure to follow the manufacturer’s instructions and recommendations for drilling.
Installing the showerhead, faucets, and other fixtures
Once the holes are drilled, it’s time to install the showerhead, faucets, and any other fixtures you have. Make sure to follow the manufacturer’s instructions for each specific fixture. Secure them tightly to ensure a proper fit and prevent any leaks.
Testing for leaks
After installing the fixtures, it’s crucial to test for leaks. Turn on the water and inspect the area around the fixtures for any signs of water leakage. If you detect any leaks, tighten the affected connections or consult a professional to resolve the issue.
Sealing and caulking
To ensure a watertight seal, it’s essential to properly seal and caulk the seams and joints of your Schluter Shower System. This will help prevent water damage and mold growth. Use high-quality silicone caulk that is specifically designed for use in wet areas and follow the manufacturer’s instructions for application.
Ensuring a watertight seal
To guarantee a watertight seal, inspect the sealed seams and joints regularly. Look for any signs of wear or damage, and promptly reapply silicone caulk as needed.
Cleaning and maintenance tips
Maintaining your Schluter Shower System is crucial for its longevity and optimal performance. Here are some cleaning and maintenance tips to follow:
- Regular cleaning practices: Clean your shower regularly using a non-abrasive cleaner and a soft cloth or sponge. Avoid using harsh chemicals or abrasive scrubbers, as these can damage the system’s surfaces.
- Preventing mold and mildew growth: To prevent mold and mildew growth, ensure that the shower area is properly ventilated. Wipe down the walls and surfaces after each use to remove excess moisture.
- Maintaining the Schluter shower system over time: Regularly inspect the system for any signs of damage or wear. Replace any worn-out or damaged components promptly to ensure the system’s effectiveness.
By following these maintenance tips and incorporating them into your regular cleaning routine, you can keep your Schluter Shower System looking and performing its best for years to come.
Troubleshooting Common Issues
While installing a Schluter Shower System can greatly enhance the durability and aesthetics of your bathroom, it’s not uncommon to encounter a few bumps along the way. Fortunately, troubleshooting common issues can help you overcome and fix these problems. In this section, we’ll explore how to deal with leaks or water damage, address uneven tiling or gaps, and fix any loose or damaged Schluter components.
Dealing with leaks or water damage
One of the most common issues that homeowners may face during the installation of a Schluter Shower System is leaks or water damage. These issues can occur due to a variety of reasons, such as improper sealing, faulty installation, or even material defects. To address leaks or water damage, follow these steps:
- Identify the source of the leakage: Carefully inspect the affected area to determine where the water is coming from. Look for any visible cracks, gaps, or damaged components.
- Repair or replace damaged components: If you find any faulty or damaged Schluter components, such as the waterproofing membrane or shower tray, make sure to replace them. It’s crucial to use high-quality replacement parts to ensure a long-lasting fix.
- Reapply sealing: If the leakage is due to improper sealing, remove the existing sealant and reapply a fresh coat of waterproof sealant. Be sure to follow the manufacturer’s instructions for the best results.
- Perform a water test: Once you’ve made the necessary repairs and resealing, perform a water test to ensure that the leakage issue has been resolved. Apply water to the shower area and monitor for any signs of leakage. If no further leaks occur, you’ve successfully addressed the issue!
Addressing uneven tiling or gaps
Uneven tiling or gaps in the tile installation can create an unsightly appearance and compromise the waterproofing of your Schluter Shower System. To address this issue, follow these steps:
- Assess the problem area: Identify the specific spots where the tiling is uneven or there are visible gaps. Make note of the severity of the problem to determine the course of action.
- Reposition or replace tiles: If the unevenness or gaps are minor, you may be able to fix the issue by carefully repositioning or replacing the affected tiles. Use a thinset mortar designed for tile installation to secure the tiles in the correct position.
- Level the surface: In cases where the unevenness is significant, you may need to level the surface before re-tiling. Use a self-leveling compound to create a flat and even surface for the new tiles.
- Grout the tiles: Once the tiling is corrected, apply grout between the tiles to ensure a seamless and waterproof finish. Be meticulous in the grouting process to prevent any gaps or cracks that could lead to future issues.
Fixing loose or damaged Schluter components
If you notice any loose or damaged Schluter components during or after the installation, it’s crucial to address them promptly. Here’s how to fix such issues:
- Inspect the components: Carefully assess the condition of the Schluter components, including the trim, corners, and edges. Look for any signs of damage, such as cracks or loosening.
- Secure loose components: If any components are loose, use a suitable adhesive, such as a Schluter-approved thinset mortar, to securely fasten them in place. Apply the adhesive according to the manufacturer’s instructions and ensure proper bonding.
- Replace damaged components: In cases where the components are damaged beyond repair, it’s necessary to replace them. Replace damaged Schluter components with new ones to maintain the integrity and functionality of the shower system.
Troubleshooting common issues when installing a Schluter Shower System is essential to ensure optimal performance and longevity. By following these steps and promptly addressing any issues that arise, you can enjoy a beautiful and functional shower for years to come.
Frequently Asked Questions
Do You Put Schluter On Before Or After Tile?
Schluter is typically installed before tile as it acts as a waterproofing and transition element. It helps in protecting the substrate and providing a clean edge for tile installation.
Is Schluter Easy To Install?
Schluter is easy to install due to its user-friendly design and installation process. It requires minimal tools and provides step-by-step instructions. The straightforward installation makes it suitable for both DIY enthusiasts and professionals.
Does Schluter Go On Top Of Drywall?
Yes, Schluter can be installed on top of drywall.
Can You Tile Directly On Schluter?
Yes, you can tile directly on Schluter.
Conclusion
To sum up, installing a Schluter shower system is a straightforward process that can greatly enhance the durability and aesthetics of your bathroom. By following the steps outlined in this guide, you can ensure a successful installation and enjoy the benefits of a waterproof and long-lasting shower system.
Remember to gather all the necessary materials, prepare the area thoroughly, and follow the manufacturer’s instructions closely. With proper care and maintenance, your Schluter shower system will provide years of reliable use and a beautiful showering experience.