
To install a recessed toilet paper holder, watch a concise video tutorial on the process. We’ll provide an introduction to help you find the perfect video for installing a recessed toilet paper holder, ensuring a seamless and straightforward installation experience.
Whether you’re a seasoned DIYer or a beginner looking to tackle a simple home improvement project, a video tutorial can guide you through each step, from gathering the necessary tools and materials to securely mounting the holder in your bathroom.
By following a well-demonstrated video tutorial, you can install your recessed toilet paper holder with confidence and enhance the aesthetics of your bathroom. So let’s dive in and find the perfect video to get started on this project.
Tools Needed For The Installation
Installing a recessed toilet paper holder can be a quick and easy DIY project that adds convenience and style to your bathroom. To get started, you’ll need a few tools to ensure a successful installation. Here are the essential tools you’ll need:
Screwdriver
A screwdriver is crucial for removing any existing hardware and installing the recessed toilet paper holder. Make sure to use the right type of screwdriver that matches the screws provided with the toilet paper holder.
Drill
A power drill will be required to create holes in the wall for mounting the recessed toilet paper holder. Choose a drill bit that matches the size of the screws provided with the toilet paper holder to ensure a secure and sturdy installation.
Level
Using a level is vital to ensure that the recessed toilet paper holder is installed straight and aligned properly. This will help in achieving a professional and aesthetically pleasing appearance.
Tape measure
A tape measure will come in handy for accurately measuring the desired location for the recessed toilet paper holder. This will ensure that the holder is installed at the right height and in the right position for optimum functionality and convenience.
Materials Needed For The Installation
If you’re looking to upgrade your bathroom and add a touch of functionality and style, installing a recessed toilet paper holder is a great option. Not only does it save space, but it also creates a sleek and seamless look. But before you embark on this project, make sure you have all the necessary materials on hand:
Recessed toilet paper holder kit
The first item you’ll need is a recessed toilet paper holder kit. This kit typically includes the main body of the holder, the roller mechanism, and any necessary trim pieces or covers. You can find these kits at your local hardware store or online. Choose a kit that matches the style and finish of your bathroom fixtures to create a cohesive look.
Mounting hardware
Next, gather the necessary mounting hardware. This typically includes screws, nuts, washers, and other fasteners needed to secure the toilet paper holder to the wall. The specific hardware required will depend on the design of your chosen kit. Refer to the instructions included with the kit to ensure you have the correct hardware.
Wall anchors (if necessary)
If you’re installing the recessed toilet paper holder on a wall that is not made of solid wood or a sturdy material, you may need to use wall anchors. Wall anchors provide extra support and stability, ensuring that your toilet paper holder stays securely in place. Check the weight capacity of the wall anchors to ensure they can handle the weight of the holder and the toilet paper roll.
Pencil
Lastly, make sure you have a pencil on hand for marking the location of the recessed toilet paper holder. This will help you accurately position the holder before installing it. Choose a pencil with a soft lead to ensure your markings are visible but can easily be removed or covered up later.
In conclusion, before you begin the installation process of a recessed toilet paper holder, gather all the necessary materials: a recessed toilet paper holder kit, mounting hardware, wall anchors (if necessary), and a pencil. Having these materials ready will ensure a smooth and hassle-free installation process. With the right tools and materials, you’ll be able to enjoy a functional and stylish addition to your bathroom in no time.
Determine The Ideal Placement For The Toilet Paper Holder
Determine the ideal placement for the toilet paper holder
When it comes to installing a recessed toilet paper holder, one of the most crucial decisions you need to make is determining the ideal placement for it. The right placement ensures convenience and accessibility for users. In this section, we will explore key factors to consider when deciding where to install your toilet paper holder.
Consider the height and accessibility for users
When determining the placement of your recessed toilet paper holder, it is important to take into account the height and accessibility for users. Installing the holder at the right height ensures ease of use for everyone, including children, elderly individuals, and individuals with disabilities.
To determine the ideal height, measure the height of your toilet bowl and then subtract a few inches to ensure the toilet paper is within easy reach. The standard height for a toilet paper holder is typically around 26 inches from the floor. However, this can vary depending on the specific needs and preferences of your household.
Additionally, consider the reach and accessibility for all users. Avoid installing the holder too far away from the toilet, as this can cause inconvenience and potential accidents. Ensure that the toilet paper holder is easily accessible regardless of the user’s physical abilities.
Ensure it is located close to the toilet
Another important aspect of determining the ideal placement for a recessed toilet paper holder is its proximity to the toilet. Having the holder located close to the toilet ensures convenience and ease of access for users.
An ideal placement for the toilet paper holder is typically within arm’s reach of the sitting position on the toilet. This allows individuals to easily reach for the toilet paper without having to strain or stretch their arms.
Take into consideration the dimensions and layout of your bathroom when deciding on the exact location. If possible, place the toilet paper holder on the side of the toilet that is most commonly used. This ensures that it is within easy reach while sitting on the toilet.
In conclusion, determining the ideal placement for a recessed toilet paper holder is crucial for ensuring convenience and accessibility for users. Considering the height and accessibility for all users, as well as the proximity to the toilet, will help you find the perfect spot for your toilet paper holder.

Locate The Wall Studs
Use a stud finder to identify the position of the studs in the wall
One of the most important steps in installing a recessed toilet paper holder is locating the wall studs. This ensures that the toilet paper holder is securely anchored and won’t come loose over time. To accurately find the position of the studs, you’ll need to use a stud finder tool. A stud finder is a handheld device that detects changes in density behind the wall, indicating the presence of a stud.
Start by turning on the stud finder and running it along the wall in the area where you plan to install the recessed toilet paper holder. Move the stud finder slowly and steadily, making sure to cover the entire area. As you do this, the stud finder will emit a beep or light up when it passes over a stud. Pay close attention to these indications and mark the location of each stud with a pencil. This will serve as a guide during the installation process.
Mark the location of the studs with a pencil
After using the stud finder to pinpoint the positions of the studs, it’s essential to mark them accurately to ensure the toilet paper holder is installed in the right place. Take a pencil and make small, visible marks on the wall at the edges of each stud. To do this, position the pencil vertically against the wall and make a small dot above and below the stud. Repeat this process for all the studs within the designated area.
Once you have marked the location of the studs, double-check their alignment and make any necessary adjustments. It’s important to ensure that the marks are straight and clearly visible, as these will guide you when it’s time to mount the recessed toilet paper holder. Take your time to carefully measure and confirm the accuracy of the marks, as this will prevent any errors during the installation process.
Measure And Mark The Position Of The Toilet Paper Holder
If you’re tired of dealing with a flimsy toilet paper holder that always falls off the wall or simply want a sleek and modern look for your bathroom, then installing a recessed toilet paper holder might be the perfect solution. In this step-by-step video guide, we’ll walk you through the process of installing a recessed toilet paper holder, starting with measuring and marking the position of the holder.
Use a tape measure to determine the desired height of the holder
Before you begin marking the position of the toilet paper holder, it’s important to determine the desired height at which you want the holder to be installed. Using a tape measure, measure the distance from the floor or the baseboard to the desired height. This will help you ensure that the toilet paper holder is at a comfortable and convenient height for you and your family.
Mark the spot on the wall with a pencil
Once you have determined the desired height, it’s time to mark the spot on the wall where the toilet paper holder will be installed. Take a pencil and make a small mark at the desired height, ensuring that it’s level with the floor or baseboard. This mark will serve as a guide for the installation process.
Tip: If you have a tiled bathroom wall, you can use a tile marker to make a more visible mark that will be easier to work with during installation.
Now that you have measured and marked the position of the toilet paper holder, you’re ready to move on to the next step: Installing the holder itself. Stay tuned for our next blog post where we will show you how to install a recessed toilet paper holder and transform your bathroom into a modern and organized space.
Mark The Location Of The Mounting Holes
Refer to the instructions provided with the recessed toilet paper holder kit
Before starting the installation process of a recessed toilet paper holder, it is crucial to refer to the instructions provided with the kit. These instructions typically include essential information such as the necessary tools, step-by-step guidelines, and measurements required for proper installation. Following the instructions carefully will ensure a smooth and successful installation process.
Mark the positions for the mounting holes on the wall
To install a recessed toilet paper holder, it is important to mark the positions for the mounting holes on the wall. This will help ensure that the holder is properly aligned and securely attached. Here’s a simple guide to marking the location of the mounting holes:
- Gather the necessary tools mentioned in the instruction manual, including a pencil, measuring tape, and level.
- Hold the recessed toilet paper holder against the wall at the desired height and position.
- Using the pencil, mark the center points of the mounting holes on the wall, making sure they are level and aligned.
- Double-check the measurements and alignment to ensure accuracy before proceeding.
Remember, precision is key when marking the position of the mounting holes. Taking the time to accurately mark the holes will make the installation process much smoother.
Once you have successfully marked the positions for the mounting holes, you are ready to move on to the next steps in installing your recessed toilet paper holder. Stay tuned for the upcoming sections on drilling the holes, securing the mounting brackets, and attaching the toilet paper holder. Remember, following the instructions and paying attention to detail will ensure a professional-looking installation that will stand the test of time.
Pre-Drill The Holes
Use a drill and a drill bit that corresponds to the size of the mounting screws
Before you begin installing a recessed toilet paper holder, it is important to gather the necessary tools. One of the key pieces of equipment you’ll need is a drill, along with a drill bit that matches the size of the mounting screws. Having the right size drill bit is essential to ensure a secure and snug fit for your recessed toilet paper holder. With the correct tools in hand, you can proceed confidently with the installation process.
Drill pilot holes at the marked positions
Once you have the appropriate drill and drill bit, the next step in installing a recessed toilet paper holder is to drill pilot holes at the marked positions. Pilot holes serve as a guide and help prevent any splitting or cracking of the wall material when screws are inserted. To ensure proper alignment and ease of installation, mark the positions for the pilot holes using a pencil or tape measure before proceeding with the drilling process.
To drill pilot holes, follow these simple steps:
- Measure and mark the desired location for the recessed toilet paper holder.
- Using your drill, attach the appropriate-sized drill bit.
- Hold the drill firmly and position it directly over one of the marked positions.
- Apply gentle pressure and begin drilling into the wall material. Remember to keep the drill straight and avoid angling it.
- Continue drilling until the desired depth for the pilot hole is achieved. This will depend on the length of the mounting screws provided with your recessed toilet paper holder.
- Repeat the drilling process for the remaining marked positions, ensuring each pilot hole is drilled to the same depth.
By pre-drilling pilot holes at the marked positions, you are taking an important step to ensure a hassle-free installation of your recessed toilet paper holder. These pilot holes will make it easier to insert the mounting screws securely, providing a sturdy foundation for your new toilet paper holder. Ensure that each H3 heading adheres to HTML syntax, making your content easily readable and accessible. With the right tools and careful attention to detail, you’ll have your recessed toilet paper holder installed in no time.
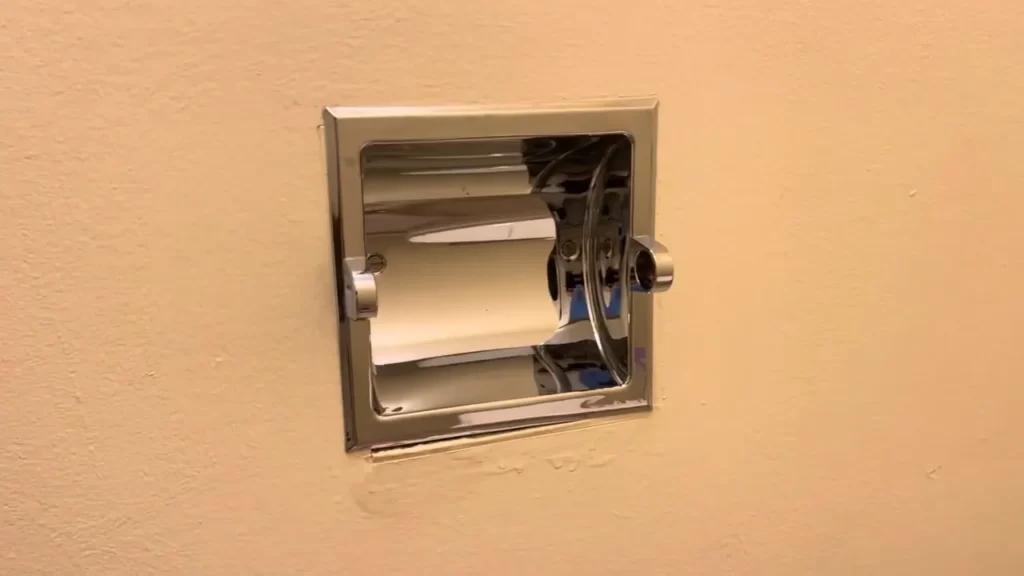
Attach The Mounting Bracket To The Wall
Installing a recessed toilet paper holder not only adds a sleek and seamless look to your bathroom, but it also helps save space. In this step-by-step guide, we will show you how to attach the mounting bracket to the wall, a crucial part of the installation process. Follow these simple instructions for a hassle-free installation.
Position the Mounting Bracket over the Pre-drilled Holes
Once you have determined the perfect location for your recessed toilet paper holder, it’s time to position the mounting bracket. Carefully hold the bracket against the wall, ensuring that it aligns with the pre-drilled holes. This step will ensure that the toilet paper holder is secure and stable once installed.
Secure It in Place Using the Provided Screws
After positioning the mounting bracket, it’s time to secure it in place using the provided screws. These screws are usually included in the packaging of your recessed toilet paper holder. Take one screw at a time and insert it through the holes on the mounting bracket, aligning it with the pre-drilled holes in the wall. Use a screwdriver to twist the screws clockwise until they are tightly secured. Repeat this process for each screw, making sure to distribute them evenly for optimal stability.
Remember to keep the mounting bracket level while inserting the screws to ensure that your recessed toilet paper holder sits straight and looks aesthetically pleasing. It is a good idea to use a level tool during this step to ensure accuracy.
Once all the screws have been securely fastened, give the mounting bracket a gentle tug to test its stability. If it holds firmly in place, you can move on to the next step of installing the recessed toilet paper holder.
Congratulations! You have successfully attached the mounting bracket to the wall, setting the foundation for a seamless and functional recessed toilet paper holder. In the upcoming steps, we will guide you through installing the holder itself and adding the finishing touches to complete the installation process. Stay tuned!
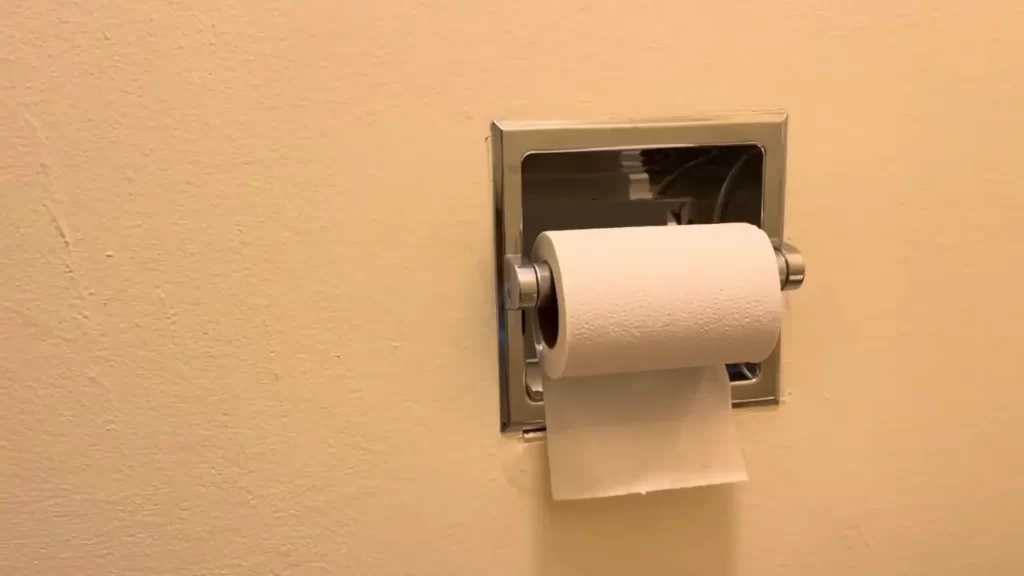
Install The Recessed Toilet Paper Holder
Install the recessed toilet paper holder
Installing a recessed toilet paper holder can give your bathroom a sleek and modern look, while also saving precious space. In this section, we will guide you through the step-by-step process of installing a recessed toilet paper holder. Follow these instructions carefully to ensure a secure and level installation.
Insert the toilet paper holder into the mounting bracket
- Start by locating the mounting bracket on the wall. The mounting bracket should have pre-drilled holes for securing the toilet paper holder.
- Insert the toilet paper holder into the mounting bracket, aligning the holes on the holder with the pre-drilled holes on the bracket.
- Make sure the holder is inserted fully into the bracket and sits flush against the wall.
Ensure it is securely attached and level
Once the toilet paper holder is inserted into the mounting bracket, it’s essential to ensure that it is securely attached and level. Follow these steps:
- Using a screwdriver or drill, tighten the screws provided with the mounting bracket to secure the holder in place. Make sure to tighten them evenly to avoid any tilting or wobbling.
- After securing the holder, use a level to ensure it is perfectly horizontal. This is important for both the appearance and functionality of the toilet paper holder.
- If needed, adjust the position of the holder by loosening the screws and repositioning it until it is level.
- Once the holder is securely attached and level, tighten the screws again to ensure it stays in place.
Congratulations! You have successfully installed your recessed toilet paper holder. Take a moment to admire your handiwork and enjoy the sleek and functional addition to your bathroom.
Check The Stability Of The Toilet Paper Holder
Before considering your installation complete, it’s essential to check the stability of the recessed toilet paper holder. After all, the last thing you want is for your brand new toilet paper holder to come loose and cause frustration, or even worse, damage to the wall. A stable toilet paper holder ensures a smooth and hassle-free experience for everyone using your bathroom.
Give it a gentle tug to ensure it is securely mounted
To check the stability of your toilet paper holder, give it a gentle tug to ensure it is securely mounted. Grab the holder firmly and pull it slightly towards you, making sure to assess the resistance. If it feels loose or wobbly, it may indicate that the mounting screws or anchors are not holding the holder in place properly. In such cases, it’s important to address the issue before continuing to use the holder.
Steps to take if the holder is not stable
If you find that your recessed toilet paper holder is not stable, don’t worry – there are steps you can take to fix the problem. Here’s what you can do:
- Check the screws or anchors: Inspect the screws or anchors that hold the toilet paper holder in place. Ensure they are tightened securely, as loose screws or anchors can cause the holder to become unstable. If needed, use a screwdriver or appropriate tools to tighten them.
- Reinforce the mount: If the screws or anchors are already tight but the holder is still unstable, you may need to reinforce the mount. This can be done by adding additional screws or anchors to provide extra support. Make sure the extra hardware is compatible with your toilet paper holder and follows the manufacturer’s guidelines.
- Consider professional help: If you’re unsure about how to fix the stability issue yourself or if the problem persists, it might be best to seek professional help. A plumber or handyman can assess the situation and provide the necessary expertise to ensure your toilet paper holder is securely installed.
By taking these steps, you can ensure that your recessed toilet paper holder remains stable and provides a reliable and convenient storage solution for your bathroom. Remember to regularly check the stability of your toilet paper holder to prevent any unexpected mishaps and maintain a well-functioning bathroom space.
Test The Functionality Of The Toilet Paper Holder
Now that you have successfully installed your recessed toilet paper holder, it’s time to test its functionality. Testing the functionality will ensure that it serves its purpose effectively and enhances the convenience of your bathroom experience. By performing a simple test, you can ensure that the paper roll is easily accessible, pullable, and rotatable within the holder.
Insert a roll of toilet paper
To begin the test, insert a roll of toilet paper into the holder. Gently place the roll onto the spindle, ensuring it is aligned properly to avoid any obstructions. The spindle should be in a horizontal position, allowing the paper roll to smoothly rotate when pulled.
Once the paper roll is securely in place, give it a gentle tug to see if it can be easily pulled. The toilet paper should unravel smoothly without any resistance. If you encounter any difficulty or if the roll feels stuck, double-check the alignment and placement of the roll in the holder.
Check if it can be easily pulled and rotated
With the roll of toilet paper inserted, proceed to check if it can be easily pulled and rotated. Pull the loose end of the paper roll towards you with a moderate amount of force.
If the toilet paper rolls out effortlessly and smoothly, you can be confident that the holder’s functionality is excellent. The paper should glide evenly without tearing or getting caught, ensuring a comfortable and hassle-free experience for anyone using the bathroom.
Additionally, test the rotation of the paper roll. Hold the end of the paper and rotate it clockwise and counterclockwise. The paper should spin freely on the spindle without any resistance or tangling.
Finalize the installation after successful testing
If the toilet paper holder passes the functionality test and meets your expectations, you can finalize the installation. Secure any screws or brackets tightly to ensure the holder remains in place for the long term. Clean the area around the holder, removing any debris or dust that may have accumulated during the installation process.
Congratulations! You have successfully installed and tested your recessed toilet paper holder. Enjoy the convenience and functionality it brings to your bathroom, providing easy access to toilet paper whenever you need it.
Remember, regular maintenance and periodic checks on the functionality of the holder can help extend its lifespan and ensure its continued usability.
Cover The Mounting Screws
Use the provided cover plate or decorative caps to conceal the screws
Once you have installed the recessed toilet paper holder securely, it’s time to cover the mounting screws for a sleek and finished look. This step is crucial to achieve a professional and seamless appearance in your bathroom. By using the provided cover plate or decorative caps, you can effectively hide the screws and create an elegant aesthetic. Here’s how to go about it:
- Locate the cover plate or decorative caps: Depending on the type of recessed toilet paper holder you have, there might be a cover plate or decorative caps specifically designed to conceal the mounting screws. These accessories are typically included in the packaging.
- Choose the right option: Inspect the cover plate or decorative caps and determine which one suits your bathroom decor and personal preference. Some cover plates are designed to match the holder’s finish, while decorative caps may come in various styles and materials to complement your overall bathroom design.
- Align and position: Place the cover plate or decorative caps over the mounting screws. Ensure that they are aligned properly and centered with the recessed toilet paper holder. This will ensure a symmetrical and visually appealing outcome.
- Secure in place: Once positioned correctly, gently press or screw the cover plate or decorative caps onto the mounting screws. Make sure they are secured firmly but avoid overtightening to prevent any damage or misalignment.
- Double-check: Take a step back and assess the overall appearance of the recessed toilet paper holder. If needed, make any necessary adjustments to ensure that the cover plate or decorative caps are perfectly centered and aligned.
Congratulations! By covering the mounting screws with the provided cover plate or decorative caps, you have successfully concealed any unsightly hardware and achieved a polished and sophisticated look for your recessed toilet paper holder.
Clean Up The Installation Area
Step 1: Remove any pencil marks or debris
Before starting the installation of your recessed toilet paper holder, it’s important to clean up the installation area to ensure a smooth and professional-looking finish. Remove any pencil marks or debris that may interfere with the installation process.
To remove any pencil marks, simply grab a clean cloth or sponge and dampen it with water. Gently rub the surface where you marked the installation points until the pencil marks disappear completely. This will give you a clean canvas to work with and prevent any unsightly marks from showing through once the recessed toilet paper holder is installed.
In addition to removing pencil marks, be sure to clear away any debris or dust that may have accumulated in the installation area. This can be done by using a vacuum cleaner or a soft bristle brush to gently sweep away any loose particles. By eliminating debris, you’ll ensure that the installation area is free from any potential obstructions that could hinder the installation process or affect the overall stability of the recessed toilet paper holder.
Step 2: Prepare the installation area
Once you have removed any pencil marks or debris, it’s time to prepare the installation area for the recessed toilet paper holder. This involves making sure the surface is clean and dry, as well as determining the exact location where you want to install the holder.
Start by wiping down the installation area with a damp cloth to remove any remaining dust or dirt. This will ensure a clean surface for the holder to adhere to. Allow the area to dry completely before proceeding with the installation.
Next, locate the desired position for the recessed toilet paper holder. Measure the distance between the toilet and any nearby fixtures or walls to ensure proper positioning. Use a level to make sure the holder will be installed horizontally and not crooked. Mark the installation points with a pencil for reference.
Step 3: Gather the necessary tools and materials
Before you start installing the recessed toilet paper holder, it’s important to gather all the necessary tools and materials. This will not only make the installation process smoother but also save you time and frustration.
| Tools | Materials |
|---|---|
| Drill | Recessed toilet paper holder |
| Level | Screws |
| Tape measure | Wall anchors |
| Pencil |
Make sure you have all the tools and materials listed above before proceeding with the installation. This will ensure that you have everything you need to complete the task without any unnecessary delays.
Step 4: Follow the installation instructions
Once the installation area is clean and you have gathered all the necessary tools and materials, it’s time to follow the specific installation instructions provided with your recessed toilet paper holder. Every model may have slight variations in the installation process, so it’s important to refer to the manufacturer’s instructions for the most accurate and up-to-date guidance.
Remember to follow all the steps carefully, ensuring proper alignment and secure attachment to the wall. Take your time and double-check everything to avoid any installation mistakes that may compromise the durability and functionality of the recessed toilet paper holder.
With these steps, you’re well on your way to successfully installing a recessed toilet paper holder. Enjoy the convenience and sleek look it will bring to your bathroom!
Enjoy Your Newly Installed Recessed Toilet Paper Holder
Admire the Sleek and Space-Saving Design
Now that you have successfully installed your recessed toilet paper holder, it’s time to admire the sleek and space-saving design it offers. This stylish addition to your bathroom not only serves a functional purpose but also adds a touch of modern elegance to your space. With its recessed installation, the toilet paper holder seamlessly blends into the wall, creating a clean and seamless look.
One of the key benefits of a recessed toilet paper holder is its space-saving design. Unlike traditional toilet paper holders that protrude from the wall, this recessed option eliminates any extra clutter and frees up valuable wall space in your bathroom. This is particularly advantageous for smaller bathrooms or powder rooms where space is limited.
The recessed design of the toilet paper holder also offers added convenience. With the roll neatly stored within the wall cavity, it is easily accessible whenever you need to replace the roll. This eliminates the hassle of fumbling with a small storage compartment or searching for spare rolls in your bathroom cabinets. Plus, with its discreet placement, the toilet paper holder blends seamlessly with your overall decor, providing a cohesive and streamlined appearance.
Easy Maintenance and Durability
In addition to its sleek design and space-saving benefits, a recessed toilet paper holder also offers easy maintenance and long-lasting durability. When it comes to cleaning, there is no need to worry about intricate details or hard-to-reach corners. Simply wipe the outer surface of the holder with a damp cloth or mild cleaning solution, and it will look as good as new.
Furthermore, recessed toilet paper holders are often constructed from high-quality materials such as stainless steel or durable plastics. This ensures their longevity and resistance to everyday wear and tear. You can enjoy your new toilet paper holder for years to come without the need for frequent replacements. Its sturdy construction also means it can withstand the demands of daily use without losing its functionality or aesthetic appeal.
Reap the Benefits of Your New Addition
Now that you have installed your recessed toilet paper holder and admired its sleek design and durability, it’s time to reap the benefits of this practical bathroom accessory. Enjoy the streamlined and clutter-free look it brings to your space. Take advantage of the additional wall space freed up by its recessed installation. And most importantly, revel in the convenience of always having your toilet paper within easy reach whenever you need it. With your new recessed toilet paper holder, you can enhance the functionality and style of your bathroom effortlessly.
Frequently Asked Questions
How Do You Install A Recessed Toilet Paper Holder In A Cabinet?
To install a recessed toilet paper holder in a cabinet, follow these steps: 1. Choose a suitable location inside the cabinet. 2. Mark the position for installation. 3. Cut a hole using a jigsaw or appropriate tool. 4. Insert the holder into the hole and secure it with screws.
5. Attach the toilet paper holder to the cabinet and make sure it is sturdy.
How Deep Is A Recessed Toilet Paper Holder?
A recessed toilet paper holder typically has a depth of around 3 to 4 inches.
How Do You Remove An Old Recessed Toilet Paper Holder?
To remove an old recessed toilet paper holder, start by locating the small screws on the inside of the holder. Use a screwdriver to loosen and remove these screws. Once the screws are removed, gently pull the holder away from the wall.
How Are Toilet Paper Holders Attached To The Wall?
Toilet paper holders are usually attached to the wall using screws or adhesive. The holder is mounted by drilling holes into the wall and securing it with screws. Alternatively, adhesive can be used to stick the holder onto the wall.
Conclusion
Installing a recessed toilet paper holder is a simple task that can add convenience and style to your bathroom. With the help of this step-by-step video guide, you’ll be able to effortlessly tackle this project on your own. By following the instructions and using the right tools, you can have a sleek and clutter-free bathroom in no time.
Don’t wait any longer! Start installing your recessed toilet paper holder today and enjoy the benefits it brings to your bathroom.