
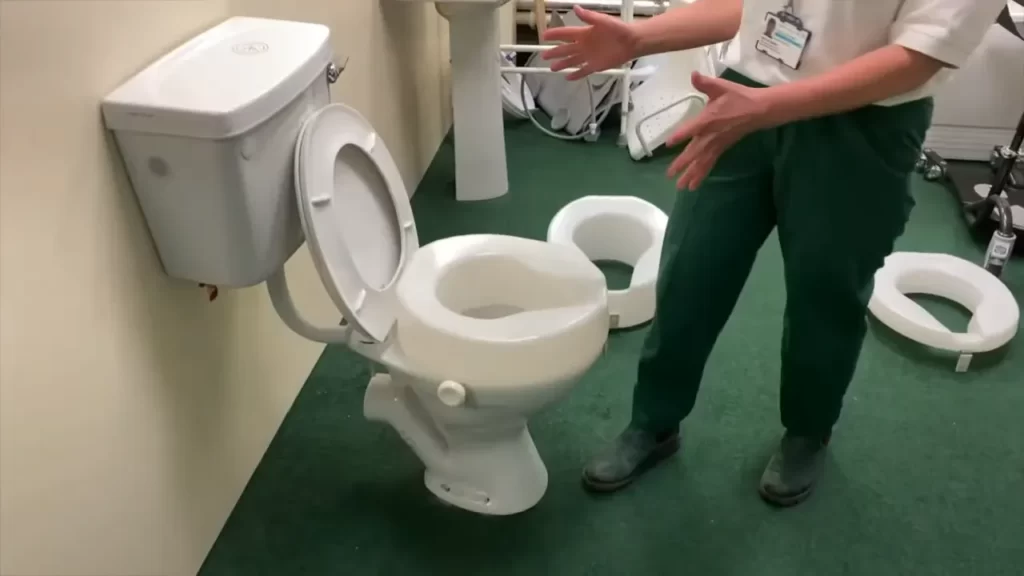
To install a raised toilet seat, position it securely on top of the existing toilet bowl and fasten it according to the manufacturer’s instructions. Having a raised toilet seat in your bathroom can be a convenient and practical solution, especially for individuals with mobility issues or those recovering from surgery or injury.
Installing a raised toilet seat is a straightforward process that can be completed in a few simple steps. We will guide you through the installation process, providing you with the necessary information to install a raised toilet seat with ease.
So, let’s get started and learn how to install a raised toilet seat in your bathroom!
The Benefits Of Using A Raised Toilet Seat
Enhanced accessibility for individuals with mobility issues
A raised toilet seat can significantly enhance accessibility for individuals with mobility issues. Whether it’s due to aging, illness, or injury, many people find it challenging to lower themselves onto a standard toilet seat.
**By installing a raised toilet seat**, individuals can eliminate the need for excessive bending and straining, making it easier to transition from standing to sitting and vice versa. The raised height provides a more comfortable and accessible position, allowing individuals to maintain their independence and dignity in the bathroom.
Reduces strain on the knees and hips
The use of a raised toilet seat can **greatly reduce strain on the knees and hips**. When using a traditional toilet seat, individuals are required to lower themselves down to a lower position, placing unnecessary stress on these joints.
**However, with a raised toilet seat**, individuals can maintain a more natural, elevated position, reducing the strain on their knees and hips. This can be particularly beneficial for individuals with arthritis, joint pain, or limited mobility, allowing them to use the toilet comfortably and with less discomfort.
Provides added stability and support
A raised toilet seat offers **added stability and support** for individuals in the bathroom. The elevated height provides a sturdy base, making it easier for individuals to sit down and stand up without assistance.
**This added stability can be especially important for individuals who are at risk of falls or have balance issues**. The raised toilet seat offers a secure and reliable platform, reducing the risk of accidents and providing individuals with the confidence they need to use the bathroom independently.
Essential Tools And Equipment
In this blog post, we will guide you through the step-by-step process of installing a raised toilet seat. Before you begin, it’s important to gather all the necessary tools and equipment. Having the right tools will make the installation process much easier and efficient. In this section, we will discuss the essential tools and equipment you’ll need to successfully install a raised toilet seat.
Raised Toilet Seat
The first and most crucial piece of equipment you will need is a raised toilet seat. This specially designed seat ensures that individuals with mobility issues can comfortably use the toilet. Raised toilet seats typically come with all the necessary hardware and installation instructions. Make sure to choose a raised toilet seat that is compatible with your toilet and suits your specific needs.
Screwdriver
One of the essential tools you’ll need for installing a raised toilet seat is a screwdriver. A screwdriver will be required to remove the existing toilet seat and secure the new raised toilet seat in place. It’s important to have a screwdriver with the proper head size and shape to ensure a secure fit. Depending on the type of screws used in your toilet seat, you may need a flathead or Phillips screwdriver.
Adjustable Wrench
Another necessary tool for installing a raised toilet seat is an adjustable wrench. This versatile tool will come in handy for tasks such as loosening or tightening nuts and bolts. The adjustable feature allows you to customize the wrench size to fit the specific hardware used in your toilet seat installation. Having an adjustable wrench ensures that you can easily make any adjustments necessary during the installation process.
By having the essential tools and equipment mentioned above, you are well-prepared to install a raised toilet seat. These tools will facilitate a smooth installation process, allowing you to create a more comfortable and accessible bathroom environment. In the next section, we will guide you through the step-by-step installation process. Stay tuned!
Detaching The Existing Toilet Seat
Detaching the Existing Toilet Seat
Before installing a raised toilet seat, you’ll need to detach the existing toilet seat from the toilet bowl. This step is crucial in order to prepare the toilet for the new raised seat. In this section, we will guide you through the process of detaching the existing toilet seat.
Locate the screws or bolts attaching the seat to the toilet bowl
The first step in detaching the existing toilet seat is to locate the screws or bolts that are attaching it to the toilet bowl. These screws or bolts are usually found at the back of the seat, near the hinges. They may be covered by plastic caps, so look for any small round covers that can be easily removed.
Loosen and remove the screws or bolts using a screwdriver or wrench
Once you have located the screws or bolts, you’ll need to loosen and remove them in order to detach the toilet seat. You can use a screwdriver or a wrench, depending on the type of screws or bolts used. Turn the screws counterclockwise to loosen them, and continue until they are completely removed.
Lift the toilet seat upwards to detach it from the toilet bowl
After you have removed the screws or bolts, it’s time to lift the toilet seat upwards to detach it from the toilet bowl. Hold the seat firmly with both hands and lift it straight up. It may require a bit of force, but be cautious not to damage the toilet bowl or any surrounding fixtures.
Now that you have successfully detached the existing toilet seat, you are ready to proceed with the installation of the raised toilet seat. Following these steps will ensure a smooth transition from the old seat to the new one, providing added comfort and accessibility for users.
Cleaning And Inspection
Before installing a raised toilet seat, it is essential to thoroughly clean and inspect the toilet bowl. This ensures a proper installation surface and helps identify any potential issues that may affect the installation or the overall functionality of the raised toilet seat.
Thoroughly clean the toilet bowl to ensure a proper installation surface
Start by cleaning the toilet bowl using a suitable toilet cleaner and a brush. Make sure to remove any stains, residue, or debris that may be present. Cleaning the toilet bowl thoroughly helps create a clean and smooth surface, ensuring a secure installation of the raised toilet seat.
Inspect the toilet bowl for any cracks or damage
After cleaning the toilet bowl, visually inspect it for any cracks or damage. Cracks or damage could compromise the structural integrity of the toilet bowl and affect the effectiveness of the raised toilet seat. Carefully examine the bowl from different angles to ensure no hidden cracks or damage are missed.
If you notice any cracks or damage, it is important to address them before proceeding with the installation.
Repair or replace the toilet bowl if necessary
If you discover any cracks or damage during the inspection, it is crucial to repair or replace the toilet bowl. Repairing cracks can help restore the integrity of the bowl, but it is often recommended to replace the bowl entirely to ensure long-term stability and functionality of the raised toilet seat.
Inspecting and addressing any cracks or damage will help prevent further issues and ensure a safer and more reliable installation of the raised toilet seat.
Positioning And Alignment
Place the raised toilet seat on top of the toilet bowl, aligning the mounting holes with the existing holes in the toilet bowl
Once you have chosen the perfect raised toilet seat for your needs, it’s time to focus on the essential step of positioning and alignment. This step ensures that your raised toilet seat is securely installed and provides optimal comfort and stability. Follow these simple instructions to ensure a smooth installation process.
Firstly, place the raised toilet seat on top of the toilet bowl. Make sure that the mounting holes on the seat align perfectly with the existing holes in the toilet bowl. This will allow for a seamless installation and prevent any unnecessary movement or instability.
Ensuring proper alignment is crucial for the long-term functionality of your raised toilet seat. It not only enhances the stability of the seat but also prevents any potential damage to the toilet bowl or the seat itself. Take your time to carefully align the mounting holes, as this will affect the overall performance and durability of your raised toilet seat.
Ensure that the seat is centered and level
Once you have aligned the mounting holes, the next step is to ensure that the seat is centered and level. This step is essential to achieve optimal comfort and prevent any discomfort or imbalance. Here’s how you can ensure a centered and level seat:
- Double-check the alignment of the mounting holes and make any necessary adjustments if needed.
- Place a level on top of the seat to check if it is perfectly horizontal. If the seat is not level, adjust it accordingly until you achieve a balanced position.
- Ensure that the seat is centered by visually inspecting its position on the toilet bowl. It should be equidistant from the front and back edges of the bowl.
By following these steps, you can ensure that your raised toilet seat is properly aligned, centered, and level. This will not only provide comfort but also enhance the safety and stability of the seat. Plus, you’ll have peace of mind knowing that you’ve installed the seat correctly, allowing you to use it with confidence.
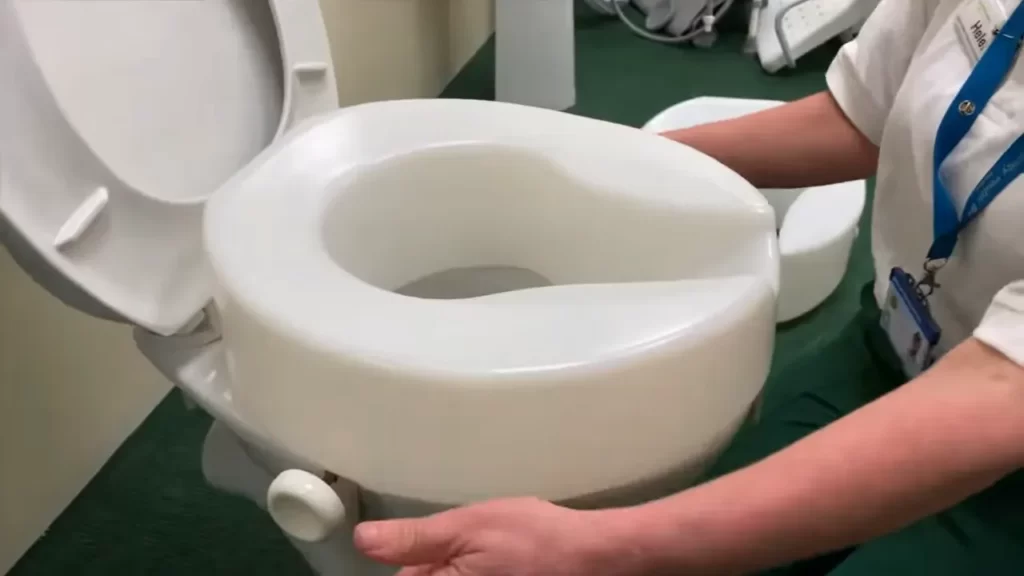
Attaching The Raised Toilet Seat
Attaching the raised toilet seat is a crucial step to ensure stability and safety. This process involves inserting and tightening screws or bolts through the mounting holes, using a screwdriver or wrench. It’s important to make sure that the seat is securely attached to the toilet bowl, providing a reliable support system for individuals with mobility issues or disabilities.
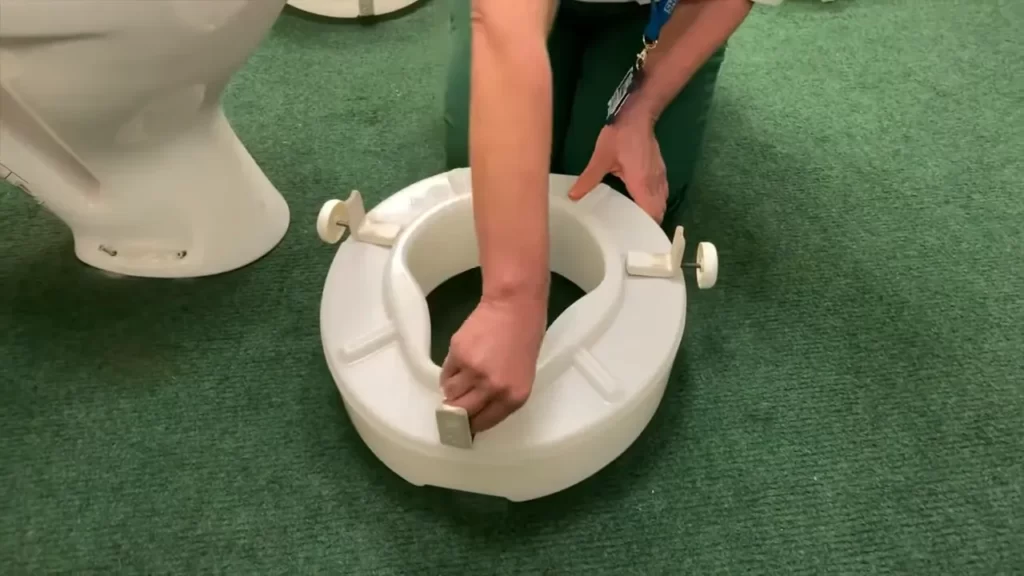
Insert and tighten the screws or bolts through the mounting holes, using a screwdriver or wrench
Once you have positioned the raised toilet seat on the toilet bowl, locate the mounting holes provided on the seat. These holes are designed to align with the corresponding holes on the toilet bowl. To attach the raised toilet seat securely, insert the screws or bolts through these mounting holes.
Using a screwdriver or wrench, tighten the screws or bolts until they are secure. Be cautious not to overtighten, as this could cause damage to the seat or toilet bowl. Ensure that the screws or bolts are tightened enough to hold the seat firmly in place, providing a stable platform for users.
In cases where the raised toilet seat comes with adjustable brackets or arms, it is important to follow the manufacturer’s instructions and adjust them accordingly before inserting the screws or bolts. This will ensure proper fit and stability.
Make sure the seat is securely attached to the toilet bowl
After attaching the raised toilet seat, make sure to check its stability. Give it a gentle shake to ensure that it does not move or wobble. If there is any movement, you may need to further tighten the screws or bolts.
Inspect the area around the mounting holes to ensure there are no gaps or spaces between the seat and the toilet bowl. This will prevent any unwanted movement or accidents when using the toilet. If you notice any gaps, try retightening the screws or bolts.
Additionally, confirm the secure attachment by sitting on the raised toilet seat and shifting your weight from side to side. If the seat remains stable and does not move or shift, it is securely attached.
By following these steps and ensuring that the seat is securely attached to the toilet bowl, you can provide a safe and comfortable experience for individuals who may require the assistance of a raised toilet seat. With proper installation, this seating solution can greatly improve bathroom accessibility and independence.
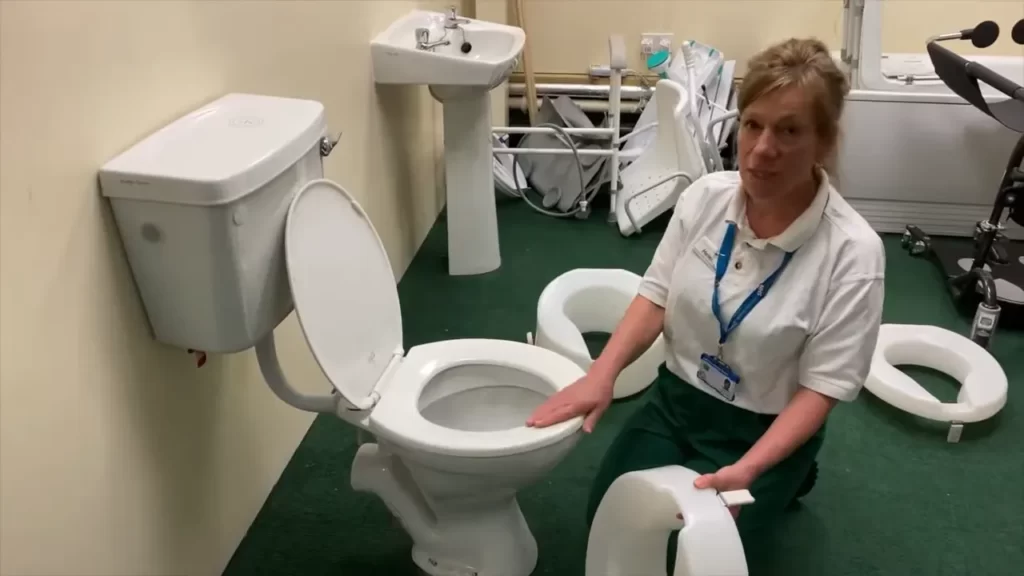
Testing Stability And Comfort
Once you have successfully installed the raised toilet seat, it is important to test its stability and comfort to ensure a safe and comfortable experience for the user. Testing the stability will help determine if any adjustments or additional measures need to be taken to secure the seat firmly to the toilet. Assessing the comfort is essential as it plays a significant role in providing a pleasant and convenient toilet experience. Here are a few steps to follow:
Sit on the installed raised toilet seat to test its stability
To test the stability of the installed raised toilet seat, carefully sit on it and apply pressure to various areas. Pay attention to any wobbling or movement that may occur. A stable seat is crucial to prevent accidents or injuries, particularly for users who have limited mobility or balance issues. If you experience any instability, it is necessary to make the required adjustments.
Make any necessary adjustments to ensure comfort and stability
If you notice any instability or discomfort while sitting on the raised toilet seat, it is essential to make the necessary adjustments. Start by checking if the screws or bolts are properly tightened. Loose screws or bolts can contribute to an unstable seat, compromising both safety and comfort. Use a wrench or screwdriver to tighten any loose hardware, ensuring a secure and stable installation.
If tightening the screws does not resolve the issue, consider using additional accessories to enhance stability. For instance, you can purchase anti-slip pads or rubber gaskets to place between the toilet seat and the raised seat. These accessories can provide extra support and prevent any movement or shifting while in use.
It is crucial to take the time to make these adjustments, as they can significantly impact the overall stability and comfort of the raised toilet seat.
Step-by-step instructions for tightening loose screws or bolts:
- Carefully identify any loose screws or bolts on the raised toilet seat.
- Use a suitable wrench or screwdriver to tighten each loose screw or bolt.
- Tighten them firmly but be cautious not to overtighten, as it may damage the seat or the toilet.
- After tightening, test the stability and comfort again by sitting on the seat.
By following these steps, you can ensure that your installed raised toilet seat is stable and comfortable, providing a secure and convenient experience for users.
Cleaning And Sanitizing
Proper cleaning and sanitizing of your raised toilet seat are essential to maintain hygiene and prevent the spread of germs and bacteria. Regular cleaning helps to ensure that your raised toilet seat remains clean and fresh, providing a comfortable experience for anyone using the toilet. Let’s take a look at some important steps to keep your raised toilet seat clean and sanitized.
Regularly clean the raised toilet seat with mild soap and water
To keep your raised toilet seat clean on a regular basis, use mild soap and water. This simple solution can effectively remove dirt, stains, and odors, leaving your seat looking and smelling fresh. Here’s how to clean your raised toilet seat:
- Mix a small amount of mild soap with warm water in a basin or sink.
- Dip a soft cloth or sponge into the soapy water.
- Gently scrub the surface of the raised toilet seat, paying attention to any hard-to-reach areas.
- Rinse the cloth or sponge thoroughly and repeat the process if necessary.
- Once you’re satisfied with the cleanliness, use a clean, dry cloth to wipe off any excess water.
Remember to avoid harsh abrasive cleaners as they can damage the surface of the raised toilet seat.
Disinfect the seat with a suitable disinfectant spray or wipes
In addition to regular cleaning, it’s crucial to disinfect the raised toilet seat to kill germs and bacteria effectively. Here’s how to disinfect your raised toilet seat:
- Select a suitable disinfectant spray or wipes specifically designed for toilet surfaces.
- Check the instructions on the disinfectant product to ensure proper usage.
- Spray the disinfectant directly onto the raised toilet seat or use a wipe to thoroughly clean the surface.
- Pay attention to all areas, including the hinges and underside of the seat.
- Allow the disinfectant to sit on the seat as recommended by the manufacturer.
- Finally, wipe off any residue with a clean cloth or allow it to air dry.
Using a suitable disinfectant will help eliminate germs and ensure a hygienic toilet seat.
Remember to always follow the manufacturer’s instructions when selecting and using cleaning and disinfecting products for your raised toilet seat. By taking these steps, you can maintain a clean and sanitary toilet environment for yourself and others who may be using the raised toilet seat.
Safety Measures
Ensure the raised toilet seat is properly installed and secure before each use
When it comes to installing a raised toilet seat, safety should be your top priority. It is essential to ensure that the seat is properly installed and secure before each use. This will help prevent any accidents or injuries that may occur due to a loose or unstable seat. Following the manufacturer’s instructions and guidelines is crucial in order to guarantee a proper installation. Here are some important safety measures to keep in mind when installing a raised toilet seat:
- Proper Installation: Start by carefully reading the installation manual provided by the manufacturer. Follow the step-by-step instructions to ensure correct installation of the raised toilet seat. Make sure all the components are tightly secured and there are no loose or wobbly parts.
- Secure Attachment: Verify that the raised toilet seat is securely attached to the toilet bowl. Check for any signs of movement or instability before each use. If you notice any looseness, tighten the attachments or seek professional assistance to fix the issue.
Follow the weight limit guidelines provided by the manufacturer
Aside from proper installation, following the weight limit guidelines provided by the manufacturer is crucial for safety. Each raised toilet seat model may have different weight capacity specifications. Exceeding the weight limit can put unnecessary strain on the seat and increase the risk of accidents. Here’s why it’s important to adhere to the weight limit guidelines:
- Prevent Structural Damage: Exceeding the weight limit can cause structural damage to the raised toilet seat. This can lead to cracks or breaks in the seat, making it unsafe to use. It is important to check the weight capacity and ensure it supports your body weight to maintain the integrity of the seat.
- Avoid Accidents: Overloading the raised toilet seat beyond its weight limit can lead to instability and potential accidents. A seat that is not designed to bear excessive weight may become loose or break during use, increasing the risk of falls or injuries.
Keep the area around the toilet seat clear of obstacles to prevent tripping or falling
In addition to proper installation and following weight limit guidelines, keeping the area around the toilet seat clear of obstacles is essential for safety. Here’s why maintaining a clutter-free environment is important when using a raised toilet seat:
- Prevent Tripping Hazards: Clearing the area around the toilet seat of objects, such as step stools or bathmats, reduces the risk of tripping when entering or exiting the seat. Ensure that the floor is dry and free of any water spills to prevent slips or falls.
- Easy Accessibility: A clutter-free environment allows for easy and smooth accessibility to the raised toilet seat. It ensures that users can safely and comfortably navigate around the seat without any hindrances or obstacles in their way.
By taking these safety measures into consideration, you can ensure a secure and accident-free experience when using a raised toilet seat. Remember to double-check the installation, follow weight limit guidelines, and maintain an obstacle-free environment to prioritize your safety and well-being.
Frequently Asked Questions
How Do You Install A Quick Lock Raised Toilet Seat?
To install a quick lock raised toilet seat, simply follow these steps: 1. Ensure the toilet seat is clean and dry. 2. Position the seat on the toilet bowl. 3. Align the locking mechanism with the bolt holes. 4. Press down firmly until the seat locks into place.
5. Test the seat for stability before use. It’s that easy!
Do Raised Toilet Seats Fit All Toilets?
Raised toilet seats are not universally compatible with all toilets. Different toilets have unique shapes and dimensions, so it is essential to choose a raised toilet seat that fits your specific toilet model. To ensure a proper fit, measure your toilet and consult the product specifications or customer support before making a purchase.
How Do I Keep My Raised Toilet Seat From Sliding?
To keep your raised toilet seat from sliding, consider using adhesive strips or nonslip mats underneath. These provide friction and stability. Alternatively, opt for a toilet seat with suction cups, which can secure it firmly in place. Additionally, make sure to clean the toilet seat regularly to prevent any build-up that may cause slipping.
Where Do You Put Toilet Seat Risers?
Toilet seat risers can be placed on top of the existing toilet seat. Simply lift the toilet seat, position the riser onto the bowl, and secure it using the provided attachments. Make sure it fits securely to ensure stability and comfort for the user.
Conclusion
Installing a raised toilet seat is a simple but effective solution for those who need a little extra support and comfort in their daily routine. By following the step-by-step instructions outlined in this blog post, you can easily transform your bathroom and enhance your everyday life.
With careful consideration of safety measures and attention to detail, the process of installing a raised toilet seat can be completed in no time. Say goodbye to discomfort and hello to a more accessible bathroom experience!