To install a rainfall shower head, remove the old shower head and clean the shower arm. Screw on the new rainfall shower head and tighten it securely.
Welcome to our guide on how to install a rainfall shower head. Upgrading your shower experience can be as simple as replacing your current shower head with a luxurious rainfall shower head. With its wide coverage and soothing water flow, a rainfall shower head can transform your ordinary shower into a spa-like retreat.
We will provide you with step-by-step instructions on how to install a rainfall shower head. Whether you’re a DIY enthusiast or just looking to upgrade your bathroom, this guide will help you achieve a relaxing and invigorating shower experience. So, let’s dive in and learn how to install a rainfall shower head.
Choosing The Right Rainfall Shower Head
Factors to Consider When Selecting a Rainfall Shower Head
When it comes to choosing the right rainfall shower head, there are several factors that you should consider. Making an informed decision will ensure that you enjoy the ultimate showering experience. Here are some important factors to keep in mind:
1. Water Pressure: One of the key factors to consider is the water pressure in your bathroom. Some rainfall shower heads require high water pressure to function optimally. If you have low water pressure, make sure to choose a shower head that is designed to work well with low pressure systems. This will ensure that you get a satisfying rainfall shower experience, irrespective of your water pressure.
2. Size and Coverage: Another important factor to consider is the size of the shower head and the coverage it offers. Rainfall shower heads come in different sizes, and you’ll want to choose one that provides adequate coverage for your specific needs. Consider the size of your shower enclosure and the amount of space you have for installation. A larger shower head will typically provide a wider coverage area, allowing you to enjoy the rain-like sensation more effectively.
3. Material and Durability: A rainfall shower head is an investment, so it’s essential to choose one that is made from durable materials. Stainless steel, brass, and chrome are popular choices for shower heads as they are resistant to corrosion and can withstand the test of time. Make sure to check the material composition before making a purchase to ensure that you are investing in a shower head that will last.
4. Style and Design: Your shower should not only be functional but also visually appealing. Consider the style and design of the rainfall shower head to ensure it complements the overall aesthetics of your bathroom. From modern and sleek to classic and elegant, there are various designs available to choose from. Selecting a shower head that matches your bathroom’s décor will enhance the overall ambiance of the space.
Different Types of Rainfall Shower Heads to Choose From
When it comes to rainfall shower heads, there are different types to choose from, each offering unique features and benefits. Here are some popular types of rainfall shower heads:
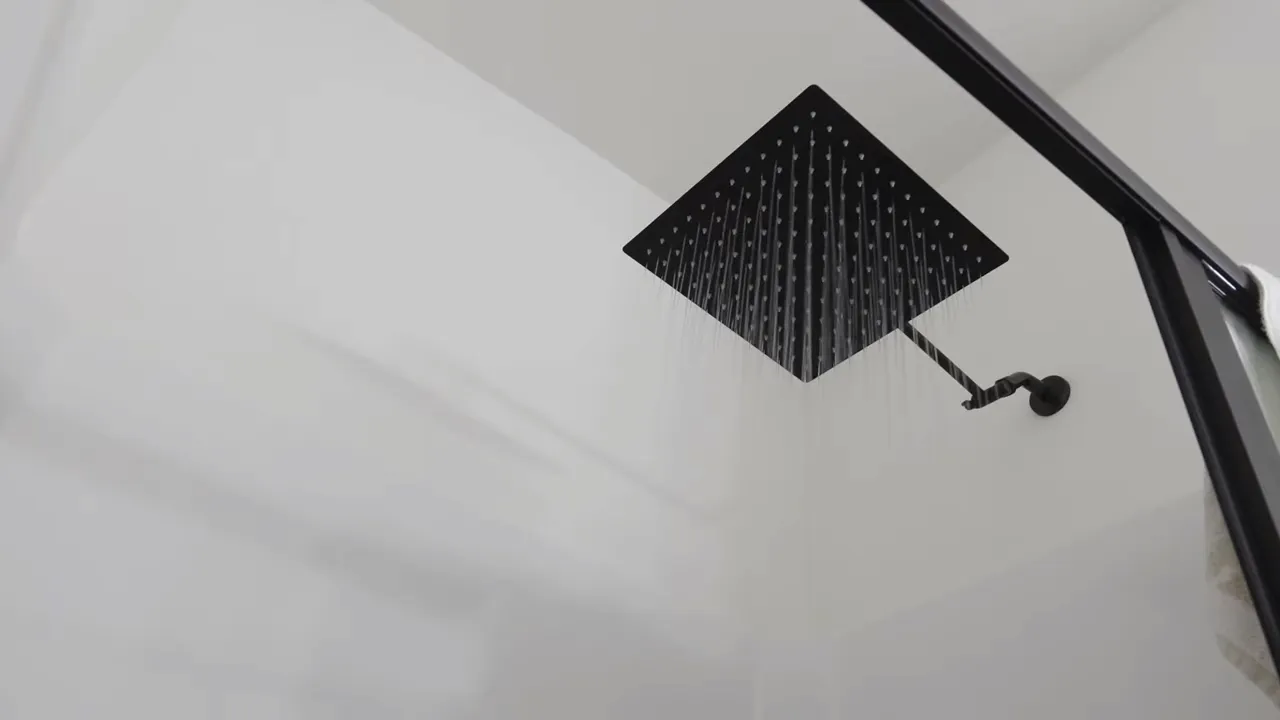
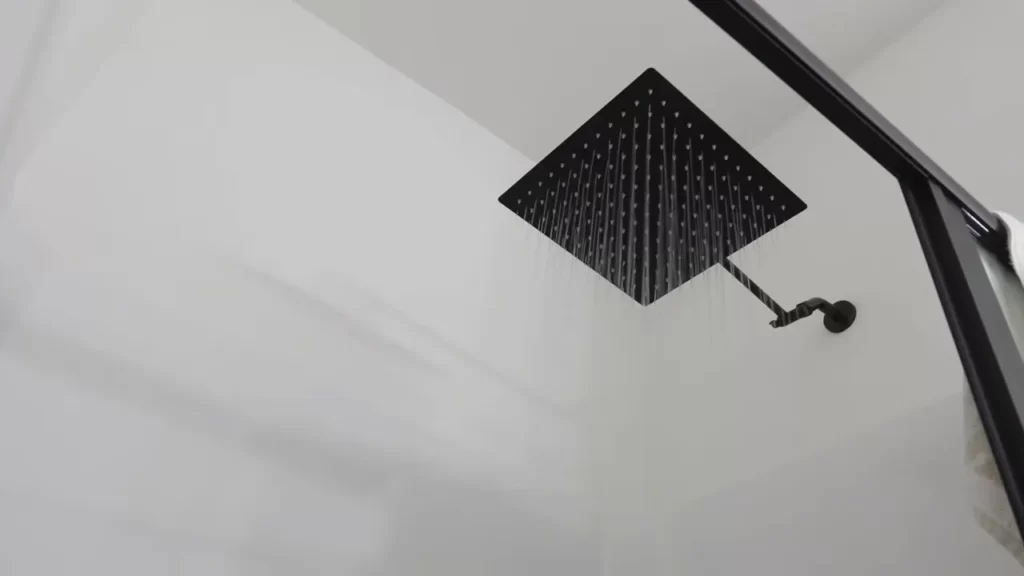
1. Ceiling-Mounted Rainfall Shower Head: This type of shower head is mounted directly onto the ceiling, providing a luxurious overhead rainfall experience. It creates a spa-like ambiance and is ideal for those who desire a truly immersive showering experience.
2. Wall-Mounted Rainfall Shower Head: As the name suggests, this shower head is mounted onto the wall, typically at shoulder level. It offers a gentle and relaxing rainfall effect, making it a popular choice for those who prefer a more traditional shower experience.
3. Handheld Rainfall Shower Head: If you prefer flexibility in your shower experience, a handheld rainfall shower head is a great option. It allows you to direct the flow of water to specific areas of your body, providing a customized shower experience.
4. Rainfall Shower Panel: A rainfall shower panel combines multiple shower heads, including a large overhead shower head, body jets, and a handheld shower head. This type of shower system offers the ultimate showering experience with its various features and functionalities.
Choosing the right rainfall shower head involves considering factors such as water pressure, size, material, and design while also taking into account the different types available. By keeping these factors in mind, you can select a rainfall shower head that meets your specific preferences and transforms your showering routine into a luxury experience.
Preparing For Installation
Before you begin installing a rainfall shower head, it’s important to ensure that you have all the necessary tools and materials ready. This will help make the installation process smoother and avoid any unnecessary interruptions. Here’s what you’ll need:
Gather the Necessary Tools and Materials
To successfully install your rainfall shower head, make sure you have the following items:
- Pipe wrench
- Adjustable wrench
- Plumber’s tape
- Drill
- Measuring tape
- Level
- Screwdriver
- Goggles and gloves for safety
- Rainfall shower head kit (including the head, arm, and any necessary fittings)
Measure and Prepare the Shower Area
Before you start the installation process, it’s essential to measure and prepare the shower area. This will ensure that the rainfall shower head is installed correctly and functions properly. Follow these steps:
- Measure the height and width of your shower area. This will help determine the ideal placement for your rainfall shower head.
- Clean the shower area thoroughly, removing any accumulated grime or residue. A clean surface will facilitate a better seal and prevent leaks.
- Use the level to ensure that the walls and floor of the shower area are even. This will provide a stable foundation for installation.
- Double-check the measurements and make any necessary adjustments or modifications before proceeding.
By following these steps, you’ll be prepared to install your rainfall shower head successfully. Make sure to have all the necessary tools and materials on hand, and properly measure and prepare the shower area. This will help ensure a smooth installation process and a satisfying rainfall shower experience.
Installing The Rainfall Shower Head
Are you looking to upgrade your shower experience? Installing a rainfall shower head can give you the luxurious feeling of standing under a gentle cascade of water. Not only does it provide a soothing and relaxing shower, but it also adds an elegant touch to your bathroom decor. In this guide, we will take you through the step-by-step process of installing a rainfall shower head, from removing your existing shower head to attaching the new one.
Removing the Existing Shower Head
The first step in installing a rainfall shower head is to remove your existing shower head. Follow these simple steps to get started:
- Locate the connection between the shower arm and the shower head. This is typically a threaded joint.
- Using an adjustable wrench, grip the shower head firmly.
- Turn the wrench counterclockwise to loosen the shower head.
- Once the shower head is loose, unscrew it completely by hand.
- Remove any plumber’s tape or debris from the shower arm threads.
Now that you have successfully removed your existing shower head, it’s time to move on to the next step.
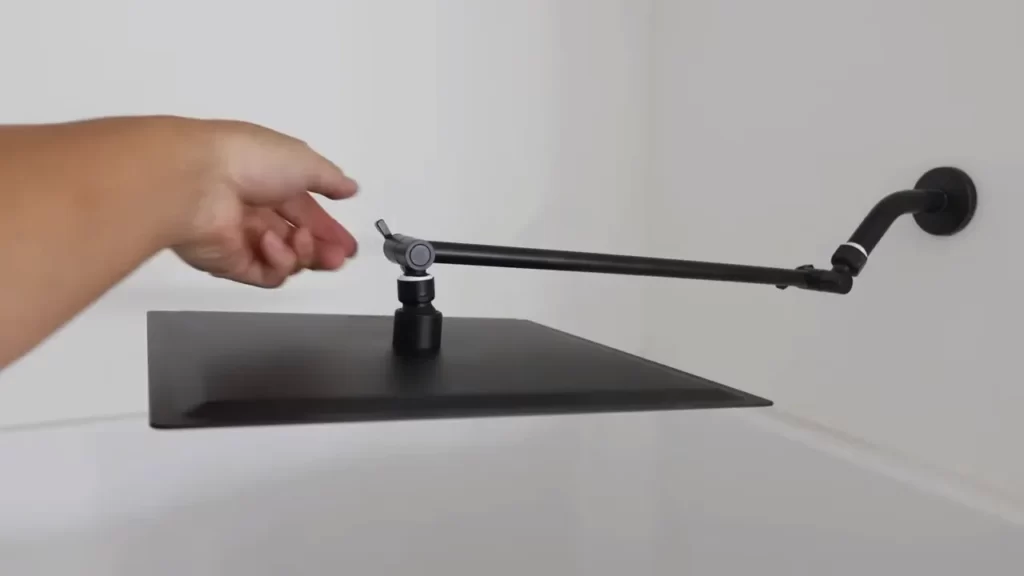
Installing the Mounting Bracket
Before attaching the rainfall shower head, you will need to install a mounting bracket if your shower arm does not already have one. Follow these steps to install the mounting bracket:
- Apply plumber’s tape to the threads of the shower arm. This will help create a tight seal.
- Thread the mounting bracket onto the shower arm. Make sure it is tightened securely.
- If the mounting bracket has an adjustable angle feature, adjust it to your desired position.
With the mounting bracket securely in place, you’re ready for the final step of the installation process.
Attaching the Rainfall Shower Head
Now it’s time to attach your new rainfall shower head to the mounting bracket. Follow these steps to ensure a proper installation:
- Remove any protective coverings or packaging from the shower head.
- Apply plumber’s tape to the threads of the shower arm, if not already applied during the previous step.
- Thread the rainfall shower head onto the shower arm, turning it clockwise.
- Tighten the shower head securely by hand. You may use an adjustable wrench, but be careful not to overtighten and damage the shower head or the mounting bracket.
Congratulations! You have successfully installed your new rainfall shower head. Now you can enjoy a luxurious shower experience with the gentle cascade of water.
Tips For Proper Installation
Installing a rainfall shower head can bring a luxurious spa-like experience to your daily shower routine. However, for a successful installation that ensures optimal performance, there are a few important tips to keep in mind. In this article, we will discuss two crucial aspects of installing a rainfall shower head: ensuring proper water flow and pressure, and adjusting the height and angle of the shower head. Follow these tips to get the most out of your rainfall shower head installation.
Ensuring Proper Water Flow and Pressure
When it comes to rainfall shower heads, ensuring proper water flow and pressure is essential. To make sure that your rainfall shower head provides the relaxing and invigorating experience you desire, follow these steps:
- Start by checking your home’s water pressure. You can use a pressure gauge to measure the water pressure coming out of your existing shower head. The ideal range for a rainfall shower head is between 40 and 60 pounds per square inch (psi). If your water pressure is too low or too high, you may need to install a pressure regulator to adjust it to the desired range.
- Remove any flow restrictors that may be present in your shower head. Some rainfall shower heads come with built-in flow restrictors to conserve water. However, removing these restrictors can help improve the water flow and provide a more satisfying shower experience.
- Clean your shower head before installation to remove any dirt or debris that may affect water flow. Soak the shower head in a vinegar solution to dissolve mineral deposits and unclog any blocked nozzles. Rinse it thoroughly before proceeding with the installation.
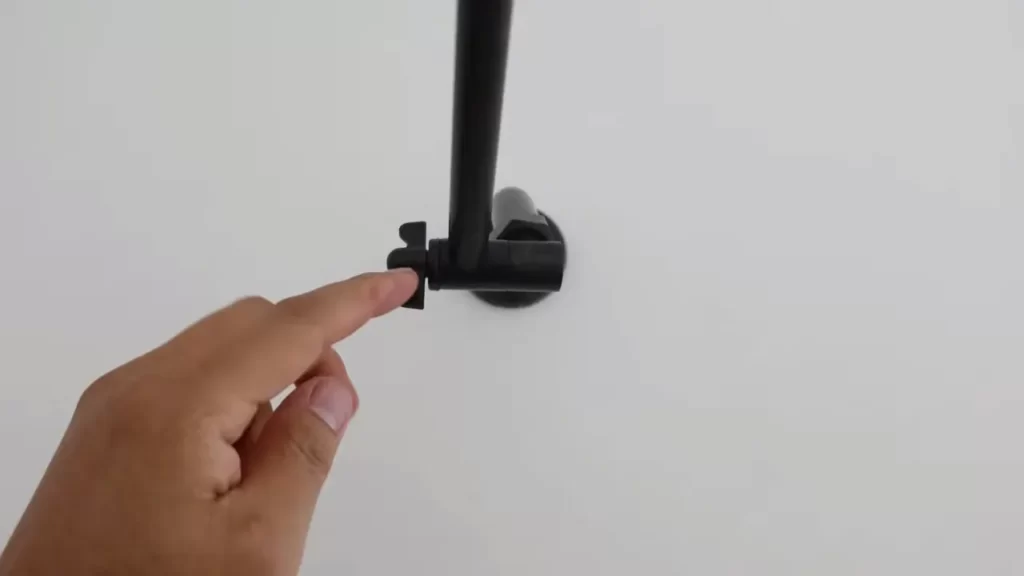
Adjusting the Height and Angle of the Shower Head
The height and angle at which your rainfall shower head is installed can greatly impact your shower experience. Follow these steps to ensure optimal position:
- Determine the ideal height for your shower head by considering the average height of the people who will be using it. The general rule of thumb is to install the shower head so that it is at least 6 feet (183 cm) above the floor. However, you can adjust it higher or lower to accommodate individual preferences.
- Before tightening the shower head onto the shower arm, test the angle to ensure it produces an even and broad water flow. Adjust the angle by hand until you find the position that provides the desired coverage and spray pattern.
- Securely fasten the shower head onto the shower arm using a wrench or pliers while being careful not to overtighten and damage the fittings. Wrap a cloth around the shower arm to protect the finish while tightening.
By following these tips for proper installation, you can ensure that your rainfall shower head provides a refreshing and luxurious shower experience. Taking the time to ensure proper water flow and pressure, as well as adjusting the height and angle, will allow you to fully enjoy the benefits of your new rainfall shower head.
Troubleshooting And Maintenance
Installing a rainfall shower head can bring a touch of luxury and a spa-like experience to your daily shower routine. However, like any other plumbing fixture, occasional issues may arise. By familiarizing yourself with common installation issues and regular maintenance tips, you can ensure your rainfall shower head continues to function at its best for years to come.
Common Installation Issues and How to Fix Them
During the installation process, you may encounter a few common issues. Don’t worry! They can be easily resolved with some simple troubleshooting steps. Here are a few problems you might face:
| Issue | Solution |
|---|---|
| Leaking connections | Tighten the connections using an adjustable wrench or plumbing tape. Make sure to check for any cracks or damages in the fittings and replace them if necessary. |
| Low water pressure | Remove the flow restrictor from the shower head to improve water flow. Clean any mineral deposits that may have accumulated in the shower head using a vinegar solution. |
| Uneven spray pattern | Remove the shower head and check for any debris or mineral buildup. Soak the shower head in a mixture of warm water and vinegar to dissolve the deposits. Rinse thoroughly and reattach. |
Regular Cleaning and Maintenance Tips
To keep your rainfall shower head performing its best, regular cleaning and maintenance are crucial. Here are some tips to follow:
- Remove mineral deposits: Use a solution of equal parts water and vinegar to soak the shower head and dissolve any mineral buildup. Rinse thoroughly before reattaching.
- Clean the shower head surface: Use a mild soap and water solution to wipe down the exterior of the shower head regularly. Avoid using abrasive cleaners or scrub brushes that can damage the finish.
- Check for leaks: Periodically inspect the connections for any signs of leakage. If you notice any, tighten the fittings or replace them if necessary.
- Replace worn-out parts: Over time, components of the shower head may wear out or get damaged. If you experience a drop in performance, consider replacing the rubber gaskets or the entire shower head if needed.
- Inspect the water flow: Ensure that the water flow is smooth and even. If you notice any blockages or reduced pressure, clean the shower head thoroughly and remove any obstructions.
By following these troubleshooting and maintenance tips, you can enjoy a refreshing and reliable rainfall shower experience for years to come. Regular cleaning and inspections will not only enhance your shower’s performance but also extend the lifespan of your shower head.
Enhancing Your Rainfall Shower Experience
If you want to turn your daily shower into a truly luxurious experience, installing a rainfall shower head is a great place to start. With its wide coverage and soothing flow of water, a rainfall shower head can create a spa-like environment right in your own bathroom. But why stop there? There are additional features and upgrades you can consider to take your rainfall shower experience to the next level.
Additional Features and Upgrades to Consider
If you’re looking to enhance your rainfall shower experience, there are a few features and upgrades that you might want to consider:
1. Adjustable Water Pressure
Having the ability to adjust the water pressure of your rainfall shower head can make a world of difference. Some models come with multiple pressure settings so you can customize the intensity of your shower to suit your preferences. This feature allows you to switch between a gentle rainfall and a more invigorating shower experience, depending on your mood.
2. LED Lighting
Why not add some ambiance to your shower with LED lighting? Many rainfall shower heads now come with built-in LED lights that can change color depending on the water temperature. This not only creates a relaxing and visually appealing atmosphere but can also serve as a safety feature, as you’ll be instantly aware of any sudden changes in water temperature.
3. Built-in Speakers
If you enjoy singing in the shower or listening to music, consider investing in a rainfall shower head with built-in speakers. These innovative shower heads allow you to connect your smartphone or other Bluetooth-enabled devices wirelessly, so you can enjoy your favorite tunes while getting ready for the day ahead.
Tips for Creating a Relaxing Shower Environment
Now that you have some ideas for enhancing your rainfall shower experience, here are a few tips for creating a relaxing shower environment:
1. Use Natural Elements
Introduce natural elements into your bathroom to create a spa-like atmosphere. Consider incorporating plants, bamboo accents, or even a small indoor waterfall to enhance the calming effect of your rainfall shower.
2. Upgrade Your Shower Products
Invest in high-quality shower products that contain soothing ingredients or aromatherapy scents. Opt for natural and organic options whenever possible to create a truly indulgent and rejuvenating shower experience.
3. Install Proper Lighting
Ensure your bathroom is well-lit with soft, warm lighting. Harsh overhead lighting can be too bright and jarring, while gentle lighting can promote relaxation and create a calming ambiance.
In conclusion, by installing a rainfall shower head and considering additional features and upgrades, you can transform your daily shower into a luxurious and refreshing experience. Combine this with a relaxing shower environment and you’ll have your own personal oasis right in your bathroom. So go ahead, indulge in the simple pleasure of a rainfall shower and elevate your shower routine to new heights.
Frequently Asked Questions
Can You Install A Rain Shower Head On A Regular Shower?
Yes, you can install a rain shower head on a regular shower.
How Much Water Pressure Is Needed For A Rain Shower Head?
A rain shower head typically requires a water pressure of 30 to 50 pounds per square inch (PSI) to function properly and provide a satisfying rainfall-like experience.
How Far From Wall Should Rain Shower Head Be?
Position the rain shower head approximately 12 inches away from the wall for optimal water flow and coverage.
How Do I Install A Rainfall Shower Head?
To install a rainfall shower head, start by removing the old shower head. Then, apply plumber’s tape to the shower arm to create a tight seal. Next, screw the new rainfall shower head onto the shower arm and tighten it with a wrench.
Finally, turn on the water to test for any leaks and adjust the angle of the shower head to your desired position.
Conclusion
Installing a rainfall shower head can transform your bathroom into a luxurious and spa-like retreat. With the right tools and a step-by-step approach, you can easily install this indulgent feature and enhance your daily bathing experience. From selecting the perfect shower head to following the installation instructions diligently, you’ll be enjoying the soothing sensation of rainfall in no time.
So, why wait? Upgrade your bathroom today and indulge in the ultimate showering experience.