To install a quartz countertop, measure and prepare the area, remove existing countertops, install plywood, apply adhesive, and secure the quartz slab in place. Installing a new quartz countertop can significantly transform the look of your kitchen or bathroom.
Quartz countertops are durable, low-maintenance, and offer a wide range of color options to match any style. Whether you are replacing an old countertop or installing a new one, it is essential to follow the proper installation process to ensure a seamless and long-lasting result.
In this guide, we will walk you through the step-by-step instructions on how to install a quartz countertop. By following these steps, you can achieve a beautiful and functional countertop that will elevate the aesthetics of your space. So without further ado, let’s get started with the installation process.
Choosing The Right Quartz Countertop
When it comes to installing a quartz countertop, one of the most crucial decisions you’ll need to make is choosing the right quartz material. This choice will not only affect the aesthetic appeal of your kitchen but also its durability and functionality. In this article, we’ll explore the factors you should consider, popular quartz brands, and how to decide on the best fit for your needs.
Factors to Consider
When selecting a quartz countertop, there are several important factors to keep in mind. These factors will help you make an informed decision and ensure that your new countertop meets all your expectations. Here are the key factors you should consider:
- Budget: Evaluate your budget and determine how much you’re willing to invest in a quartz countertop. Understand the price range for different quartz brands and choose accordingly.
- Color and Design: Quartz countertops are available in a wide variety of colors, patterns, and designs. Consider the existing color scheme and overall design of your kitchen to select a quartz countertop that complements the space.
- Thickness: Decide on the desired thickness of your countertop. Thicker quartz countertops offer additional durability and a more luxurious feel.
- Resistance to Stains and Scratches: Check the level of stain and scratch resistance offered by different quartz materials. Look for quartz countertops with a high rating in these areas to ensure long-lasting beauty.
- Maintenance: Consider the level of maintenance required for each quartz material. Some quartz countertops are virtually maintenance-free, while others may require periodic sealing or special cleaning products.
- Warranty: Look for quartz brands that offer a substantial warranty. A warranty will provide you with peace of mind and protect your investment in case of any manufacturing defects.
Popular Quartz Brands
Now that you have a better understanding of the factors to consider, let’s explore some of the most popular quartz brands in the market. These brands are known for their exceptional quality, wide range of designs, and customer satisfaction. Here are a few renowned quartz brands to consider:
| Brand | Notable Features |
|---|---|
| Silestone | Offers a vast array of color options and advanced stain resistance technology. |
| Caesarstone | Known for its durability, scratch resistance, and vibrant surface designs. |
| Cambria | Offers natural beauty, exceptional durability, and a comprehensive lifetime warranty. |
Deciding on the Best Fit
With so many factors to consider and numerous quartz brands available, deciding on the best fit for your quartz countertop can be overwhelming. To make your decision easier, prioritize your requirements based on the factors discussed above. Determine your budget, analyze the design options, and consider the maintenance needs of each quartz material. Don’t forget to check customer reviews and ratings to gauge each brand’s reputation and customer satisfaction. By carefully weighing these factors, you can choose the perfect quartz countertop that meets your needs and enhances the beauty of your kitchen.

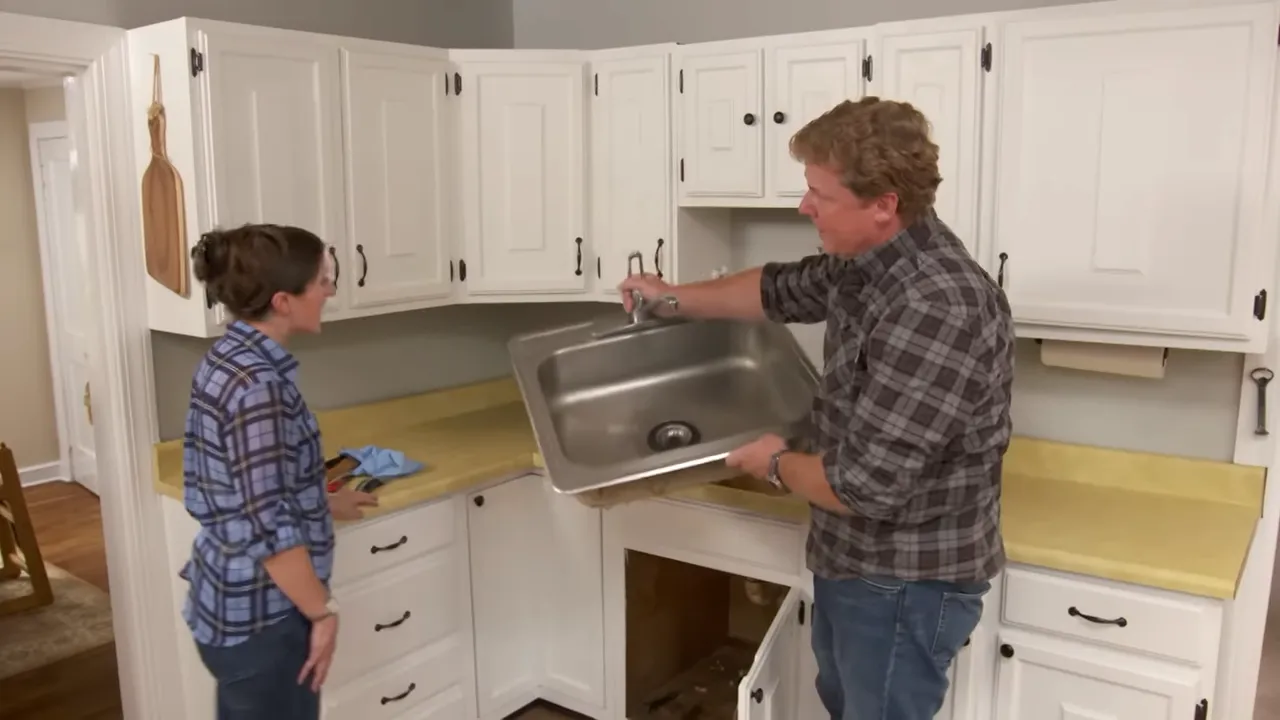
Measuring And Preparing The Space
Before you begin the installation process for a quartz countertop, it is crucial to properly measure and prepare the space. This ensures that the countertop fits perfectly and provides a seamless and professional look. In this section, we will guide you through the steps of measuring the countertop area, preparing the cabinets, and ensuring proper support and leveling.
Measuring the Countertop Area
To start the installation process, you need to accurately measure the countertop area. This step ensures that the slab of quartz you purchase fits perfectly in your space. Here’s how you can measure the countertop area:
- Clear the existing countertop: Remove any appliances, dishes, or objects from the existing countertop to get a clear view of the space.
- Measure the length and width: Use a tape measure to measure the length and width of the countertop area. Make sure to measure from the edge of the cabinets, as this will determine the size of the countertop you need.
- Account for the overhang: If you want an overhang on your countertop, subtract the desired overhang length from the measured width. This will give you the exact width of the countertop slab you need to purchase.
- Double-check the measurements: It’s always a good idea to double-check your measurements before purchasing the quartz slab. Measure again to ensure accuracy and make any necessary adjustments.
Preparing the Cabinets
Once you have measured the countertop area, the next step is to prepare the cabinets. Proper preparation ensures that the cabinets can support the weight of the quartz countertop effectively. Here’s how you can prepare the cabinets:
- Clean and clear the cabinets: Remove any items from the cabinets and clean out any debris or dust. This will provide a clean surface for the installation.
- Check for levelness: Use a level tool to check if the cabinets are level. If they are not, you may need to make adjustments using shims or other leveling methods.
- Reinforce the cabinets if necessary: If the cabinets are not sturdy enough to support the weight of the quartz countertop, reinforce them by adding additional support brackets or reinforcing the existing structure.
Ensuring Proper Support and Leveling
Proper support and leveling are crucial to ensure that your quartz countertop is installed correctly and functions well. Follow these steps to ensure proper support and leveling:
- Add support brackets: Install support brackets to provide additional support for the quartz slab. These brackets should be placed strategically, considering the weight distribution of the countertop.
- Secure the brackets: Make sure the support brackets are securely attached to the cabinets, using screws or other suitable fasteners.
- Check for levelness: Use a level tool to check if the countertop is level. If it is uneven, adjust the support brackets or use shims to ensure a level surface.
By measuring the countertop area accurately, preparing the cabinets, and ensuring proper support and leveling, you are well on your way to installing a quartz countertop that not only looks great but also functions efficiently. In the next section, we will discuss the steps for cutting and fitting the quartz slab to complete the installation process.

Preparing The Quartz Countertop For Installation
Preparing the quartz countertop for installation is a crucial step to ensure a smooth and successful process. This stage involves inspecting the quartz slab, cutting it to the desired size, and making the necessary cutouts for sinks and appliances. Following these steps diligently will result in a beautifully installed quartz countertop that enhances the aesthetic appeal and functionality of your space.
Inspecting the Quartz Slab
Before beginning the installation process, it is essential to carefully inspect the quartz slab to ensure it is in optimal condition. Here are a few steps to follow when inspecting the quartz slab:
- Check for Any Visible Damage: Thoroughly examine the slab for any visible cracks, chips, or scratches. These imperfections, if present, can affect the overall integrity and appearance of the countertop.
- Measure for Accuracy: Use a tape measure to check the dimensions of the quartz slab and ensure that it aligns with the intended measurements for your countertop.
- Verify Color Consistency: Quartz countertops are known for their uniformity in color and pattern. Verify that the slab you have chosen maintains consistent coloring throughout.
- Inspect for Any Manufacturer Defects: Look out for any potential defects caused during the manufacturing process. Notify your supplier promptly if any defects are found.
Cutting the Quartz to Size
Once the quartz slab has been inspected and deemed suitable for installation, the next step is cutting it to the desired size. Cutting quartz requires precision and the right tools. Here’s what you should consider:
- Measure and Mark: Take accurate measurements of the area where you intend to install the countertop. Mark these measurements clearly on the quartz slab to guide your cutting process.
- Use Diamond Blades: Diamond blades are recommended for cutting quartz due to their strength and ability to produce clean and precise cuts. Ensure that the blades are sharp for optimal results.
- Wear Safety Gear: It is crucial to prioritize safety when cutting quartz. Wear safety goggles, gloves, and a mask to protect yourself from any potential hazards associated with cutting and dust.
- Take Your Time: Cutting quartz requires patience and precision. Take your time to make accurate cuts, ensuring that the edges are smooth and fit perfectly into your space.
Making Cutouts for Sink and Appliances
If you plan to incorporate a sink or appliances into your quartz countertop, making the necessary cutouts is vital. Follow these steps when creating cutouts:
- Measure and Mark: Measure and mark the precise locations where the cutouts need to be made for sinks and appliances. Accuracy is crucial to ensure a proper fit.
- Use Diamond Drill Bits: For drilling holes in quartz, diamond drill bits are highly recommended. These bits are specifically designed to cut through the dense quartz material efficiently.
- Work Gradually: When making cutouts, work gradually and avoid rushing the process. This allows for better control and reduces the risk of damaging the quartz slab.
- Sand and Smooth Edges: After making the necessary cutouts, gently sand and smooth the edges to ensure a clean and polished look.
By following these steps to prepare your quartz countertop for installation, you are setting the foundation for a successful and visually appealing addition to your space. Taking the time to inspect, cut, and make appropriate cutouts will result in a beautiful quartz countertop that enhances the overall aesthetics and functionality of your kitchen or bathroom.
Installing The Quartz Countertop
Installing the Quartz Countertop
When it comes to giving your kitchen a stylish and modern makeover, installing a quartz countertop is an excellent choice. Quartz is a durable and versatile material that not only looks stunning but also offers exceptional functionality. From its low maintenance requirements to its resistance to stains and heat, a quartz countertop is an ideal addition to any kitchen.
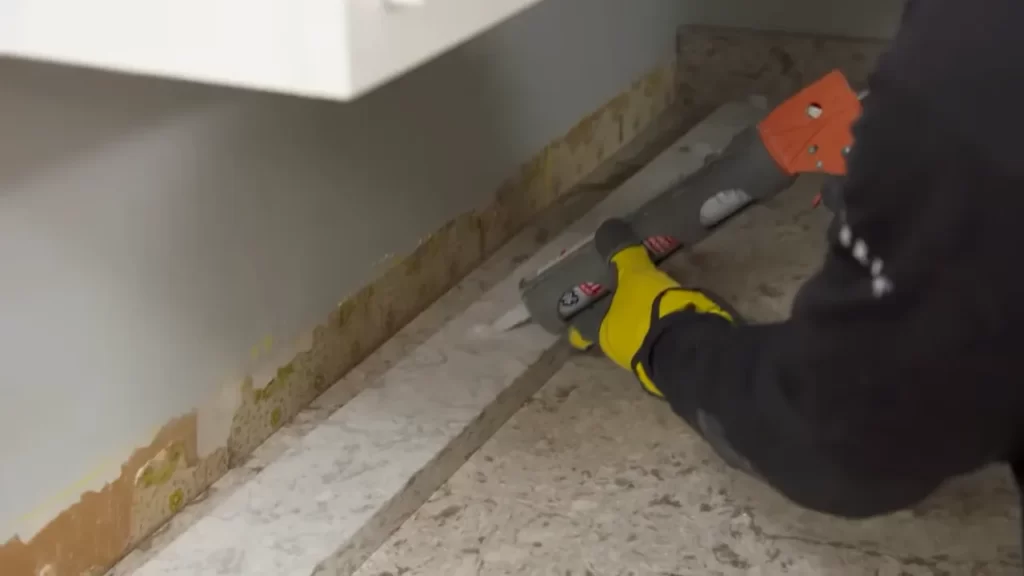
Applying Adhesive
To ensure a secure and long-lasting installation, it is crucial to properly apply adhesive to the base cabinets before placing the quartz slab. Before you start, make sure the surface is clean and dry. Here’s a step-by-step guide on how to apply adhesive:
1. Prep the adhesive: Mix the adhesive according to the manufacturer’s instructions. Ensure that you have the right consistency for optimal bonding.
2. Apply the adhesive: Using a trowel, spread a thin layer of adhesive evenly on the surface of the base cabinets. Make sure to cover the entire area where the quartz slab will be placed.
3. Create ridges: After applying the adhesive, use the notched edge of the trowel to create ridges. This will help with adhesion and prevent the slab from shifting during installation.
Placing the Quartz Slab
Once the adhesive is applied, it’s time to place the quartz slab onto the base cabinets. Here’s how to do it correctly:
1. Align the slab: Carefully lift the slab and position it onto the adhesive-covered base cabinets. Take your time to ensure a perfect fit and alignment with the edges of the cabinets.
2. Press down: Apply even pressure across the entire surface of the slab to ensure maximum contact with the adhesive. This helps to create a strong bond and prevents any gaps or unevenness.
Securing and Leveling the Countertop
After placing the quartz slab, securing and leveling the countertop is essential for a polished and professional finish. Follow these steps to ensure a secure and level installation:
1. Secure the countertop: Use screws to secure the quartz slab to the base cabinets. Make sure to space the screws evenly along the perimeter of the countertop. This will provide additional stability and prevent any movement.
2. Level the countertop: Use a level to check if the countertop is even. Adjust the height of the quartz slab by adding shims underneath if necessary. A leveled countertop is not only aesthetically pleasing but also ensures proper functionality.
In conclusion, installing a quartz countertop requires careful attention to detail and precise execution. By following the steps outlined above, you can enjoy a beautiful and functional quartz countertop that will enhance the overall look and value of your kitchen. Remember to take your time, be diligent, and seek professional assistance if needed.
Sealing And Finishing Touches
Once you’ve successfully installed your quartz countertop, there are a few crucial steps to complete the process and ensure its long-lasting durability. The sealing and finishing touches are essential in protecting your countertop from stains, water damage, and wear and tear. In this section, we’ll walk you through the important steps of applying sealant, cleaning the surface, and reconnecting the plumbing and appliances.
Applying Sealant
Applying a high-quality sealant is a crucial step in protecting your quartz countertop from spills and stains. This will create a barrier on the surface, making it easier to clean and maintaining its pristine condition. To apply the sealant:
- Ensure that the countertop is clean and dry before starting the sealing process.
- Using a clean cloth or sponge, apply the sealant in a thin, even layer, following the manufacturer’s instructions.
- Allow the sealant to dry completely, typically for around 24 hours.
- After the initial application, it is recommended to reapply the sealant every 1 to 2 years, or as per the manufacturer’s guidelines, to maintain its effectiveness.
Cleaning the Surface
Keeping your quartz countertop clean is not only important for maintaining its beauty but also for hygiene purposes. Here are some tips to ensure a spotless surface:
- Wipe spills and stains immediately using a mild detergent or non-abrasive cleaner to prevent them from settling into the surface.
- Avoid using harsh chemicals or abrasive cleaners, as they can dull the quartz finish over time.
- Use a soft cloth or sponge to clean the surface, and rinse thoroughly with water afterward.
- Dry the countertop with a clean, lint-free cloth to prevent water spots.
Reconnecting Plumbing and Appliances
Now that your quartz countertop is sealed and clean, it’s time to reconnect the plumbing and appliances:
- Start by carefully reconnecting the water supply lines to the faucets or sink using the appropriate fittings.
- Double-check all connections for leaks, and tighten if necessary.
- Reconnect the drainpipes, ensuring a proper fit and secure connection.
- If you removed any appliances during the installation process, such as a stovetop or dishwasher, carefully reinstall them, following the manufacturer’s instructions.
- Test all plumbing and appliances to ensure proper functionality.
By following these sealing and finishing touches, your quartz countertop will be fully protected, maintaining its beauty and functionality for years to come.
Maintaining And Caring For Your Quartz Countertop
Once you have installed your stunning quartz countertop, it’s important to ensure its longevity by properly maintaining and caring for it. With just a few simple steps, you can keep your countertop looking as good as new for years to come. From regular cleaning to preventing damage and handling stains, here are some tips to help you maintain your quartz countertop.
Cleaning Tips
To keep your quartz countertop clean and free from dirt and grime, follow these cleaning tips:
- Use a gentle, non-abrasive cleaner to avoid scratching the surface. Avoid using harsh chemicals or abrasive cleaning tools.
- Wipe up spills immediately to prevent them from staining the surface.
- Use a soft cloth or sponge to clean the countertop, and avoid using scrub brushes or scouring pads.
- Warm water and mild dish soap are usually sufficient for everyday cleaning. Rinse thoroughly and dry the surface with a clean cloth.
- For tougher stains or dried-on food particles, you can use a quartz cleaner specifically designed for quartz surfaces. Follow the manufacturer’s instructions for best results.
Avoiding Damage
To protect your quartz countertop from damage, consider these preventative measures:
- Always use cutting boards or chopping blocks when preparing food. Quartz is a durable material, but it can still be susceptible to scratches from sharp knives or other sharp objects.
- Use trivets or hot pads under hot pots, pans, or dishes to prevent heat damage. While quartz is heat resistant, extreme temperature changes can cause cracking or discoloration.
- Avoid placing heavy objects or applying excessive force on your countertop, as this can cause it to crack or chip. Use caution when moving heavy appliances or utensils on the surface.
- Consider using coasters or placemats under glasses, bottles, or cans to prevent potential staining from acidic or colored liquids.
Dealing with Stains
If a stain does occur on your quartz countertop, it’s essential to address it promptly to minimize any discoloration. Here are a few steps to help you deal with common stains:
- For liquid stains such as coffee or wine, gently blot the spill with a paper towel or soft cloth. Avoid scrubbing, as this can spread the stain.
- To remove tougher stains or dried-on substances, you can create a paste with baking soda and water. Apply the paste to the stain, let it sit for a few minutes, and then gently scrub with a soft cloth. Rinse thoroughly and dry the surface.
- For oily or greasy stains, you can use a degreasing agent or a gentle household cleaner. Follow the manufacturer’s instructions and rinse thoroughly after cleaning.
- If the stain persists, you may need to consult with a professional cleaner who specializes in quartz surfaces for advice or further assistance.
By following these maintenance and care tips, your quartz countertop will continue to shine and impress for many years to come. Remember to clean spills promptly, use proper cutting boards and hot pads, and handle stains with care, and you’ll enjoy a beautiful and functional countertop in your home.
Frequently Asked Questions
Is Quartz Countertop Easy To Install?
Yes, quartz countertops are easy to install. Their straightforward installation process makes it convenient for homeowners. Quartz countertops can be easily placed and secured onto cabinets or supporting surfaces using adhesive and screws. Professional installation is recommended for precise alignment and to ensure a seamless finish.
What Do You Put Under Quartz Countertops?
Quartz countertops require support from a stable and sturdy base such as plywood or particleboard. These materials provide a secure foundation for the countertops to be installed on.
Can You Install Quartz Yourself?
Yes, you can install quartz yourself. It is a straightforward process that requires careful measurements and proper tools. Ensure you follow the manufacturer’s instructions to achieve a successful installation.
How Do They Attach A Quartz Countertop?
Quartz countertops are attached using a strong adhesive that bonds them to the cabinets or bases. The adhesive is carefully applied to ensure a secure and permanent attachment. This method guarantees stability and durability for the countertop.
Conclusion
Installing a quartz countertop doesn’t have to be a daunting task. By following these step-by-step instructions, you can have a beautiful and durable countertop in your kitchen or bathroom. Remember to measure carefully, prepare the area properly, and use the right tools and materials.
Whether you’re a DIY enthusiast or hiring a professional, the end result will be a stunning quartz countertop that adds value and elegance to your space. So go ahead and take on this project with confidence!