To install a PVC slip coupling, first ensure the pipes are clean and dry. Then, apply PVC primer to the pipe ends, followed by PVC cement.
Firmly push the slip coupling onto one pipe, ensuring it covers the PVC primer and cement.
Understanding The Purpose And Function Of A Pvc Slip Coupling
Understanding the Purpose and Function of a PVC Slip Coupling
PVC slip couplings are essential components when it comes to joining sections of PVC pipe together. Designed with convenience and efficiency in mind, these slip couplings play a crucial role in various plumbing and irrigation applications. Whether you’re a DIY enthusiast or a professional plumber, it’s important to have a solid understanding of how slip couplings work and the benefits they provide.
Definition and Basic Overview of PVC Slip Coupling
PVC slip couplings are versatile fittings that are commonly used in PVC pipe installations. They are designed to allow for quick and easy connections between two sections of PVC pipe without the need for complex joining techniques or adhesives. Slip couplings consist of two separate parts: a cylindrical body and a compression nut. The body of the coupling features two slip ends that allow the pipe to be inserted and secured, while the compression nut creates a tight seal by compressing the coupling onto the pipe ends.
Explanation of How Slip Couplings Work
Slip couplings work on a simple yet effective principle. When installing a slip coupling, the first step is to measure and cut the PVC pipe to the desired length. Once the pipe is cut, it can be easily inserted into one end of the slip coupling. It’s important to ensure that the pipe is fully inserted into the coupling until it reaches the stop inside. The compression nut is then tightened onto the coupling, creating a secure and leak-proof joint.
The unique design of slip couplings allows for flexibility and adjustability during installations. If a mistake is made during the cutting or measurement process, slip couplings make it easy to make adjustments without the need for additional materials or tools. This makes them a popular choice for both professional plumbers and DIY enthusiasts.
Highlighting the Benefits of Using Slip Couplings in PVC Installations
There are several key benefits to using slip couplings in PVC installations:
- Easy and quick installation: Slip couplings eliminate the need for complex joining techniques or adhesives, making installations faster and more efficient.
- Flexibility and adjustability: The ability to easily make adjustments during installations ensures a higher level of accuracy and reduces the risk of errors.
- Leak-proof joints: The compression nut creates a tight seal, preventing water or other fluids from leaking out of the pipe.
- Cost-effective: Slip couplings are affordable and readily available, making them a cost-effective choice for PVC installations.
Overall, PVC slip couplings are invaluable components that simplify and enhance PVC pipe installations. Their ease of use, flexibility, and leak-proof properties make them a go-to choice for professionals and DIYers alike.
Factors To Consider When Selecting A Pvc Slip Coupling
Selecting the right PVC slip coupling is crucial for ensuring a secure connection between two pipes. By considering key factors such as pipe size, application, slip coupling types, and material durability, you can make an informed decision that meets your specific needs. In this article, we will explore these factors in detail to help you choose the ideal PVC slip coupling for your project.
Assessing the Required Pipe Size and Application
When it comes to selecting a PVC slip coupling, one of the first factors to consider is the required pipe size. This will determine the specific slip coupling size you need to ensure a proper fit. Measure the outside diameter of the pipe and match it with the corresponding size of the slip coupling.
Additionally, you should assess the application for which you need the slip coupling. Consider factors such as the type of fluid or material that will flow through the pipes, the amount of pressure the coupling will need to withstand, and the temperature variations it will be exposed to. Understanding these requirements will help you choose a slip coupling that is suitable for your specific application.
Understanding the Different Types of Slip Couplings Available
There are various types of slip couplings available, each designed for specific applications and installation methods. Familiarize yourself with the different types to ensure you select the most appropriate one. Some common types of slip couplings include:
| Slip Coupling Type | Description |
|---|---|
| Standard Slip Coupling | This type of slip coupling is ideal for regular pipe connections. It provides a simple and reliable joining method. |
| Repair Slip Coupling | If you need to repair a damaged section of a pipe, a repair slip coupling can be used to cut out the damaged area and join the remaining pipe segments. |
| Expansion Slip Coupling | This type of slip coupling allows for expansion and contraction of pipes due to temperature changes. It is commonly used in applications where temperature variations are significant. |
Considering the Material and Durability of the Slip Coupling
The material and durability of the slip coupling are crucial factors to consider, as they can directly impact the longevity and reliability of the connection. PVC slip couplings are available in different materials, including regular PVC and CPVC. Regular PVC is suitable for most applications, while CPVC provides higher temperature resistance.
Furthermore, consider the durability of the slip coupling. Look for slip couplings that are resistant to corrosion, chemicals, and UV rays. This ensures that the coupling will remain strong and reliable even under harsh conditions.
In conclusion, when selecting a PVC slip coupling, it is important to assess the required pipe size and application, understand the different types of slip couplings available, and consider the material and durability. By carefully considering these factors, you can confidently choose a slip coupling that will provide a secure and long-lasting connection for your pipes.
Gathering The Necessary Tools And Materials
List of tools required for installing a PVC slip coupling:
Before you begin installing a PVC slip coupling, it’s essential to gather all the tools you’ll need. Having the right tools at hand will make the installation process smooth and efficient. Here is a list of the tools you should have:
- Adjustable wrench
- Hacksaw
- Measuring tape
- Deburring tool
- PVC primer
- PVC cement
- Marker or pencil
- Pipe cutter
Necessary materials for the installation process:
In addition to the tools, it’s crucial to gather all the necessary materials for the PVC slip coupling installation. Having these materials ready will help you complete the project without any delays. The materials you’ll need include:
- PVC slip coupling
- PVC pipe
- Teflon tape
- Clean cloth or rag
Once you have gathered all the tools and materials, you are ready to move on to the next steps of installing a PVC slip coupling. However, before starting the installation process, it’s recommended to read the manufacturer’s instructions and follow all necessary safety precautions.
Measuring And Cutting The Pvc Pipes
One of the crucial steps in installing a PVC slip coupling is accurately measuring and cutting the PVC pipes. This ensures a proper fit and allows for a smooth and seamless installation process.
Measuring the Length of the Existing Pipes Accurately
Before cutting the PVC pipes, it is essential to measure the length of the existing pipes accurately. This step ensures that the slip coupling will fit perfectly between the two ends, creating a secure and leak-free connection. To measure the length, follow these steps:
- Start by identifying the area where you need to install the slip coupling.
- Place a measuring tape at one end of the pipe and extend it along the pipe’s length until you reach the other end.
- Hold the measuring tape firmly in place and note down the measurement in inches or centimeters, depending on your preference.
- Repeat this process for each section of the pipe that requires a slip coupling.
Techniques for Cutting PVC Pipes Safely and Precisely
Once you have accurately measured the length of the existing pipes, it’s time to cut the PVC pipes. Cutting PVC pipes safely and precisely is crucial to ensure a proper fit and avoid any mishaps during the installation. Here are some techniques to help you cut PVC pipes effectively:
- Hacksaw: A hacksaw is an excellent tool for cutting PVC pipes. Make sure to choose a fine-toothed blade specifically designed for cutting plastic. Start by marking the pipe with a pencil or marker at the desired length. Then, secure the pipe in a vise or clamp to prevent it from moving. Slowly and steadily, saw through the marked line using long, smooth strokes.
- PVC Pipe Cutter: PVC pipe cutters are specially designed for cutting PVC pipes efficiently. These cutters have a sharp blade and a ratcheting mechanism that assists in making clean and precise cuts. Place the cutter around the pipe at the desired cutting point, squeeze the handles together, and rotate the cutter around the pipe. Repeat this process until the pipe is cut through entirely.
- Miter Saw: If you have access to a miter saw, it can be a great tool for cutting PVC pipes. Set up the miter saw with a fine-toothed blade suitable for cutting plastic. Before cutting, ensure the pipe is securely clamped in place. Then, lower the saw blade onto the marked cutting point and smoothly push the blade through the pipe.
Ensuring Smooth and Clean Pipe Ends for a Proper Fit
After cutting the PVC pipes, it is vital to ensure the ends are smooth and clean. This step guarantees a proper fit and prevents any obstruction or misalignment when connecting the slip coupling. Follow these tips to ensure smooth and clean pipe ends:
- Remove Burrs: Use sandpaper or a deburring tool to remove any rough edges or burrs from the cut ends of the PVC pipes. Gently sand the edges in a circular motion until they feel smooth to the touch.
- Clean the Pipe Ends: Use a clean cloth or rag to wipe away any debris, dust, or dirt from the pipe ends. This ensures a clean and secure connection between the slip coupling and the existing pipes.
By accurately measuring and cutting the PVC pipes, as well as ensuring smooth and clean pipe ends, you are one step closer to successfully installing a PVC slip coupling. These steps help create a secure and reliable connection, ensuring your plumbing system functions smoothly for years to come.
Step 1: Preparing The Pipes And Slip Coupling
HTML response starts below:
When it comes to installing a PVC slip coupling, it is important to start with the right preparations. This will ensure a proper and secure fit, allowing for efficient and leak-free plumbing connections. In this first step, we will focus on preparing the pipes and slip coupling before installation.
Clean the Pipe Ends with Sandpaper or a Cleaner Solution
Before joining the pipes with a slip coupling, it is essential to clean the pipe ends to remove any dirt, debris, or oxidation that may hinder the bonding process. Here’s what you need to do:
- Start by using a piece of fine sandpaper to gently sand the outer surface of the pipe ends. This will help remove any roughness or oxidation.
- Alternatively, you can use a cleaner solution specifically designed for PVC pipes. Apply the solution to a clean rag or cloth and wipe down the pipe ends thoroughly.
Cleaning the pipe ends is crucial as it allows for better adhesion and ensures a proper seal. By removing any potential contaminants, you can create a clean surface that facilitates a strong bond between the pipes and the slip coupling.
Applying PVC Primer and Glue to the Pipe Ends
Once the pipe ends are clean, the next step involves applying PVC primer and glue to create a strong bond. Follow these steps:
- Apply the PVC primer to the outside of the pipe end using a small brush. Be sure to coat the entire circumference of the pipe.
- Allow the primer to dry for the specified time recommended by the manufacturer. This usually takes around 15 seconds.
- Once the primer is dry, apply PVC glue to the outside of the pipe end in the same manner as the primer. Apply an even layer, covering the entire surface.
- Now, it’s time to insert the pipe end into the slip coupling. Make sure to align the pipe properly with the coupling.
- Give the pipe a slight twist to evenly distribute the glue and ensure a secure bond.
Applying PVC primer and glue is crucial for creating a strong and durable connection. The primer prepares the surface for bonding, while the glue provides a secure and waterproof seal. Together, they form a reliable joint that can withstand pressure and prevent leaks.
Obtaining the Correct Placement of the Slip Coupling
To ensure a successful installation, it is vital to obtain the correct placement of the slip coupling. Follow these steps:
- Measure the required length of the slip coupling, ensuring it matches the gap between the pipe ends.
- Mark the measured length on both pipes using a marker or pencil. This will serve as a guide for proper placement.
- Insert the slip coupling between the marked points on the pipes, adjusting it until it fits perfectly.
Obtaining the correct placement of the slip coupling is essential for a secure connection. It ensures that both pipe ends are properly aligned and allows for a seamless joint.
In conclusion, preparing the pipes and slip coupling is a critical first step when installing a PVC slip coupling. By cleaning the pipe ends, applying PVC primer and glue, and obtaining the correct placement of the slip coupling, you can create a strong, reliable, and leak-free connection.
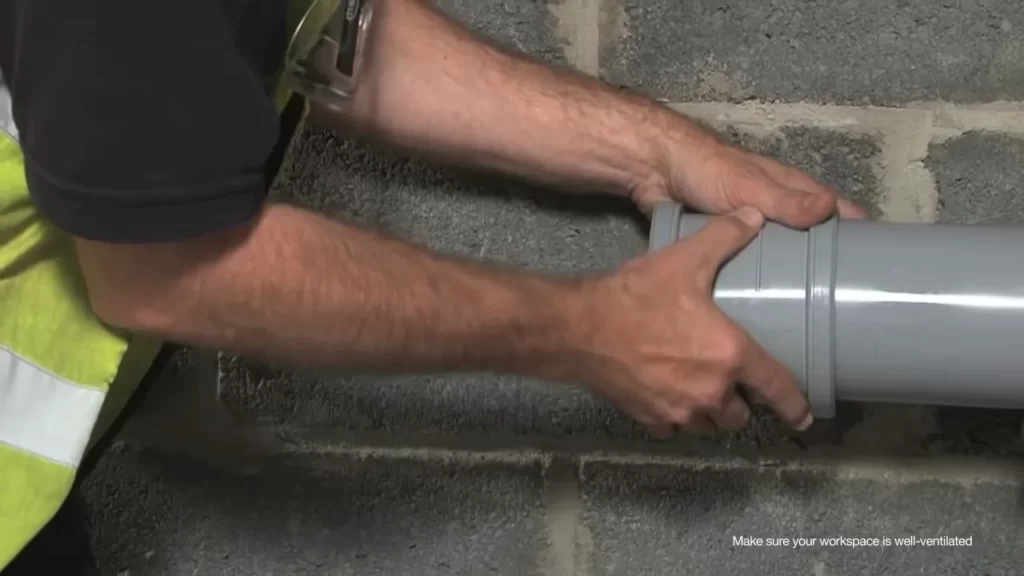
Step 2: Sliding The Slip Coupling
Now that you have prepared the pipes for installation, it’s time to slide the slip coupling onto one end of the pipe. The slip coupling is a versatile and efficient fitting that allows you to join two sections of PVC pipe together swiftly and securely. Follow these instructions to ensure a proper alignment and fit of the coupling:
- Apply a small amount of PVC primer to the outside of the pipe end, ensuring it covers the entire circumference.
- Next, apply PVC cement to the inside of the coupling. Be sure to coat the entire interior surface with a thin, even layer.
- Hold the slip coupling in one hand, aligning it with the pipe end.
- Gently push the slip coupling onto the pipe, making sure it slides smoothly and evenly.
- Continue pushing the coupling until it reaches the desired position, which may be indicated by a mark or a set distance from the pipe end.
It is essential to take note of a few key considerations while sliding the slip coupling:
- Ensure that the coupling is pushed firmly enough to create a snug fit, but not so forcefully that it damages the pipe or coupling.
- Check for proper alignment between the coupling and the pipe to ensure a straight connection. Misalignment may lead to leaks or a weak joint.
- Pay attention to any markings or indicators on the coupling that may guide you in achieving the correct depth or position.
Remember, the slip coupling allows for some movement and adjustment once installed, making it easy to make corrections if necessary. However, it is always best to get it right on the first attempt to ensure a strong and durable joint.
Step 3: Securing The Slip Coupling
Once you have prepped the pipes and applied the primer and PVC cement, it’s time to secure the slip coupling in place. This step is crucial for creating a leak-proof and durable connection. Follow these steps to properly secure the slip coupling.
Applying PVC glue to the other pipe end
Before securing the slip coupling, you’ll need to apply PVC glue to the end of the second pipe. This ensures a strong bond between the pipe and the slip coupling. Take the following steps to apply the glue:
- Apply PVC glue generously around the outside of the pipe end.
- Using a brush or your finger, spread the glue evenly to cover the entire outside surface of the pipe.
- Ensure that the glue is applied smoothly without any clumps or excess.
Inserting the second pipe into the slip coupling
Now that the second pipe is properly glued, it’s time to insert it into the slip coupling. Follow these simple steps to insert the pipe:
- Hold the slip coupling with one hand, ensuring that it is aligned with the first pipe.
- Using your other hand, gently insert the glued end of the second pipe into the slip coupling.
- Slide the pipe all the way into the coupling until it reaches the stop inside.
- Ensure that the pipe is inserted straight and fully into the coupling.
Checking for tightness and proper alignment
Once the second pipe is inserted into the slip coupling, it’s important to check for tightness and proper alignment. Following these steps will help you ensure a secure connection:
- Gently twist the slip coupling to ensure that it’s snug against both pipes.
- Check for any gaps or misalignment between the slip coupling and the pipes.
- If there are any issues, you may need to remove the slip coupling and reapply PVC glue to fix the problem.
- Make sure that both pipes are properly aligned and straight.
By applying PVC glue to the other pipe end, inserting the second pipe into the slip coupling, and checking for tightness and proper alignment, you have successfully secured the slip coupling. This step is crucial in creating a strong and reliable joint in your PVC pipe system.
Checking For Leaks And Functionality
Once you have successfully installed your PVC slip coupling, it is crucial to check for leaks and ensure its proper functionality. Taking these steps will help you avoid potential water damage, keep your plumbing system running smoothly and save you from expensive repairs down the line.
Performing a Pressure Test After Installation
One of the first things you should do is perform a pressure test to ensure the slip coupling is installed correctly and securely. This test involves pressurizing the system and checking for any signs of leakage. Here’s how you can do it:
- Close all the valves and faucets connected to the plumbing line.
- Attach a pressure gauge to a hose bib or any accessible spigot in your plumbing system.
- Slowly open the main water supply valve to pressurize the system.
- Monitor the pressure gauge closely. If the pressure drops significantly over time, there may be a leak.
If you notice a pressure drop, you will need to identify the source of the leak and make the necessary adjustments or repairs. It’s important to address any leaks promptly to prevent water damage and ensure the slip coupling functions effectively.
Observing for Any Signs of Leaks or Gaps
Even after performing a pressure test, it’s essential to keep a close eye on the slip coupling to check for any signs of leaks or gaps. Here are some key areas to observe:
- Inspect the joint between the pipes where the slip coupling is installed. Look for any water drips, dampness, or water stains.
- Check for any visible gaps between the slip coupling and the pipes it connects. These gaps may indicate an improper installation or a potential leak.
- If you notice any leaks or gaps, it’s important to take immediate action. Tighten the slip coupling if necessary, using slip joint pliers or a wrench, following the manufacturer’s instructions.
Regularly inspecting the slip coupling for any signs of leaks or gaps can help you catch and address potential issues early on, preventing further damage to your plumbing system.
Troubleshooting Common Issues with Slip Couplings
Sometimes, slip couplings may encounter common issues that can compromise their functionality. Here are a few troubleshooting tips to keep in mind:
| Issue | Troubleshooting Tip |
|---|---|
| The slip coupling is difficult to slide onto the pipes | Apply some lubricant or dish soap on the pipes to ease the installation process. |
| The slip coupling is not sealing properly | Check if the pipes are clean and free from debris. Ensure the slip coupling is fully inserted onto the pipes, and securely tightened. |
| The slip coupling is leaking after installation | Inspect for any visible gaps or improper alignment. Make sure the slip coupling is tightened adequately. If necessary, disassemble and reinstall the coupling carefully. |
By troubleshooting these common issues and following the appropriate steps, you can ensure that your slip couplings function effectively and provide a reliable connection between your PVC pipes.
Checking for leaks and ensuring the functionality of your PVC slip coupling is crucial for the integrity and performance of your plumbing system. Performing a pressure test, observing for leaks or gaps, and troubleshooting common issues will help you maintain a leak-free and efficient plumbing system.
Additional Tips And Maintenance
Proper maintenance is crucial for the longevity and efficiency of PVC slip couplings. In this section, we will discuss some recommendations for maintaining slip couplings, as well as how regular inspection can help lengthen their lifespan. We will also highlight when it is necessary to replace or repair slip couplings.
Recommendations for Proper Maintenance of Slip Couplings
To keep your PVC slip couplings functioning optimally, follow these maintenance recommendations:
- Regularly inspect the slip couplings for any signs of leaks, cracks, or damage. Look for discoloration or irregularities in the appearance of the coupling.
- Ensure that the slip couplings are protected from extreme temperatures, direct sunlight, and harsh environmental conditions.
- Avoid applying excessive force or torque when tightening the slip couplings. Over-tightening can cause damage to the couplings or the adjoining pipes.
- Regularly clean the slip couplings using a mild detergent and water solution. Do not use abrasive cleaners or solvents, as they can degrade the PVC material.
- Apply a lubricant or PVC-friendly sealant to the slip couplings, which can help prevent wear and tear and improve the ease of installation and removal.
Lengthening the Lifespan of Slip Couplings through Regular Inspection
Regular inspection plays a vital role in extending the lifespan of PVC slip couplings. By conducting routine inspections, you can identify any potential issues early on and take prompt action to prevent further damage.
During inspections, pay attention to the following:
- Check for any signs of leaks, such as dripping water or moisture around the slip couplings.
- Inspect the alignment of the slip couplings and ensure they are properly seated on the adjoining pipes.
- Look for any cracks or fractures in the slip couplings.
- Monitor the condition of the sealing rings or gaskets, as worn-out or damaged seals can lead to leaks.
If you notice any issues during the inspection, take immediate action to repair or replace the slip couplings to prevent further damage or potential water damage.
When to Replace or Repair Slip Couplings
While proper maintenance can significantly prolong the lifespan of slip couplings, there may come a time when replacement or repair is necessary. Consider the following factors:
- If the slip couplings show severe cracks, leaks, or damage that cannot be repaired, it is advisable to replace them.
- When the sealing rings or gaskets become worn out or lose their effectiveness, it is essential to replace them promptly to prevent water leakage.
- If the slip couplings repeatedly fail or do not provide a reliable seal, it may be an indication of a bigger underlying issue that requires professional inspection and repair.
Regularly monitor the condition of your slip couplings and promptly address any problems to ensure the proper functioning of your PVC plumbing system.
Recap Of The Pvc Slip Coupling Installation Process
In this section, we will provide a summary of the step-by-step installation procedure for a PVC slip coupling. By following these instructions diligently, you can ensure a successful installation and enjoy the benefits of a secure and leak-free PVC pipe system.
Summary of the step-by-step installation procedure:
As a quick overview, here is a summary of the installation process for a PVC slip coupling:
- Prepare the PVC pipes: Measure and cut the PVC pipes to the desired length. Ensure that the ends of the pipes are clean and free from any debris or rough edges.
- Apply primer: Using a brush, apply a PVC primer to the outside of the pipe end and the inside of the slip coupling. Allow the primer to dry according to the manufacturer’s instructions.
- Apply adhesive: Once the primer is dry, apply a generous amount of PVC adhesive to the primed areas of the pipe end and the slip coupling.
- Insert the slip coupling: Carefully slide the slip coupling onto one end of the PVC pipe until it reaches the midpoint of the coupling.
- Slide the pipe into the coupling: Insert the other end of the PVC pipe into the open end of the slip coupling. Rotate the pipe slightly to ensure a proper bond between the adhesive and the pipe surfaces.
- Final adjustments: Ensure that the PVC pipe is fully inserted into the slip coupling, leaving no gaps or spaces. Wipe off any excess adhesive that may have squeezed out during the installation process.
- Allow the adhesive to cure: Leave the slip coupling undisturbed for the recommended curing time specified by the adhesive manufacturer.
- Test for leaks: Once the adhesive has cured, test the PVC pipe system for any potential leaks by running water through the installed pipes and checking for any signs of moisture or dripping.
Importance of using slip couplings for PVC pipe installations
Slip couplings play a critical role in PVC pipe installations, providing numerous benefits that ensure the longevity and reliability of the system. Here are some key reasons why using slip couplings is important:
- Flexibility: Slip couplings allow for slight movement and flexibility within the PVC pipe system. This is especially important in situations where the pipes may expand or contract due to temperature changes or ground movements.
- Easy repair and maintenance: Slip couplings make it easier to replace a damaged section of PVC pipe without the need for extensive cutting or disassembly. Simply slide the coupling back, remove the damaged pipe, and insert a new one.
- Leak prevention: The adhesive used in slip coupling installations provides a secure and watertight seal, minimizing the risk of leaks or water damage. This is especially crucial in applications where water pressure is high or where leaks can cause significant damage.
- Time-saving installation: Slip couplings offer a quicker and more efficient installation process compared to traditional methods. The slip-on design eliminates the need for complex jointing techniques, allowing for faster completion of the project.
- Cost-effective solution: By using slip couplings, you can minimize material wastage and reduce labor costs associated with traditional PVC pipe jointing methods. This makes slip couplings a cost-effective solution for both small-scale and large-scale PVC pipe installations.
In conclusion, understanding the installation process and the importance of slip couplings in PVC pipe systems is crucial for successful and durable installations. By following the step-by-step procedure and utilizing slip couplings, you can ensure a secure and efficient pipe system that will withstand the test of time.
Final Thoughts On Installing Pvc Slip Couplings
Final Thoughts on Installing PVC Slip Couplings
Discussion on the Advantages and Benefits of Slip Couplings
When it comes to plumbing repairs or installations, finding the most efficient and convenient solution is always a top priority. That’s where PVC slip couplings come in. These versatile fittings offer a range of advantages and benefits that make them a popular choice among DIY enthusiasts and professional plumbers alike.
One of the main advantages of slip couplings is their ease of use. Unlike traditional couplings that require meticulous measuring and cutting, slip couplings can be installed quickly and easily. These couplings come with a slip end that easily slides over existing pipes, eliminating the need for precise measurements. This straightforward installation process saves time and effort, making slip couplings an ideal choice for any plumbing project.
The benefits of using slip couplings go beyond their ease of installation. These fittings are also highly durable and resistant to corrosion and chemical damage. PVC slip couplings are made from a high-quality, strong material that can withstand extreme temperatures and harsh conditions. This durability ensures long-lasting performance, making slip couplings a reliable solution for any plumbing system.
Another key benefit of slip couplings is their versatility. These fittings can be used in a variety of applications, including repairs and new installations. Whether you’re fixing a leaky pipe or connecting new plumbing fixtures, slip couplings offer a flexible solution that can adapt to your specific needs. With slip couplings, you can easily make adjustments or additions to your plumbing system without the hassle of complex modifications.
Encouragement for DIY Enthusiasts to Try Slip Coupling Installations Themselves
If you’re a DIY enthusiast looking to tackle a plumbing project, installing PVC slip couplings can be a great starting point. Their user-friendly design and straightforward installation process make slip couplings an excellent choice for beginners. By opting for slip couplings, you can confidently take on plumbing repairs or installations without needing extensive experience or specialized tools.
Installing slip couplings yourself not only saves you money on hiring a professional plumber but also gives you the satisfaction of completing a successful project on your own. It’s an empowering experience that allows you to take control of your home maintenance and repairs.
Before starting the installation, it’s important to familiarize yourself with the basic steps and safety precautions. Ensure you have the necessary tools and materials, such as a pipe cutter and primer, to properly complete the installation. Follow the manufacturer’s instructions and consult helpful online resources or tutorials to guide you through the process.
Remember, practice makes perfect. Don’t be afraid to make mistakes and learn from them. With each successful slip coupling installation, your confidence and skills will grow.
In conclusion, PVC slip couplings offer a convenient and reliable solution for plumbing repairs and installations. Their advantages, including easy installation, durability, and versatility, make them an attractive choice for both DIY enthusiasts and professional plumbers. So why not give slip coupling installations a try yourself? With a bit of preparation, practice, and the right tools, you’ll be on your way to successfully completing your next plumbing project.
Frequently Asked Questions
How Do You Install A Pvc Slip Joint Union?
To install a PVC slip joint union, follow these steps: 1. Cut the PVC pipe at the desired location. 2. Slide the slip nut and washer onto one end of the pipe. 3. Insert the pipe into the union until it reaches the stop inside.
4. Slide the slip nut and washer onto the other end of the pipe. 5. Tighten the slip nuts by hand to create a secure connection. Remember to use PVC primer and solvent cement to ensure a strong and leak-free joint.
How Do You Glue Pvc Slip Repair Coupling?
To glue a PVC slip repair coupling, follow these steps: 1. Ensure the pipe surfaces are clean and dry. 2. Apply PVC primer to both the pipe and the fitting. 3. Apply PVC cement to the outside of the pipe and the inside of the fitting.
4. Insert the pipe into the fitting, giving it a quarter turn to spread the cement evenly. 5. Hold the joint firmly in place for a few seconds to allow the cement to set.
How Do You Fit A Slip Coupling?
To fit a slip coupling, follow these steps: 1. Measure the length needed and mark the pipe. 2. Cut the pipe using a pipe cutter or saw. 3. Slide the slip coupling onto one end of the pipe. 4. Push the other pipe end into the coupling.
5. Tighten the slip coupling’s screws to secure the connection.
How Do You Install Pvc Coupling Without Stop?
To install a PVC coupling without a stop, follow these steps: 1. Measure and cut the desired length of PVC pipe. 2. Apply PVC primer to the pipe ends and inside the coupling. 3. Apply PVC cement to the pipe ends and inside the coupling.
4. Align and insert the pipe into the coupling, twisting slightly for a secure fit. 5. Allow the cement to dry completely before using the connection.
Conclusion
To conclude, installing a PVC slip coupling is a straightforward process that requires a few simple steps. By following the instructions provided in this blog post, you can effortlessly connect two PVC pipes without the need for any additional tools or fittings.
Remember to ensure a tight seal by tightening the slip coupling firmly. With this knowledge, you can confidently tackle any plumbing project involving PVC pipes. Happy DIY-ing!