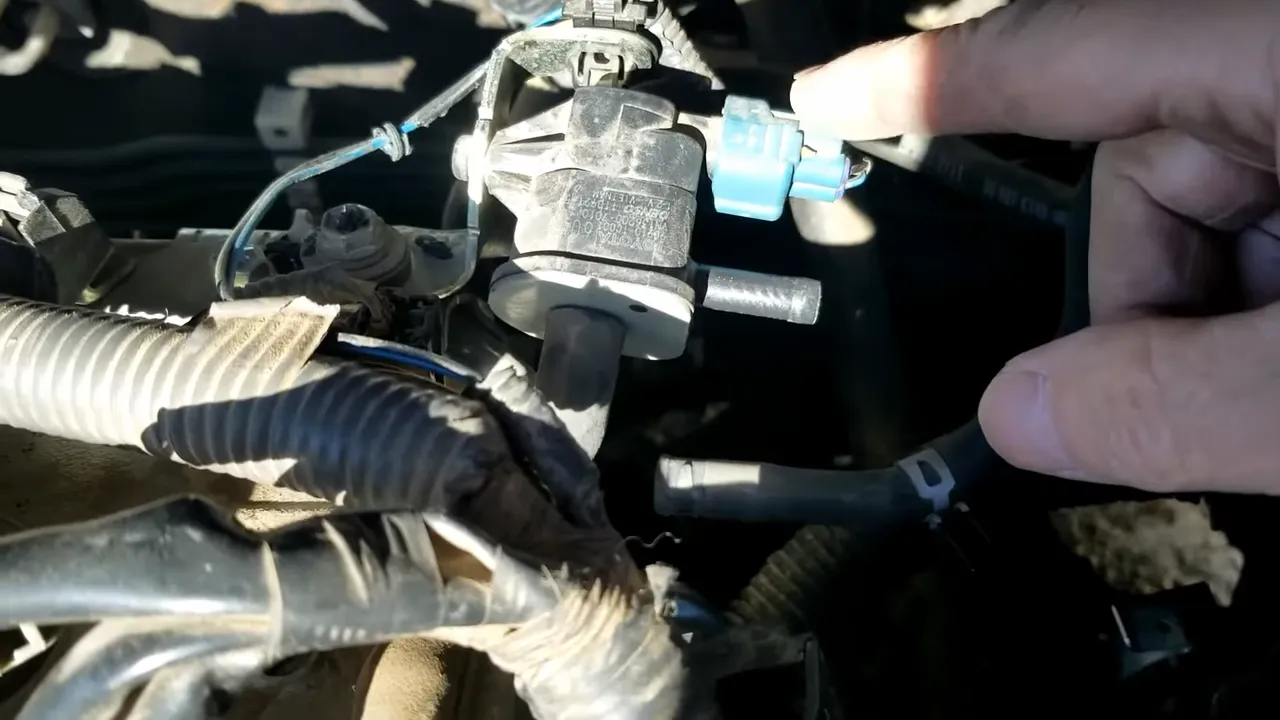
To install a purge valve, start by locating the old valve and disconnecting it from the intake manifold and vacuum lines. Then, install the new valve, reconnect the vacuum lines, and secure the valve to the intake manifold.
Common Signs Of A Faulty Purge Valve
The purge valve is a critical component of your vehicle’s evaporative emission control system. It helps prevent hydrocarbon vapors from escaping into the atmosphere by storing them temporarily in a charcoal canister. Over time, the purge valve can become faulty, leading to various issues in your vehicle’s performance. In this section, we will discuss the common signs of a faulty purge valve that you should be aware of.
Engine Misfiring
One of the common signs that your purge valve may be faulty is engine misfiring. When the purge valve fails to open or close properly, it can cause an imbalance in the air-fuel mixture entering the combustion chamber. This imbalance can result in intermittent misfires, which you may notice as jerking or hesitation while driving. If you experience engine misfiring, it’s essential to have your purge valve inspected and replaced, if necessary.
Rough Idling
A faulty purge valve can also lead to rough idling. When the valve gets stuck in an open position, it allows too much fuel vapor to enter the intake manifold, upsetting the engine’s idle speed. As a result, you may experience a rough or unstable idle, with the engine vibrating more than usual. Addressing this issue by replacing the faulty purge valve can help restore smooth idling and improve overall engine performance.
Decreased Fuel Efficiency
Another indication of a faulty purge valve is decreased fuel efficiency. When the valve fails to close properly, it can create a constant vacuum leak in the intake system, causing the engine to burn more fuel. As a result, you may notice a decrease in your vehicle’s mileage, requiring more frequent trips to the gas station. Monitoring your fuel consumption and addressing any decrease in efficiency can help diagnose and resolve purge valve issues.
Check Engine Light Illumination
A malfunctioning purge valve often triggers the check engine light on your vehicle’s dashboard. The engine control unit (ECU) detects irregularities in the evaporative emission system, such as excessive vacuum or insufficient purge flow, and illuminates the check engine light as a warning. If you notice the check engine light illuminated, it’s crucial to have your vehicle scanned for trouble codes and inspect the purge valve for any faults.
In conclusion, being aware of the common signs of a faulty purge valve can help you troubleshoot and resolve any issues promptly. If you experience engine misfiring, rough idling, decreased fuel efficiency, or see the check engine light illuminate, it’s advisable to consult a professional mechanic and have your purge valve inspected and replaced, if necessary.
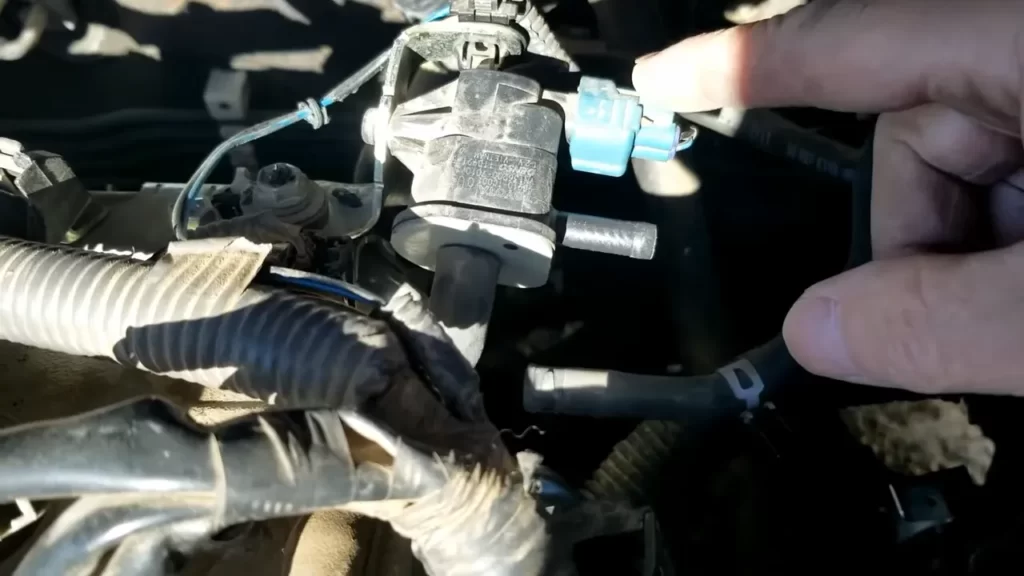
Preparing For Purge Valve Installation
Before you embark on the task of installing a purge valve, it is important to properly prepare yourself and gather all the necessary tools and information. This section will guide you through the essential steps to take before starting the installation process.
Gather Essential Tools
The first step in preparing for the installation of a purge valve is to gather all the necessary tools. By ensuring you have the right tools on hand, you can greatly simplify the installation process and avoid any unnecessary delays. Here are some of the tools you will need:
- Socket set: A socket set will come in handy for removing any bolts or screws that hold the purge valve in place.
- Torque wrench: A torque wrench is essential for tightening the bolts to the correct specifications after installation.
- Screwdrivers: You may need both Phillips and flathead screwdrivers for various parts of the installation process.
- Pliers: Pliers will come in handy for removing and installing certain components.
- Shop towels or rags: Having shop towels or rags nearby will help keep your hands clean during the installation process.
- Penetrating oil: Penetrating oil can help loosen stubborn bolts or screws that may be difficult to remove.
Inspect the Purge Valve and New Components
Before installing the purge valve, it is essential to thoroughly inspect both the purge valve itself and any new components you may be installing. This will ensure that everything is in working order and prevent any issues from arising. Here’s what you need to do:
- Inspect the purge valve: Carefully examine the purge valve for any signs of damage or wear. If you notice any cracks, leaks, or other abnormalities, it is advisable to replace the valve before proceeding with the installation.
- Check the new components: If you are installing new components along with the purge valve, carefully inspect them for any defects or damage. Make sure all the necessary components are included and in good condition before beginning the installation.
Ensure Proper Safety Measures
When working on your vehicle, it’s important to prioritize safety. Before installing the purge valve, ensure you take the following safety measures:
- Disconnect the battery: Before starting any work on your vehicle, it is crucial to disconnect the battery to prevent any accidental electrical shocks.
- Engage the parking brake: Make sure to engage the parking brake to prevent the vehicle from moving while you are working on it.
- Wear protective gear: Protect yourself by wearing gloves, safety glasses, and any other necessary protective gear to prevent injury.
- Work in a well-ventilated area: If you are working in an enclosed space, such as a garage, make sure it is well-ventilated to avoid inhaling any harmful fumes.
Familiarize Yourself with the Vehicle’s Manual or Schematics
Prior to installing the purge valve, it is important to familiarize yourself with the vehicle’s manual or schematics. This will provide you with essential information about the location of the purge valve, the proper installation procedure, and any specific precautions you need to take. Make sure to have the manual or schematics readily accessible during the installation process for easy reference.
By following these steps and properly preparing for the installation of a purge valve, you can ensure a smooth and successful installation process. Now that you are ready to install the purge valve, let’s dive into the actual installation process in the next section.
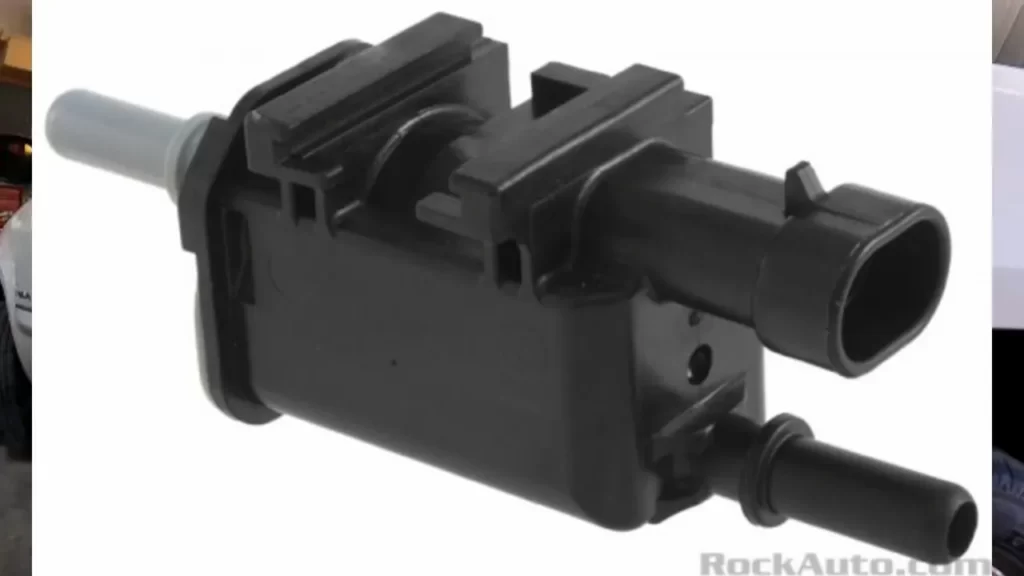
Step 1: Locate The Purge Valve
If you’re experiencing issues with your vehicle’s evaporative emission control system, it could be due to a faulty purge valve. The purge valve plays a crucial role in keeping your engine running smoothly by regulating the flow of fuel vapor from the charcoal canister to the engine intake manifold. If you need to replace the purge valve or simply want to know its location for future maintenance, this step-by-step guide will help you locate it efficiently.
Identifying the Purge Valve’s Position
The first step in installing a purge valve is to identify its position in your vehicle. Every car model may have a slightly different location for the purge valve, so it’s essential to consult your vehicle’s manual to ensure accuracy. Here are a few common locations where you might find the purge valve:
- Engine Bay: Check around the engine bay, typically near the intake manifold or throttle body. Look for a small cylindrical component with electrical connections and vacuum hoses.
- Near the Charcoal Canister: The charcoal canister is usually located near the fuel tank. The purge valve is usually attached to it or in close proximity.
- Under the Vehicle: In some cases, the purge valve might be located underneath the vehicle. Look for a component attached to the fuel vapor lines.
Remember to take safety precautions and wear protective gear before working on your vehicle. It’s also a good idea to disconnect the negative terminal of the battery to avoid any electrical mishaps during the installation process.
Understanding the System Design
Before you proceed with installing the purge valve, it’s helpful to have a basic understanding of the evaporative emission control system’s design. This system is designed to capture and store fuel vapors from the fuel tank, preventing them from being released into the atmosphere. When the engine is running, the purge valve opens, allowing the stored fuel vapors to be drawn into the engine and burned off.
The purge valve’s role is vital in this process, as it regulates the flow of fuel vapors based on signals from the vehicle’s engine control unit (ECU) or the powertrain control module (PCM). It uses vacuum signals to open and close, controlling the timing and amount of fuel vapor flow. A malfunctioning purge valve can lead to drivability issues, such as rough idling, hesitation, or even increased emissions.
Now that you have a clear understanding of the purge valve’s role and its positioning in your vehicle, you are ready to proceed with the installation process. Stay tuned for the next step in this guide to successfully install a new purge valve or replace the existing one.
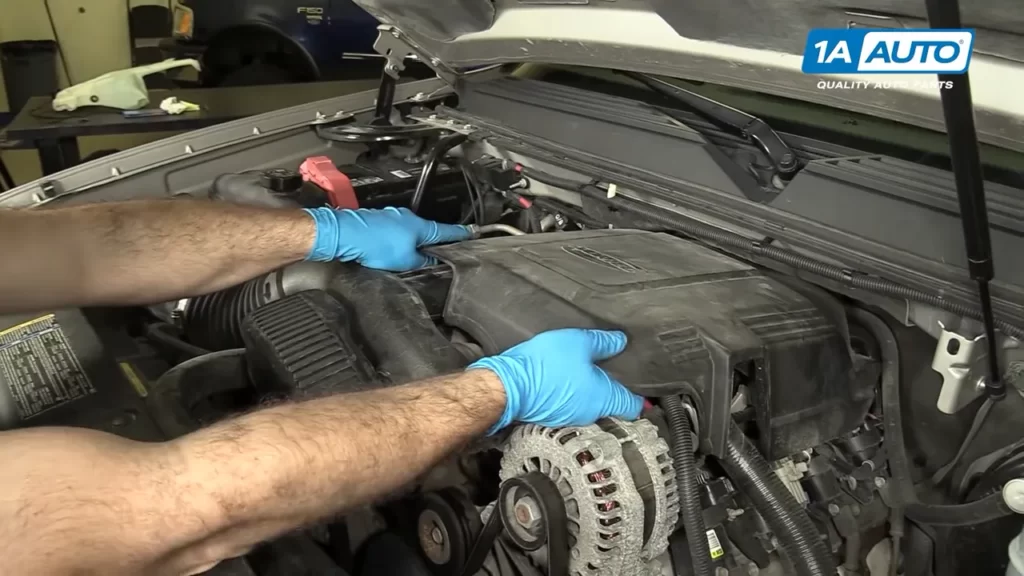
Step 2: Disconnect The Electrical Connections
Identifying the Electrical Connector
Before you can disconnect the electrical connections of the purge valve, it’s crucial to identify the right connector. The electrical connector might vary depending on the make and model of your vehicle, so it’s essential to consult your owner’s manual or do a quick online search to locate it. In newer cars, the purge valve electrical connector is often a rectangular plug, while in older vehicles, it could be a round-shaped connector. Once you’ve located the electrical connector, you’re ready to move on to the next step.
Safely Disconnecting the Wiring
To disconnect the wiring from the purge valve, follow these simple steps:
- Start by removing any protective coverings or debris around the connector to ensure better access.
- Check if there is a lock or clip securing the connector in place. If so, release it carefully using a small flat-head screwdriver or a specialized tool designed for connector removal.
- Once the lock or clip is released, firmly hold the connector, and gently pull it straight out of the purge valve. Avoid yanking or twisting the connector excessively as this may damage the wiring or connector pins.
- If you encounter resistance while pulling the connector, double-check for any remaining locks or clips that may still be engaged. These additional securing mechanisms, if present, can vary from vehicle to vehicle.
- With the electrical wiring disconnected, inspect it closely for any signs of damage or corrosion. If you notice any issues, it’s a good idea to replace the connector or consult a professional for further assistance.
Remember, it’s vital to exercise caution when handling electrical connections. If you’re unsure about disconnecting the wiring on your own, it’s always recommended to seek the help of a qualified technician.
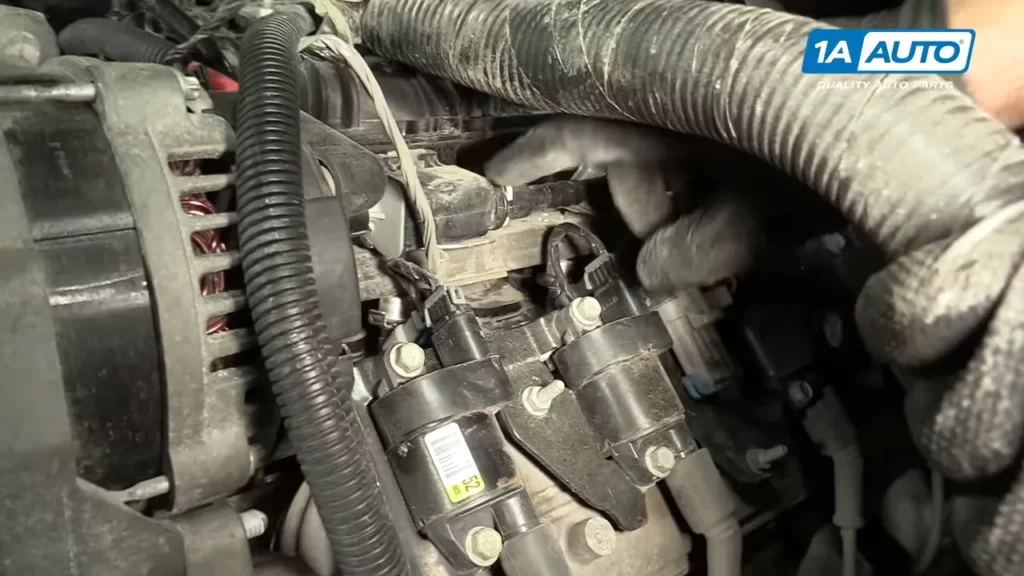
Step 3: Remove The Vacuum And Vapor Lines
Now that you have located the purge valve and prepared the necessary tools, it’s time to remove the vacuum and vapor lines. This step is crucial as it allows for the proper installation of the new purge valve. Follow the instructions below to safely detach the lines from the purge valve.
Locating the Vacuum and Vapor Lines
Before you can start removing the lines, you need to locate them. The vacuum line carries air from the intake manifold to the purge valve, while the vapor line connects the purge valve to the fuel tank. These lines are typically made of rubber or plastic and should be visible near the purge valve.
Safely Detaching the Lines from the Purge Valve
To detach the vacuum and vapor lines from the purge valve, follow these steps:
- Inspect the lines for any signs of damage, such as cracks or leaks. If you notice any issues, consider replacing the lines before proceeding.
- With a pair of pliers or a suitable tool, gently squeeze the tabs or clamps securing the lines to the purge valve.
- Once the tabs or clamps are squeezed, carefully pull the lines away from the purge valve. Be cautious not to apply excessive force to avoid damaging the lines.
- Some lines may be connected to the purge valve with quick-disconnect fittings. In this case, you may need a tool specifically designed for disconnecting these fittings. Refer to your vehicle’s manual or consult a mechanic for guidance.
- As you remove each line, pay close attention to their orientation and placement. It’s crucial to reinstall them correctly to ensure proper functioning of the purge valve.
- Inspect the lines for any debris or blockages, and clean them if necessary before reinstallation.
By following these steps, you will be able to safely remove the vacuum and vapor lines from the purge valve. Now you can proceed to the next step in the installation process.
Step 4: Loosen And Remove The Mounting Bolts
Now that you have identified the mounting points for the purge valve, it’s time to move on to the next step of the installation process. Step 4 involves loosening and removing the mounting bolts that secure the old purge valve in place.
Identifying the Mounting Points
Before you can start loosening and removing the mounting bolts, you need to identify the specific points where the purge valve is attached to your vehicle. This will vary depending on the make and model of your car, so it’s important to consult your vehicle’s user manual or an online resource for accurate information.
Typically, the mounting points for the purge valve are located either on the intake manifold or on the firewall. These points are usually marked by small bolts or screws that secure the valve in place.
Using the Appropriate Tools to Remove the Bolts
Once you have identified the mounting points, you will need to gather the appropriate tools to remove the mounting bolts. The exact tools required may vary depending on the specific bolts used in your vehicle, but commonly used tools include a socket wrench set and a screwdriver.
Before you start loosening the bolts, make sure to choose the correct socket or screwdriver size that fits snugly on the bolt heads. This will prevent any slipping or stripping of the bolt heads during the removal process. It’s also a good idea to apply some penetrating oil to the bolts if they are stuck or rusty, as this will help make the removal easier.
Once you have the necessary tools and are ready to begin, position your socket wrench or screwdriver on the bolt head and turn it counterclockwise to loosen the bolts. If the bolts are too tight, you may need to apply some additional force or use a breaker bar for added leverage. Only loosen the bolts enough to remove them completely, as over-loosening can cause damage to the purge valve or other components.
Once you have successfully loosened all the mounting bolts, you can proceed to the next step of the purge valve installation process. Remember to keep the bolts and any accompanying hardware in a safe place for future use or disposal.
Step 5: Extracting The Old Purge Valve
Now that we’ve safely disconnected the electrical connectors and released any hoses attached to the purge valve, it’s time to extract the old valve from its position. This step is crucial to ensure the proper functioning of the new purge valve and prevent any damage to surrounding components. Let’s dive into the process of gently removing the valve and taking necessary precautions:
Gently Removing the Valve from its Position
Removing the purge valve requires a delicate touch to avoid any unintentional damage. Follow these steps to safely detach it:
- Inspect the valve and identify the securing mechanism, which may vary depending on the make and model of your vehicle.
- Using the appropriate tools, such as a wrench or socket set, carefully loosen and remove any bolts or screws that hold the purge valve in place. Keep track of the hardware and store it in a safe place for later reinstallation.
- Once the securing mechanism is released, gently wiggle and pull the old purge valve out of its position. It may require some maneuvering, but avoid using excessive force to prevent any harm.
Ensuring No Damage to Surrounding Components
As you extract the old purge valve, it’s crucial to take extra precautions to safeguard the surrounding components. Follow these tips to prevent any accidental damage:
- Pay close attention to nearby hoses, wires, or any other parts that may be in close vicinity to the purge valve. Avoid bending or tugging on them, as they could be fragile.
- If necessary, temporarily move or secure any components that might impede the safe removal of the purge valve. This could include releasing clamps, detaching connectors, or repositioning nearby parts.
- While removing the old valve, keep a close eye on any gaskets or seals that may be present. Take note of their condition and ensure they remain intact.
- Inspect the area surrounding the old purge valve for any signs of corrosion, debris, or other potential issues. Cleaning or addressing these problems before installing the new valve is highly recommended.
By following these steps and taking the necessary precautions, you can safely and successfully extract the old purge valve without causing any harm to your vehicle’s components. With the old valve removed, we’re one step closer to installing the new purge valve and experiencing its benefits.
Step 1: Position The New Purge Valve
Installing a new purge valve in your vehicle is a relatively straightforward task that can improve the performance of your car’s emissions system. In this step-by-step guide, we will show you how to properly position the new purge valve to ensure it functions optimally. Let’s get started!
Correct Placement of the Valve
The first thing you need to determine is the correct placement of the new purge valve. Consult your vehicle’s manual or manufacturer’s instructions for the exact location of the valve. Generally, the purge valve is located near the intake manifold or the engine compartment.
Before you begin positioning the new purge valve, make sure the engine is cool to avoid any potential burns. Now, follow these steps:
- Open the hood of your vehicle and locate the mounting bracket where the old purge valve was attached. You may need to remove any nearby components, such as air intake tubes or hoses, to access the bracket.
- Once you have a clear view of the mounting bracket, identify the mounting holes. These are usually located on either side of the bracket.
- Take the new purge valve and align it with the mounting holes. Ensure that the valve is positioned correctly and in the same orientation as the old valve.
- Gently insert the bolts or screws through the mounting holes and into the valve. Start by hand tightening them to secure the valve in place.
- Using a wrench or screwdriver, tighten the bolts or screws until they are snug. Be careful not to overtighten as this can damage the valve or the mounting bracket.
By following these steps, you have successfully positioned the new purge valve in your vehicle. This ensures proper alignment and allows for efficient operation of your car’s emissions system.
Step 2: Secure With Mounting Bolts
Once you have positioned the purge valve in the desired location, it’s time to secure it with mounting bolts. This step is crucial to ensure that the valve remains in place, providing efficient operation and preventing any potential leaks. To complete this step successfully, follow the instructions below:
Attaching the Valve to the Mounting Points
- Take a moment to locate the designated mounting points on your vehicle. These points are usually predetermined and may be marked with pre-drilled holes or brackets.
- Position the purge valve over the mounting points, ensuring it aligns properly with the holes or brackets.
- Insert the mounting bolts into the holes or brackets, starting with the bottom ones.
- Secure the valve by tightening the bolts using an appropriate-sized wrench. Ensure that the valve remains level and does not wiggle or move excessively.
Pay attention to any specific instructions provided by the manufacturer regarding torque specifications or additional hardware required for securing the valve. Following these guidelines will help ensure a proper and secure installation.
Tightening the Bolts Firmly but Not Overly Tightly
While tightening the bolts, it’s important to strike a balance between a firm hold and avoiding excessive tightening. Over-tightening can lead to damage to the valve or mounting points, potentially causing leaks or other issues.
When tightening the bolts:
- Use the appropriate-sized wrench or socket, ensuring a snug fit.
- Apply steady pressure to tighten the bolts, using a clockwise motion.
- Stop tightening when you feel resistance and the valve is securely attached. Avoid applying excessive force, as it may cause damage.
Remember that the valve should be held firmly in place, without any visible gaps or movement. Take a moment to inspect the installation and ensure it meets the required specifications.
Step 3: Reconnect Vacuum And Vapor Lines
In order to complete the installation of a purge valve, it is essential to properly align and attach the vacuum and vapor lines to the valve. This step ensures the efficient functioning of the purge valve system, preventing any leakages or inconsistencies. Here’s a detailed breakdown of how to successfully connect the lines to the valve:
Properly Aligning and Attaching the Lines to the Valve
1. Begin by identifying the vacuum and vapor lines. These lines are typically labeled, making it easier to differentiate between them. If they are not labeled, refer to the vehicle’s manual or consult with a professional.
2. Once you have identified the lines, ensure that they are clean and free from any debris or obstructions. This will help guarantee a secure and leak-free connection.
3. Align the vacuum and vapor lines with the corresponding connections on the purge valve. Pay close attention to the shape and size of the connections to ensure a proper fit. It is important to note that mismatched connections can lead to leakages and decreased functionality of the purge valve system.
4. Gently push the lines onto the connections, applying a slight amount of pressure. Verify that they are securely attached by giving them a gentle tug. If they come loose or feel loose, readjust and ensure a tight connection.
5. Once you are confident in the alignment and attachment of the lines, move on to the next step of the installation process.
Ensuring No Leakages
1. After connecting the vacuum and vapor lines to the purge valve, it is crucial to test for any potential leakages. A leak in the system can compromise the efficiency and effectiveness of the purge valve, leading to poor engine performance.
2. Start by visually inspecting the connection points for any signs of moisture or seepage. If you notice any leakage, redo the connection and make sure it is secure.
3. Additionally, you can perform a simple test to ensure there are no leaks. Apply a mixture of soap and water to the connection points and observe for any bubble formation. If bubbles appear, it indicates a leak, and the connection needs to be tightened or redone.
4. Once you have verified that there are no leakages, proceed with the final steps of the purge valve installation.
By following these instructions and ensuring a proper alignment and attachment of the vacuum and vapor lines, you can successfully reconnect them to the purge valve, guaranteeing optimal performance and preventing any potential leakages.
Step 4: Reconnect Electrical Connections
Once you’ve successfully removed the old purge valve and positioned the new one in place, it’s time to move on to step 4: reconnecting the electrical connections. This step is crucial to ensure the proper functioning of your vehicle’s purge valve system. Follow the subheadings below to align and plug in the electrical connector and confirm a secure connection:
Aligning and Plugging in the Electrical Connector
Begin by locating the electrical connector on your new purge valve. This connector is what allows the valve to receive power and communicate with the vehicle’s onboard computer. It is essential to align the connector correctly before plugging it in.
Inspect both the connector and the corresponding terminal on the purge valve. Ensure there are no visible signs of damage or corrosion that may interfere with the connection. If any issues are present, address them before proceeding further.
Once you’re confident that the connector and terminal are in good condition, carefully align the connector’s prongs with the terminal. Take your time to ensure a proper fit. Misalignment could prevent a secure connection and potentially cause further complications down the line.
When the connector is properly aligned, exert gentle pressure to plug it into the terminal. The connection should feel snug and secure. Avoid forcing the connector or using excessive pressure, as this can damage the components.
Confirming a Secure Connection
After plugging in the electrical connector, it’s essential to confirm that the connection is secure. A loose or unreliable connection can lead to malfunctioning or erratic purge valve operation.
One way to assess the connection’s security is by gently tugging on the connector. It should remain firmly in place, without any movement or signs of looseness. If the connector easily detaches or feels loose, unplug it and repeat the alignment and plugging-in process.
Additionally, visually inspect the connector and terminal once more to ensure they are fully engaged and that no prongs are bent or damaged. If any issues are detected, address them promptly before proceeding further.
Remember, a secure electrical connection is crucial for the performance and longevity of your new purge valve. Take your time during this step to ensure a reliable connection that will provide optimal functionality.
Step 5: Test The New Purge Valve
Now that you have successfully installed the new purge valve in your vehicle, it’s important to test its functionality. This step will ensure that everything is working properly before you hit the road. Follow these simple instructions to test the new purge valve:
Turning on the Vehicle Ignition
1. Insert the key into the ignition and turn it to the “on” position. This will activate the electrical systems of your vehicle, including the purge valve.
2. Listen carefully for any unusual noises coming from the purge valve area. A properly functioning valve should operate quietly without any strange sounds.
Checking for Proper Functioning
1. Start the engine and let it run for a few minutes. As the engine warms up, the purge valve should open and close to regulate the fuel vapor flow.
2. Monitor the engine performance during idle. If the new purge valve is working correctly, you shouldn’t notice any rough idling or stalling.
If you suspect any issues with the new purge valve, it’s essential to address them immediately to prevent further damage to your vehicle’s fuel system. Consult a professional mechanic for assistance if needed.
Installing a new purge valve in your vehicle is an important maintenance task that ensures proper fuel vapor control. By following all the necessary steps and testing the new valve, you can have peace of mind knowing that your vehicle’s fuel system is operating efficiently. Don’t forget to regularly inspect and clean the purge valve to prevent clogging and extend its lifespan. With a well-maintained purge valve, your vehicle will run smoothly, enhancing both performance and fuel economy.
Frequently Asked Questions
How Much Does Purge Valve Installation Cost?
The cost of purge valve installation varies depending on the make and model of the vehicle. It can range from $150 to $400, including parts and labor.
What Are The Symptoms Of A Bad Purge Valve?
A bad purge valve can cause symptoms like difficulty starting the engine, rough idling, and poor fuel efficiency. It may also trigger the check engine light and lead to emissions problems.
Can You Drive A Car Without A Purge Valve?
No, you cannot drive a car without a purge valve. The purge valve is a crucial component for controlling the emission system and keeping the vehicle running smoothly. Without it, the engine performance may be compromised, and the vehicle may not pass emissions tests.
What Happens If You Don’T Fix Purge Valve?
If you don’t fix the purge valve, your vehicle’s emissions control system may malfunction, leading to decreased fuel efficiency and increased pollution. It is important to address this issue promptly to maintain optimal performance and comply with environmental regulations.
Conclusion
To sum up, installing a purge valve is a straightforward process that can help in maintaining the efficiency and longevity of your vehicle’s emissions control system. By following the step-by-step instructions provided in this blog post, you can save time and money by performing the installation yourself.
Remember to take necessary precautions and refer to your vehicle’s manual for any specific instructions. Happy DIY car maintenance!
