To install a pressure regulator for drip irrigation, select a suitable location and attach the regulator to the main water supply line using the appropriate fittings. Install a filter before the regulator to prevent debris from entering the system.
Are you considering installing a pressure regulator for your drip irrigation system? This essential component helps control the water pressure and prevents damage to your irrigation system. We will guide you through the process of installing a pressure regulator, ensuring that your system runs smoothly and efficiently.
Proper installation involves selecting the right location, connecting the regulator to the main water supply line using the correct fittings, and installing a filter to ensure debris doesn’t affect the performance of your system. Let’s dive in and get started!
Preparing The Irrigation System For Installation
Installing a pressure regulator for your drip irrigation system is an important step to ensure that your plants receive the right amount of water pressure. Before you begin the installation process, there are a few steps you need to take to prepare your irrigation system. This includes shutting off the water supply, flushing the system, and locating the appropriate section for installation. By following these steps, you can ensure a smooth and successful installation process.
Shutting off the water supply
The first step in preparing your irrigation system for pressure regulator installation is to shut off the water supply. This will prevent any water from flowing through the system while you work on it. To do this, locate the main water supply valve for your irrigation system and turn it off. The valve is typically located near the water source or the irrigation controller. Once the water supply is shut off, you can proceed with the next step.
Flushing the system
After shutting off the water supply, it is important to flush out any remaining water in the irrigation system. Flushing the system helps to remove any debris or sediments that may have accumulated over time. To flush the system, open all the valves in your system and let the water flow for a few minutes. This will clear out any unwanted materials and ensure a clean installation. Once you have completed the flushing process, you can move on to the final step.
Locating the appropriate section for installation
Before installing the pressure regulator, you need to locate the appropriate section in your irrigation system. The pressure regulator should be installed after the main water supply valve and before the first irrigation zone or drip line. This ensures that the pressure is regulated throughout the entire system. Take note of all the components in your irrigation system, such as valves, filters, and backflow preventers, to determine the best location for the pressure regulator. Once you have located the appropriate section, you are ready to proceed with the installation.
By following these steps to prepare your irrigation system for pressure regulator installation, you can ensure that your drip irrigation system works efficiently and effectively. Taking the time to properly shut off the water supply, flush the system, and locate the appropriate section for installation will help to prevent any issues and ensure a successful installation process. So let’s get started and transform your irrigation system into a well-regulated and precise watering system for your plants.
Selecting The Right Pressure Regulator For Your System
Installing a pressure regulator is essential for maintaining the optimal flow rate and pressure in your drip irrigation system. By selecting the right pressure regulator, you can ensure that your plants receive the right amount of water without causing damage to the system. In this section, we will explore two important aspects to consider when selecting a pressure regulator for your drip irrigation system: understanding the flow rate and pressure requirements and choosing the appropriate regulator type.
Understanding the Flow Rate and Pressure Requirements
Before selecting a pressure regulator, it is crucial to understand the specific flow rate and pressure requirements of your drip irrigation system. The flow rate refers to the amount of water that needs to be delivered to your plants per unit of time. This information typically comes from the manufacturer’s specifications or can be estimated based on the total area that needs to be irrigated.
Equally important is the pressure requirement. Too high of a pressure can result in damage to the drip irrigation system, while too low of a pressure can lead to inadequate water distribution. It is best to consult the manufacturer’s guidelines or seek professional advice to determine the ideal pressure range for your system.
Choosing the Appropriate Regulator Type
Once you have a clear understanding of the flow rate and pressure requirements, it’s time to select the appropriate regulator type for your drip irrigation system. There are two main types of pressure regulators commonly used: preset and adjustable.
A preset pressure regulator is pre-configured to deliver a specific flow rate and pressure. These regulators are often factory-set and provide a fixed pressure that cannot be adjusted. They are ideal for systems with consistent water requirements and where a fixed pressure range is sufficient.
An adjustable pressure regulator, on the other hand, allows you to customize the pressure to suit the specific needs of your drip irrigation system. This type of regulator provides flexibility and control, especially in situations where the water requirements vary across different zones or plant types.
| Regulator Type | Advantages |
|---|---|
| Preset Pressure Regulator |
|
| Adjustable Pressure Regulator |
|
Considering the specific needs of your drip irrigation system, weigh the advantages of both regulator types and choose the most suitable one. Keep in mind that while the adjustable pressure regulator provides more control, it may require additional monitoring and adjustments to ensure optimal pressure settings.
By understanding the flow rate and pressure requirements and choosing the appropriate regulator type, you can confidently select the right pressure regulator for your drip irrigation system. This will help you maintain the health and productivity of your plants while preserving the longevity of your irrigation system.
Installing The Pressure Regulator In The Irrigation System
Cutting the irrigation tubing
To install a pressure regulator in your drip irrigation system, the first step is to cut the irrigation tubing at the desired location. This is where the pressure regulator will be inserted to ensure a steady and optimal water pressure for efficient irrigation. Measure the appropriate length of tubing needed for the pressure regulator installation using a tape measure or ruler.
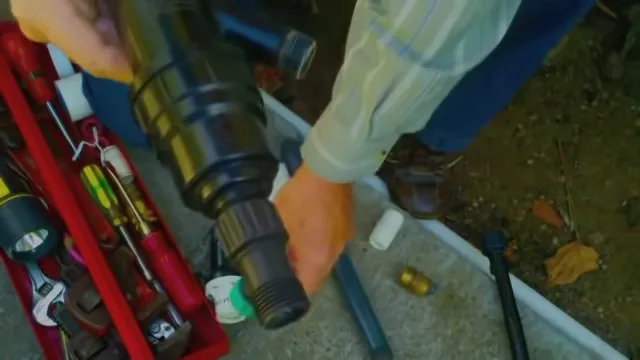
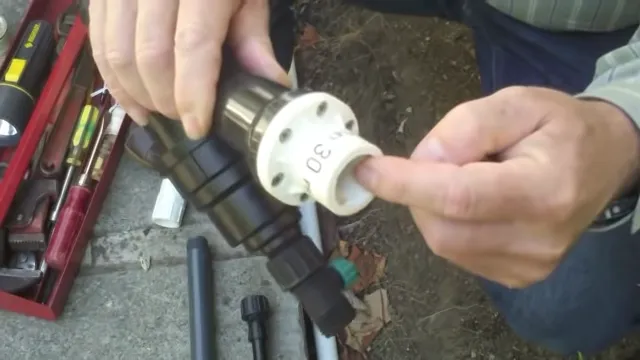
Attaching the pressure regulator
Once the tubing is cut, it’s time to attach the pressure regulator. Begin by taking one end of the tubing and inserting it into one side of the pressure regulator. Make sure the tubing fits snugly into the regulator to prevent any leaks. Then, take the other end of the tubing and insert it into the opposite side of the pressure regulator. Again, ensure a tight fit to guarantee a secure connection.
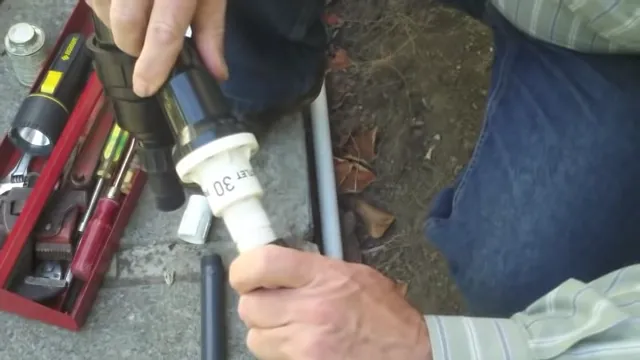
Securing the connections
After attaching the pressure regulator to the irrigation tubing, it’s crucial to secure the connections properly. This will prevent any accidental dislodging or leaks during operation. To secure the connections, use hose clamps or zip ties. Place the clamp or zip tie around the tubing near each end of the pressure regulator, then tighten it until secure. Be careful not to overtighten, as this can damage the tubing or pressure regulator.
Once the connections are secured, it’s essential to check for any leaks. Turn on the water supply and examine the entire system for any signs of leakage. If you spot any leaks, adjust the connections or replace any faulty components to ensure a watertight seal.
By following these steps and properly installing a pressure regulator in your drip irrigation system, you can maintain consistent water pressure, prevent damage to your plants, and ensure effective water distribution throughout your garden or landscape. Don’t forget to regularly inspect and maintain your pressure regulator to ensure it continues to function properly over time.
Adjusting And Testing The Pressure Regulator
Installing a pressure regulator for your drip irrigation system is crucial for maintaining optimal water pressure and preventing damage to your system. But simply installing the regulator isn’t enough; you need to properly adjust and test it to ensure it’s working correctly. In this section, we’ll walk you through the steps to set the desired pressure, check for leaks and proper functioning.
Setting the Desired Pressure
To begin, you’ll need to determine the recommended pressure for your specific drip irrigation system. Different plants and soil types have varying pressure requirements, so it’s important to consult your system’s documentation or manufacturer’s guidelines for the ideal pressure range.
Once you know the desired pressure range, you can adjust the pressure regulator accordingly. Here’s how:
- Locate the adjustment screw on the pressure regulator. This screw is typically located on the top or side of the regulator.
- Using a screwdriver or adjustable wrench, turn the screw clockwise to increase the pressure or counterclockwise to decrease it.
- Make small adjustments and test the pressure after each adjustment until you reach the desired range.
Remember, it’s important not to exceed the maximum recommended pressure for your system, as this can cause damage to the drip lines or emitters. It’s always better to err on the side of caution and set the pressure slightly lower than the maximum range.
Checking for Leaks and Proper Functioning
Once you’ve set the desired pressure, it’s important to thoroughly test the pressure regulator for any leaks or malfunctions. Follow these steps:
- Turn on the water supply to the drip irrigation system.
- Inspect the pressure regulator for any visible signs of leaks. Pay close attention to the connections between the regulator, water source, and drip lines.
- Check for proper functioning by observing the flow of water from the emitters. Ensure that the flow is consistent and not too high or too low.
- If you notice any leaks or irregularities, try tightening the connections or replacing any faulty components. If the issue persists, consider consulting a professional for further assistance.
Regularly checking for leaks and proper functioning of your pressure regulator is essential for the long-term health and efficiency of your drip irrigation system. By taking the time to adjust and test the pressure regulator, you can ensure that your plants receive the right amount of water at the correct pressure, ultimately leading to healthier and more thriving vegetation.
Regular Maintenance To Ensure Optimal Performance
Regular maintenance is crucial to ensure optimal performance of your drip irrigation system, especially when it comes to the pressure regulator. The pressure regulator plays a vital role in maintaining the correct water pressure for efficient operation. By regularly inspecting for debris or clogs and cleaning the pressure regulator, you can prevent any issues and keep your drip irrigation system running smoothly. In this section, we will discuss the steps to inspect and clean the pressure regulator effectively.
Inspecting for Debris or Clogs
One of the first steps in regular maintenance is to inspect the pressure regulator for any debris or clogs that may impede its performance. Over time, particles, sediment, or even plant material can accumulate in the regulator, leading to reduced water flow or pressure. Here’s a simple process to inspect for debris or clogs:
- Turn off the water supply: Before beginning the inspection, make sure to turn off the water supply to avoid any accidents.
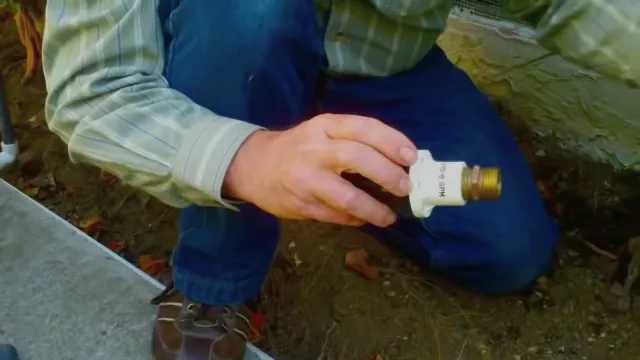
- Locate the pressure regulator: The pressure regulator is usually installed near the water source or at a central point in the irrigation system, depending on its design.
- Remove the cover or housing: Carefully remove the cover or housing of the pressure regulator. This may require using a screwdriver or wrench, depending on the type of regulator.
- Inspect the interior: Once the cover is removed, visually inspect the interior of the pressure regulator for any signs of debris or clogs. Check the diaphragm, spring, and other components for any obstructions.
- Clean or replace the affected parts: If you notice any debris or clogs, clean the affected parts using clean water. In some cases, you may need to replace the damaged components altogether.
- Reassemble and test: After cleaning or replacing the parts, carefully reassemble the pressure regulator and turn on the water supply. Monitor the water pressure and check if the regulator is functioning properly.
Cleaning the Pressure Regulator
Cleaning the pressure regulator on a regular basis is essential to maintain its efficiency. Over time, mineral deposits, algae, or other contaminants can build up on its surface, reducing its performance. Here’s a step-by-step guide to effectively clean the pressure regulator:
- Turn off the water supply: Begin by turning off the water supply to avoid any water flow during the cleaning process.
- Remove the pressure regulator: Carefully remove the pressure regulator from its installation point. Make sure to follow the manufacturer’s instructions to ensure a safe and proper removal.
- Prepare a cleaning solution: Prepare a mild cleaning solution by mixing water and a gentle detergent. Avoid using harsh chemicals or abrasive cleaners that may damage the regulator.
- Soak the pressure regulator: Place the pressure regulator in the cleaning solution and let it soak for a few minutes to loosen any built-up contaminants.
- Scrub and rinse: Use a soft brush or cloth to scrub the pressure regulator gently, paying attention to the nooks and crevices where deposits may accumulate. Rinse thoroughly with clean water to remove any residual cleaning solution.
- Air dry and reassemble: Allow the pressure regulator to air dry completely before reassembling it. Ensure that all components are properly aligned and securely attached.
- Reinstall and test: Once the pressure regulator is dry and reassembled, reinstall it in its original location. Turn on the water supply and check if the regulator is functioning effectively by monitoring the water flow and pressure.
Regular maintenance, including inspecting for debris or clogs and cleaning the pressure regulator, is essential to ensure the optimal performance of your drip irrigation system. By following these steps diligently, you can prevent any issues and keep your system running smoothly for years to come. Remember, a well-maintained pressure regulator will not only save water but also help your plants thrive by providing them with the right amount of moisture.
Common Issues And Troubleshooting Solutions
Common issues and troubleshooting solutions
Installing a pressure regulator for drip irrigation can help ensure that your system operates efficiently and effectively. However, like any other component, pressure regulators can encounter common issues that may prevent them from functioning correctly. In this section, we will discuss some of these issues and provide troubleshooting solutions to help you resolve them.
Low water pressure
One of the most common issues you may encounter when using a pressure regulator is low water pressure. This can occur if the regulator is not properly adjusted or if there are obstructions or blockages in the irrigation system. To troubleshoot low water pressure:
- Check the pressure adjustment: Many pressure regulators have an adjustable screw or knob that allows you to increase or decrease the pressure. Ensure that the pressure is set at the desired level.
- Inspect the system for blockages: Inspect the pipeline and drip emitters for any blockages or clogs that may be reducing water flow. Clean or remove any obstructions to restore proper water pressure.
- Check for leaks: Leaks in the irrigation system can also contribute to low water pressure. Inspect all connections and fittings for any signs of leakage and repair or replace as necessary.
Water leakage
Water leakage can be another issue that you may encounter with your pressure regulator. This can be caused by loose fittings, worn-out seals, or damaged components. Here are some troubleshooting solutions to address water leakage:
- Tighten fittings: Inspect all connections and fittings to ensure that they are securely tightened. Use adjustable wrenches or pliers to tighten any loose fittings.
- Replace worn-out seals: Over time, seals in the pressure regulator may wear out, leading to water leakage. Replace any damaged or worn-out seals with new ones to prevent leakage.
- Inspect the pressure regulator: Carefully examine the pressure regulator for any cracks or damage to its housing. If any damage is found, replace the regulator with a new one.
Regulator not functioning properly
In some cases, the pressure regulator may not function as expected, leading to inconsistent or erratic water pressure. To troubleshoot this issue, consider the following solutions:
- Check for debris: Debris or dirt particles can sometimes accumulate inside the pressure regulator, affecting its performance. Clean the regulator thoroughly to remove any debris and ensure its proper functioning.
- Inspect the pressure gauge: The pressure gauge on the regulator may provide valuable information about its performance. Check if the gauge is faulty or incorrectly calibrated and replace it if necessary.
- Consult the manufacturer’s instructions: If all else fails, refer to the manufacturer’s instructions or contact their customer support for further guidance on troubleshooting and resolving issues with the pressure regulator.
By addressing these common issues and implementing the appropriate troubleshooting solutions, you can ensure that your pressure regulator functions properly and enables your drip irrigation system to deliver water efficiently to your plants.
Frequently Asked Questions
Where Should A Drip Irrigation Pressure Regulator Be Installed?
The drip irrigation pressure regulator should be installed at the water source or directly after the main shut-off valve. It helps maintain consistent pressure throughout the system, ensuring optimal water flow and preventing damage to the drip irrigation components.
How Do You Install A Drip Pressure Regulator?
To install a drip pressure regulator, follow these steps: 1. Turn off the water supply. 2. Attach the regulator to the water source. 3. Connect the drip irrigation system to the regulator. 4. Adjust the regulator to your desired pressure.
5. Turn on the water supply and check for leaks.
Do I Need A Pressure Reducer For Drip Irrigation?
Yes, a pressure reducer is necessary for drip irrigation. It helps regulate water flow and ensures the system operates at an optimal pressure. This reduces the risk of damage to the drip lines and emitters, resulting in more efficient and consistent watering for your plants.
Do You Put Drip Irrigation Filter Before Or After Pressure Regulator?
It is recommended to place the drip irrigation filter before the pressure regulator.
Conclusion
Installing a pressure regulator is essential for ensuring efficient and consistent drip irrigation. By maintaining optimal water pressure, you can prevent damage to your system and promote better water distribution to your plants. With the steps outlined in this blog post, you can easily set up a pressure regulator and enjoy the benefits of a well-functioning drip irrigation system.
Remember, proper maintenance is key to maximizing the lifespan and performance of your regulator. Happy gardening!