To install a pressure regulator, first, turn off the water supply. Then, disconnect the water line from the main valve using a wrench and attach the pressure regulator in between.
Tighten all connections and turn the water supply back on. Welcome to our comprehensive guide on how to install a pressure regulator. Whether you’re experiencing high water pressure or looking to regulate the flow, a pressure regulator can be an essential component in your plumbing system.
We will provide step-by-step instructions on how to install a pressure regulator to ensure optimal water pressure throughout your home or business. By following these simple steps, you’ll be able to install a pressure regulator effortlessly and enjoy a well-balanced water pressure system in no time. So, let’s dive in and get started!
Why You Need A Pressure Regulator
A pressure regulator is an essential component for maintaining the proper water pressure in your plumbing system. Without it, you run the risk of encountering various issues that can cause damage to your pipes, appliances, and increase your water consumption. In this section, we will dive deeper into the reasons why you need a pressure regulator.
Protecting your plumbing system
One of the key reasons why you need a pressure regulator is to protect your plumbing system. High water pressure can put undue stress on your pipes, causing them to weaken and eventually lead to leaks or burst pipes. By installing a pressure regulator, you can limit the water pressure to a safe and optimal level, preventing these damaging situations from occurring. It acts as a safeguard for your plumbing system, ensuring its longevity and efficiency.
Reducing water consumption
Another significant advantage of using a pressure regulator is its ability to reduce water consumption. When water pressure is too high, it can result in excessive water flow, leading to wastage. This not only impacts your utility bills but also contributes to water scarcity issues. By installing a pressure regulator, you can regulate the water pressure and minimize the amount of water being used in your household. It promotes conservation and allows you to be more mindful of your water usage, all while ensuring your plumbing system operates efficiently.
Protecting appliances from damage
High water pressure doesn’t just affect your plumbing system; it can also cause damage to your appliances. Appliances such as dishwashers, washing machines, and water heaters are designed to operate within a certain pressure range. When the water pressure exceeds this range, it can lead to accelerated wear and tear, increased energy consumption, and even premature failure of the appliances. By installing a pressure regulator, you can maintain the recommended pressure levels for your appliances, protecting them from potential damage and extending their lifespan.
In conclusion, a pressure regulator is an invaluable device that offers multiple benefits for your plumbing system, water consumption, and appliance longevity. By investing in a pressure regulator and ensuring its proper installation, you can protect your pipes, reduce water wastage, and safeguard your appliances. It’s a small yet powerful addition to your plumbing setup that brings peace of mind and long-term cost savings.

Understanding Pressure Regulation
When it comes to your plumbing system, understanding how pressure is regulated is crucial. A pressure regulator is a vital component that ensures that the water pressure in your pipes remains at an optimal level. In this section, we will delve into the role of a pressure regulator and explain how excessive pressure can negatively affect your plumbing system.
The role of a pressure regulator
A pressure regulator, also known as a pressure-reducing valve, is responsible for maintaining a consistent water pressure throughout your plumbing system. It is installed at the main water supply line, just after the water meter. The primary function of a pressure regulator is to decrease the incoming water pressure from the municipal supply to a manageable and safe level for your household.
By reducing the pressure, a pressure regulator helps prevent damage to the plumbing fixtures, appliances, and pipes within your home. It acts as a safeguard, ensuring that only the necessary amount of pressure is distributed throughout the system. Without a pressure regulator, the high water pressure coming from the municipal supply could cause leaks, bursts, and other costly plumbing issues.
How excessive pressure can affect your plumbing system
Excessive water pressure can wreak havoc on your plumbing system and lead to various problems. Here are some of the negative effects of high water pressure:
- Damage to pipes: High pressure puts immense stress on your pipes, causing them to weaken and potentially develop leaks. Additionally, it increases the risk of pipe bursts, which can result in significant water damage to your property.
- Leaky fixtures: Excessive pressure can cause faucets, toilets, and other fixtures to leak or drip. This not only wastes water but also leads to higher water bills.
- Appliance malfunctions: Appliances that rely on water, such as dishwashers, washing machines, and water heaters, may experience malfunctions or premature failure due to the excessive pressure.
- Noise issues: High water pressure can create noisy pipes, resulting in annoying banging or rattling sounds whenever you use water fixtures in your home.
- Reduced lifespan: Overall, the constant strain from excessive pressure shortens the lifespan of your plumbing system, leading to frequent repairs and replacements.
To protect your plumbing system and avoid these issues, it is essential to install a pressure regulator that will keep the water pressure in check. By maintaining a proper water pressure level, you can ensure the longevity of your pipes, fixtures, and appliances, saving you from unnecessary expenses and headaches.
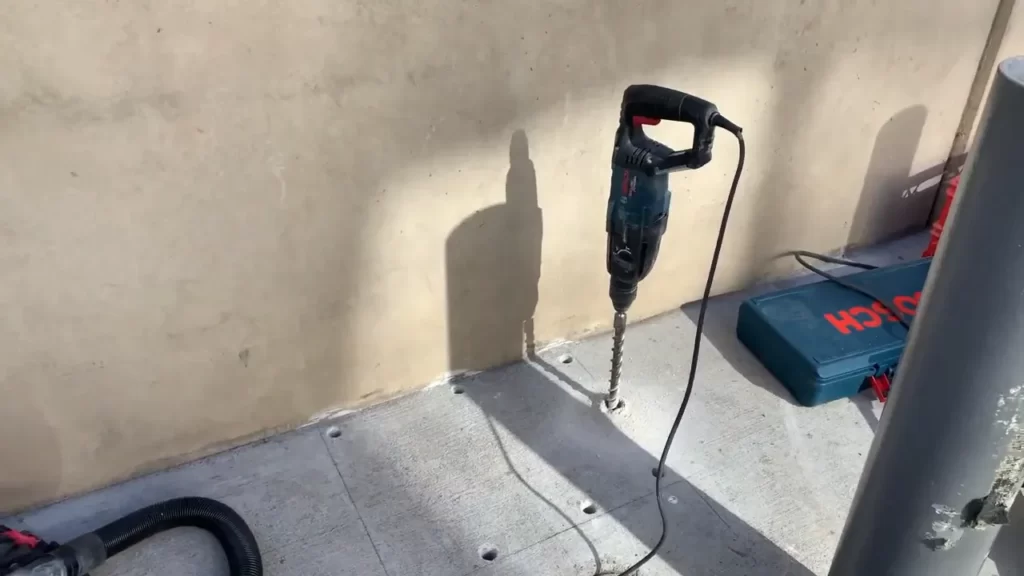
Gathering The Tools And Materials
Gathering the necessary tools and materials is the first step to successfully installing a pressure regulator. By ensuring you have everything you need before you start the installation process, you can save time and avoid any unnecessary interruptions. In this section, we will discuss the essential tools and materials required for the installation.
Pressure Regulator
The pressure regulator itself is, of course, the main component you will need. This device helps to regulate and reduce the pressure in a pipe system, ensuring that the water flow remains consistent and within safe limits. Choose a pressure regulator that is appropriate for your specific system and meets your desired pressure requirements.
Adjustable Wrench
An adjustable wrench will be invaluable during the installation process. This versatile tool allows you to tighten and loosen various fittings and connections. Make sure to choose a wrench that fits the size of the fittings you will be working with, as a proper fit is crucial for a secure installation.
Pipe Cutter
A pipe cutter is essential for cutting any pipes or tubing that need to be modified or replaced during the installation process. This tool ensures clean and precise cuts, providing a secure and leak-free connection. Choose a pipe cutter that is suitable for the type and size of the pipes you will be working with.
Teflon Tape
Teflon tape, also known as plumber’s tape, is a thread sealant that is used to create a watertight seal between threaded connections. This thin, white tape is easy to apply and provides an effective barrier against leaks. Wrap the Teflon tape clockwise around the threaded connections before tightening them.
Pipe Cleaner
A pipe cleaner, also known as a pipe brush, is used to clean the inside of pipes and fittings before installation. This ensures that there is no debris or residue that could potentially cause leaks or clogs. Choose a pipe cleaner that is appropriate for the size and material of the pipes you will be working with.
Shutting Off The Water Supply
If you are planning to install a pressure regulator, one of the first steps you need to take is shutting off the water supply. This is an important safety measure that ensures you can work on your plumbing system without any water flowing through the pipes. In this section, we will guide you on how to locate the main water shut-off valve and turn off the water supply to your home.
Locating the main water shut-off valve
The main water shut-off valve is typically located near the water meter. It can be found in various places depending on the design of your home. Here are a few common locations:
- Basement: Look for the shut-off valve on an exterior wall of your basement near the water meter.
- Crawlspace: If your home has a crawlspace, the shut-off valve may be located in this area.
- Garage: Some homes have the shut-off valve in the garage, especially if the water meter is located there.
- Utility Room: Check for the shut-off valve in a utility room where your plumbing system is accessible.
- Outside: In warmer climates, the shut-off valve may be located outside your home near the water meter.
Turning off the water supply
Once you have located the main water shut-off valve, follow these steps to turn off the water supply:
- Position yourself in front of the valve and make sure you have easy access.
- Using a wrench, turn the valve clockwise (to the right) to close it. You might need to use some force, especially if the valve hasn’t been used in a while.
- Continue turning the valve until it is fully closed. This will stop the flow of water into your home.
It is important to make sure the valve is completely closed to prevent any water from entering your plumbing system. Once you have closed the valve, you can proceed with the installation of the pressure regulator.
Removing The Old Pressure Regulator (If Applicable)
Removing the Old Pressure Regulator (if applicable)
If you are installing a new pressure regulator or replacing an old one, the first step is to remove the old pressure regulator. This process is necessary to ensure that the new pressure regulator functions properly and maintains the desired water pressure.
1. Draining any remaining water:
Before removing the old pressure regulator, it is important to drain any remaining water from the system. This can be done by turning off the main water supply valve and opening all the faucets in your home to let the water drain out. You should also ensure that any water-dependent appliances or fixtures are turned off to prevent any accidental flooding.
2. Unscrewing the old pressure regulator:
Once all the remaining water is drained from the system, you can proceed to remove the old pressure regulator. Start by locating the old pressure regulator, which is usually installed near the main water supply valve. It is typically a cylinder-shaped device with inlets and outlets for water flow.
Using a wrench or pliers, carefully unscrew the fittings or connections that secure the old pressure regulator to the plumbing system. Make sure to turn counterclockwise to loosen the connections. A small amount of residual water may still be present, so be prepared with a towel or bucket to catch any drips.
3. Inspecting the old pressure regulator:
Once the old pressure regulator is removed, take a moment to inspect it for any signs of damage or wear. Look for cracks, leaks, or corrosion on the body of the regulator and check the integrity of the seals and diaphragm. If you notice any significant damage or if the pressure regulator is old and outdated, it is recommended to replace it with a new one.
4. Cleaning the connections:
Before installing the new pressure regulator, it is essential to clean the connections and remove any debris or residue left behind by the old regulator. Use a clean cloth or brush to wipe away any dirt and ensure a smooth and secure connection for the new pressure regulator.
In conclusion, removing the old pressure regulator is an important step in the installation or replacement process. By draining any remaining water, unscrewing the old pressure regulator, inspecting its condition, and cleaning the connections, you can prepare your plumbing system for the installation of a new pressure regulator. Remember to follow manufacturer’s instructions and guidelines for your specific pressure regulator model to ensure proper installation.
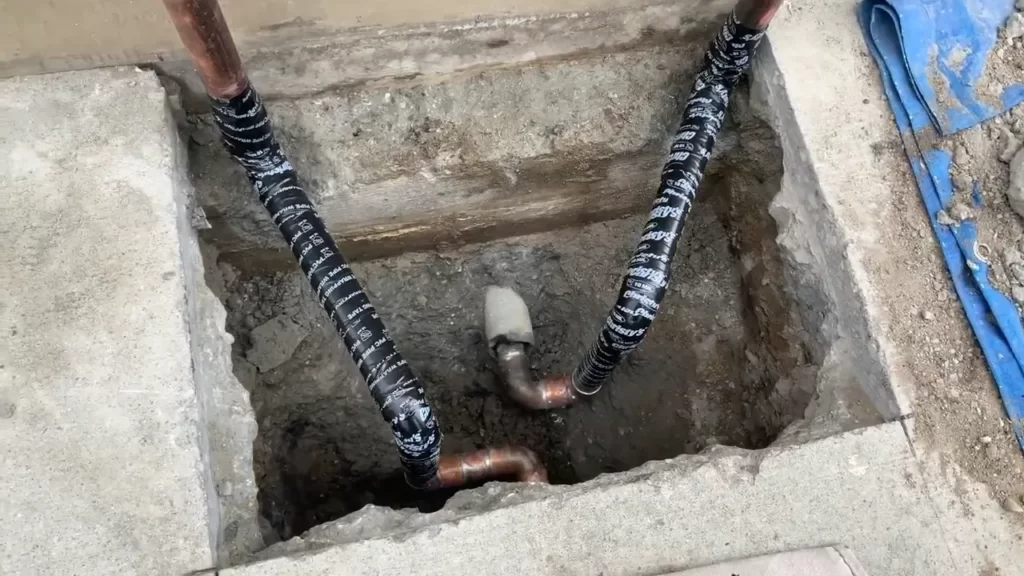
Preparing The Pipes
Before installing a pressure regulator, it is crucial to properly prepare the pipes to ensure a secure and leak-free connection. This step-by-step guide will walk you through the process of cleaning the pipe ends and applying Teflon tape to the threaded ends.
Cleaning the Pipe Ends
Cleaning the pipe ends is an essential step to remove any dirt, debris, or old pipe compound that could interfere with the connection of the pressure regulator. Follow these simple steps to clean the pipe ends:
- Start by using a clean cloth or rag to wipe away any loose dirt or debris from the pipe ends.
- Next, use a wire brush or emery cloth to gently scrub the pipe ends, removing any rust or stubborn grime.
- After scrubbing, rinse the pipe ends with water to ensure they are thoroughly cleaned.
- Finally, use a clean cloth to dry the pipe ends completely before moving on to the next step.
Applying Teflon Tape to the Threaded Ends
To create a tight and secure seal, applying Teflon tape to the threaded ends is essential. Follow these steps to properly apply Teflon tape:
- Start by holding the end of the pipe with one hand and the Teflon tape roll with the other.
- Begin wrapping the Teflon tape around the threaded end of the pipe in a clockwise direction.
- Ensure that the Teflon tape is applied neatly and evenly, overlapping the previous wrap by about half.
- Continue to wrap the Teflon tape until the entire threaded end is covered, leaving the last thread uncovered.
- After wrapping, use your fingers to press the Teflon tape firmly onto the threads, ensuring it adheres securely.
- Trim off any excess Teflon tape using a sharp knife or scissors, making sure to leave a clean edge.
By following these steps and properly preparing the pipes, you are now ready to proceed with the installation of the pressure regulator. The clean and securely sealed pipe ends will ensure a reliable and leak-free connection.
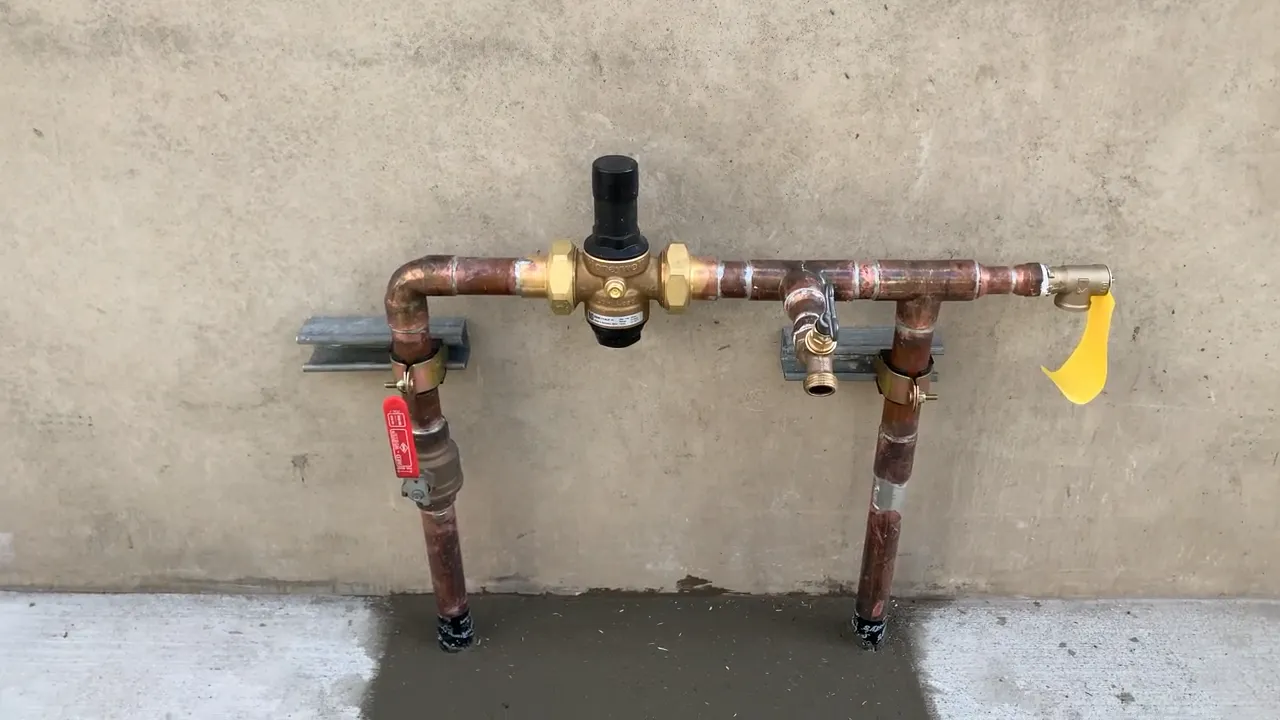
Installing The New Pressure Regulator
Once you have selected the appropriate pressure regulator for your system, it’s time to install it. In this section, we will guide you through the installation process step by step. Follow these instructions carefully to ensure a successful installation.
Determining the correct orientation
Before you begin the installation process, you need to determine the correct orientation of the pressure regulator. This is important to ensure that the regulator functions effectively and delivers the desired pressure to your system. The orientation of the pressure regulator can be identified by examining the direction of the flow arrows on the body of the regulator.
Make sure to position the pressure regulator in the correct direction, with the inlet side connected to the incoming water supply and the outlet side connected to the system requiring regulated pressure.
Tightening the fittings with an adjustable wrench
To ensure a secure and leak-free connection, you need to tighten the fittings of the pressure regulator using an adjustable wrench. Here’s a step-by-step guide:
- Wrap Teflon tape around the threaded ends of the fittings.
- Thread the fittings into the corresponding ports of the pressure regulator, ensuring a snug fit.
- Using an adjustable wrench, tighten the fittings firmly. Be careful not to overtighten, as this can damage the fittings or the regulator.
It’s important to check for any leaks after tightening the fittings. If you notice any leaks, tighten the fittings a bit more until the leaks are eliminated.
By following these steps, you can successfully install a new pressure regulator for your system. Remember to follow the manufacturer’s instructions and safety guidelines throughout the installation process to ensure optimal performance and longevity of the pressure regulator.
Testing And Adjusting The Pressure
When it comes to installing a pressure regulator, testing and adjusting the pressure is an important step to ensure that the regulator is functioning properly. This step involves turning the water supply back on, using a pressure gauge to check the pressure, and adjusting the regulator if necessary. Follow this guide to properly test and adjust the pressure of your pressure regulator.
Turning the water supply back on
After installing the pressure regulator, you will need to turn the water supply back on to test the pressure. Locate the main water shutoff valve, which is typically located near the water meter. Turn the valve in a clockwise direction to open the water supply. Make sure to open the valve slowly to prevent any sudden surges in pressure.
Using a pressure gauge to check the pressure
To accurately test the pressure, you will need to use a pressure gauge. Attach the gauge to a hose bib or any other fixture that is directly connected to the water supply. Open the fixture fully and allow the water to flow freely. The pressure gauge will display the current water pressure. Take note of the reading on the gauge.
Adjusting the regulator if necessary
If the pressure reading on the gauge is above the desired pressure, you may need to adjust the pressure regulator. Locate the adjustment screw on the regulator and use a screwdriver to turn the screw in a clockwise direction to increase the pressure or in a counterclockwise direction to decrease the pressure. Make small adjustments and retest the pressure after each adjustment. Once the desired pressure is achieved, tighten the locknut on the regulator to secure the adjustment.
Remember to test the pressure at different fixtures throughout your home to ensure that the pressure is consistent. If you encounter any issues or are unsure about making adjustments to the pressure regulator, it is recommended to consult a professional plumber.
Additional Tips And Safety Precautions
Installing a pressure regulator is a crucial step in maintaining the optimal water pressure in your plumbing system. While the installation process may seem straightforward, there are a few additional tips and safety precautions that you should keep in mind to ensure a successful installation and prevent any potential issues. In this section, we will discuss two important aspects to consider: checking for leaks and inspecting the overall plumbing system for any issues.
Checking for leaks
Before you begin the installation process, it’s essential to check for any existing leaks in your plumbing system. Even a small leak can affect the accuracy of the pressure regulator and lead to wasted water and increased utility bills. Take the following steps to ensure a leak-free plumbing system:
- Turn off all faucets and appliances connected to the water supply.
- Inspect visible pipes and connection points for any signs of leakage, such as water stains or puddles.
- If you suspect a leak but cannot locate its source, you may consider using a leak detection kit or contacting a professional plumber for assistance.
- Repair any leaks before proceeding with the installation of the pressure regulator.
Inspecting the overall plumbing system for any issues
Along with checking for leaks, it’s important to thoroughly inspect your plumbing system for any underlying issues that may affect the performance of the pressure regulator. Here are some key areas to focus on during your inspection:
- Observe the water pressure in various faucets and showers throughout your home. If you notice significant variations in pressure, it could indicate a blockage or other plumbing problems that should be addressed.
- Check the water pressure at the main water supply line. This will serve as a baseline measurement for comparison after installing the pressure regulator.
- Examine the condition of pipes and fittings for any signs of corrosion, damage, or wear. Replace any faulty components to ensure a secure and efficient plumbing system.
- Consider consulting a professional plumber if you are uncertain about any potential issues or need assistance in identifying and resolving them.
By thoroughly checking for leaks and inspecting your overall plumbing system, you can ensure that the installation of the pressure regulator is performed on a solid foundation. These additional tips and safety precautions will help you avoid potential problems and ensure a smooth and efficient plumbing system for years to come.
Frequently Asked Questions
How Should A Pressure Regulator Be Installed?
To install a pressure regulator, follow these steps: 1. Turn off the water supply. 2. Attach the regulator to the main water line. 3. Ensure the arrow on the regulator faces the direction of the water flow. 4. Tighten the connections using a wrench.
5. Turn the water supply back on and check for any leaks. Remember to consult the manufacturer’s instructions for specific installation guidelines.
How Do I Replace My Home Water Pressure Regulator?
To replace your home water pressure regulator: 1. Turn off the main water supply. 2. Locate the current regulator, usually near the main water valve. 3. Disconnect the old regulator using a wrench or pliers. 4. Install the new regulator, ensuring it’s compatible with your system.
5. Reconnect the water supply and test the water pressure.
What Happens When You Install A Pressure Regulator Backwards?
Installing a pressure regulator backwards can cause problems, such as inaccurate pressure measurement and reduced efficiency. This can lead to system damage, leaks, and even safety risks. It’s important to consult the regulator’s manual or seek professional help to ensure correct installation for optimal performance.
Where Should A Pressure Regulator Be Located?
A pressure regulator should be located at the point where the pressure needs to be controlled.
Conclusion
To sum up, installing a pressure regulator is a crucial step in maintaining and protecting your plumbing system. This small device plays a big role in preventing water damage, increasing the lifespan of appliances, and saving money on water bills.
By following the simple steps and tips outlined in this guide, you can easily install a pressure regulator and ensure optimal water pressure throughout your home. Remember, regular maintenance and monitoring are key to ensuring the regulator functions properly and continues to provide efficient water flow.