To install a pocket door in an existing wall, follow these steps: remove the drywall, build the pocket frame, install the track and door hardware, and hang the door. Are you looking to seamlessly integrate a pocket door into an existing wall?
Installing a pocket door can be a practical and visually appealing solution to save space and improve the flow of a room. With a few simple steps, you can transform a conventional doorway into a pocket door system that effortlessly slides into a hidden compartment within the wall.
In this guide, we will take you through the process of installing a pocket door in an existing wall. By following these steps, you’ll have a seamless and space-saving pocket door in no time. So, let’s get started!
Getting Started: An Introduction To Pocket Doors
What is a pocket door?
A pocket door is a space-saving alternative to a traditional hinged door that slides into a hidden compartment, or “pocket,” inside the wall when it is opened. This type of door is a popular choice for smaller rooms or areas where a traditional swinging door would take up valuable space. Pocket doors are not only functional but can also add a touch of elegance and modernity to any interior design.
Advantages of installing a pocket door in an existing wall
There are several advantages to installing a pocket door in an existing wall. Here are some key benefits:
- Space-saving: One of the most significant advantages of a pocket door is its ability to save valuable space. Unlike traditional doors that swing open and take up extra floor space, pocket doors slide into the wall, allowing you to use the entire area without any obstructions.
- Improved accessibility: Pocket doors are an excellent choice for individuals with limited mobility or those who use mobility aids such as wheelchairs or walkers. Since pocket doors glide along a track, they require less effort to open and close compared to heavy hinged doors.
- Enhanced aesthetics: Pocket doors can instantly elevate the overall appearance of a room. With their sleek and minimalist design, they create a seamless and modern look that adds a touch of elegance to any interior.
- No door swing interference: When you install a pocket door, you no longer have to worry about door swing interfering with furniture placement or traffic flow. This allows for more flexibility when it comes to arranging your space.
- Improved sound insulation: Pocket doors can offer better sound insulation compared to traditional doors. Since they fit snugly into the wall, they minimize the amount of noise that can pass through from one room to another.
Things to consider before installing a pocket door
Before you embark on installing a pocket door in an existing wall, there are a few important factors to consider:
- Structural considerations: Determine if your wall is suitable for a pocket door installation. It is crucial to assess the wall’s structural integrity and verify if there are any obstacles, such as electrical wiring or plumbing pipes, that may impede the door installation process.
- Space availability: Ensure that you have enough space within the wall cavity to accommodate the pocket door’s width and height. Measure the dimensions accurately before proceeding with the installation.
- Cost and budget: Consider the cost of materials, labor, and any additional modifications required for the installation. Set a budget to ensure that you can complete the project within your financial means.
- Permits and regulations: Check with your local building authority to determine if any permits or approvals are necessary for installing a pocket door. Adhering to local regulations will ensure that the installation is compliant and safe.
- Preparation and planning: Proper planning is essential before starting the installation process. Take the time to gather all the necessary tools and materials, familiarize yourself with the instructions, and create a timeline for completion.
By considering these aspects before installation, you can anticipate any challenges and ensure a smooth and successful pocket door installation in your existing wall.

Step 1: Assessing Suitability Of The Existing Wall
Before you start the process of installing a pocket door in an existing wall, it is crucial to assess the suitability of the wall. This step involves evaluating the wall for structural integrity and strong support, checking for any electrical or plumbing obstacles, and measuring the available space for the pocket door installation.
Evaluating the wall for structural integrity and strong support
The first step in assessing the suitability of the existing wall is to carefully evaluate its structural integrity and ensure it can support the weight of a pocket door. Look for any signs of damage, such as cracks or bulges, which may affect the stability of the wall.
- Check for any load-bearing beams or pillars in the wall that could pose a challenge for installing a pocket door. These structural elements may require additional reinforcement to ensure proper support.
- Ensure that the wall is not a part of the building’s foundation or a load-bearing wall, as altering these areas could compromise the overall structural integrity of the building.
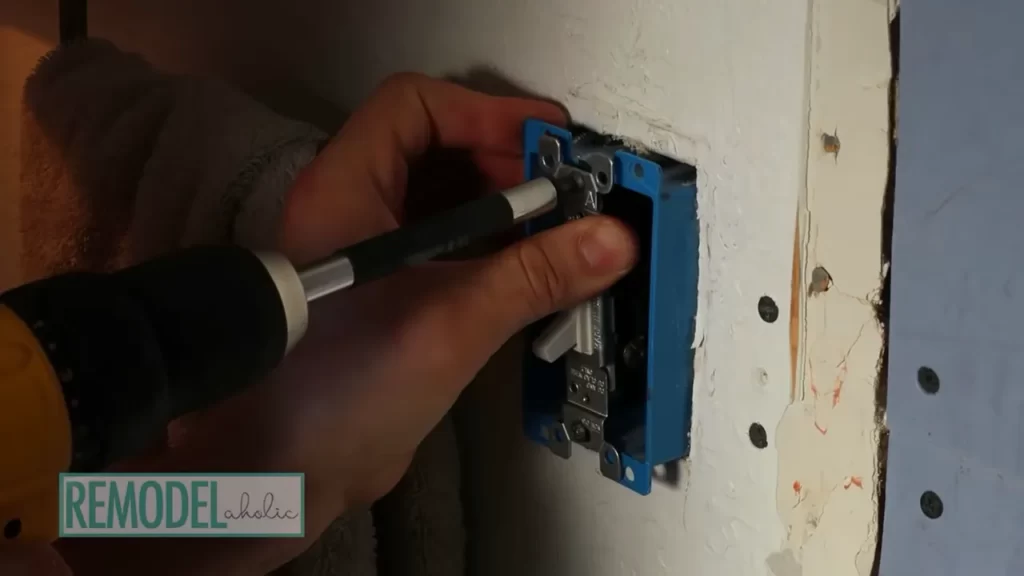
Checking for any electrical or plumbing obstacles
Another crucial aspect of assessing the suitability of the existing wall is checking for any electrical or plumbing obstacles that may be present. This step helps prevent any accidental damage or interference with existing wiring or pipelines.
- Identify and mark the location of electrical wiring and outlets, as well as any plumbing pipes that may run through the wall. This information will prove valuable during the installation process to avoid cutting or damaging any crucial components.
- Consult a professional electrician or plumber if you are uncertain about the location of electrical or plumbing elements in the wall. They can provide guidance and ensure the installation process goes smoothly.
Measuring the available space for the pocket door installation
Lastly, it is essential to accurately measure the available space within the existing wall to determine the appropriate size of the pocket door and its frame. A precise measurement ensures a proper fit and smooth operation of the door.
- Take measurements from multiple points on the existing wall, including the width and height. This step helps account for any inconsistencies or unevenness in the wall.
- Consider the thickness of the wall when measuring, as this will affect the dimensions required for the pocket door installation.
- Use a level to ensure the measurements are accurate and the wall is straight. Any deviation from levelness can impact the installation process and result in an uneven pocket door.
By thoroughly assessing the suitability of the existing wall, you can proceed with confidence to the next steps of the pocket door installation process. This initial evaluation sets the foundation for a successful and smooth installation, ensuring a functional and aesthetically pleasing pocket door in your space.
Step 2: Gathering The Necessary Tools And Materials
Introductory Paragraph:
In order to successfully install a pocket door in an existing wall, it is important to gather all the necessary tools and materials. In this step, we will discuss the list of tools required for the installation process, the materials needed for installing a pocket door, and optional accessories that can enhance its functionality. By being prepared with the right tools and materials, you can ensure a smooth installation process and achieve the desired end result.
List of tools required for the installation process:
Before embarking on the installation of a pocket door, it is essential to have the following tools ready:
- Measuring tape
- Level
- Chisel
- Screwdriver
- Drill
- Hammer
- Saw
- Sanding block
These tools will play a crucial role in ensuring precise measurements, creating the necessary openings, and securing the pocket door in place.
Materials needed for installing a pocket door:
In addition to the tools, the following materials will be required for the installation:
- Pocket door kit
- Door slab
- Door frame kit
- Drywall screws
- Wood shims
- Nails
- Drywall compound
- Sandpaper
- Paint or finish
These materials are necessary for constructing the pocket door frame, attaching the door slab, and finishing the installation with a polished look.
Optional accessories to enhance the functionality of a pocket door:
If you wish to enhance the functionality and convenience of your pocket door, consider these optional accessories:
- Soft-close mechanism: This accessory allows the pocket door to close gently and quietly, minimizing any slamming noises.
- Floor guide: A floor guide keeps the pocket door aligned and prevents it from swinging or shifting when in use.
- Flush pull handle: This handle allows for easy opening and closing of the pocket door, without the need for a visible handle on the door surface.
- Privacy lock: If the pocket door is intended for a bathroom or bedroom, a privacy lock ensures the door can be securely closed and locked when needed.
By incorporating these optional accessories, you can customize your pocket door to meet your specific needs and preferences.
Now that you are equipped with the knowledge of the required tools, materials, and optional accessories, you are ready to move on to the next step – preparing the existing wall for the installation of a pocket door.
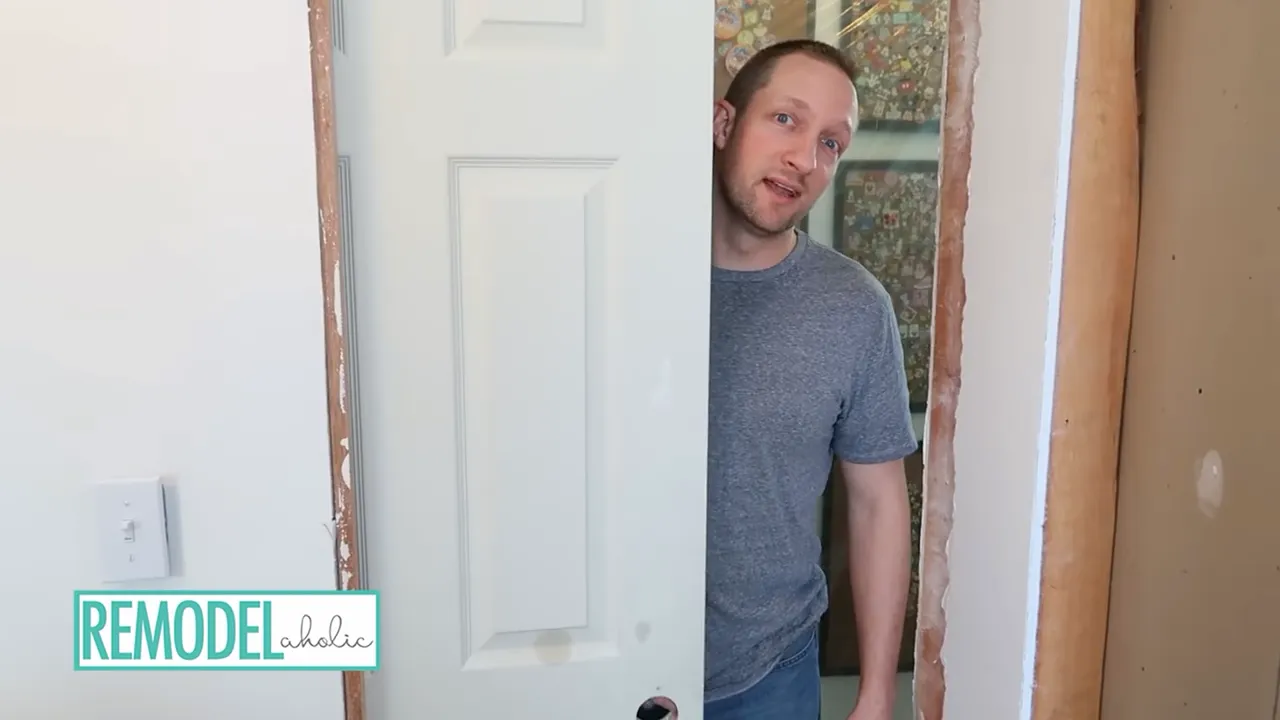
Step 3: Removing The Existing Door And Frame
Now that you have gathered all the necessary tools and materials for installing a pocket door in your existing wall, it’s time to move on to the next step: removing the existing door and frame. This step is crucial to make way for the new pocket door. Here’s a detailed breakdown of what needs to be done:
Removing the door from its hinges
- Begin by closing the door and locating the hinge pins. These pins secure the door to the hinges.
- Using a flathead screwdriver and a hammer, gently tap the bottom of each hinge pin upwards until it loosens.
- Once the hinge pins are loose, grip them firmly with your hands and lift them out of the hinges.
- With the pins removed, carefully tilt the door towards you and lift it off the hinges.
- Place the door aside in a safe location, ensuring it doesn’t get damaged during the remaining steps.
Taking out the door frame and casing
- Use a utility knife to score along the edges where the frame and casing meet the wall. This will help loosen the caulking and paint.
- Starting from the top, use a pry bar to carefully pry the frame away from the wall. Proceed slowly and apply even pressure to prevent any damage to the surrounding structure.
- If there are any nails securing the frame to the wall, use a cat’s paw or a nail puller to remove them.
- Continue prying the frame away from the wall until it is completely detached.
- Once the frame is removed, use a pry bar or a flathead screwdriver to gently pry off the casing from the wall.
- Set the frame and casing aside for disposal or reuse, depending on their condition.
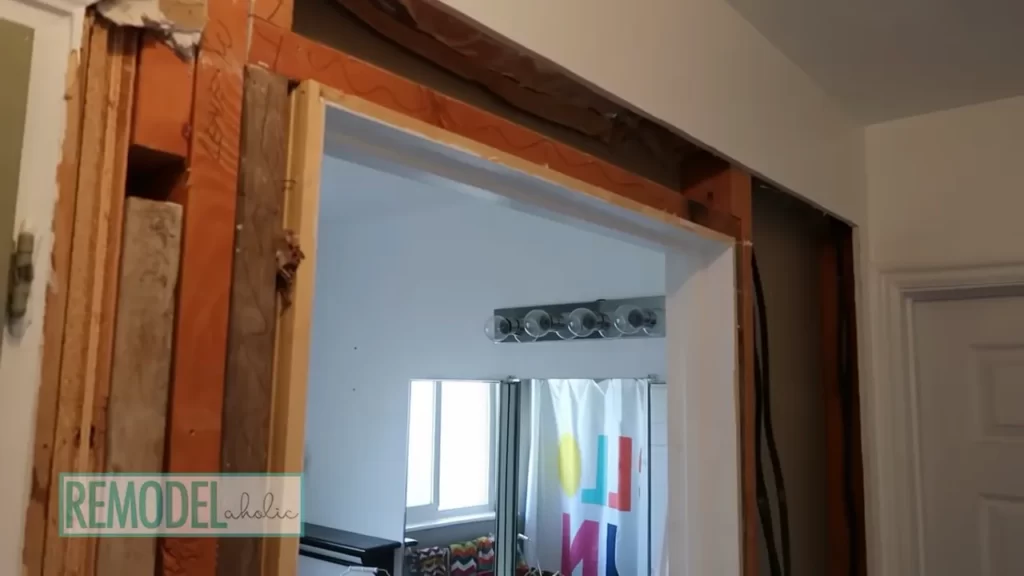
Preparing the opening for the pocket door installation
- Inspect the opening for any obstructions or debris. Remove any nails, screws, or other objects that may interfere with the pocket door installation.
- Clean the opening thoroughly to ensure a smooth and even surface for the pocket door to slide into.
- Measure the width and height of the opening to ensure an accurate fit for the pocket door.
- If needed, use a handsaw or a reciprocating saw to trim the opening according to the manufacturer’s specifications.
- Check the levelness of the opening using a carpenter’s level. Make any necessary adjustments to ensure the opening is perfectly level.
- Inspect the surrounding wall for any damage or cracks. Repair any issues before proceeding with the pocket door installation.
By following these steps, you have successfully removed the existing door and frame, and prepared the opening for the pocket door installation. The next step will involve installing the track and assembling the pocket door kit. Stay tuned for Step 4!
Step 4: Preparing The Pocket Door Kit
Now that you have measured and prepared the opening, it’s time to move on to the next step: preparing the pocket door kit. This step involves assembling the pocket door frame components, adjusting the frame to fit the dimensions of the opening, and ensuring smooth operation of the door within the frame. Let’s dive into the details!
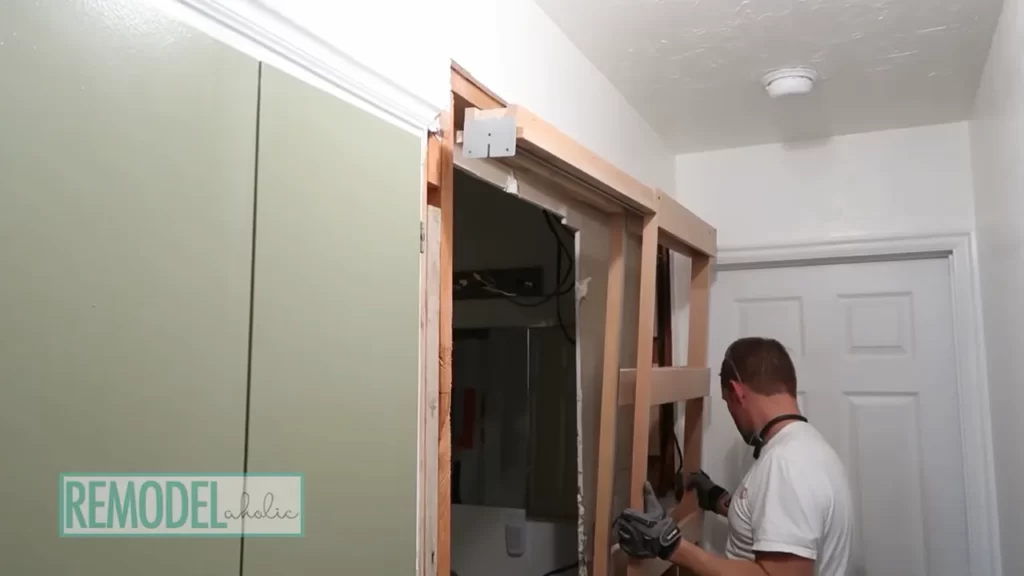
Assembling the pocket door frame components
The first task in preparing the pocket door kit is to assemble the frame components. The kit typically includes the header, studs, and tracks. Follow these steps:
- Start by laying out all the frame components in front of you. Ensure that you have all the necessary parts before proceeding.
- Carefully read the manufacturer’s instructions for assembling the pocket door frame. Different kits may have slightly different assembly processes, so it’s important to follow the specific instructions provided.
- Begin by attaching the header to the studs according to the manufacturer’s instructions. Use the provided screws or nails to secure the components together. This will form the basic structure of the pocket door frame.
- Double-check that all the connections are secure and that the frame is sturdy. Adjust as needed before moving on to the next step.
Adjusting the frame to fit the dimensions of the opening
After assembling the pocket door frame, the next step is to adjust it to fit the dimensions of the opening. This ensures a proper and snug fit for the pocket door. Follow these steps:
- Measure the height and width of the opening again to ensure accurate dimensions.
- Using a saw or other suitable tools, trim the studs and tracks of the pocket door frame to match the measurements of the opening. Take care to make precise cuts for a professional-looking installation.
- Place the adjusted frame back into the opening and check that it fits correctly. Make any necessary adjustments until the frame fits snugly and evenly within the wall.
- Once you are satisfied with the fit, secure the pocket door frame in place using the provided fasteners. Follow the manufacturer’s instructions for proper installation.
Ensuring smooth operation of the door within the frame
With the adjusted pocket door frame in place, the final step is to ensure smooth operation of the door within the frame. This step involves fine-tuning the door’s movement and making any necessary adjustments. Here’s what you need to do:
- Attach the door to the frame according to the manufacturer’s instructions. This may involve installing hangers or rollers that allow the door to slide smoothly within the pocket.
- Carefully test the door’s movement by sliding it back and forth within the pocket. Pay attention to any sticking or roughness in the motion.
- If necessary, make adjustments to the hangers or rollers to ensure smooth operation. This may involve tightening or loosening screws, lubricating the tracks, or other minor tweaks.
- Continue testing and adjusting until the door moves effortlessly within the pocket. This will ensure a satisfactory end result.
With these steps completed, you have successfully prepared the pocket door kit for installation. The next step will be installing the door itself and making any final adjustments for a seamless finish. Hang on tight, we’re almost there!
Step 5: Installing The Pocket Door Frame
Securing the frame to the existing wall
Now that you have prepared the opening and inserted the pocket door frame, it’s time to secure the frame to the existing wall. This step ensures that the frame is stable and secure, providing a solid foundation for the pocket door.
To secure the frame, follow these steps:
- Start by positioning the frame in the opening, making sure it’s centered and flush with the wall.
- Use a level to ensure that the frame is plumb vertically and level horizontally, adjusting as necessary.
- Once the frame is properly aligned, mark the locations of the screw holes on the frame and wall.
- Pre-drill pilot holes at the marked locations, using a drill bit slightly smaller than the screws you’ll be using.
- With the pilot holes drilled, insert screws through the frame and into the wall, tightening them securely.
- Repeat this process for all screw holes, ensuring that the frame is securely fastened to the wall.
Aligning the frame properly for a level and plumb installation
Proper alignment of the pocket door frame is crucial for a level and plumb installation. Follow these steps to align the frame:
- Check the plumbness of the frame by using a plumb bob or a level along the sides of the frame. Adjust as needed to ensure the frame is vertical and straight.
- Use a level to check the horizontal alignment of the frame on the top and bottom. Make any necessary adjustments to ensure the frame is level.
- Double-check the alignment by opening and closing the door, ensuring it moves smoothly within the frame without any obstructions.
Checking the stability and functionality of the installed frame
After securing and aligning the pocket door frame, it’s important to check its stability and functionality. Follow these steps to ensure everything is in working order:
- Test the stability of the frame by gently pushing and pulling on it. It should feel solid and not move or shift.
- Open and close the pocket door several times to make sure it operates smoothly within the frame. Check for any sticking points or rough movements that may require adjustments.
- Inspect the frame for any gaps or irregularities that may need to be filled or fixed. Smooth out any rough edges or surfaces that could interfere with the door’s function.
By following these steps and thoroughly checking the stability and functionality of the installed pocket door frame, you can ensure a successful installation and enjoy the benefits of a space-saving and functional pocket door.
Step 6: Mounting The Pocket Door
Attaching the door to the hardware of the frame
With the pocket door frame securely installed and the rollers in place, it’s time to attach the door to the hardware. This step requires careful precision to ensure a proper fit and smooth operation of the pocket door. Here’s how to do it:
- Start by positioning the door on the floor, aligning it with the frame. Make sure the bottom edge of the door is flush with the floor.
- Next, lift the door and carefully insert the top rollers into the track of the frame. Gently release the door, allowing it to rest on the rollers.
- Using the provided screws, secure the door to the brackets that hold the rollers in place. Make sure to tighten the screws firmly but not excessively, as this could affect the smooth movement of the door.
- Check the alignment of the door by opening and closing it a few times. If it rubs or sticks, you may need to adjust the roller height or make minor modifications to the door’s size.
Adjusting the door for proper alignment and smooth movement
After attaching the door to the hardware, it’s important to ensure that the door is aligned properly and moves smoothly within the pocket. Follow these steps to make any necessary adjustments:
- With the door closed, check the gap between the door and the frame on both sides. The gap should be even from top to bottom. If it’s not, adjust the roller height until the door is properly aligned.
- Test the door by sliding it open and closed. Pay attention to any resistance or dragging. If you encounter any issues, you may need to adjust the roller height or make minor modifications to the frame or door.
- If the door rubs against the floor or ceiling, consult the manufacturer’s instructions on how to adjust the door height. This typically involves loosening screws and moving the door up or down before retightening them.
Testing the functionality and ease of operation of the pocket door
Now that the door is mounted and adjusted, it’s time to test its functionality and ensure it operates smoothly. Follow these steps to complete the installation:
- Open and close the pocket door multiple times to test its movement. It should slide effortlessly within the frame without sticking or jolting.
- Check for any gaps between the door and the frame when the door is closed. If there are any noticeable spaces, you may need to make further adjustments to the alignment or height of the door or frame.
- Continue testing the door’s operation, paying attention to any unusual sounds or resistance. If you encounter any issues, consult the manufacturer’s instructions or seek professional assistance to troubleshoot and resolve the problem.
Congratulations! By successfully completing these steps, you have now mounted and tested your pocket door. It’s time to admire your handiwork and enjoy the convenience and space-saving benefits of a fully functional pocket door.
Step 7: Finishing Touches And Enhancements
Now that you have successfully installed a pocket door in your existing wall, it’s time to add those finishing touches and enhancements that will not only enhance the functionality of your door but also add a touch of style and sophistication to your space. In this step, we will guide you through the process of installing door handles and locks, adding decorative trim and finishing elements, as well as enhancing the soundproofing and insulation features of your pocket door.
Installing Door Handles and Locks
Installing door handles and locks is an essential step in completing your pocket door installation. It not only provides a secure closing mechanism but also adds a decorative element that complements your overall interior design. Follow these steps to install door handles and locks:
- Measure and mark the desired height for your door handle and lock on the door.
- Drill holes for the handle and lock mechanisms using a drill bit that matches the size specified by the manufacturer.
- Insert the handle and lock mechanisms into the drilled holes, ensuring they are tight and secure.
- Attach the exterior faceplate and interior handle/lock components according to the manufacturer’s instructions.
- Test the functionality of the door handle and lock to ensure smooth operation.
Adding Decorative Trim and Finishing Elements
Adding decorative trim and finishing elements can transform your pocket door into a stunning focal point of your interior space. Here are some ideas to consider:
- Select decorative trim that complements your existing door style and overall interior aesthetic.
- Measure and cut the trim pieces to fit the dimensions of your pocket door.
- Apply wood glue or adhesive to the back of the trim pieces and carefully press them onto the edges of the door.
- Secure the trim in place using finishing nails or a brad nailer.
- Fill any visible nail holes with wood filler and sand the surface smooth.
- Apply a coat of paint or stain to match the color of your door or create a contrasting effect.
Enhancing the Soundproofing and Insulation Features
Enhancing the soundproofing and insulation features of your pocket door can help create a quieter and more energy-efficient environment. Follow these tips:
- Apply weatherstripping along the edges of the pocket door frame to create a tight seal when closed.
- Add a layer of soundproofing material, such as mass-loaded vinyl or foam insulation, to the interior side of the door.
- Consider installing an automatic door bottom seal to further improve soundproofing and insulation.
- Regularly check and maintain the condition of the door seals to ensure optimal performance.
By following these steps and adding those finishing touches and enhancements, you can elevate the functionality, aesthetics, and performance of your pocket door installation. Enjoy the seamless operation, enhanced style, and improved insulation of your new pocket door!
Step 8: Maintenance And Troubleshooting Tips
Once you have installed a pocket door in your existing wall, it is important to properly maintain and troubleshoot any issues that may arise. This will not only ensure the longevity of your pocket door but also keep it functioning smoothly for years to come. In this section, we will discuss some essential maintenance tips as well as common issues and troubleshooting techniques for your pocket door.
Tips for maintaining the pocket door and its components
Maintaining your pocket door and its components is essential to prevent any potential problems. By following these maintenance tips, you can keep your pocket door in excellent condition:
- Regularly clean the tracks: Over time, dirt and debris can accumulate in the tracks, causing the door to stick or slide unevenly. To prevent this, use a soft brush or cloth to clean the tracks at least once a month.
- Inspect the rollers: The rollers are responsible for the smooth movement of the door. Check them periodically for any signs of wear and tear, such as cracks or missing pieces. If necessary, replace the rollers to ensure optimal performance.
- Lubricate the tracks and hinges: Applying a silicone-based lubricant to the tracks and hinges can help reduce friction and ensure effortless operation. Remember to wipe off any excess lubricant to prevent accumulation of dirt.
- Check the door alignment: Over time, the door may become misaligned, leading to issues with opening and closing. Regularly check the door’s alignment and make necessary adjustments if needed.
- Inspect the door frame: Check the door frame for any signs of damage or warping. If you notice any issues, repair or replace the door frame to maintain the structural integrity of the pocket door.
Common issues and troubleshooting techniques
Despite regular maintenance, some issues may still arise with your pocket door. Knowing how to troubleshoot these problems can save you time and money. Here are some common issues and their troubleshooting techniques:
| Common Issues | Troubleshooting Techniques |
|---|---|
| The door doesn’t slide smoothly | 1. Clean the tracks thoroughly and lubricate them 2. Check and adjust the rollers 3. Ensure the door is properly aligned |
| The door gets stuck | 1. Clean the tracks and remove any debris 2. Check for any obstructions in the track or behind the door 3. Inspect the rollers for damage or misalignment |
| The door doesn’t latch properly | 1. Adjust the strike plate to ensure proper alignment 2. Check the latch mechanism for any damage or blockage 3. Replace the latch if necessary |
| The door comes off the track | 1. Check if the track is properly secured 2. Inspect the rollers for any damage or misalignment 3. Reinstall the door onto the track |
Remember, if you encounter any major issues or are unsure about how to fix a problem, it is always recommended to consult a professional for assistance.
By conducting regular inspections, performing necessary maintenance, and troubleshooting any issues that arise, you can ensure your pocket door operates smoothly and remains a valuable addition to your existing wall.
Frequently Asked Questions
Can You Fit A Pocket Door Into An Existing Wall?
Yes, it is possible to fit a pocket door into an existing wall. This allows for space-saving and seamless integration.
How Much Does It Cost To Install A Pocket Door In An Existing Wall?
The cost of installing a pocket door in an existing wall varies, ranging from $500 to $1,500. The total expense depends on factors like the size of the door, materials used, labor costs, and any necessary modifications to the wall.
Can You Install A Pocket Door Where A Regular Door Is?
Yes, it is possible to replace a regular door with a pocket door. The installation process involves removing the existing door and frame, adjusting the opening size if necessary, and installing the pocket door hardware and frame. It can be a good space-saving solution for tight areas.
Do Pocket Doors Need To Be Installed Before Drywall?
Yes, pocket doors should be installed before drywall. Installing them afterward would require removing and cutting into the drywall, resulting in additional work and potentially damaging the finished walls. Therefore, it is recommended to install pocket doors during the framing and pre-drywall stage of construction.
Conclusion
Installing a pocket door in an existing wall is a practical and space-saving solution. By following the step-by-step guide provided in this blog post, you can successfully complete this project. Remember to gather all the necessary tools and materials, measure accurately, and take your time to ensure a smooth installation process.
With careful planning and attention to detail, you can enjoy the benefits of a pocket door in your home.