To install a one-piece tub surround, start by prepping the walls, applying adhesive, and aligning the surround with the tub. Then, secure the surround to the wall and let the adhesive dry.
A one-piece tub surround can be a great addition to any bathroom, providing a sleek and seamless look. Installing it yourself may seem challenging at first, but with a few simple steps, you can have your tub surround in place in no time.
This guide will walk you through the installation process, from prepping the walls to securing the surround in place. Whether you’re a DIY enthusiast or just looking to save some money, installing a one-piece tub surround can be a rewarding project that enhances the overall look and functionality of your bathroom.
Gathering The Necessary Tools And Materials
Before you embark on the installation of a one-piece tub surround, it is essential to gather all the necessary tools and materials. Having everything you need at hand can save you time and frustration during the installation process. In this section, we will provide you with a comprehensive list of the tools and materials required for a smooth and successful installation.
List of tools and materials needed for the installation
Here is a detailed breakdown of the tools and materials you will need:
Tools:
- Utility knife – essential for cutting and trimming the tub surround.
- Tape measure – to ensure accurate measurements for a precise fit.
- Level – necessary to ensure that the tub surround is installed evenly.
- Drill – used for making holes in the wall and tub surround for screws or adhesive.
- Silicone caulk gun – for applying adhesive or caulk to secure the tub surround.
- Screwdriver – required if you plan to attach the tub surround with screws.
- Putty knife – useful for spreading adhesive or removing any excess.
- Rubber mallet – handy for gently tapping the tub surround into place.
- Rags or towels – for cleaning and wiping away any excess adhesive or caulk.
- Safety goggles and gloves – to protect your eyes and hands during the installation.
Materials:
- One-piece tub surround – available in a variety of styles and materials such as acrylic or fiberglass.
- Adhesive or caulk – depending on the installation method you choose.
- Screws – if you opt for screwing the tub surround into place.
- Plastic sheeting – to protect the floor and surrounding area from debris or damage.
- Tub and tile cleaner – for cleaning the existing tub and walls before installation.
- Tape – to mark measurements or secure the plastic sheeting.
Importance of having all the necessary items before starting the project
Having all the necessary tools and materials before starting the installation project is vital for several reasons:
- Efficiency: By having everything ready, you can streamline the installation process, reducing the time and effort required.
- Precise Measurements: With the proper measuring tools, you can ensure accurate measurements, allowing for a snug fit and professional-looking result.
- Smooth Installation: When you have the right tools and materials on hand, you can work seamlessly without interruptions, enabling a smooth and continuous installation.
- Avoid Delays: Running out of materials or realizing you lack essential tools midway through the installation can lead to frustrating delays. Avoid this by preparing beforehand.
Now that you have gathered all the necessary tools and materials, you are ready to embark on the installation process. In the next section, we will guide you through the steps of preparing the area for installation.

Measuring And Preparing The Bathroom
Before you can begin the installation of a one-piece tub surround in your bathroom, it’s crucial to properly measure the area and prepare the space. Taking accurate measurements will ensure that your tub surround fits perfectly, while preparing the bathroom will create a clean and smooth surface for installation. In this section, we will guide you through the process step-by-step, from measuring the area where the tub surround will be installed to removing existing fixtures and preparing the walls for installation.
Measuring the area where the tub surround will be installed
Measuring the area where the tub surround will be installed is the first step in ensuring a proper fit. Here are the steps you need to follow:
- Using a tape measure, measure the width and height of the area where the tub surround will be installed. Make sure to measure from wall to wall, and from the floor to the ceiling. Write down these measurements for reference.
- Next, measure the depth of the area. This is particularly important if you have plumbing or pipes that need to be accounted for.
- Once you have the measurements, use a level to check if the wall is straight and level. This will help you identify any uneven areas that may need to be addressed before installation.
Tips for removing the existing fixtures and preparing the walls for installation
Before installing the new tub surround, it’s important to remove any existing fixtures and prepare the walls. Here are some tips to guide you:
- Start by turning off the water supply to the fixtures you will be removing. This will prevent any accidents or leaks during the process.
- Using a wrench, carefully remove the old fixtures, such as the showerhead, faucet, and handles. Take your time to ensure that you don’t damage any surrounding tiles or walls.
- Once the fixtures are removed, inspect the walls for any damage or mold. If you find any issues, address them before proceeding further. This may involve patching holes, repairing drywall, or treating areas affected by mold.
- Clean the walls thoroughly to remove any dirt or grease that may hinder the adhesion of the tub surround. A mixture of warm water and mild soap should do the trick.
- After cleaning, use sandpaper to lightly roughen the surface of the walls. This will provide a better grip for the adhesive.
- Finally, use a level to ensure that the walls are still straight and level. If needed, make any adjustments before proceeding with the installation.
By measuring the area accurately and preparing the bathroom properly, you are now ready to move on to the next step of installing your one-piece tub surround. Stay tuned for our next section, where we will guide you through the installation process.
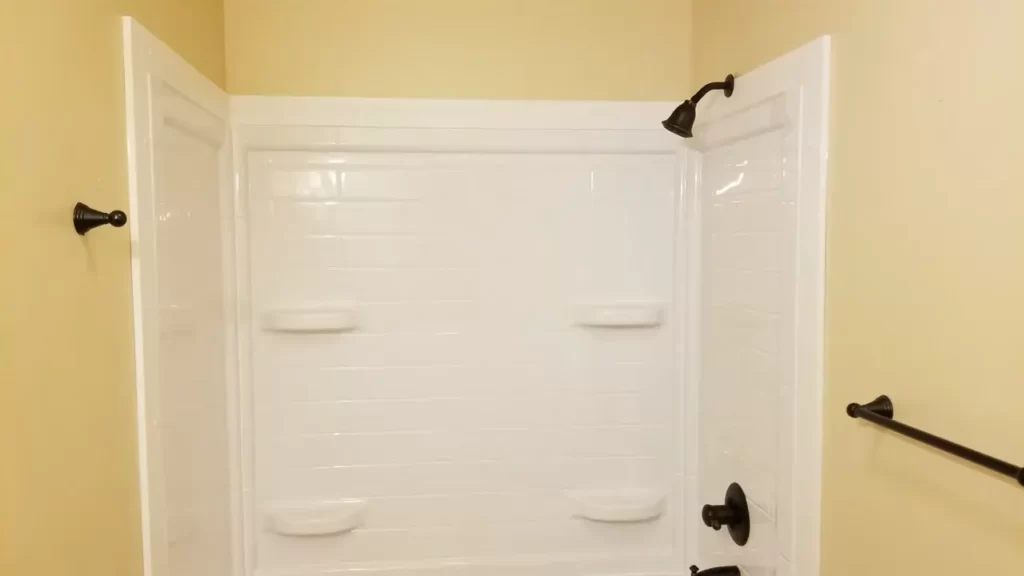
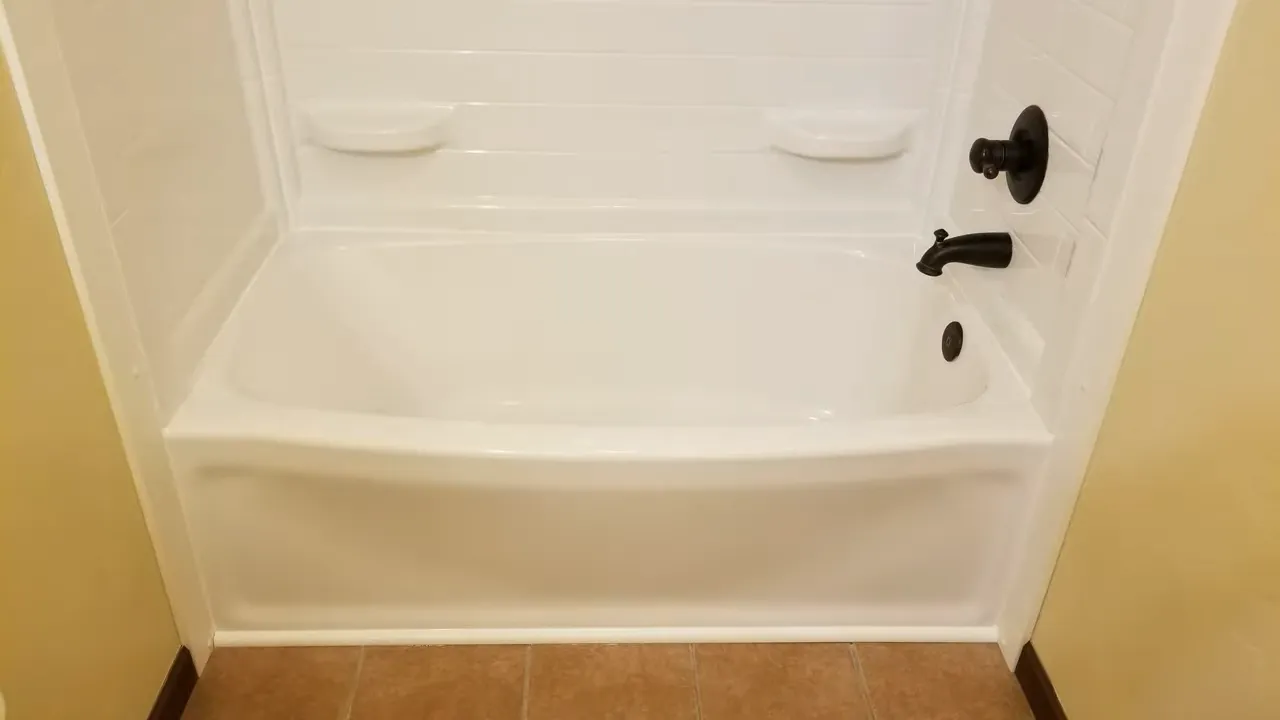
Installing The One Piece Tub Surround
One of the key elements in a bathroom renovation is installing a new tub surround. A one piece tub surround not only enhances the aesthetic appeal of your bathroom but also provides a waterproof barrier to protect the walls from moisture damage. While the process of installing a one piece tub surround may seem daunting, with the right tools and step-by-step instructions, you can achieve a professional-looking installation in no time.
Preparing the Tub Surround for Installation
Before you begin attaching the tub surround to the wall, it’s important to properly prepare the surface to ensure a secure and long-lasting installation. Here’s what you need to do:
- Clean the walls: Start by thoroughly cleaning the walls where the tub surround will be installed. Remove any dirt, debris, or old caulk using a mild detergent and water.
- Measure and mark: Measure the height of the tub surround and mark the corresponding height on the wall. Use a level to ensure accuracy.
- Apply adhesive: Apply a high-quality adhesive recommended by the manufacturer to the back of the tub surround. Be sure to follow the manufacturer’s instructions for application.
Step-by-Step Instructions for Attaching the Tub Surround to the Wall
Now that you’ve prepared the tub surround and the wall, it’s time to start the installation process. Follow these step-by-step instructions:
- Position the tub surround: Carefully lift the tub surround and position it against the wall, aligning it with the marked height.
- Press firmly: Apply firm pressure to the tub surround, ensuring that it adheres securely to the wall. Use your hand or a rubber mallet to gently tap the surface to create a strong bond.
- Check for level: Use a level to check if the tub surround is perfectly level. Make adjustments if needed by adding shims behind the surround to achieve a level position.
- Secure the surround: Once the tub surround is level, secure it to the wall by attaching screws or nails at the designated locations specified by the manufacturer. Be careful not to over-tighten the fasteners.
Tips for Ensuring a Secure and Level Installation
To ensure a secure and level installation of your one piece tub surround, consider these tips:
- Double-check the measurements: Measure twice and cut once. It’s crucial to accurately measure the height and width of the tub surround before making any cuts.
- Use the right adhesive: Choose an adhesive specifically designed for tub surrounds to ensure a strong and durable bond.
- Follow the manufacturer’s instructions: Each tub surround may have specific installation requirements, so it’s important to carefully read and follow the manufacturer’s instructions.
- Check for level at multiple points: Use a level in multiple spots along the tub surround to ensure that it is level both vertically and horizontally.
By following these step-by-step instructions and tips, you can confidently install a one piece tub surround that enhances the beauty of your bathroom while providing reliable protection against water damage.
Sealing And Finishing The Installation
Once you have successfully installed your one-piece tub surround, it’s important to seal and finish the installation properly to ensure its longevity and maintain a professional look. Taking the time to apply sealant, finish the edges and corners, and clean and maintain the tub surround will help prevent water damage, create a cohesive appearance, and keep your bathroom looking fresh and clean.
Applying sealant to prevent water damage
One of the most crucial steps in sealing and finishing a one-piece tub surround installation is applying sealant. This will help prevent water damage and ensure the integrity of the installation. To apply sealant:
- Clean the areas where the tub surround meets the walls and floor, removing any dirt or debris.
- Using a caulk gun, apply a thin, even bead of silicone caulk along the joints between the tub surround and the walls and floor.
- Smooth the caulk with a wet finger or caulk smoothing tool to create a neat and seamless finish.
- Allow the caulk to dry completely before using the tub or shower to ensure a proper seal.
How to properly finish the edges and corners for a professional look
Properly finishing the edges and corners of your one-piece tub surround is essential for achieving a professional look. Here’s how to do it:
- Measure and cut a trim molding or corner molding to fit the exposed edges and corners of the tub surround.
- Apply adhesive to the back of the molding and press it firmly onto the edges or corners, ensuring a secure bond.
- If necessary, use screws or nails to further secure the molding in place.
- Once the molding is installed, caulk along the edges to seal any gaps and create a seamless finish.
Cleaning and maintaining the tub surround after installation
After completing the sealing and finishing process, it’s important to clean and maintain your one-piece tub surround to keep it looking its best. Follow these steps:
- Regularly clean the tub surround using a non-abrasive cleaner and a soft cloth or sponge.
- Avoid using harsh chemicals or abrasive scrubbers that can damage the surface of the tub surround.
- Inspect the sealant periodically and reapply as needed to ensure a watertight seal.
- Address any signs of mold or mildew immediately by using a mildew remover and following the manufacturer’s instructions.
- Avoid placing heavy objects or applying excessive force to the tub surround, which could cause damage.
By following these sealing, finishing, cleaning, and maintenance steps, you can ensure that your one-piece tub surround installation remains beautiful and functional for years to come.
Frequently Asked Questions
What Do You Put Behind A Tub Surround?
You can put drywall or cement board behind a tub surround. Drywall is not recommended for wet areas, so cement board is a better choice to prevent moisture damage.
How Do You Install A Plastic Tub Surround?
To install a plastic tub surround, first, remove the old surround and clean the area. Measure and mark the placement of the new surround. Apply adhesive to the wall and press the surround firmly in place. Use trim pieces to cover any gaps.
Seal the edges with silicone caulk for a watertight seal.
Can You Put A Tub Surround On An Existing Tub?
Yes, you can install a tub surround on an existing tub. It is a straightforward process that involves attaching the surround panels to the existing walls. This not only enhances the look of your bathroom but also provides protection for your walls from water damage.
Does A Tub Surround Go Over Drywall?
Yes, a tub surround can go over drywall. It provides a protective barrier that covers the drywall and enhances the appearance of the bathroom. It is important to properly prepare the drywall surface before installing the tub surround to ensure a secure and lasting installation.
Conclusion
To sum up, installing a one-piece tub surround is a straightforward process that can transform the look of your bathroom. With the right tools and a step-by-step approach, you can achieve professional results without the need for costly contractors. Remember to follow the manufacturer’s instructions carefully and ensure a proper seal to protect against leaks.
By taking the time to install a one-piece tub surround correctly, you can enhance your bathroom’s aesthetics and functionality for years to come.