To install a one-piece toilet, first, position the wax ring on the flange, then lower the toilet bowl onto the wax ring and press down firmly. Installing a toilet may sound daunting, but with a few simple steps, you can have a fully functional one-piece toilet in no time.
We will guide you through the process of installing a one-piece toilet from start to finish. Whether you are replacing an old toilet or starting from scratch, this step-by-step guide will help you confidently navigate the installation process. By following these instructions, you can ensure a secure and leak-free installation that will provide convenience and comfort in your bathroom.
So, let’s get started and learn how to install a one-piece toilet properly.
Gather The Necessary Tools And Materials
Before diving into the installation process of a one-piece toilet, it’s important to gather all the tools and materials you will need. This ensures a smooth and uninterrupted process, saving you time and unnecessary frustration. To make things easier for you, we have compiled a list of essential tools and materials required for installing a one-piece toilet.
Gather the tools required for installing a one-piece toilet
Make sure you have the following tools handy before starting the installation:
- Adjustable wrench
- Bucket
- Crescent wrench
- Hacksaw
- Plunger
- Putty knife
- Screwdriver (flathead and Phillips head)
- Tape measure
- Washers
Gather the materials required for installing a one-piece toilet
In addition to the tools, you will also need the following materials:
- One-piece toilet (with tank and bowl)
- Wax ring
- Tank bolts
- Tank-to-bowl gasket
- Flapper valve
- Fill valve
- Tank-to-bowl bolts
- Nuts
- Flexible supply line
- Plumber’s putty
- Silicone caulk
Having all these tools and materials prepared beforehand will help you complete the installation of your one-piece toilet without any hiccups. So, gather them all up and let’s move on to the next step in the installation process.
How To Effortlessly Install A One Piece Toilet: Expert Guide
Installing a one-piece toilet may seem like a daunting task, but with the right guide, it can be a hassle-free process. In this expert guide, we will walk you through each step, ensuring a seamless installation process. Whether you are a seasoned DIYer or a beginner, this guide will help you successfully install a one-piece toilet in no time. So, let’s get started!
Follow this expert guide to effortlessly install a one-piece toilet
Step 1: Gather all the necessary tools and materials
Before you begin the installation process, it’s essential to have all the tools and materials on hand. Here’s a quick checklist of what you’ll need:
| Tools | Materials |
|---|---|
| Screwdriver | Wax ring |
| Adjustable wrench | Water supply line |
| Hacksaw | Plastic caps |
| Bucket | Mounting bolts |
Step 2: Prepare the area for installation
- Start by turning off the water supply to the toilet. Locate the shut-off valve at the base of the toilet and rotate it clockwise to close it.
- Flush the toilet to drain as much water as possible. You can also use a small bucket or towel to soak up any remaining water in the bowl and tank.
Step 3: Remove the old toilet
- Locate the mounting bolts at the base of the toilet and use a screwdriver or adjustable wrench to loosen the nuts.
- Once the nuts are loose, carefully lift the toilet off the floor and place it on a soft surface to prevent any damage.
- Remove the wax ring from the flange and clean the area thoroughly.
Step 4: Install the new one-piece toilet
- Set the wax ring onto the flange, ensuring it is centered.
- Position the new one-piece toilet over the wax ring, aligning the mounting holes with the mounting bolts.
- Gently press down on the toilet to compress the wax ring and create a secure seal.
- Tighten the nuts onto the mounting bolts, alternating between the two sides to ensure even pressure.
- Once the toilet is securely in place, trim the excess length of the mounting bolts using a hacksaw.
Step 5: Connect the water supply
- Attach the water supply line to the fill valve on the bottom of the toilet tank.
- Hand-tighten the connection, then give it an additional quarter turn using an adjustable wrench.
That’s it! You’ve successfully installed a one-piece toilet using our expert guide. Remember to turn on the water supply valve and check for any leaks. If you followed the steps diligently, your new toilet should be ready for use. Enjoy the convenience and comfort of your newly installed one-piece toilet!
Preparation And Removal
Before you can begin installing a one piece toilet, it’s important to properly prepare the bathroom area and remove the old toilet. This step-by-step guide will walk you through the process, ensuring a smooth and successful installation.
Prepare the bathroom area for the installation process
To ensure a hassle-free installation, it’s crucial to prepare the bathroom area beforehand. Follow these steps:
- Clear the space around the toilet: Remove any rugs, cabinets, or objects that may obstruct the installation process.
- Gather the necessary tools: Before you begin, make sure you have all the tools you will need for the installation, such as a wrench, pliers, and a putty knife.
- Shut off the water supply: Locate the water shut-off valve, usually located behind the toilet, and turn it clockwise to shut off the water supply.
- Flush the toilet: Flush the toilet to drain out any remaining water in the tank and bowl.
Remove the old toilet and clean the area thoroughly
Now that the bathroom area is prepared, it’s time to remove the old toilet and clean the area before installing the new one. Follow these steps:
- Disconnect the water supply: Using a wrench or pliers, disconnect the water supply line from the bottom of the toilet tank.
- Remove the toilet tank: Unscrew the bolts that connect the toilet tank to the bowl and carefully lift off the tank.
- Remove the toilet bowl: Unscrew the nuts from the bolts securing the toilet bowl to the floor. Carefully lift the bowl off the floor and set it aside.
- Clean the area: With the old toilet removed, thoroughly clean the floor area using a putty knife and disinfectant. Remove any old wax or caulk residue to ensure a clean and level surface for the new toilet.
With the bathroom area properly prepared and the old toilet removed, you’re now ready to move on to the next step in the installation process. Stay tuned for our upcoming blog post on how to install a one piece toilet!
Safe Removal Of The Old Toilet
Before you can install a shiny new one piece toilet, it’s important to safely remove the old one. This step-by-step guide will ensure that you complete the process without any mishaps or messy accidents. Plus, we’ll also cover proper disposal of the old toilet and the sanitary precautions you need to take.
Step-by-step instructions for safely removing the old toilet
- Turn off the water supply: Locate the shut-off valve for the toilet’s water supply, usually located near the base of the toilet. Turn it clockwise to shut off the water flow.
- Flush and drain: Flush the toilet to remove as much water as possible from the tank and bowl. Use a small cup or bucket to remove any remaining water.
- Disconnect the supply line: Using an adjustable wrench, loosen the nut connecting the water supply line to the bottom of the toilet tank. Once loose, carefully remove the line from the tank.
- Remove the toilet tank lid: Lift off the lid and set it aside on a safe surface.
- Detach the tank: Locate the bolts on each side of the toilet tank that secure it to the bowl. Unscrew the nuts with a wrench and lift the tank off the bowl. Place it aside.
- Detach the bowl: Locate the bolts at the base of the toilet bowl. Remove the nuts with a wrench and carefully lift the bowl off the floor. It may be heavy, so ask for assistance if needed.
Proper disposal of the old toilet and sanitary precautions to be taken
Now that you have successfully removed the old toilet, it’s time to address proper disposal and maintain sanitary conditions. Follow these guidelines:
- Proper disposal: Contact your local waste management facility to understand their regulations for disposing of toilets. Some areas may have specific guidelines for toilet disposal, while others may recommend taking it to a recycling center.
- Protective measures: When handling the old toilet, always wear gloves and eye protection to minimize contact with potentially harmful bacteria or germs.
- Clean the area: After removing the old toilet, thoroughly clean the installation area with a disinfectant to ensure a hygienic surface for the new toilet.
Following these steps will ensure a smooth and safe removal of the old toilet, readying the space for the installation of your new one piece toilet. With proper disposal and sanitary precautions, you can be confident in maintaining a clean and healthy bathroom environment.
Cleaning And Preparing The Area
Cleaning and preparing the area is an important step when installing a one-piece toilet. By thoroughly cleaning the area around the toilet flange and preparing the floor to ensure it is level, you can ensure a smooth and successful installation. This section will provide you with step-by-step guidance on how to clean and prepare the area for your new toilet.
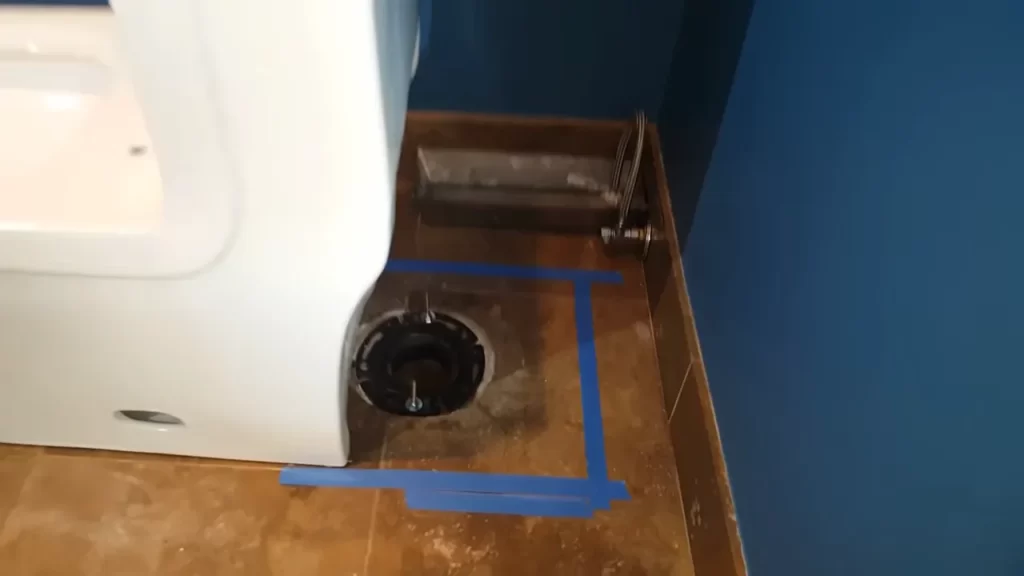
Thoroughly clean the area around the toilet flange
The first step in preparing the area is to thoroughly clean the area around the toilet flange. This is important to ensure a proper seal between the toilet and the flange, preventing any leaks or odors. To clean the area, follow these steps:
- Remove the old wax ring and any remnants from the flange. Use a putty knife or scraper to gently scrape away any residue.
- Wipe the area clean with a damp cloth or sponge. Pay special attention to the flange and the surrounding floor area.
- Inspect the flange for any cracks or damages. If you notice any issues, it is recommended to replace the flange before proceeding with the installation.
- Ensure that the flange is level and securely fastened to the floor. If it is loose or unstable, use screws or anchors to secure it in place.
By following these steps and thoroughly cleaning the area, you can ensure a clean and stable base for your new one-piece toilet.
Prepare the floor and ensure it is level for the new toilet installation
After cleaning the area, the next step is to prepare the floor and ensure it is level. A level and stable floor are essential for a proper installation. Here’s how you can prepare the floor:
- Remove any debris, such as old flooring or adhesive, from the installation area. A clean and smooth surface will ensure a proper fit for your new toilet.
- Check the floor for any irregularities or unevenness. If you notice any bumps or dips, use a leveling compound or shims to even out the surface.
- Using a carpenter’s level, place it in various spots around the installation area to check for levelness. If the floor is not level, adjust it using shims or a leveling compound as necessary.
- Make sure that the area is dry and free of any moisture before proceeding with the toilet installation.
Once you have thoroughly cleaned the area and ensured that the floor is level, you are ready to proceed with the installation of your new one-piece toilet.
Installing The New Toilet
Step-by-Step Instructions for Installing the New One-Piece Toilet
Installing a new one-piece toilet may seem like a daunting task, but with the right guidance, it can be a straightforward process. By following these step-by-step instructions, you’ll have your new toilet up and running in no time.
1. Prepare the Area
Before you begin the installation, make sure to remove any old materials and thoroughly clean the area where the new toilet will go. This will ensure a clean and stable base for the new fixture.
2. Measure and Mark
Using a tape measure, carefully measure the distance between the wall and the center of the toilet flange, which is the opening in the floor where the toilet will be secured. Mark this measurement on the floor to ensure proper alignment during installation.
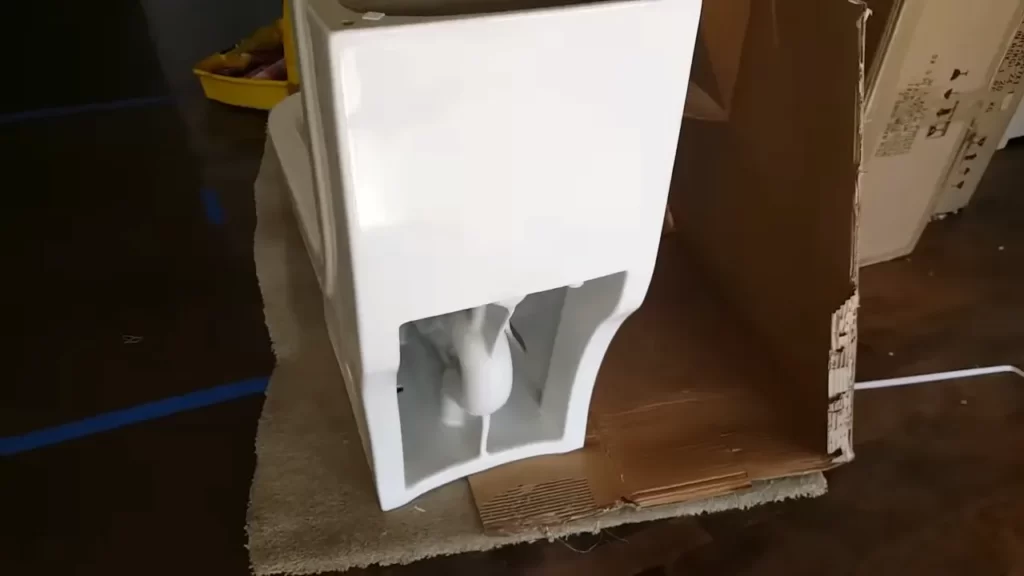
3. Position the Wax Ring
Next, place the wax ring on the flange, making sure it is centered. The wax ring creates a watertight seal between the toilet and the flange, preventing any leaks. Ensure that the wax ring is in good condition and not damaged.
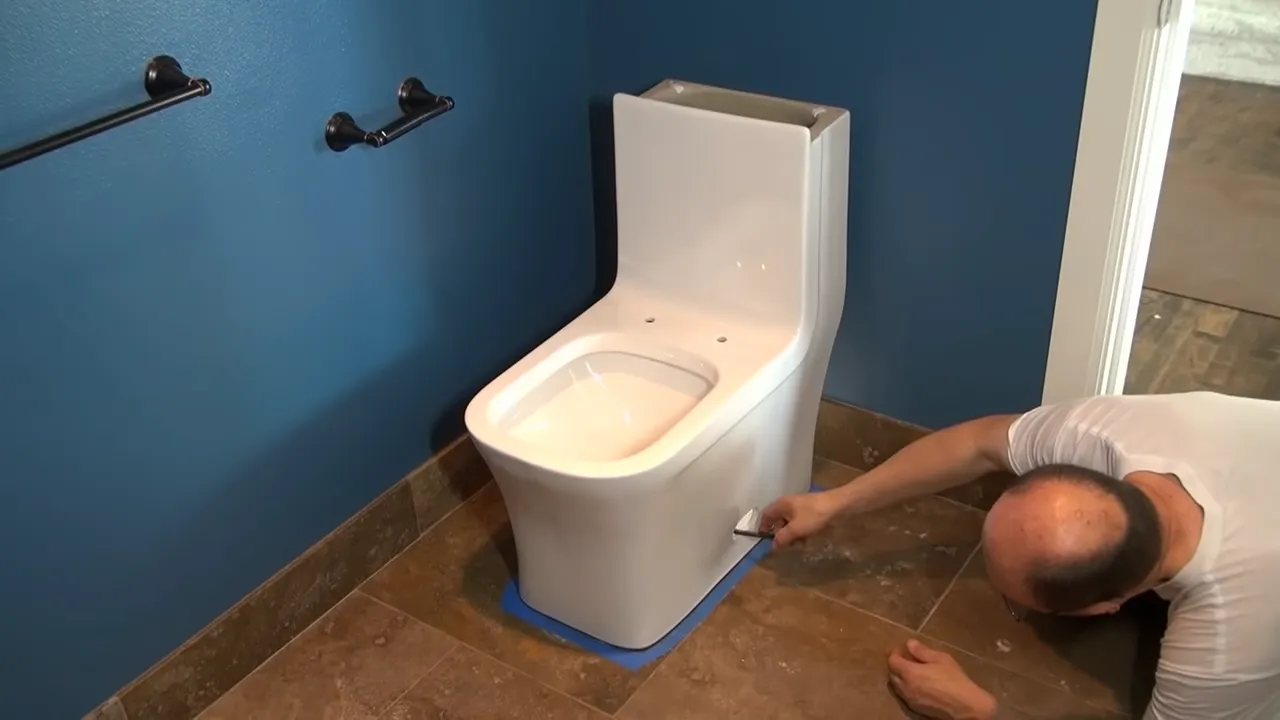
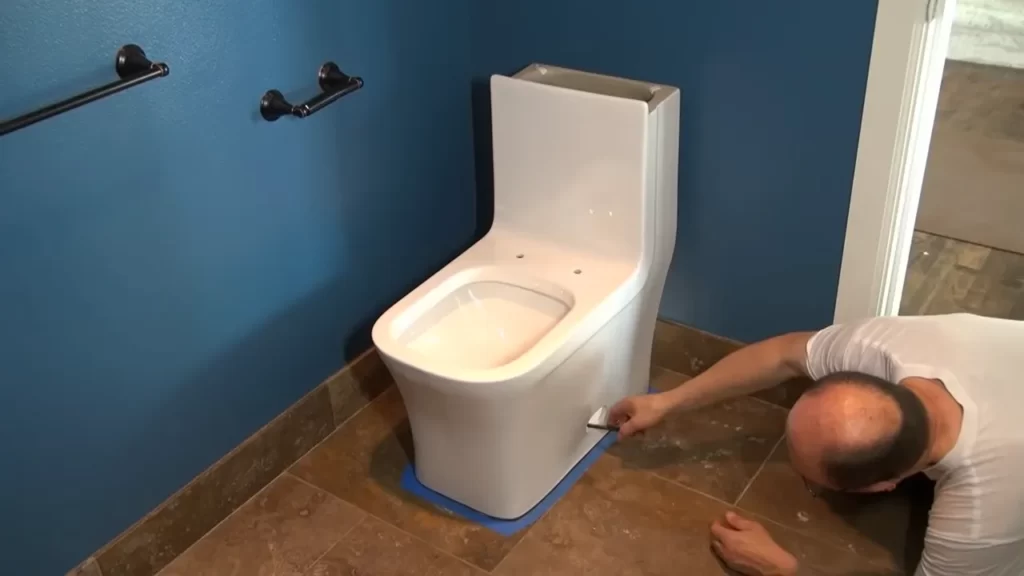
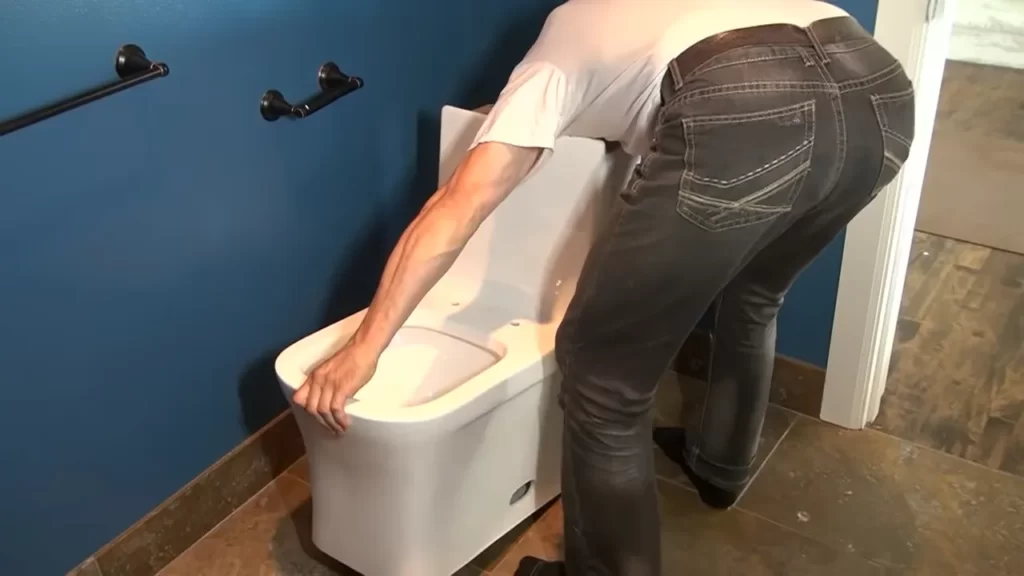
4. Position the Toilet
With the help of a friend or family member, carefully lift the new one-piece toilet and position it over the wax ring. Make sure the toilet is aligned with the marks on the floor and gently lower it onto the flange.
5. Tighten the Bolts
Once the toilet is in place, insert the bolts into the mounting holes on the base of the toilet. Tighten them evenly, alternating between both sides, to ensure a secure fit. Be careful not to overtighten, as this could damage the toilet or the flange.
6. Attach the Tank
If your one-piece toilet comes with a separate tank, carefully attach it to the bowl according to the manufacturer’s instructions. Make sure all connections are tight and secure to prevent any leaks.
7. Connect the Water Supply
Attach the water supply line to the fill valve on the bottom of the tank. Use an adjustable wrench to tighten the connection, ensuring it is snug but not overly tight. Turn on the water supply to check for any leaks, and make adjustments as necessary.
8. Test the Flushing Mechanism
Finally, flush the toilet several times to ensure that the flushing mechanism is working properly. Check for any leaks around the base or tank and make any necessary adjustments or repairs.
Congratulations! You have successfully installed your new one-piece toilet. Now you can enjoy the benefits of a modern and efficient fixture in your bathroom. Be sure to follow the manufacturer’s recommendations for regular maintenance and cleaning to extend the lifespan of your toilet.
Placing The Wax Ring And Setting The Toilet
Properly position and secure the wax ring on the toilet flange
Before installing a one-piece toilet, it is crucial to properly position and secure the wax ring on the toilet flange. The wax ring acts as a seal between the toilet and the waste pipe, preventing any leaks or odors.
To begin, ensure that the toilet flange is clean and free of any debris. This will create a smooth surface for the wax ring to adhere to. If needed, use a putty knife to scrape away any old wax or residue.
Next, center the wax ring evenly on top of the toilet flange. The wax ring should have a tapered edge on one side. Make sure that this tapered edge is facing the toilet bowl. This will help guide any waste into the pipe.
Press down firmly on the wax ring to secure it in place. Applying equal pressure around the entire circumference of the wax ring will ensure a proper seal. Take your time to ensure that the wax ring is securely positioned.
If you want to add an extra layer of protection against leaks, you can also use a wax ring with a built-in rubber gasket. This helps create a watertight seal and provides added peace of mind.
Carefully lower the toilet onto the wax ring and ensure it is aligned correctly
After securing the wax ring, it’s time to carefully lower the toilet onto the wax ring and ensure it is aligned correctly. This step is crucial for a proper installation and for preventing any leaks in the future.
With the help of a friend or family member, begin by lifting the toilet and positioning it directly over the wax ring. Slowly lower the toilet, making sure that the mounting bolts on the base of the toilet align with the holes in the flange.
As you lower the toilet, pay close attention to ensure that it is aligned evenly. You can use the edges of the base or any visible markers to guide you. Take your time, as a misaligned toilet can cause leaks or a wobbly seat.
Once the toilet is securely in place, apply gentle pressure on top of the toilet and wiggle it slightly to help the wax ring form a tight seal. This will compress the wax and create a watertight connection between the toilet and the flange.
Finally, tighten the nuts onto the mounting bolts to secure the toilet in place. Be cautious not to overtighten, as this can fracture the base of the toilet. Alternate tightening the nuts to ensure even pressure distribution.
Now that the wax ring is properly in place and the toilet is secure, you can move on to connecting the water supply and completing the installation process.
Attaching The Toilet To The Floor
Once you have properly prepared the bathroom floor for installation and positioned the wax ring, it is time to securely fasten the toilet to the floor. This step is crucial to ensure the stability and durability of your one-piece toilet. In this section, we will guide you through the process of attaching the toilet to the floor using bolts or screws.
Securely fasten the toilet to the floor using bolts or screws
To begin, locate the mounting holes on the base of the toilet. These are the holes where the bolts or screws will be inserted to secure the toilet in place. Place the toilet on top of the wax ring, aligning the holes with the mounting flange on the floor.
Next, insert the bolts or screws through the mounting holes, making sure they extend through the mounting flange. It is important to use the appropriate fastening hardware specified by the manufacturer to ensure a secure installation.
Once the bolts or screws are in place, slowly and evenly tighten them using a wrench or screwdriver. Be careful not to overtighten, as this could damage the toilet or the mounting flange. Refer to the manufacturer’s instructions for the recommended torque specifications.
After tightening the bolts or screws, check the toilet for any movement or wobbling. A stable toilet is essential for proper functioning and longevity. If you notice any instability, adjust the bolts or screws accordingly until the toilet is firmly secured to the floor.
Ensure the toilet is stable and does not wobble
After attaching the toilet to the floor, take a moment to ensure that it is stable and does not wobble. An unstable toilet can lead to leaks and other issues in the future. To check for stability, press down on the toilet bowl from different angles and check for any movement. If you feel any wobbling, it may be necessary to tighten the bolts or screws a bit further.
In addition to checking for stability, you should also inspect the base of the toilet for any gaps or unevenness. A properly installed toilet should have a snug fit against the floor with no gaps. If you notice any gaps, it may indicate that the wax ring was not properly seated or that the toilet needs further adjustment.
By following these steps and ensuring that your toilet is securely attached to the floor, you can have peace of mind knowing that your one-piece toilet is installed correctly and will provide reliable performance for years to come.
Connecting The Water Supply
Now that you have successfully installed the toilet bowl and tank, it’s time to connect the water supply. This step is crucial to ensure the proper functioning of your one-piece toilet. Follow the steps below to connect the water supply line to the toilet tank:
Connect the water supply line to the toilet tank
To begin, locate the water inlet valve on the bottom of the toilet tank. Ensure that the valve is shut off before connecting the supply line. The water supply line typically consists of a flexible hose with threaded connections on both ends.
Attach one end of the supply line to the water inlet valve on the tank. Use an adjustable wrench to tighten the connection securely, making sure it is snug but not overly tight. A gentle hand-tightening is usually sufficient. Remember not to cross-thread the connections, as it may lead to leaks.
Now, proceed to the other end of the supply line. Check if it has the appropriate connection for your water supply shut-off valve. If not, you may need to purchase an adapter fitting to ensure a proper fit.
Once you have the correct connection, attach the other end of the supply line to the water supply shut-off valve. Again, tighten the connection using an adjustable wrench, ensuring it is secure but not excessively tight.
Check for any leaks and ensure proper water flow
After connecting the water supply line, it’s crucial to check for any leaks and ensure that water flows properly into the toilet tank. Secure the supply line properly to prevent it from kinking or getting tangled with other fixtures in the bathroom.
With the water supply turned on, carefully inspect the connections and all around the supply line for any signs of leaks. Keep an eye out for dripping or pooling water. If you notice any leaks, gently tighten the connections. However, be cautious not to overtighten, as it may damage the threads.
Once you have ensured that there are no leaks, flush the toilet several times to check for proper water flow. Observe the water level in the tank, as it should fill and stop at the recommended line. If you notice any issues with water flow or filling, double-check the connections and adjust as necessary.
By properly connecting the water supply line, checking for leaks, and ensuring proper water flow, you have completed this crucial step in installing your one-piece toilet. The next step will focus on testing the toilet for functionality and making any necessary adjustments. Stay tuned!
Testing And Finishing Touches
Testing and Finishing Touches
Perform a final check and test the installed toilet
Once you have successfully installed the one piece toilet, it’s essential to perform a final check to ensure everything is in proper working order. Follow these steps to test your installed toilet:
1. Inspect for leaks: Carefully examine the toilet base, water supply line, and all connections for any signs of leaks. Check for any water pooling or water droplets on the floor or around the toilet base. If you notice any leaks, tighten the connections or replace faulty parts as necessary.
2. Flush test: Flush the toilet multiple times to ensure it operates smoothly and effectively. Pay attention to the flush performance and check if it completely empties and refills the tank properly. If you notice any weak flush or incomplete filling, adjustments may be needed.
3. Fill valve test: Watch the fill valve closely during the flushing process to verify that it shuts off promptly once the tank is filled. If the fill valve continues to release water even after the tank is full, there may be a problem with the valve that needs to be addressed.
4. Check the wax ring seal: Inspect the wax ring seal between the toilet and flange to confirm there are no gaps or spaces. A snug and secure seal is crucial to prevent any unpleasant odors or potential leaks.
Complete any necessary finishing touches for a clean and polished look
To give your newly installed one piece toilet a final touch of perfection, consider these tips for a clean and polished appearance:
1. Caulk the base: Apply a line of caulk around the base of the toilet to create a watertight and aesthetically pleasing seal. Choose a high-quality silicone caulk that matches your bathroom décor. This step not only enhances the overall look but also helps to prevent any water or debris from accumulating in hard-to-reach spaces.
2. Adjust toilet seat: Ensure that the toilet seat is securely attached and aligned properly with the toilet. Make any necessary adjustments to tighten the seat hinges.
3. Clean and shine: Use a mild bathroom cleaner and a soft cloth to wipe down the entire toilet, including the tank, bowl, and exterior surfaces. Pay attention to the crevices and hard-to-reach areas to remove any dirt or grime. Finish off by buffing the toilet with a dry cloth to achieve a shiny and spotless finish.
4. Add decorative touches: Once the toilet is thoroughly cleaned and polished, consider adding some decorative accents to complement your bathroom decor. Place a small potted plant or a scented candle nearby to create a welcoming atmosphere.
By performing a final check and incorporating these finishing touches, you can ensure that your one piece toilet installation is not only functional but also visually appealing. Taking the time to thoroughly test and refine the installation will contribute to a long-lasting and enjoyable bathroom experience.
Checking For Leaks And Proper Flushing
Once you have successfully installed your new one-piece toilet, it is crucial to check for any leaks around the base and ensure that the flushing mechanism is working correctly. These steps will help you prevent any potential water damage in your bathroom and ensure the proper functionality of your toilet. Let’s dive into how to check for leaks around the base and test the flushing mechanism:
Ensure there are no leaks around the base of the toilet
After installing the one-piece toilet, the first step is to make sure there are no leaks around the base. A leaky toilet can cause significant damage to your bathroom floor and even lead to mold growth if left unattended. Follow these simple steps to check for leaks:
- Visual inspection: Carefully examine the area around the base of the toilet for any visible signs of water leaks. Look for wet spots, discoloration, or puddles of water. If you notice any of these signs, it may indicate a leak.
- Tighten the bolts: If the toilet appears to be leaking, try tightening the bolts that secure it to the floor. Use a wrench or pliers to gently tighten each bolt until they feel snug. Be cautious not to overtighten, as it may crack the toilet base.
- Wax seal replacement: If tightening the bolts doesn’t solve the issue, you may need to replace the wax seal. This seal ensures a watertight connection between the toilet and the sewer pipe. To replace it, carefully remove the toilet, scrape off the old wax seal, and install a new one following the manufacturer’s instructions.
By checking for leaks and promptly addressing any issues, you can prevent water damage and ensure the longevity of your one-piece toilet.
Test the flushing mechanism and check for proper water flow
Having a properly functioning flushing mechanism is essential for the efficient operation of your one-piece toilet. Follow these steps to test the flushing mechanism and check for proper water flow:
- Fill the tank: Start by filling the tank with water. Turn on the water supply valve and let the tank fill completely. Ensure that the water reaches the fill line indicated by the manufacturer.
- Flush the toilet: Once the tank is filled, press down on the flushing lever to initiate a flush. Observe the flushing mechanism to ensure that it operates smoothly without any delays or obstructions.
- Check water flow: After flushing, examine the water flow from the bowl. It should be forceful and steady, allowing the waste to be efficiently carried away. Weak or inadequate water flow could indicate a clog or an issue with the flushing mechanism.
- Adjustments as needed: If you notice any problems with the flushing mechanism or water flow, consult the toilet’s user manual for troubleshooting tips. Adjustments might involve adjusting water levels, cleaning the jets, or replacing any faulty components.
Regularly testing the flushing mechanism and ensuring proper water flow will help maintain the functionality of your one-piece toilet and prevent any inconveniences in the future.
Caulking And Sealing
One of the final steps in installing a one-piece toilet is caulking and sealing. This is an important step that ensures a secure and water-tight connection between the toilet and the floor. Proper caulking and sealing not only prevents leaks but also gives your toilet a clean and finished look. In this section, we’ll walk you through the steps on how to apply caulk around the base of the toilet and clean up any excess caulk for a neat finish. Let’s get started!
Apply caulk around the base of the toilet for a secure seal
To create a secure seal between your one-piece toilet and the floor, you’ll need to apply caulk around the base. Caulk acts as a barrier, preventing water from seeping into the gaps between the toilet and the floor. Here’s how you can do it:
- Clean the area: Before applying caulk, make sure the area around the base of the toilet is clean and dry. Remove any dust, debris, or old caulk using a scraper or a putty knife.
- Prepare the caulk: Get a tube of silicone caulk that matches the color of your toilet or bathroom. Cut the tip of the caulk tube at a 45-degree angle and insert it into a caulk gun.
- Apply the caulk: Slowly squeeze the trigger of the caulk gun to apply a thin, continuous line of caulk around the base of the toilet. Start from the back and work your way around to the front, ensuring complete coverage. Avoid applying too much caulk, as it may create a messy finish.
- Smooth the caulk: After applying the caulk, use your finger or a caulk squeegee to smooth and press it into the gaps between the toilet and the floor. This helps to ensure a solid seal and a neat appearance.
Clean up any excess caulk and ensure a neat finish
Once you’ve applied the caulk, it’s important to clean up any excess caulk for a neat finish. Here’s what you need to do:
- Wipe away excess caulk: Use a damp cloth or sponge to carefully wipe away any excess caulk from the toilet base and floor. Be gentle to avoid smearing the caulk.
- Check for gaps: Inspect the caulked area and make sure there are no gaps or missing spots. If you notice any, apply a small amount of caulk to fill them in.
- Allow the caulk to dry: Check the drying time mentioned on the caulk tube. Typically, it takes around 24 hours for the caulk to fully cure. Avoid using the toilet during this time to allow the caulk to set properly.
By following these simple steps, you can ensure a secure seal and a professional-looking finish when caulking and sealing your one-piece toilet. Take your time, pay attention to detail, and enjoy the satisfaction of a job well done!
Frequently Asked Questions
Are One-Piece Toilets Easy To Install?
Yes, one-piece toilets are easy to install. They can be quickly set up without much hassle.
Is It Better To Get A 1 Piece Or 2 Piece Toilet?
The choice between a 1 piece and 2 piece toilet depends on your personal preferences. A 1 piece toilet is easier to clean and has a sleeker design, but a 2 piece toilet may be more affordable and easier to install.
Consider your needs and budget before making a decision.
How Long Does It Take To Install A One-Piece Toilet?
Installing a one-piece toilet typically takes around 1-2 hours. The process involves removing the old toilet, preparing the area, placing the new toilet, connecting the water supply, and testing for leaks. It’s best to consult a professional plumber for efficient and error-free installation.
How Do You Bolt Down A One-Piece Toilet?
To bolt down a one-piece toilet, follow these steps: 1. Place the wax ring onto the toilet flange. 2. Align the toilet over the flange and gently lower it into place. 3. Secure the toilet by tightening the nuts onto the bolts.
4. Use a wrench to tighten the nuts evenly, alternating between sides. 5. Once tightened, check for stability and make any necessary adjustments.
Conclusion
Installing a one-piece toilet doesn’t have to be a complicated task. By following the step-by-step process outlined in this guide, you can easily complete the installation without any hassle. Remember to gather all the necessary tools, prepare the area, and take your time to ensure a proper and secure installation.
With this knowledge, you’ll be able to enjoy the convenience and efficiency of your new one-piece toilet in no time. Happy DIY-ing!