To install a one piece shower unit, you need to follow a few simple steps. These steps include preparing the area, attaching the drain, installing the walls and base, and sealing the unit.
By following these steps, you can easily install a one piece shower unit in your bathroom. Whether you are renovating your bathroom or building a new one, a one piece shower unit is a convenient and stylish option that can enhance the overall aesthetic and functionality of your space.
With its seamless design and easy installation, a one piece shower unit is a popular choice among homeowners and contractors alike. So, let’s discuss how to install a one piece shower unit in detail.
Why Should You Choose A One Piece Shower Unit?
When it comes to choosing a shower unit for your bathroom, there are several options available in the market. One of the most popular choices among homeowners is the one piece shower unit. This type of shower unit offers numerous advantages over traditional shower installations, making it an excellent choice for anyone looking to upgrade their bathroom. In this blog post, we will explore the benefits of a one piece shower unit and the factors you should consider before installing one.
Benefits of a One Piece Shower Unit
1. Easy Installation
Installing a one piece shower unit is a hassle-free process compared to other shower installations. Since the entire shower unit comes in a single piece, there’s no need for extensive plumbing work or tile installation. This not only saves you time but also allows you to enjoy your new shower sooner.
2. Seamless Design
A one piece shower unit offers a seamless and sleek design that enhances the overall aesthetic of your bathroom. There are no grout lines or seams to clean, which makes maintaining the cleanliness of your shower a breeze. It also provides a luxurious and modern look, adding value to your bathroom and home.
3. Durability and Longevity
One piece shower units are made from durable materials such as fiberglass or acrylic, which are resistant to cracks, chips, and stains. These materials are also easy to clean, ensuring that your shower unit remains in excellent condition for years to come. Additionally, the one piece construction provides structural integrity, reducing the risk of leaks and water damage.
4. Customization Options
One piece shower units come in a variety of sizes, shapes, and styles, allowing you to find the perfect fit for your bathroom. Whether you have a small or large space, there are options available to suit your needs. You can also choose from various finishes, such as matte or glossy, to complement your existing bathroom decor.
Factors to Consider Before Installing a One Piece Shower Unit
1. Size and Space
Before choosing a one piece shower unit, consider the size of your bathroom and the available space. Measure the area where you plan to install the shower unit to ensure it will fit comfortably without overcrowding the room.
2. Plumbing Requirements
Check the plumbing requirements for the one piece shower unit you’re considering. Ensure that the existing plumbing connections in your bathroom are compatible with the specific shower unit you intend to install. If necessary, consult a professional plumber to make any necessary adjustments.
3. Accessibility Features
If you have specific accessibility needs or are planning for the future, consider a one piece shower unit that offers features such as grab bars, built-in seating, or low threshold entry. These features can enhance the safety and convenience of your shower experience.
4. Budget
Set a budget for your one piece shower unit installation. Consider not only the cost of the unit itself but also any additional expenses such as plumbing modifications, accessories, and installation fees. Research different brands and models to find a shower unit that fits within your budget without compromising on quality.
In conclusion, a one piece shower unit offers numerous benefits, including easy installation, seamless design, durability, and customization options. Before installing a one piece shower unit, consider factors such as size, plumbing requirements, accessibility features, and your budget. By taking these factors into account, you can choose a one piece shower unit that meets your needs and enhances your bathroom space.
Preparing For The Installation
Before installing a one-piece shower unit, it’s crucial to properly prepare the area to ensure a smooth and hassle-free installation process. This involves measuring the bathroom space, gathering the necessary tools and materials, and clearing the area while ensuring proper ventilation. By following these steps, you can make the installation process much easier and achieve the desired results.
Measuring the bathroom space
Measuring the bathroom space is the first step in preparing for the installation of a one-piece shower unit. This step allows you to determine the dimensions of the shower unit that will fit perfectly in your bathroom. To measure the space, you will need a measuring tape and a pen or pencil to record the measurements accurately. Start by measuring the width, height, and depth of the area where the shower unit will be installed. Take note of any constraints such as obstructions or uneven walls that may affect the installation process.
Gathering necessary tools and materials
Before beginning the installation, it’s essential to gather all the necessary tools and materials. Doing so will save you time and ensure that you have everything at hand once you start the installation process. Some of the tools and materials you may need include:
| Tools | Materials |
|---|---|
|
|
Having these tools and materials ready beforehand will ensure a smoother installation process and prevent delays.
Clearing the area and ensuring proper ventilation
Before installing a one-piece shower unit, it’s crucial to clear the area of any obstructions or debris that may hinder the installation process. This includes removing any old shower units, bathroom fixtures, or unnecessary items that may be in the way. Additionally, ensuring proper ventilation is vital to prevent moisture buildup and potential issues such as mold growth. It’s recommended to have a window or an exhaust fan installed in the bathroom to facilitate proper air circulation.
By measuring the bathroom space accurately, gathering the necessary tools and materials, and clearing the area while ensuring proper ventilation, you can effectively prepare for the installation of a one-piece shower unit. These steps will lay the foundation for a successful and efficient installation process, resulting in a functional and aesthetically pleasing shower unit in your bathroom.
Removing The Old Shower Unit
Before installing a new one-piece shower unit, you need to remove the old one. This can seem like a daunting task, but with the right process, it can be done efficiently. In this section, we will guide you through the step-by-step process of removing the old shower unit.
Turn off water supply and disconnect plumbing
The first step is to turn off the water supply to the shower. This will prevent any unexpected leaks or accidents during the removal process. Locate the shut-off valve for the shower and turn it clockwise until it is fully closed. If you cannot find a shut-off valve dedicated to the shower, you may need to shut off the water supply for the entire house.
After turning off the water supply, it’s time to disconnect the plumbing that connects the shower to the water supply. Depending on the configuration of your plumbing, this may involve unscrewing or cutting pipes. Use a wrench or pliers to disconnect the fittings, ensuring that you have a bucket or towel handy to catch any water that may be in the pipes.
Removing fixtures and fittings
Once the plumbing is disconnected, it’s time to remove any fixtures and fittings that are attached to the old shower unit. This may include handles, showerhead, and any other accessories. Use a screwdriver or appropriate tools to carefully remove these items without causing any damage. If there are any caulking or sealants around the fixtures, gently scrape them off to facilitate easy removal.
If you are planning to reuse any of these fixtures, make sure to store them in a safe place for later use. Otherwise, consider replacing them with new fixtures to give your new shower unit a fresh and updated look.
Detaching the old shower unit from the wall
The final step in removing the old shower unit is detaching it from the wall. Depending on how it was initially installed, this may involve removing screws, nails, or adhesive. Carefully inspect the surrounding area to identify any fasteners that may be securing the shower unit in place.
Once you have located the fasteners, use appropriate tools such as a screwdriver or pry bar to remove them. Be cautious during this step to avoid damaging the walls or surrounding tiles. If there are any caulking or sealants around the edges of the shower unit, use a putty knife to gently scrape them away.
With all the fasteners removed and any caulking or sealants cleared, you should be able to carefully detach the old shower unit from the wall. Enlist the help of a friend or family member to assist you in carrying the unit out of the bathroom, as it can be heavy and awkward to handle alone.
By following these steps and exercising caution, you can successfully remove the old shower unit in preparation for the installation of a new one-piece shower unit. With the old unit out of the way, you’re one step closer to enjoying a revitalized and functional shower space.
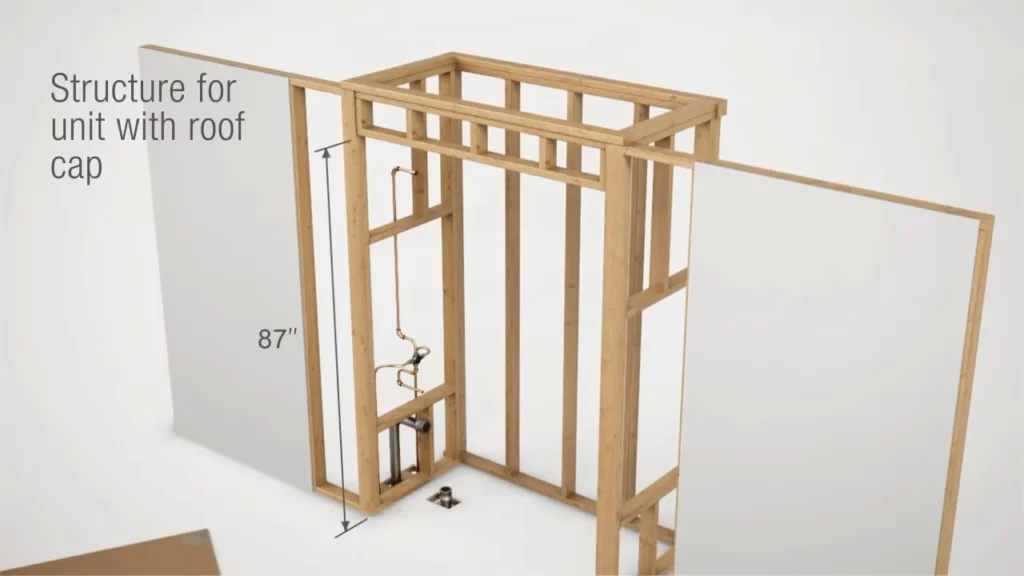
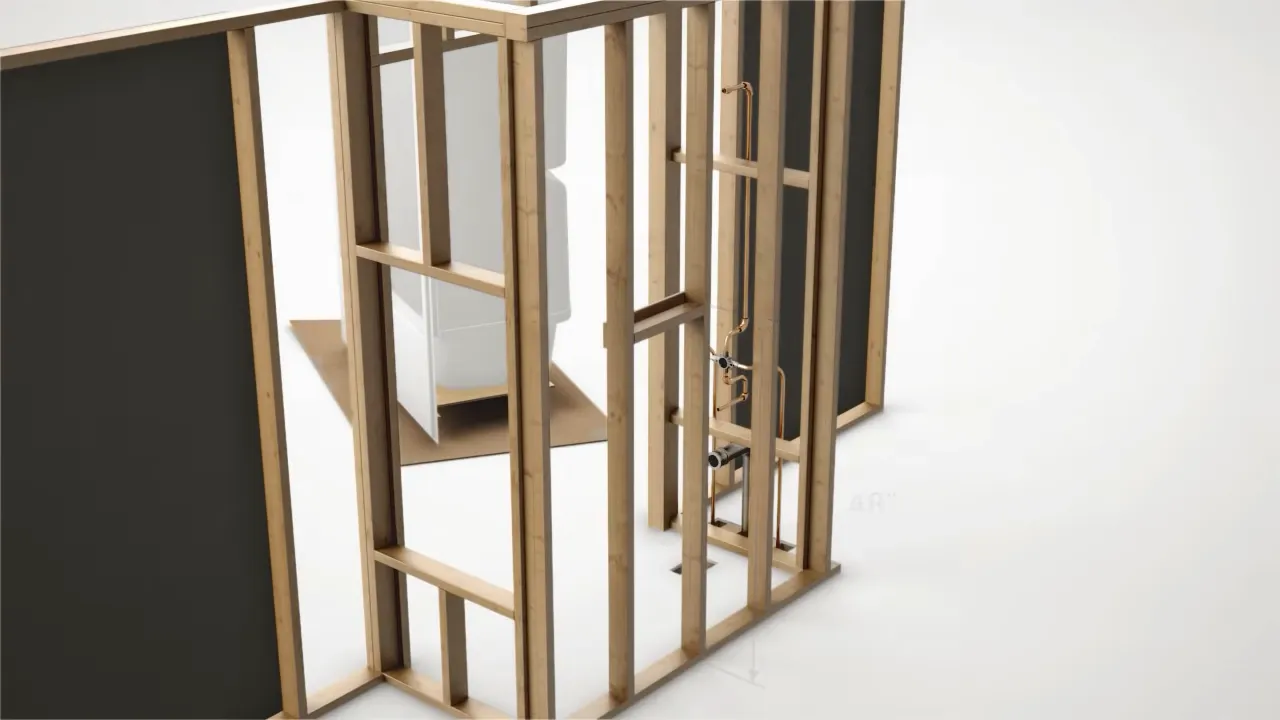
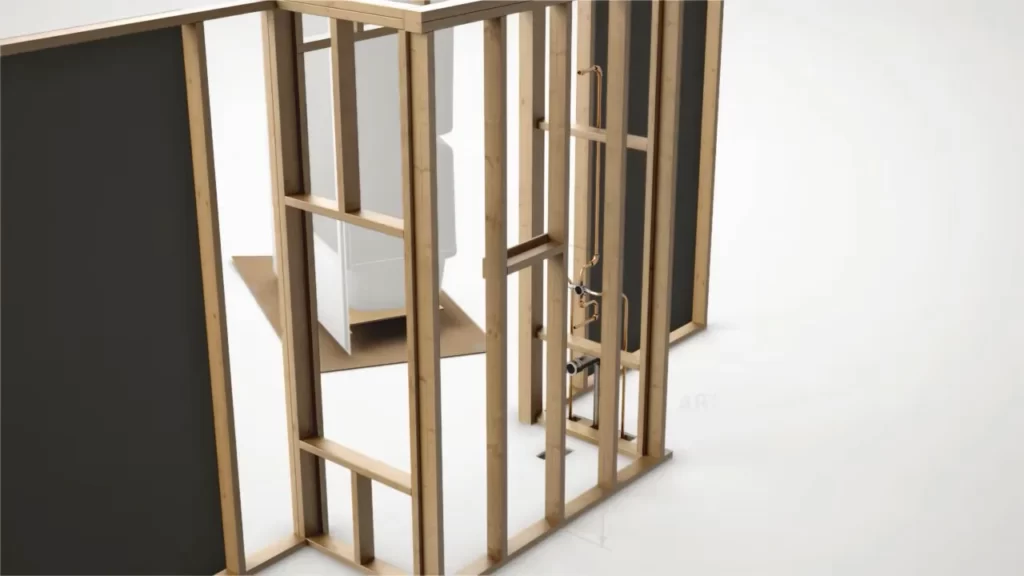
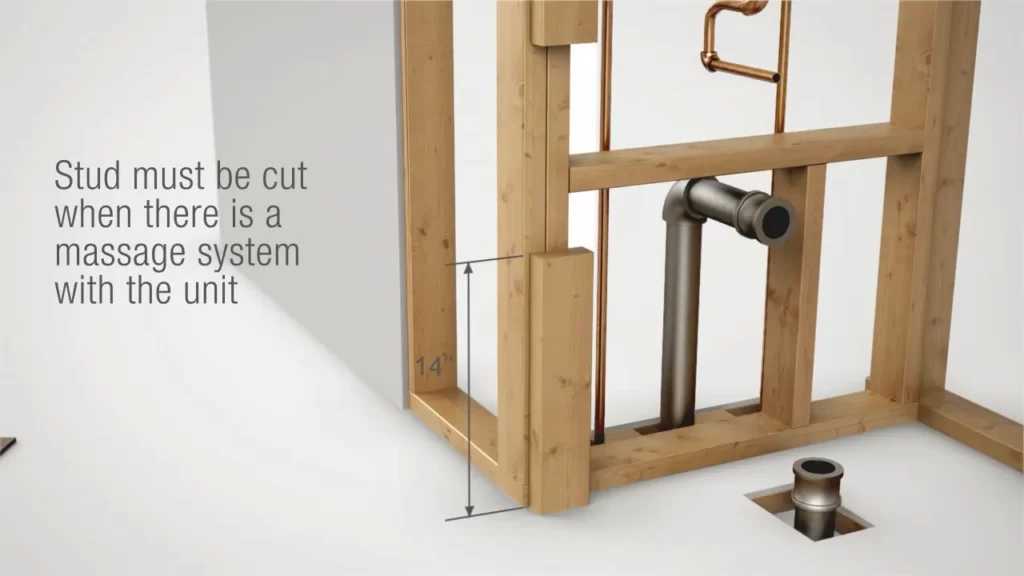
Installing The One Piece Shower Unit
Installing a one piece shower unit can be a great way to give your bathroom a fresh, modern look. With a sleek design and easy installation process, these units are becoming increasingly popular among homeowners. In this section, we will guide you through the steps of installing a one piece shower unit, from positioning the unit to connecting the drain and attaching it securely to the wall. With these simple instructions, you can have your new shower unit up and running in no time.
Positioning the new shower unit
The first step in installing a one piece shower unit is to properly position it in your bathroom. Start by measuring the space where you plan to install the unit and make sure it will fit comfortably. Remember to take into account any existing plumbing and electrical connections that may affect the placement of the unit. Once you have determined the ideal position, use a level to ensure that the unit is straight and aligned properly. Make any necessary adjustments before moving on to the next step.
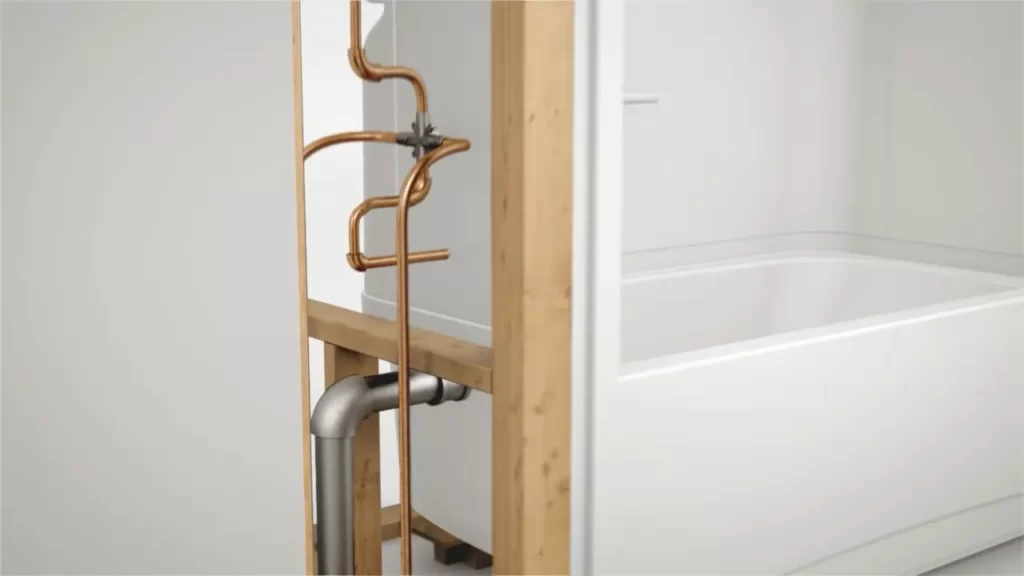
Connecting the drain
Now that you have positioned the unit, it’s time to connect the drain. Start by removing the old drain if you have one. Clean the area thoroughly to ensure a proper seal. Then, apply plumber’s putty around the base of the new drain and insert it into the drain hole of the shower unit. Tighten the drain using a wrench until it is securely in place. Finally, connect the drain pipe to the trap, making sure to use the appropriate fittings. Test for any leaks by running water through the drain.
Attaching the unit to the wall securely
With the drain connected, it’s time to attach the shower unit to the wall securely. Start by marking the position of the wall studs on the back of the unit. This will help you determine where to place the screws for maximum stability. Once you have marked the positions, drill pilot holes into the wall studs and then attach the unit to the wall using screws. Be sure to check for levelness and make any adjustments as needed. This will ensure that your unit is securely attached and won’t shift or move during use.
Installing fixtures and fittings
Now that the unit is securely attached to the wall, it’s time to install fixtures and fittings. This includes items such as faucets, showerheads, and controls. Start by following the manufacturer’s instructions for installing each fixture. Use the appropriate tools and fittings to ensure a proper and secure installation. Test each fixture to make sure it is functioning correctly before moving on to the next one. With all fixtures and fittings properly installed, your one piece shower unit is now ready for use.
Testing And Finishing Touches
Once you have successfully installed your one-piece shower unit, it’s important to perform some crucial tests to ensure everything is functioning properly. Additionally, there are a few finishing touches that can enhance the appearance of your new shower. In this section, we will discuss how to check for leaks and proper drainage, how to seal any gaps and joints, and how to apply a final touch to give your shower a polished look.
Checking for leaks and proper drainage
One of the most essential steps in the installation process is checking for leaks and ensuring proper drainage. To do this, you can follow these simple steps:
- Turn on the water supply and let the shower run for a few minutes.
- Inspect all visible connections, such as the faucet and showerhead, for any signs of leaks or drips.
- Check the floor and walls around the shower unit for any water accumulation or moisture.
- Verify that the water is draining properly by observing how quickly it goes down the drain.
If you notice any leaks or drainage issues, it’s important to address them before proceeding further. Fixing these issues early on will save you from potential problems down the line.
Sealing gaps and joints
Sealing gaps and joints is crucial to prevent any water leakage or seepage that could cause damage to your walls or floor. Here’s how you can ensure proper sealing:
- Inspect all joints and seams along the shower unit for any visible gaps.
- Use a high-quality silicone caulk to seal any gaps or joints.
- Apply the caulk evenly along the seams, using a caulk gun for precise application.
- Smooth out the caulk using a caulk smoothing tool or your finger, ensuring a tight seal.
Allow the caulk to dry completely before using the shower. This will ensure a watertight seal and prevent any potential damage due to water infiltration.
Applying a final touch to enhance the appearance
Once you have tested for leaks, ensured proper drainage, and sealed all gaps and joints, it’s time to give your one-piece shower unit a final touch to enhance its appearance:
- Wipe down the entire shower unit with a damp cloth to remove any dust or debris.
- Apply a mild cleaner specifically designed for the shower surface, following the product instructions.
- Gently scrub the surface to remove any stains or residue.
- Rinse the shower thoroughly with warm water to remove any cleaning product residue.
- Dry the shower with a clean, soft cloth to prevent water spots.
By following these steps, you can ensure that your one-piece shower unit not only functions flawlessly but also looks pristine and inviting.
Cleaning up the work area
After completing the testing and finishing touches, it’s important to clean up the work area to leave it neat and tidy. Here’s what you need to do:
- Remove any tools or materials used during the installation process.
- Wipe down any surfaces that may have collected dust or debris.
- Dispose of any leftover packaging or waste materials responsibly.
By cleaning up the work area, you ensure that your bathroom remains organized and clutter-free, allowing you to fully enjoy your newly installed one-piece shower unit.
Final Thoughts And Maintenance Tips
Now that your one piece shower unit is fully installed and ready to use, it’s time to take a moment and appreciate the transformation it has brought to your bathroom. This sleek and convenient shower unit not only adds functionality but also enhances the overall aesthetic appeal of your space. To ensure that you continue to enjoy your new one piece shower unit for years to come, it is essential to follow some key maintenance tips.
Maintenance tips to ensure longevity
Maintaining your one piece shower unit is relatively simple and requires minimal effort. By incorporating these maintenance tips into your regular bathroom cleaning routine, you can keep your shower unit looking and functioning its best:
- Keep it clean: Regularly clean the surfaces of your shower unit using a mild, non-abrasive cleaner. Avoid harsh chemicals that can damage the unit’s finish. Wipe away soap scum and water spots to maintain the unit’s shine.
- Prevent mold and mildew: To prevent the growth of mold and mildew, run a squeegee or towel along the walls and floor of your shower unit after each use to remove excess moisture. This will help to keep the unit dry and discourage the growth of these unsightly and potentially harmful substances.
- Avoid abrasive scrubbers: When cleaning your shower unit, avoid using abrasive scrubbers or rough sponges that can cause scratches or damage the surface. Instead, opt for soft cloths or non-scratch cleaning tools.
- Check for leaks: Periodically inspect your one piece shower unit for any signs of leaks. Look for water stains, dripping faucets, or any other indicators of a leak. If you notice any issues, address them promptly to prevent further damage.
Conclusion
Installing a one piece shower unit is an excellent investment that brings both style and convenience to your bathroom. By following these maintenance tips, you can ensure the longevity of your shower unit and continue to enjoy its benefits for years to come. With proper care and regular cleaning, your one piece shower unit will remain a standout feature in your bathroom, providing a luxurious and refreshing bathing experience every time.
Frequently Asked Questions
How To Install A Prefab Shower Unit?
To install a prefab shower unit, first ensure the area is clean and level. Then, connect the drain and water supply pipes according to the manufacturer’s instructions. Attach the walls and secure them properly. Install the shower pan and check for leaks.
Finally, connect the shower faucet and handles.
Can I Fit A One Piece Shower Through Door?
Yes, it is possible to fit a one piece shower through a door. Ensure that the door is wide enough to accommodate the dimensions of the shower. Measure the shower and the door opening accurately to ensure a proper fit.
How Much Does It Cost To Install A One Piece Shower?
The cost of installing a one-piece shower varies depending on factors such as size, materials, and location. On average, the cost ranges from $800 to $3,000, including installation. Prices may differ based on additional features and customization. It’s advisable to consult a professional for an accurate estimate.
Can I Install A Shower Kit Myself?
Yes, you can install a shower kit yourself.
Conclusion
To wrap up, installing a one piece shower unit may seem like a daunting task at first, but with the right tools and step-by-step instructions, it can be a manageable DIY project. By following the tips highlighted you can ensure a successful installation and enjoy the benefits of a new shower in no time.
Remember to always consult the manufacturer’s guidelines for specific instructions and seek professional help if needed. With a little patience and effort, you’ll have a beautiful and functional shower that will enhance your bathroom for years to come.