To install a linear shower drain in concrete, follow these steps: mark the desired location, cut the trench, install the drain assembly, and connect the pipes. Installing a linear shower drain in concrete involves a series of straightforward steps that can be completed with basic tools and materials.
By following these steps, you can ensure a proper installation that will provide efficient drainage in your shower.
Necessary Tools And Materials
Before beginning the installation process, it is important to gather all the necessary tools and materials. Having everything ready beforehand will save you time and ensure a smooth and hassle-free installation. Here is a list of the tools and materials you will need:
Drain Assembly Kit
A drain assembly kit is an essential component for installing a linear shower drain in concrete. It typically includes the drain body, grate cover, and any required gaskets or seals. Make sure to choose a drain assembly kit that is compatible with your shower design and meets your aesthetic preferences.
Concrete Saw
A concrete saw is needed to cut through the concrete floor where the linear shower drain will be installed. This tool will enable you to create a precise and neat opening for the drain. When selecting a concrete saw, consider the cutting depth required for your specific project.
Safety Equipment (Goggles, Gloves, Mask)
Ensuring your safety should always be a priority during any construction project. Protect your eyes with safety goggles, your hands with gloves, and your respiratory system with a mask. Concrete dust can be harmful, so taking these precautions is essential for your well-being.
Measuring Tape
Precision is key when it comes to installing a linear shower drain in concrete. A measuring tape will help you accurately determine the placement and dimensions of the drain. Before making any cuts, carefully measure and mark the desired location using a high-quality measuring tape.
Chalk or Marker
Marking the concrete accurately is crucial for a successful installation. Use chalk or a marker to clearly mark the outline of the drain opening. This will serve as a guide when cutting the concrete with the saw and ensure the drain fits snugly in the designated area.
Concrete Bonding Adhesive
To ensure a secure and stable bond between the drain body and the concrete floor, a concrete bonding adhesive is necessary. This adhesive will prevent any future movement or shifting of the drain, ensuring its longevity and functionality. Choose a high-quality adhesive that is specifically designed for concrete applications.
Trowel
A trowel is an essential tool for preparing and applying the concrete mix. It allows for smooth and even application, ensuring proper adhesion between the drain and the concrete floor. Select a trowel that is suitable for the size and depth of your drain installation.
Concrete Mix
A high-quality concrete mix is necessary for filling the area around the drain after it is placed. This mix will provide stability and support for the drain, ensuring it remains in place even with heavy use. Make sure to choose a concrete mix that is suitable for shower applications and meets the required strength and durability specifications.
Waterproofing Membrane
To prevent any water leakage and ensure proper drainage, a waterproofing membrane is essential. This membrane acts as a barrier, preventing moisture from seeping into the concrete and causing damage. Choose a waterproofing membrane that is specifically designed for shower installations and offers long-lasting protection.
Drainage Slope
Creating a proper drainage slope is crucial for effective water flow. A sloped floor will direct water towards the drain instead of allowing it to pool. Ensure your concrete floor has the correct slope before starting the installation. This will help maintain a dry and safe showering area.
Measuring And Marking For Drain Placement
Measuring and marking for drain placement is a crucial step when installing a linear shower drain in concrete. Proper measurement and marking ensure that the drain is positioned correctly in the shower area, allowing for efficient water drainage. In this article, we will guide you through the process of measuring and marking for drain placement to help you achieve a successful installation.
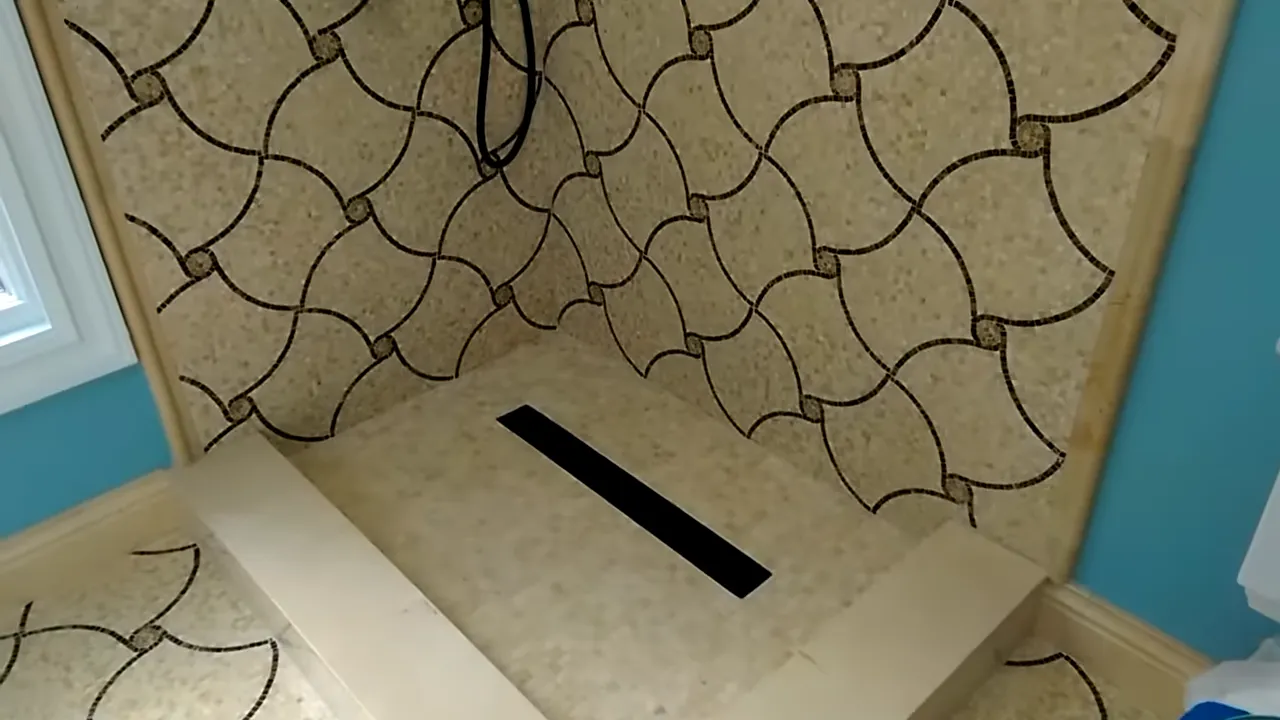
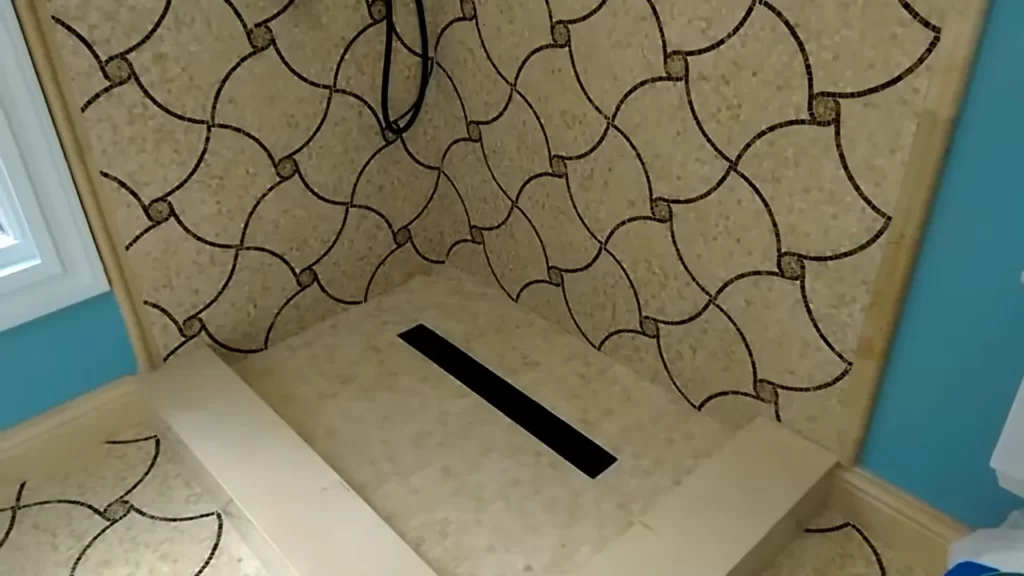
Positioning the drain in the shower area
Before you begin measuring, it is essential to determine the ideal position for the drain in the shower area. The drain should be placed near the wall or in a central location to ensure efficient water drainage. To position the drain, consider the shower layout and the slope of the floor to ensure that water flows towards the drain.
Measuring the distance from the wall
Once you have determined the desired location for the drain, it’s time to measure the distance from the wall. Use a measuring tape or ruler to measure the distance accurately. This measurement will help you identify the placement of the drain within the shower area.
Marking the centerline for drain installation
After measuring the distance from the wall, it’s crucial to mark the centerline for the drain installation. The centerline ensures that the drain is aligned properly and allows for easy installation. To mark the centerline, measure half the distance previously measured and make a mark on the concrete floor.
If you are installing multiple drain sections, repeat the process for each section, ensuring that the centerlines are aligned and evenly spaced. This will help maintain a consistent flow of water through the drain system.
Once you have marked the centerline, it’s time to prepare the concrete floor for drain installation. Ensure that the marked area is clean and free from any debris or obstructions that may hinder the installation process.
By following these measurement and marking steps, you are setting up a solid foundation for a successful linear shower drain installation in concrete. Properly positioning, measuring, and marking the drain will ensure efficient water drainage, contributing to a functional and visually appealing shower space.
Selecting The Right Saw Blade
Selecting the Right Saw Blade
Installing a linear shower drain in concrete can be a challenging task, but with the right tools and techniques, it can be done efficiently and effectively. One of the crucial steps in this process is selecting the right saw blade for cutting through the concrete. By choosing the appropriate blade, you can ensure clean and precise cuts, making the installation process much smoother.
Understanding different saw blade options
Before diving into the specifics of choosing a blade suitable for concrete cutting, it’s important to have a basic understanding of the different saw blade options available. There are various types of saw blades on the market, each designed for specific materials and applications.
Some common types of saw blades include:
- Diamond blades: Diamond blades are widely used for cutting through tough materials like concrete, asphalt, and stone. These blades are known for their durability and ability to provide clean cuts.
- Abrasive blades: Abrasive blades are typically made from abrasive grit bonded together with resin. While they are less expensive than diamond blades, they tend to wear out faster and may not offer the same level of precision.
- Carbide-tipped blades: Carbide-tipped blades are designed for cutting through materials like wood, plastic, and non-ferrous metals. They are not ideal for concrete cutting, as they are not as durable and may wear down quickly.
Choosing a blade suitable for concrete cutting
When it comes to cutting through concrete for installing a linear shower drain, a diamond blade is the ideal choice. Diamond blades are specifically designed to handle the hardness and toughness of concrete, ensuring clean and precise cuts.
When selecting a diamond blade for concrete cutting, consider the following factors:
- Diamond concentration: Different diamond blades have varying diamond concentrations. Higher diamond concentration blades tend to provide better performance and longer lifespan.
- Segment type: Diamond blades feature different segment types, such as segmented rim, turbo rim, and continuous rim. Each segment type has its own advantages, so choose one that suits your specific cutting needs.
- Blade size: The blade size should be chosen based on the thickness of the concrete you need to cut through. Ensure that the blade size matches your project requirements.
- Blade quality: It’s essential to select a high-quality diamond blade to ensure durability and optimal performance. Cheaper blades may wear out quickly and compromise the quality of your cuts.
By considering these factors and selecting a diamond blade with the right specifications for your concrete cutting needs, you can ensure a successful installation of a linear shower drain in concrete.
Preparing The Concrete Surface
Before you can install a linear shower drain in concrete, it is important to properly prepare the concrete surface. This step is crucial to ensure that the drain installation is secure and long-lasting. In this section, we will guide you through the steps to clean the area, apply concrete bonding adhesive, and mix the concrete to the correct consistency.
Cleaning the Area
The first step in preparing the concrete surface is to thoroughly clean the area where the linear shower drain will be installed. This will ensure that the drain adheres properly to the concrete and prevents any loose particles from interfering with the installation process. Follow these steps to clean the area:
- Remove any debris such as dirt, dust, or loose concrete using a broom.
- Use a pressure washer to remove any stubborn stains or ingrained dirt. Make sure to use a suitable nozzle and keep the pressure at a level that won’t damage the concrete surface.
- Allow the surface to dry completely before proceeding to the next step.
Applying Concrete Bonding Adhesive
Once the area is clean and dry, the next step is to apply concrete bonding adhesive. This adhesive will help create a strong bond between the linear shower drain and the concrete surface. Follow these steps to apply the adhesive:
- Read and follow the manufacturer’s instructions for the specific concrete bonding adhesive you are using.
- Using a paintbrush or roller, apply a thin and even coat of the adhesive to the concrete surface where the linear shower drain will be installed.
- Allow the adhesive to dry according to the manufacturer’s instructions.
Mixing Concrete to the Correct Consistency
Once the concrete bonding adhesive is dry, it’s time to mix the concrete to the correct consistency. This ensures that the concrete will flow easily around the linear drain and provide a secure base. Follow these steps to mix the concrete:
- Gather all the necessary materials, including the concrete mix, water, and a mixing container.
- Refer to the instructions on the concrete mix packaging for the recommended water-to-concrete ratio.
- Slowly add the water to the concrete mix while continuously stirring with a mixing tool until you achieve a thick, but pourable consistency. Avoid making the concrete too watery as it may weaken the overall strength.
- Let the concrete mixture sit for a few minutes, allowing it to settle and any air bubbles to escape.
By following these steps and properly preparing the concrete surface, you are now ready to move on to the next phase of installing a linear shower drain: installing the drain body and waterproofing the area. Stay tuned for the next section for a step-by-step guide on how to proceed.
Cutting The Trench
Guiding the saw along the marked centerline
Once you have marked the centerline of your linear shower drain in concrete, the next step is to cut the trench. Guiding the saw along the marked centerline is crucial to ensure a precise and accurate cut. It’s important to note that you will need a diamond blade saw to cut through the concrete effectively. Here’s how to guide the saw along the marked centerline:
1. Start by securing the diamond blade to the saw. Make sure it’s properly tightened to avoid any mishaps during the cutting process.
2. Position yourself at one end of the marked centerline, holding the saw firmly. Align the blade with the centerline to begin your cut.
3. Slowly start the saw and let the diamond blade gradually penetrate the concrete. Use a steady hand and maintain a consistent speed throughout the cutting process.
4. Keep your eye on the marked centerline and make sure the blade stays aligned with it. This will help you achieve a straight and even cut for your linear shower drain.
5. As you guide the saw along the marked centerline, apply gentle pressure to ensure the blade cuts through the concrete smoothly. Avoid applying excessive force, as it may cause the blade to bind or kick back.
6. Continue cutting along the marked centerline until you reach the end of the trench. Take your time and focus on maintaining a straight line to achieve the desired results.
Cutting a straight and even trench for the drain
Cutting a straight and even trench for the drain is crucial to ensure proper installation and functionality. Follow these steps to achieve a precise trench for your linear shower drain:
1. Before you start cutting, double-check the marked centerline to ensure it’s accurate and aligns with your desired drain placement. Adjust if necessary.
2. Using the diamond blade saw, carefully cut along the marked centerline, following the steps mentioned in the previous section. Remember to maintain a steady hand and a consistent speed for a clean cut.
3. Once you have completed the initial cut, inspect the trench to ensure it is straight and even. Pay close attention to any potential deviations or unevenness. If needed, make minor adjustments using the saw to correct any imperfections.
4. After achieving a straight and even trench, remove any excess concrete debris or dust using a brush or a vacuum cleaner. This will provide a clean surface for the drain installation.
5. Finally, measure the depth of the trench to ensure it matches the specifications provided by the linear shower drain manufacturer. Adjust the depth if necessary using the diamond blade saw.
By following these steps and properly cutting the trench for your linear shower drain, you will be one step closer to a successful installation. Take your time, be patient, and focus on achieving a precise and even cut to ensure a seamless integration of your drain into the concrete floor.
Applying The Waterproofing Membrane
Preparing the membrane for application
Before applying the waterproofing membrane, it is crucial to properly prepare it to ensure maximum effectiveness. Here are the necessary steps to prepare the membrane:
- Carefully read the manufacturer’s instructions to understand the specific preparation requirements for the waterproofing membrane you are using.
- Ensure that the trench and surrounding areas are clean and free from debris such as dirt, dust, and loose concrete particles.
- If your waterproofing membrane requires priming, apply the recommended primer onto the concrete surfaces.
- Allow the primer to dry completely before proceeding with the application of the membrane.
Applying the membrane to the trench and surrounding areas
Now that the membrane is prepared, it’s time to apply it to the trench and the surrounding areas. Pay close attention to every detail to ensure a watertight seal. Follow these steps:
- Begin by applying a thick layer of the waterproofing membrane onto the bottom of the trench. Use a putty knife or trowel to spread the membrane in an even and consistent manner.
- Continue to apply the waterproofing membrane along the sides of the trench, making sure to overlap the membrane sections by the recommended amount according to the manufacturer’s instructions.
- Smooth out any air bubbles or wrinkles in the membrane by using a roller specifically designed for membrane application.
- Extend the application of the membrane beyond the edges of the trench to create a seamless transition between the drain and the surrounding concrete area.
- Pay special attention to areas where the membrane meets corners, joints, or other obstacles. Ensure that the membrane is well adhered and properly sealed in these areas.
- Allow the first layer of the waterproofing membrane to dry according to the manufacturer’s instructions.
- Apply a second layer of the membrane, following the same steps as before. This second layer serves as an added insurance for a watertight seal.
ensuring each H3 heading adheres to HTML syntax
With these steps, you can confidently apply the waterproofing membrane to your linear shower drain in concrete, protecting your shower area from any potential water damage. Remember to always follow the manufacturer’s instructions and take the time to carefully complete each step for the best results.
Assembling The Drain Components
Connecting the drain body to the waste pipe
To start assembling the drain components, you’ll first need to connect the drain body to the waste pipe. This step is crucial in ensuring proper drainage and preventing any leaks. Here’s a step-by-step guide on how to do it:
- Begin by preparing the waste pipe. Make sure it is clean and free from any debris or obstructions.
- Apply PVC primer to both the waste pipe and the inside of the drain body.
- Follow the primer with PVC glue, ensuring a generous amount is applied to both surfaces.
- Insert the waste pipe into the drain body, twisting it slightly to ensure a tight fit.
- Start by determining the desired height for the shower drain. This will depend on the thickness of the tiles or floor covering you plan to install.
- Once you have determined the desired height, adjust the leveling feet accordingly. Use a wrench or pliers to turn the leveling feet clockwise to raise the height, or counterclockwise to lower it.
- Check the level of the drain with a spirit level. Make any necessary adjustments until the drain is perfectly level.
- Place the drain grate over the drain body, aligning the holes on the grate with the holes on the drain body.
- Insert the screws provided into each hole, ensuring they are tightly secured.
- Alternatively, some linear shower drains may require a locking mechanism. If this is the case, follow the manufacturer’s instructions for attaching the drain grate securely.
- Ensure that the drain grate is level and flush with the floor surface, providing a seamless and safe shower area.
By following these simple steps, you can connect the drain body to the waste pipe securely, providing a reliable connection for proper drainage.
Adjusting the height of the leveling feet
Next, you’ll need to adjust the height of the leveling feet to ensure that your linear shower drain sits level with the surrounding floor. Here’s how you can do it:
By properly adjusting the height of the leveling feet, you can ensure that your linear shower drain will sit flush with the floor, preventing any water from pooling or draining incorrectly.
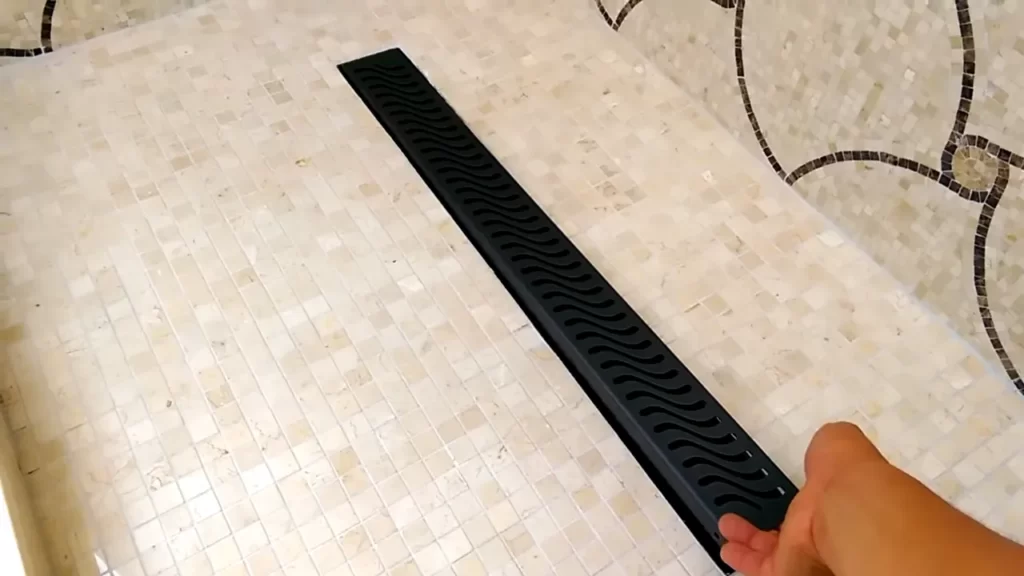
Attaching the drain grate securely
After connecting the drain body to the waste pipe and adjusting the height of the leveling feet, it’s time to securely attach the drain grate. Follow these steps to ensure a secure attachment:
By securely attaching the drain grate, you can ensure that it remains in place and functions effectively, allowing water to flow freely and preventing any blockages.
Setting The Drain In Concrete
Once you have prepared the trench for your linear shower drain, it’s time to set the drain in concrete. This crucial step ensures a secure and properly functioning drain system that will effectively remove water from your shower area. In this section, we will guide you through the process of pouring the concrete mix into the trench, leveling and smoothing the surface with a trowel, and ensuring the proper slope for drainage.
Pouring the concrete mix into the trench
To begin, gather your concrete mix and carefully pour it into the trench around the linear shower drain. Make sure to distribute the mix evenly, filling any gaps or voids completely. It is essential to follow the manufacturer’s instructions for mixing the concrete to ensure the best results. Use a shovel or a trowel to spread and level the mix as you pour it, creating a smooth and evenly distributed layer.
Leveling and smoothing the surface with a trowel
Once the concrete mix is in place, use a trowel to level and smooth the surface. Start by pressing the trowel against the edge of the trench and gradually work your way towards the center, moving in a back-and-forth motion. Ensure that the surface is flat and even, paying close attention to the area around the linear shower drain. Smooth out any rough spots or ridges, as these can affect the installation and functioning of the drain system.
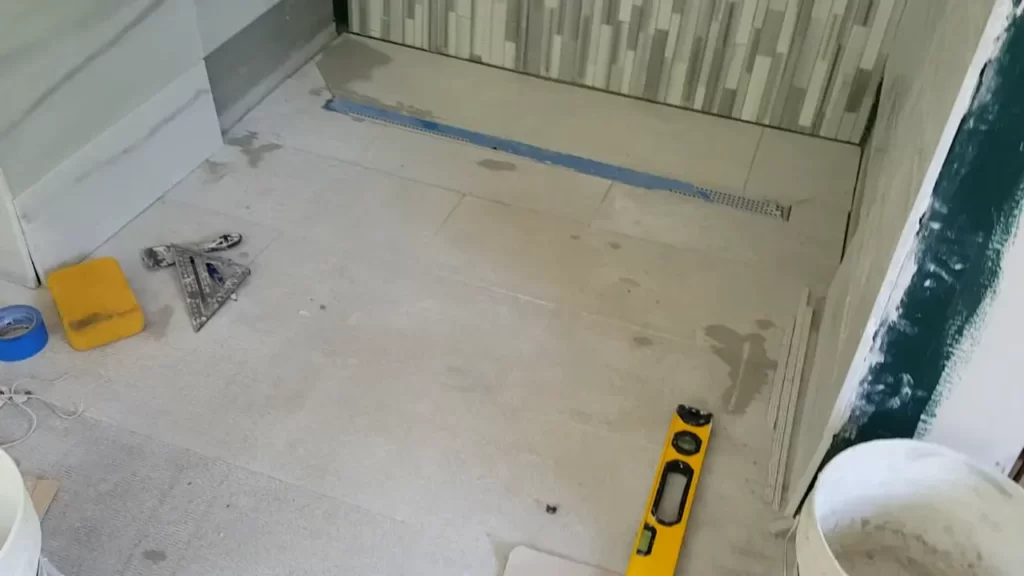
Ensuring proper slope for drainage
Proper slope is critical for ensuring effective drainage in your shower area. You want the water to flow towards the drain naturally and without any backup or pooling. Use a level and a measuring tape to determine the appropriate slope or gradient for your specific situation. Typically, a slope of 1/4 inch per foot is recommended. This means that for every foot of distance, the surface should slope down by 1/4 inch towards the drain. Take your time to ensure accuracy, as a slight deviation can cause water to collect and lead to problems down the line.
When setting the drain in concrete, precision and attention to detail are key. Pour the concrete mix evenly, level and smooth the surface with a trowel, and ensure the proper slope for efficient drainage. By following these steps, you’ll be well on your way to installing a functional and durable linear shower drain in your concrete shower floor.
Allowing The Concrete To Cure
After you have successfully installed a linear shower drain in concrete, it is crucial to allow the concrete to cure properly. This is a crucial step in ensuring the longevity and durability of your shower drain installation.
Recommended curing time for the concrete
The curing time for concrete refers to the period during which it achieves its maximum strength and hardness. It is important to understand that proper curing time varies depending on factors such as the type of concrete mix, temperature, humidity, and the specific brand’s instructions.
As a general guideline, it is recommended to allow the concrete to cure for a minimum of 24 to 48 hours before subjecting it to any significant weight or stress. However, it is always best to refer to the manufacturer’s instructions for the specific duration recommended for the product you are using.
Maintaining proper humidity and temperature
In addition to the curing time, proper humidity and temperature conditions are crucial for the concrete to cure correctly. These factors play a crucial role in the chemical reaction process that allows the concrete to harden and gain its strength.
It is recommended to maintain a relative humidity of around 40% to 70% during the curing process. This can be achieved by covering the concrete with a plastic sheet or using a curing compound to retain moisture. Additionally, it is essential to ensure that the temperature remains within the optimal range, typically between 50°F and 90°F (10°C to 32°C).
Both extreme high or low temperatures can negatively impact the curing process, affecting the strength and durability of the concrete. It is important to monitor and control the temperature and humidity levels to create an ideal environment for proper curing.
Testing The Drain
Once you have installed a linear shower drain in concrete, it is crucial to test the drain to ensure proper functionality and prevent any future problems. Taking the time to perform thorough testing will give you peace of mind and ensure that your shower area is free from leaks or drainage issues.
Pouring water into the shower area
To start the testing process, pour water into the shower area using a hose or a bucket. Make sure to pour a significant amount of water to properly test the drain’s capacity. This step will help you identify any potential clogs or drainage problems.
Checking for proper drainage and any leaks
After pouring the water, closely observe the drainage to ensure that the water is flowing smoothly and in the intended direction. Pay attention to any leaks around the drain or in other areas. Additionally, check for any pooling or slow draining, which may indicate an issue with the slope or the installation.
If you notice any leaks or drainage problems, it is vital to address them promptly. Depending on the severity of the issue, you may need to contact a professional plumber or make necessary adjustments to the drain installation.
Performing thorough testing after installing a linear shower drain in concrete is essential to guarantee a properly functioning shower area. By pouring water into the shower area and carefully checking for proper drainage and leaks, you can ensure that your shower drain installation will provide reliable performance for years to come.
Applying The Finishing Touches
After successfully installing a linear shower drain in concrete, it’s time to apply the finishing touches to complete the project. These final steps ensure not only the functionality but also the aesthetic appeal of your new shower drain. In this section, we will go over two important tasks to consider: cleaning the drain grate and surrounding area, and sealing the joints and edges for added protection.
Cleaning the Drain Grate and Surrounding Area
Before you can fully enjoy your newly installed linear shower drain, it’s essential to clean the drain grate and the surrounding area to remove any debris or dirt that may have accumulated during the installation process. Here’s a step-by-step guide to help you:
- Start by removing the drain grate carefully. You can do this by either lifting it or unscrewing it, depending on the type of drain grate you have.
- Once the grate is removed, inspect it and clean any visible debris or build-up with a soft brush or cloth. If necessary, use mild soap and warm water to remove stubborn stains.
- Next, focus on the surrounding area. Clear away any loose concrete, dust, or other particles that may have accumulated during the installation process.
- Use a vacuum cleaner or a brush to ensure that the area around the drain is thoroughly cleaned and free from any debris.
- Finally, place the cleaned drain grate back into position, making sure it fits securely. This will not only improve the visual appeal but also prevent any clogging issues caused by debris.
Sealing the Joints and Edges for Added Protection
To ensure the longevity and water-tightness of your linear shower drain, it is crucial to seal the joints and edges properly. This step will provide added protection against potential leaks and water damage. Here’s how you can seal the joints and edges:
- Inspect the joints and edges around the drain carefully. Look for any visible gaps, cracks, or areas that may need sealing.
- Choose an appropriate sealant that is compatible with your shower drain and the surrounding materials.
- Carefully apply the sealant to the joints and edges, ensuring a complete and even coverage.
- Smooth out the sealant using a putty knife or a caulk smoothing tool to create a neat and professional finish.
- Allow the sealant to dry completely as per the manufacturer’s instructions before using the shower.
By cleaning the drain grate and surrounding area, as well as properly sealing the joints and edges, you can ensure that your linear shower drain installation is not only functional but also visually appealing and well-protected. Take the extra time to apply these finishing touches, and you’ll enjoy a beautiful and leak-free shower experience for years to come.
Frequently Asked Questions
Can I Put A Shower Drain In Concrete Floor?
Yes, it is possible to install a shower drain in a concrete floor. Proper planning and preparation are necessary to ensure a successful installation. It is recommended to hire a professional plumber or contractor who has experience with concrete work to ensure proper installation and prevent any potential issues in the future.
How Do You Install A Shower Channel Drain In A Concrete Slab?
To install a shower channel drain in a concrete slab, follow these steps: 1. Prepare the area by removing any existing flooring. 2. Create a trench in the concrete slab to accommodate the drain. 3. Install the drain by positioning it in the trench and connecting it to the plumbing.
4. Secure the drain in place using concrete or mortar. 5. Finish by placing a waterproof membrane and pouring concrete to cover the drain. Note: Seek professional assistance if needed.
How Much Slope Do I Need For A Linear Shower Drain?
For a linear shower drain, you need a slope of at least 1/4 inch per foot or 2% slope for efficient water drainage. This angle ensures proper water flow and prevents pooling in the shower area.
What Is The Downside Of A Linear Drain?
The downside of a linear drain is that it requires precise installation and proper slope preparation. Without this, water may not drain properly, leading to pooling and potential water damage. Additionally, linear drains may be unsuitable for certain locations due to space limitations or architectural constraints.
Conclusion
Installing a linear shower drain in concrete is a worthwhile investment for any bathroom design. The process may seem daunting at first, but with the right tools and know-how, it can be achieved successfully. By following the step-by-step guide we have provided, you can ensure a seamless and efficient installation.
Enjoy the benefits of a modern and functional shower while adding value to your home. Start your project today and experience the convenience and aesthetic appeal that a linear shower drain brings to your bathroom.