
To install a linear shower drain, measure and mark the desired location, cut through the floor or mortar bed, insert the drain body, connect the plumbing, and secure the drain grate. If you’re renovating your bathroom, upgrading your shower drain can be a wise choice.
A linear shower drain offers a sleek and modern look while providing efficient water drainage. Whether you’re a DIY enthusiast or a professional contractor, learning how to install a linear shower drain is a relatively straightforward process. In this guide, we’ll walk you through the step-by-step procedure of installing a linear shower drain, ensuring that your bathroom stays dry and stylish.
So, let’s get started!
The Importance Of A Linear Shower Drain
The Importance of a Linear Shower Drain
When it comes to bathroom renovations or construction, every detail matters. From the tiles on the walls to the fixtures, every element contributes to the overall appearance and functionality of the space. One such element that is often overlooked but plays a key role in a well-designed bathroom is the linear shower drain. A linear shower drain is a sleek and modern alternative to traditional center drains, and it offers a range of benefits that can enhance the overall appearance and functionality of your bathroom.
Benefits of installing a linear shower drain
A linear shower drain offers several benefits that make it a popular choice among homeowners and designers. Let’s take a look at some of the key advantages:
1. Enhanced water drainage
Unlike traditional center drains, a linear shower drain is positioned along one side of the shower floor. This design allows for efficient and effective water drainage, preventing any potential pooling or standing water. With a linear drain, water is directed towards the drain more effectively, reducing the risk of water damage and minimizing the need for frequent cleaning.
2. Improved safety
A linear shower drain offers improved safety compared to traditional center drains. With a linear drain, there are no raised edges or thresholds to step over, making it more accessible for individuals with mobility limitations. Additionally, the larger surface area of a linear drain reduces the chances of slipping or tripping, adding an extra layer of safety to your bathroom.
3. Versatile design options
One of the main advantages of a linear shower drain is its versatility in design. Unlike center drains that require specific tile placement, a linear drain can be installed anywhere along the shower floor. This gives you the freedom to create unique and visually appealing shower designs, such as floor-to-ceiling tile installations or linear patterns that complement the rest of your bathroom decor.
4. Easy maintenance
Cleaning a linear shower drain is a breeze compared to center drains. The sleek and elongated design of a linear drain makes it easier to access and keep clean, reducing the chances of mold, mildew, and mineral buildup. With a quick wipe or rinse, you can maintain the cleanliness and functionality of your linear drain with minimal effort.
In conclusion, a linear shower drain is an essential component of a well-designed bathroom. Its benefits, including enhanced water drainage, improved safety, versatile design options, and easy maintenance make it a popular choice among homeowners and designers alike. Whether you want to create a visually appealing shower space or ensure efficient water drainage, a linear shower drain is a must-have addition to any bathroom.
Step 1: Preparing For Installation
Installing a linear shower drain can add both functionality and style to your bathroom. Before starting the installation process, it is important to properly prepare and gather all the necessary tools and materials. This ensures a smooth and efficient installation process. In this step, we will guide you through the process of gathering the necessary tools and materials and measuring and marking the location for the drain.
Gathering the necessary tools and materials
To begin the installation, you will need the following tools and materials:
| Tools | Materials |
|---|---|
|
|
Measuring and marking the location for the drain
Once you have gathered all the necessary tools and materials, it’s time to measure and mark the location for the drain. Follow these steps:
- Start by determining the desired location for the drain. Consider factors such as the slope of the shower floor, the size and position of the tiles, and building codes and regulations.
- Using a measuring tape, measure the dimensions of the linear drain and mark the center point on the shower floor with a pencil or marker.
- Ensure that the drain is positioned in a way that allows for proper water drainage and aligns with the slope of the shower floor. Use a level to check the alignment.
- Next, mark the outline of the drain on the shower floor, ensuring that it fits securely and matches the dimensions of the linear drain.
- Using an electric drill, create pilot holes around the marked outline of the drain. These holes will act as a guide for cutting the floor.
- Using a hacksaw or jigsaw, carefully cut along the marked outline to create the hole for the linear drain. Take caution not to damage any pipes or electrical wiring beneath the floor.
By properly preparing for the installation process and ensuring accurate measurements and markings, you will be well on your way to installing a functional and aesthetically pleasing linear shower drain.

Step 2: Removing The Old Drain
Techniques for Removing an Existing Drain
Before you can install a new linear shower drain, you need to remove the old drain from your shower floor. This step can be a bit tricky, but with the right techniques, you can successfully remove the old drain without causing any damage. Here are a few techniques you can use:
- Screwdriver method: One of the easiest ways to remove the old drain is by using a screwdriver. Start by removing the drain cover with a flathead screwdriver. Once the cover is off, you can use the screwdriver to unscrew the drain flange in a counterclockwise direction. Keep turning until the flange is fully detached from the drain pipe.
- Plumber’s wrench method: Another technique you can use is the plumber’s wrench method. This method is particularly useful if the old drain is tightly secured. Begin by removing the drain cover with a screwdriver. Then, use a plumber’s wrench to grip the drain flange and turn it counterclockwise until it comes loose from the drain pipe. If the flange is stuck, you can try applying a bit of lubricant to help loosen it.
- Drill and chisel method: In some cases, the old drain may be difficult to remove using traditional methods. In such situations, you can try the drill and chisel method. Start by drilling a series of holes around the edge of the drain flange. Then, use a chisel and hammer to carefully chisel away the areas between the holes. This should help break the flange free from the drain pipe.
Ensuring the Area is Clean and Ready for Installation
Once you have successfully removed the old drain, it’s important to ensure that the area is clean and ready for the installation of the new linear shower drain. Follow these steps to prepare the area:
- Clean the drain hole: Use a brush or sponge to clean any debris or grime from the drain hole. Make sure to remove any old sealant or adhesive as well. This will ensure a clean and smooth surface for the new drain.
- Inspect the drain pipe: Take a close look at the drain pipe to check for any signs of damage or corrosion. If you notice any issues, it’s important to address them before proceeding with the installation. You may need to replace the drain pipe if it is damaged.
- Measure the drain hole: Measure the dimensions of the drain hole to ensure that the new linear shower drain will fit properly. Use a tape measure to determine the width and depth of the hole. This will help you choose the right-sized drain for your shower.
By properly removing the old drain and ensuring the area is clean and ready, you are setting the foundation for a successful installation of your new linear shower drain. Follow these techniques and steps carefully to ensure a smooth transition and a leak-free shower for years to come.
Step 3: Installing The Linear Shower Drain
Now that you’ve chosen the right drain system for your bathroom and completed the necessary preparations, it’s time to move on to the exciting part – installing the linear shower drain. Follow this step-by-step guide to ensure a smooth and successful installation process.
Choosing the right drain system for your bathroom
Before diving into the installation process, it’s crucial to choose the right linear shower drain system for your bathroom. Consider the following factors:
- Bathroom size: Measure the length and width of your shower area to determine the appropriate length of the drain.
- Drain type: Decide whether you prefer a center or off-center drain, based on your shower’s design and plumbing layout.
- Material: Choose a drain made of high-quality material such as stainless steel, which is both durable and corrosion-resistant.
- Design: Select a drain grate style that complements your bathroom aesthetic while also providing efficient water drainage.
By considering these factors, you’ll ensure that the linear shower drain you choose is not only functional but also enhances the overall look of your bathroom.
Step-by-step guide to installing the drain
Follow these steps to install your linear shower drain:
- Start by marking the centerline of your shower floor. Measure the distance from the walls and ensure the centerline is perpendicular to them.
- Using a drill, create a small pilot hole at the center point of the shower floor. This will serve as a guide for the drain installation.
- Apply a layer of waterproofing membrane on the shower floor. This ensures that water doesn’t seep through and damage the surrounding areas.
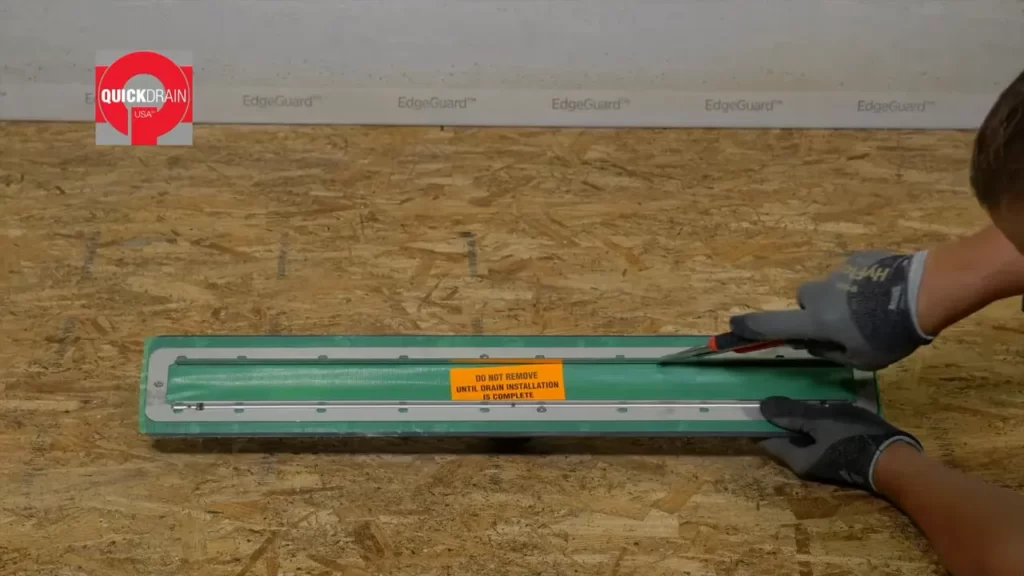
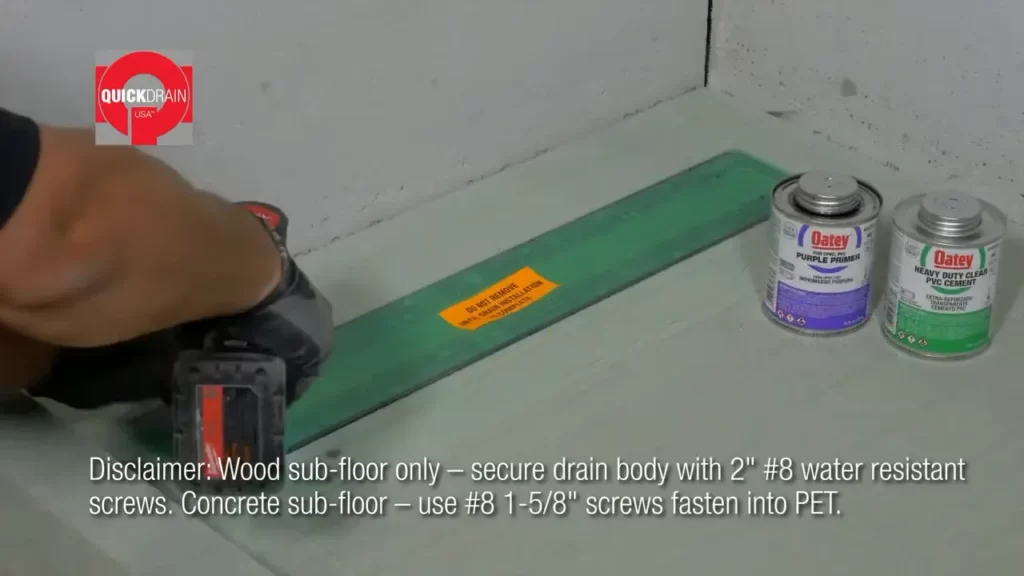
- Place the drain’s flange over the pilot hole and align it with the centerline. Secure it in place by driving screws through the flange screw holes and into the subfloor.
- Attach the drain body to the flange, following the manufacturer’s instructions. Make sure it is securely connected and aligned with the centerline.
- Apply a bead of waterproof silicone around the edges of the flange, creating a watertight seal between the drain and the shower floor.
- Install the drain grate on top of the drain body. Ensure it sits flush with the surrounding floor and is securely fastened.
- Test the drain by pouring water into the shower floor and checking for proper drainage. Make any necessary adjustments if there are any issues.
- Once the drain is fully installed and functioning correctly, continue with the rest of your shower installation process.
Congratulations! You’ve successfully installed your linear shower drain and can now enjoy a modern and efficient drainage system in your bathroom.
Step 4: Waterproofing The Surrounding Area
Waterproofing is a crucial step in the installation of a linear shower drain. The purpose of waterproofing is to protect the underlying structure of the shower area from water damage. Without proper waterproofing, water can seep into the walls and floor, leading to mold growth, structural damage, and costly repairs. In this step, we will discuss the importance of waterproofing in a shower installation and how to apply a waterproofing membrane or barrier.
Importance of waterproofing in a shower installation
Ensuring the proper waterproofing of a shower area is essential to maintain the integrity and longevity of the bathroom. The consistent exposure to water and moisture makes showers highly susceptible to leaks, which can result in significant damage over time. Waterproofing helps create a watertight seal that prevents water from penetrating the surrounding area.
A well-executed waterproofing process provides several benefits:
- Prevents water damage: By sealing the shower area, waterproofing prevents water from seeping into the walls, floor, and subfloor, which can cause rot, mold, and structural damage.
- Protects against leaks: Waterproofing acts as a barrier against leaks, ensuring that water stays within the shower area and doesn’t leak into adjacent rooms or areas.
- Increases lifespan of the shower area: By protecting the underlying structure from water damage, proper waterproofing can extend the lifespan of the shower area, reducing the need for costly repairs or renovations.
Applying a waterproofing membrane or barrier
There are different methods to apply a waterproofing membrane or barrier, depending on the type of material you choose. Here are the general steps to follow:
- Clean and prepare the surface: Ensure that the surface of the shower area is clean, dry, and free from any contaminants or debris that could affect the adhesion of the waterproofing membrane.
- Apply a primer: Use a suitable primer to treat the surface before applying the waterproofing membrane. The primer helps improve adhesion and ensures a strong bond between the membrane and the surface.
- Apply the waterproofing membrane: Follow the manufacturer’s instructions on how to apply the waterproofing membrane. It may involve using a brush, roller, or trowel to evenly spread the membrane on the walls and floor of the shower area.
- Seal joints and corners: Pay special attention to joints and corners, as these areas are more prone to leaks. Use a waterproofing tape or sealant to create a watertight seal.
- Cure and test for leaks: Allow the waterproofing membrane to cure according to the manufacturer’s instructions. Once cured, perform a leak test by spraying water on the surface to ensure that no water seeps through.
Remember, proper waterproofing is a critical step to ensure the longevity and functionality of your shower area. By following these steps, you can minimize the risk of water damage and enjoy a watertight, leak-free shower experience for years to come.
Step 5: Tiling And Grouting
Once you have successfully prepared the shower floor for tiling, it’s time to move on to the next crucial step – tiling the area around the linear drain. This step plays a significant role in not only enhancing the aesthetic appeal of your shower but also ensuring proper drainage and water flow. Let’s dive deeper into the process!
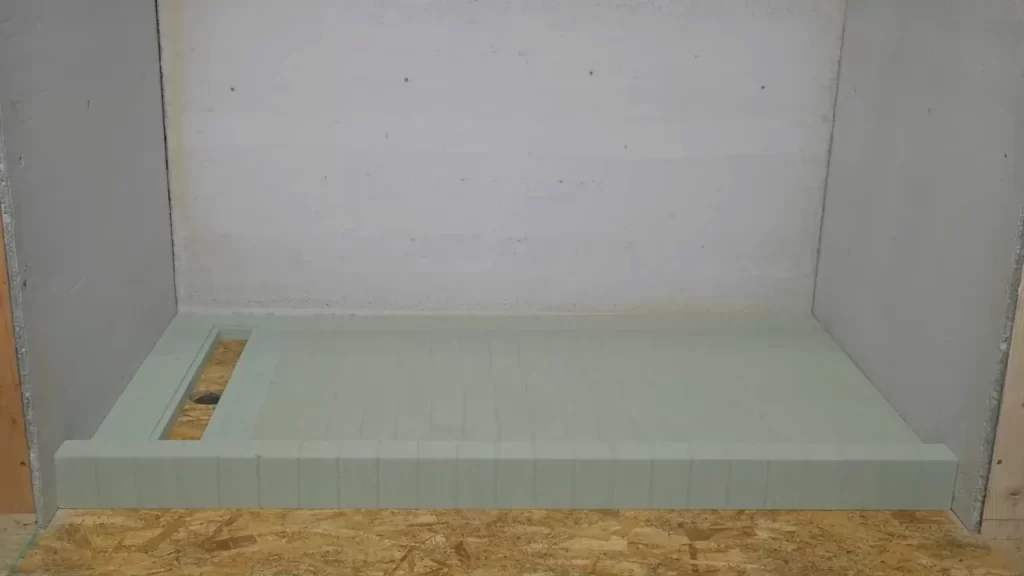
Preparing the shower floor for tiling
Before you begin tiling, it is essential to ensure that the shower floor is adequately prepared. Follow these simple steps to ensure a smooth and successful tiling process:
- Start by cleaning the shower floor and removing any debris or dust. This will help create a clean and level surface for your tiles.
- Next, take measurements to determine the exact area that needs to be tiled. This will help you calculate the number of tiles required.
- Apply a waterproofing membrane to the shower floor. This will prevent any water damage and ensure longevity.
- Allow the waterproofing membrane to dry completely before proceeding to the next step.
By following these steps, you will create a solid foundation for your tiles and ensure a professional-looking finish.
Tiling the area around the linear drain
Now that your shower floor is fully prepared, it’s time to start tiling. Follow these steps to tile the area around the linear drain:
- Apply tile adhesive to the shower floor using a notched trowel. Spread the adhesive evenly, covering an area that is suitable for one or two tiles at a time.
- Place your tiles firmly onto the adhesive, starting from the corner closest to the drain. Ensure that each tile is level and properly aligned with the others.
- Continue adding tiles in a systematic manner, working your way towards the drain.
- Use tile spacers to maintain consistent spacing between the tiles. This will give your shower a professional, polished look.
- Once all the tiles are laid, allow the adhesive to dry completely according to the manufacturer’s instructions.
- Now it’s time to grout! Mix the grout according to the package instructions, and apply it to the tile joints using a grout float.
- Ensure that all the gaps between the tiles are properly filled with grout.
- After applying the grout, wipe off any excess using a damp sponge, moving diagonally across the tiles.
- Allow the grout to dry for the recommended time, usually 24 to 48 hours, before using the shower.
By following these steps, you can achieve a beautifully tiled shower with a linear drain, creating a sleek and modern look for your bathroom while ensuring proper drainage and functionality.
Step 6: Finishing Touches
Congratulations! You are almost done with the installation process of your linear shower drain. In this final step, you will add the finishing touches to ensure a seamless and functional shower drain system. This includes installing the drain cover and checking for any leaks or issues. Let’s dive right in!
Installing the drain cover
The drain cover is an essential component that not only adds a stylish touch to your shower but also prevents any debris from clogging the drain. Here’s how you can install it:
- Ensure that the drain cover is the correct size for your linear shower drain. Measure the opening to ensure a precise fit.
- Place the drain cover over the drain opening, aligning it properly.
- If your drain cover comes with screws, use a screwdriver to secure it in place. Tighten the screws firmly but be careful not to overtighten.
- Check that the drain cover sits flush with the floor surface. If it appears uneven, adjust it accordingly until it sits flat.
- Once the drain cover is securely in place, give it a gentle tap to ensure it doesn’t move or rattle.
Checking for any leaks or issues
Now that you have installed the drain cover, it’s crucial to check for any leaks or issues that may compromise the functionality of the linear shower drain. Follow these steps to ensure everything is in proper working condition:
- Turn on the shower and let the water flow.
- Inspect the drain area and the surrounding floor for any signs of leakage. Pay close attention to any water pooling, dripping, or unusual sounds.
- If you detect any leaks or issues, such as water not draining properly, you may need to disassemble the drain and check for any blockages or misalignments.
- Remove any debris, hair, or other potential obstructions that may be hindering water flow.
- Reassemble the drain components securely, ensuring a tight fit.
- Run the water again to confirm that the issue has been resolved and the drain is functioning smoothly.
By following these steps, you have successfully installed a linear shower drain and completed the finishing touches to ensure an efficient drainage system in your shower. Take a moment to appreciate the hard work you put into this project. Now you can enjoy a revitalizing shower experience in a beautifully designed and functional space.
Frequently Asked Questions
Are Linear Shower Drains Hard To Install?
Linear shower drains are not hard to install. With proper preparation and basic plumbing knowledge, installing a linear shower drain can be a straightforward process. Secure the drain, slope the floor towards the drain, and connect the plumbing. It is important to follow the manufacturer’s instructions for a successful installation.
How Do You Install A Linear Shower Liner Drain?
To install a linear shower drain liner, follow these steps: 1. Start by locating the drain hole in the shower floor. 2. Measure and mark the position of the drain on the liner. 3. Cut a hole in the liner that matches the size of the drain.
4. Place the liner over the drain and secure it in place. 5. Connect the drain to the plumbing system and test for any leaks.
What Is The Downside Of A Linear Drain?
The downside of a linear drain is its limited capacity compared to a centrally located drain. However, it offers easier accessibility for maintenance and cleaning.
Where Should A Linear Drain Be Placed In A Shower?
A linear drain should be placed against the shower wall, opposite the entry area, to ensure proper water drainage.
Conclusion
Installing a linear shower drain is a simple and effective way to improve the functionality and aesthetic appeal of your bathroom. By following the step-by-step process outlined in this blog post, you can easily install a linear shower drain without any hassle.
With its sleek design and efficient drainage capabilities, a linear shower drain is a great addition to any bathroom. So, why wait? Start your installation process today and enjoy the benefits of a sophisticated and functional shower space.