
To install a heat pump package unit, begin by choosing a suitable location and ensuring proper electrical connections. Then, connect the refrigerant lines and condensate drain.
Finally, secure the unit in place and test its functionality. This installation process is vital to efficiently and effectively heat or cool your home or building. Whether you’re replacing an existing unit or installing one for the first time, following these steps will help ensure a successful installation.
By understanding the process and taking the necessary precautions, you can enjoy the benefits of a heat pump package unit in no time.
Factors To Consider For Optimal Placement
Factors to Consider for Optimal Placement
When it comes to installing a heat pump package unit, there are several factors to consider for optimal placement. By carefully evaluating these factors, you can ensure that your heat pump operates effectively and efficiently. In this post, we’ll discuss three important considerations: sun exposure and shade, accessibility for installation and maintenance, and noise considerations.
Sun Exposure and Shade
The placement of your heat pump package unit in relation to sun exposure and shade is crucial for optimal performance. Direct sunlight can cause the unit to overheat, leading to efficiency issues and potential damage. On the other hand, excessive shade can limit the unit’s ability to absorb heat from the surroundings. To strike the right balance, consider the following:
- Place the unit where it receives moderate levels of sunlight during the cooler parts of the day, especially in regions with hot climates.
- Avoid placing the unit in direct sunlight during the hottest parts of the day, when the sun is at its peak intensity.
- Ensure that the unit is not obstructed by tall trees or buildings that can cast excessive shade upon it.
Accessibility for Installation and Maintenance
Proper accessibility is essential for both the installation and future maintenance of your heat pump package unit. Without easy access, the installation process may become more challenging, and routine maintenance tasks can become a hassle. Consider the following points to ensure accessibility:
- Choose a location that allows for adequate space around the unit for easy installation and future repairs.
- Ensure that the unit can be easily reached by the installation team, as well as by technicians for regular maintenance and repairs.
- Consider any potential obstructions, such as fences or walls, that may hinder the installation or require additional steps to ensure accessibility.
Noise Considerations
Heat pump package units, like any other HVAC equipment, generate noise during operation. If the unit is installed in a location where the generated noise can cause disturbance or discomfort, it can become a significant issue. To minimize noise-related concerns, keep the following in mind:
- Place the unit away from bedrooms, home offices, and other areas where noise sensitivity is paramount.
- Consider using noise-reducing features or technologies to mitigate the sound generated by the unit.
- Ensure that the unit is not located near areas where the amplified sound can be reflected, such as walls or buildings, which can intensify the noise levels.
By taking into account these factors, you can optimize the placement of your heat pump package unit, ensuring its efficiency, accessibility, and noise levels align with your needs and preferences. Remember to consult with a professional installer to determine the best location based on your specific circumstances and regional climate conditions. With the right placement, you can maximize the benefits of your heat pump while enjoying a comfortable indoor environment.
Essential Items For The Installation Process
When it comes to installing a heat pump package unit, having the right equipment and materials is essential. This blog post will guide you through the necessary items needed for a successful installation. From the heat pump package unit itself to the refrigerant lines and insulation, we’ll cover everything you need to know. Let’s get started!
Heat Pump Package Unit
The heart of your heat pump system is the heat pump package unit. This all-in-one unit contains the compressor, condenser, and evaporator, ensuring efficient heating and cooling of your home. Make sure you choose a unit that is compatible with your specific needs and energy requirements. It’s also important to consider the size and weight of the unit to ensure proper installation and support.
Ductwork and Fittings
The ductwork is responsible for distributing conditioned air throughout your home. Properly designed ductwork ensures efficient airflow and an even distribution of heating and cooling. When installing a heat pump package unit, it’s important to have the necessary ductwork and fittings on hand. This includes duct connectors, elbows, reducers, and registers. Inspect the existing ductwork for any damage or leaks, and repair or replace as needed to ensure optimal performance.
Electrical Wirings and Connectors
Electrical wirings and connectors are essential for powering your heat pump package unit. Ensure you have the correct gauge wires, wire connectors, and circuit breakers to provide a safe and reliable electrical connection. It’s crucial to follow the manufacturer’s guidelines and local electrical codes when wiring your heat pump system. Consult a licensed electrician if you’re unsure about any part of the installation process.
Mounting Brackets and Fasteners
To securely install your heat pump package unit, you’ll need mounting brackets and fasteners. These provide stability and support, preventing the unit from shifting or falling. Choose high-quality brackets and fasteners that are specifically designed for heat pump package units. Consider factors such as the weight and location of the unit to determine the appropriate type and size of brackets and fasteners.
Refrigerant Lines and Insulation
The refrigerant lines play a crucial role in transporting the refrigerant between the heat pump unit and the condenser. It’s important to have the correct size and length of refrigerant lines for your specific heat pump system. Additionally, proper insulation of the refrigerant lines helps maintain the efficiency of the system and prevent condensation. Use insulation tubing or wrap to protect the lines from external environmental factors and ensure optimal performance.
Steps To Ensure A Clean And Safe Installation Space
Before installing a heat pump package unit, it is essential to prepare a clean and safe installation space. This will not only ensure optimal performance but also enhance the longevity of the unit. In this section, we will guide you through the necessary steps to achieve a clean and safe installation space for your heat pump package unit.
Clearing Debris and Obstructions
Start by clearing the area of any debris and obstructions that may hinder the installation process or interfere with the unit’s functionality. Remove loose rocks, twigs, leaves, or any other objects that could potentially obstruct the airflow or cause damage to the unit.
Leveling the Ground or Platform
Next, ensure that the ground or platform on which the heat pump package unit will be placed is leveled. A level surface is crucial for the proper functioning and stability of the unit. Use a leveling tool to check the surface and make any necessary adjustments to ensure an even foundation.
Providing Proper Ventilation and Airflow
Proper ventilation and airflow are vital for the efficient operation of your heat pump package unit. Ensure that the installation space allows for sufficient airflow around the unit. This can be achieved by keeping the recommended clearances and distances from surrounding walls, shrubs, or other structures.
Additionally, you may need to provide proper ventilation for the unit. The heat pump package unit requires a sufficient inflow of air for cooling and optimal performance. Ensure there is an adequate supply of fresh air by installing vents or openings as recommended by the manufacturer.
Remember, a clean and safe installation space is the foundation for a well-functioning heat pump package unit. By following these steps and adhering to the manufacturer’s guidelines, you can ensure optimal performance and enhanced efficiency for your heating and cooling needs.
Step-By-Step Process For Successful Installation
Step-by-step process for successful installation
Installing a heat pump package unit may seem like a daunting task, but with the right guidance, it can be a straightforward process. By following these step-by-step instructions, you can ensure a successful installation that will provide efficient heating and cooling for your space.
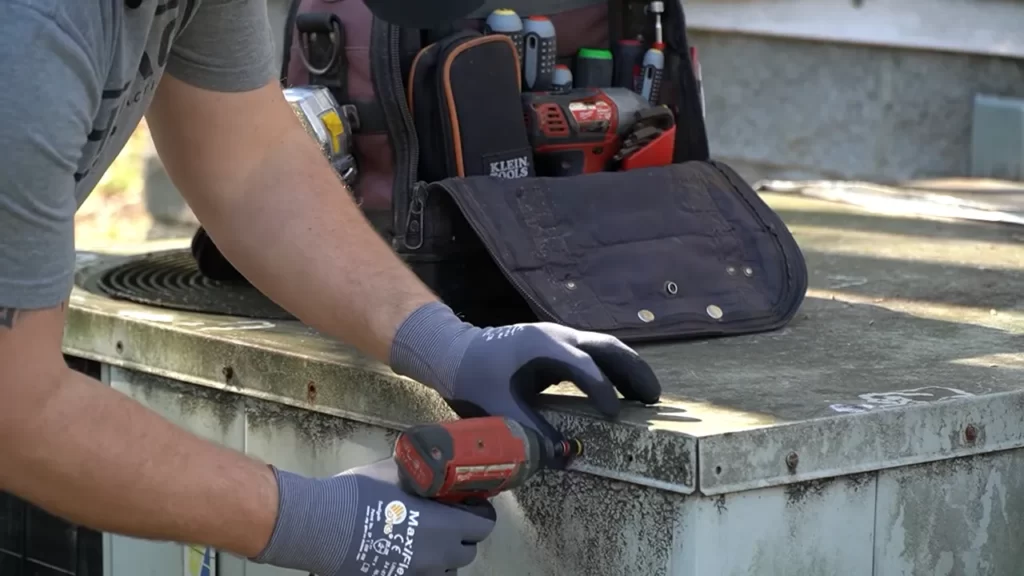
Mounting the unit on the platform or ground
The first step in the installation process is to mount the heat pump package unit on a stable platform or directly on the ground. This is crucial for proper operation and longevity of the unit. Follow these steps to ensure a secure mount:
- Prepare the platform or ground by clearing any debris and ensuring a level surface.
- Position the heat pump package unit on the platform or ground, making sure it is stable and level.
- Secure the unit to the platform or ground using anchor bolts or other suitable mounting hardware.
- Double-check the stability of the unit to ensure it is securely mounted.
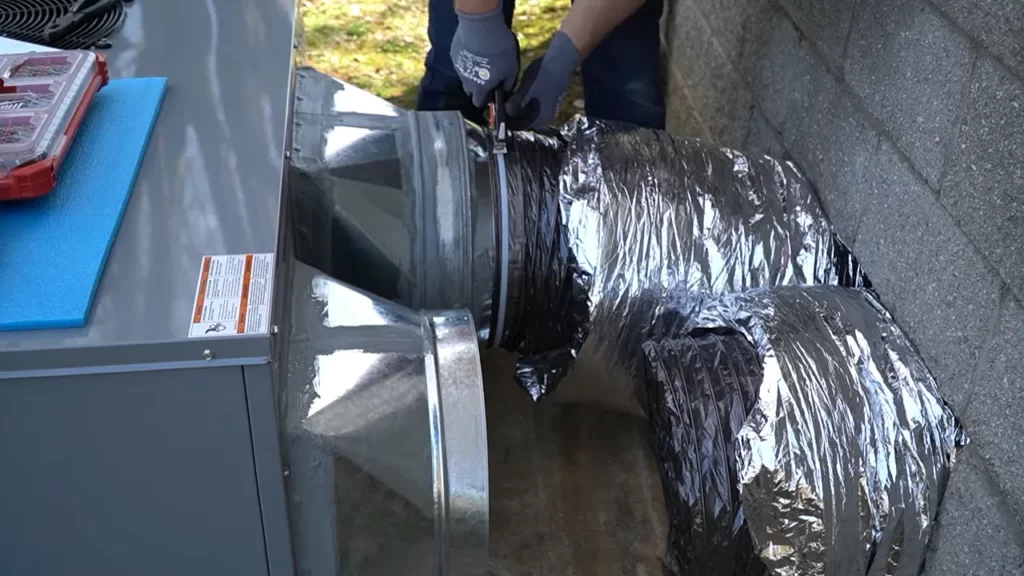
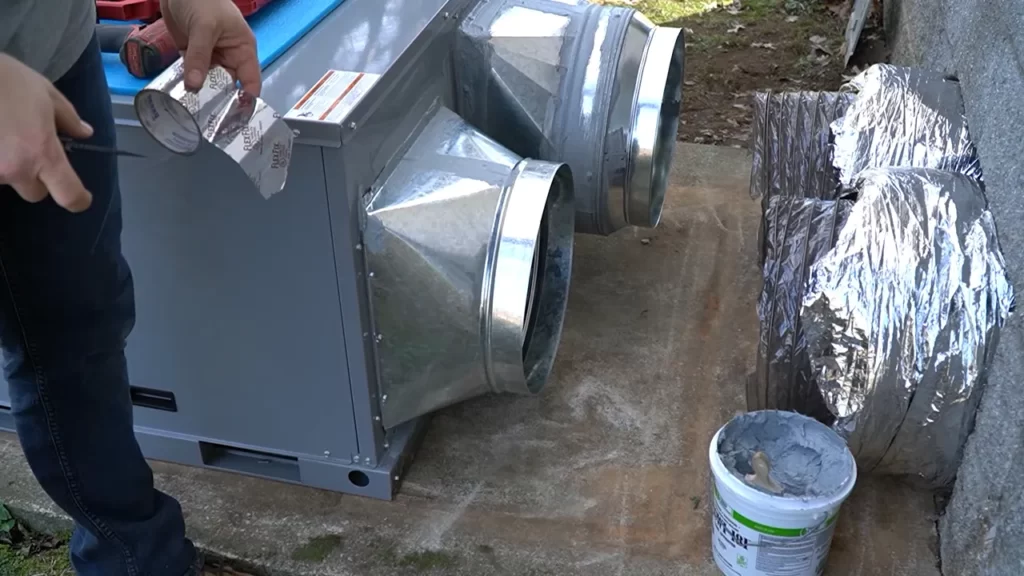
Connecting the ductwork and ensuring airtight seals
Once the unit is securely mounted, the next step is to connect the ductwork and ensure airtight seals. This is important for efficient air distribution and to prevent energy loss. Follow these steps to properly connect the ductwork:
- Measure and cut the appropriate lengths of ductwork to fit your specific installation.
- Attach the ductwork to the heat pump package unit, using appropriate connectors or sheet metal screws.
- Apply duct sealant to all connections, ensuring airtight seals.
- Inspect all connections to confirm they are secure and leak-free.
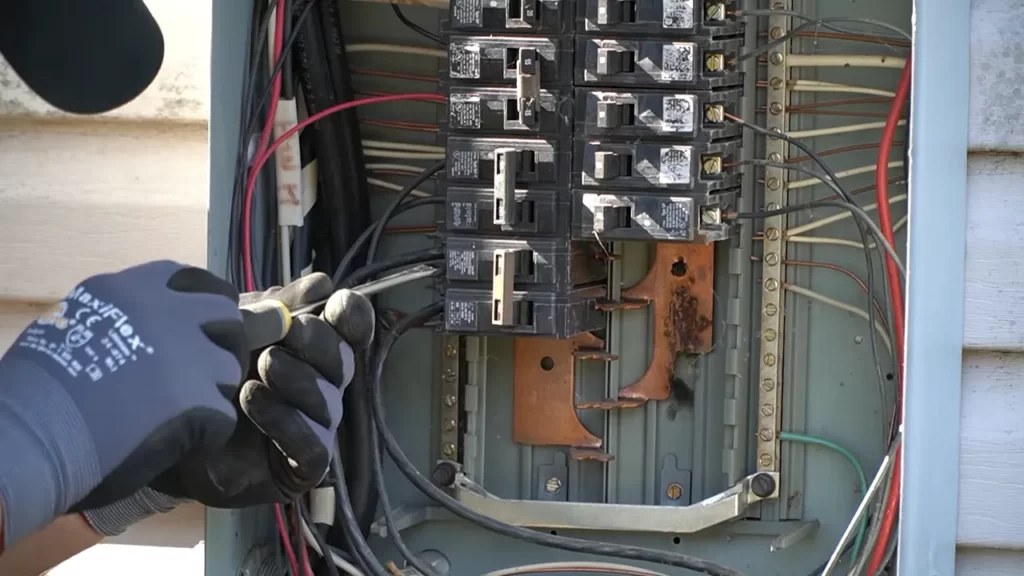
Wiring the electrical system and securing connections
Properly wiring the electrical system is essential for the safe and efficient operation of the heat pump package unit. Follow these steps to ensure the electrical connections are correctly made:
- Turn off the power supply to the unit before beginning any electrical work.
- Connect the wiring according to the manufacturer’s instructions, using wire nuts or appropriate connectors.
- Double-check the connections to ensure they are securely tightened and free from any loose wires.
- Re-establish the power supply to the unit and test the electrical system to confirm it is functioning correctly.
Installing and insulating the refrigerant lines
The final step in the installation process is to install and insulate the refrigerant lines. This is crucial for maintaining the efficiency of the heat pump package unit. Follow these steps to properly install and insulate the refrigerant lines:
- Measure and cut the appropriate lengths of refrigerant lines, ensuring they are properly sized for the installation.
- Connect the refrigerant lines to the unit, using appropriate couplings or fittings.
- Insulate the refrigerant lines using insulation sleeves, ensuring they are properly secured.
- Inspect the refrigerant lines and insulation for any gaps or damage, and make any necessary repairs.
- Test the system to ensure proper refrigerant flow and performance.
By following these step-by-step instructions, you can successfully install a heat pump package unit. If you are unsure of any step, it is always recommended to consult a professional HVAC technician to ensure a safe and efficient installation.
Ensuring Proper Functionality And Safety Compliance
When it comes to installing a heat pump package unit, it is crucial to ensure proper functionality and safety compliance. Taking the necessary steps to check for leaks and proper refrigerant levels, verify electrical connections and performance, as well as conduct a thorough system inspection, will help guarantee the efficiency and longevity of your heat pump.
Checking for leaks and proper refrigerant levels
One of the first things you need to do when installing a heat pump package unit is to check for leaks and ensure proper refrigerant levels. Leaks can not only compromise the performance of your system, but they can also be hazardous to both you and the environment. To identify any leaks, use a refrigerant leak detector and thoroughly inspect all connections and valves. If any leaks are detected, tighten the connections or replace the faulty parts. Furthermore, it is important to ensure that the refrigerant levels are neither too high nor too low. Refer to the manufacturer’s specifications and use a refrigerant gauge to verify the current levels during the installation process.
Verifying electrical connections and performance
Proper electrical connections are essential for the safe and reliable operation of your heat pump package unit. Before proceeding with the installation, make sure that all electrical connections are secure and in accordance with the manufacturer’s instructions. Check for any loose or damaged wiring, and ensure that all connections are properly insulated. Additionally, it is crucial to verify the performance of your heat pump once it is installed. Use a multimeter to measure the voltage and current at different points in the system. Compare the readings to the specifications provided by the manufacturer to ensure that everything is functioning correctly.
Conducting a thorough system inspection
After completing the installation process, it is vital to conduct a thorough system inspection to ensure that everything is in proper working order. Start by visually inspecting the entire heat pump package unit for any signs of damage or wear. Look for loose connections, damaged components, or any other abnormalities that could affect the performance or safety of the system. Additionally, check the airflow through the heat pump and ensure that it is not obstructed by debris or other obstacles. Finally, test the system’s overall functionality, including both heating and cooling modes, to guarantee its efficiency and effectiveness.
By following these steps and adhering to proper safety compliance, you can install a heat pump package unit with confidence, knowing that it will provide both warmth and comfort for years to come.
Frequently Asked Questions
Can I Install My Own Heat Pump System?
Yes, you can install your own heat pump. However, it is crucial to follow proper guidelines and ensure safety. Hiring a professional is recommended for accurate installation and to avoid any risks or damage.
Are Package Units Easy To Install?
Package units are simple to install with minimal effort. Their compact design allows for easy placement and connection to the existing ductwork in your home or office. With proper guidelines and professional assistance, the installation process becomes hassle-free.
Is A Heat Pump The Same As A Package Unit?
No, a heat pump and a package unit are not the same. A heat pump is a type of HVAC system that can both cool and heat a space, while a package unit refers to a self-contained unit that contains both the heating and cooling components in one unit.
Is It Hard To Install Your Own Heat Pump?
Installing your own heat pump can be challenging. Consider hiring a professional for proper installation.
Conclusion
Installing a heat pump package unit may seem like a daunting task, but with the right guidance and a little patience, you can successfully complete the installation process. By following the step-by-step instructions provided in this blog post, you can ensure that your heat pump package unit is correctly installed and functioning efficiently.
Remember to always prioritize safety and consult a professional if needed. With proper installation, you can enjoy the benefits of a reliable and energy-efficient heat pump package unit in your home for years to come.