
To install a hand pump into an existing well, follow these steps: Measure the well’s depth, choose a hand pump based on the water level and your needs, attach the pump to a pipe, lower the pipe into the well, secure it, and start pumping to check for water flow. Installing a hand pump into an existing well is a simple process that can provide a reliable water source, especially in areas without electricity or with unreliable water supply.
By following the steps mentioned above, you can easily set up a hand pump and access clean water for various purposes such as irrigation, gardening, or emergency use. With a hand pump, you can ensure a continuous water supply even during power outages or water shortages.
Learn how to install a hand pump into an existing well by following the steps outlined in this guide.
Gathering The Necessary Tools And Materials
Before you start the process of installing a hand pump into your existing well, it’s important to gather all the necessary tools and materials. This step is crucial to ensure a smooth and hassle-free installation. In this section, we will discuss the key elements you need to consider when gathering your tools and materials.
Choosing the right hand pump for your well
The first step in gathering the necessary tools and materials is choosing the right hand pump for your well. Hand pumps come in various types, sizes, and capacities, so it’s essential to select one that is suitable for your specific well. Consider factors such as the depth and diameter of your well, the water level, and the expected water usage. Research different hand pump options and consult with professionals if needed to find the perfect fit.
Ensuring you have the necessary tools and equipment
Once you have chosen the right hand pump, it’s time to ensure you have the necessary tools and equipment for the installation. Here is a list of essential tools and equipment you may need:
- Adjustable wrench
- Pipe wrench
- Teflon tape
- Thread sealant
- Drill
- Various drill bits
- Tubing cutter
- Flux and solder
- Pipe cutter
- Measuring tape
- Gloves and safety glasses
Ensure that all the tools are in good working condition and that you have any additional items, such as replacement parts or accessories, that may be required for your specific installation.
Checking if any additional materials are required
In addition to tools and equipment, it’s important to check if any additional materials are required for the installation of the hand pump. Some common materials you may need include:
- PVC pipes and fittings
- Check valves
- Brackets and mounting hardware
- Sealants and adhesives
- Pressure gauge
- Foot valve
- Well cap
Check with your local hardware store or consult a professional to ensure you have all the necessary materials for a successful installation.
By gathering the right tools and materials, you are setting yourself up for success when it comes to installing a hand pump into your existing well. Take the time to choose the right hand pump, gather all the necessary tools and equipment, and check if any additional materials are required to ensure a smooth and efficient installation process.
Assessing The Condition Of The Existing Well
Before installing a hand pump into an existing well, it is crucial to assess the condition of the well to ensure its suitability and to identify any necessary adjustments or repairs that need to be made. This includes inspecting the well structure and casing, testing the water quality and depth, and evaluating the condition of the existing pumping system. By thoroughly assessing the well, you can proceed with confidence, knowing that the installation will be successful and provide the reliable water supply you need.
Inspecting the Well Structure and Casing
The first step in assessing the condition of the existing well is to inspect the well structure and casing. This involves visually examining the exterior of the well, checking for any sign of damage or deterioration. Look for cracks, corrosion, or any other structural issues that may compromise the integrity of the well. Pay close attention to the well casing, as it serves as a protective barrier for the well and prevents contaminants from entering the water supply. If there are any cracks or gaps in the casing, it is essential to repair or replace it to ensure the well remains in good condition.
Testing the Water Quality and Depth
Another important aspect of assessing the existing well is testing the water quality and depth. This will help you determine if there are any contaminants present or if the water level is sufficient for your needs. To test the water quality, you can collect a water sample and send it to a laboratory for analysis. The results will provide valuable information about the water’s safety and suitability for consumption. Additionally, measuring the depth of the water will give you an idea of how much water is available in the well. This is important to ensure that it can adequately meet your water demands.
Evaluating the Condition of the Existing Pumping System
Lastly, assessing the condition of the existing pumping system is vital when installing a hand pump into an existing well. Check the pump for any signs of wear and tear, such as rust or corrosion. Verify that all the components, including the motor, valves, and pipes, are in working order. If there are any issues with the existing pumping system, it is necessary to address them before proceeding with the installation. This may involve replacing faulty parts or upgrading the system to ensure it can handle the operation of the hand pump effectively.
By carefully inspecting the well structure and casing, testing the water quality and depth, and evaluating the condition of the existing pumping system, you will be able to assess the condition of the existing well accurately. This assessment is crucial for a successful hand pump installation, providing you with a reliable and efficient water supply for your needs.
Preparing The Well For Hand Pump Installation
Before installing a hand pump into an existing well, it’s important to properly prepare the well to ensure a smooth and successful installation. This involves shutting off the power supply to the existing pump, removing the existing pumping system and components, and cleaning the well to remove any debris or obstructions. Following these steps will help you prepare the well for the installation of a hand pump.
Shutting off the power supply to the existing pump
To start the process, you’ll need to shut off the power supply to the existing pump. This can usually be done by locating the breaker or switch that controls the pump’s power and turning it off. It’s important to ensure the power is completely shut off before proceeding with any further steps. This will prevent any unexpected operation of the pump during the installation process and ensure your safety.
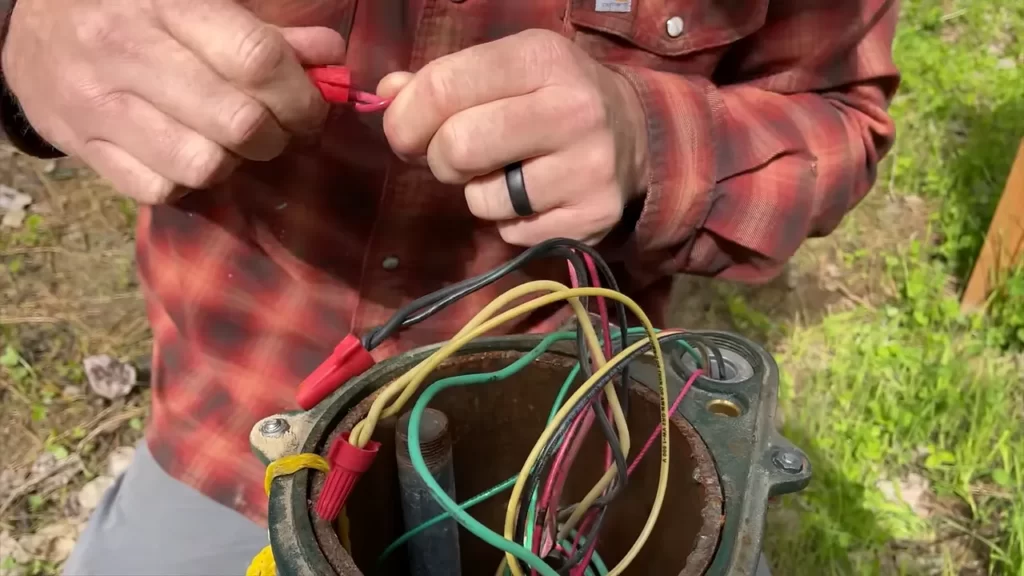
Removing the existing pumping system and components
Once the power supply is turned off, you can proceed with removing the existing pumping system and components. This may include disconnecting pipes, unscrewing fittings, and removing the pump itself. Refer to the manufacturer’s instructions or consult a professional if you are unsure about how to properly remove the components. Take care to label or make note of any parts that are removed for easier reinstallation in the future.
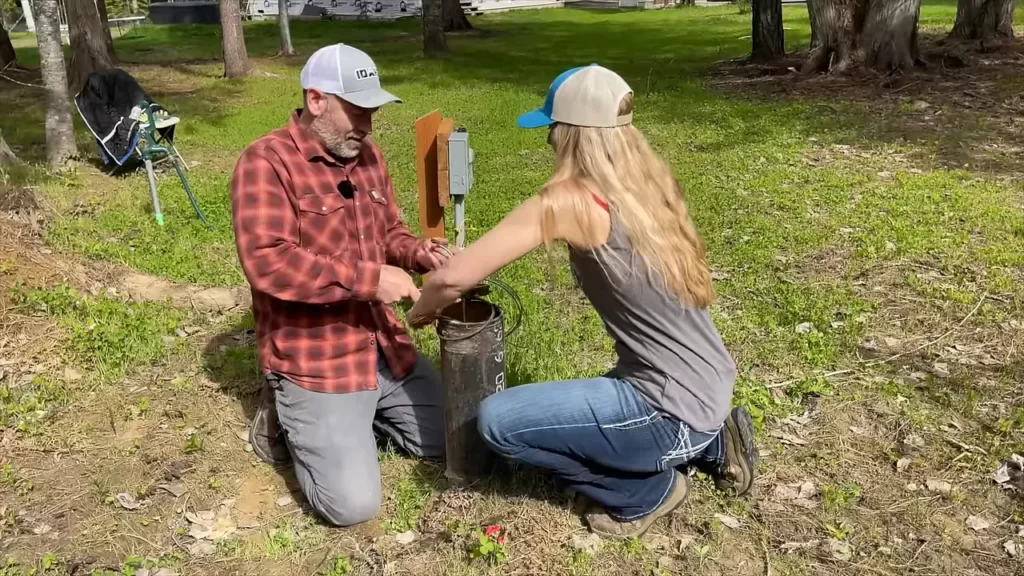
Cleaning the well and removing any debris or obstructions
After removing the existing pumping system, it’s crucial to clean the well and remove any debris or obstructions that may be present. Use a bucket or a wet/dry vacuum cleaner to remove any loose debris, such as leaves or dirt, from the bottom of the well. Additionally, use a well brush or wire brush to scrub the sides of the well casing and remove any built-up sediment or algae. This will help ensure the hand pump operates effectively and prolong its lifespan.
Furthermore, it is important to inspect the well for any signs of damage or contamination. Look for cracks, leaks, or signs of corrosion, and address any issues before proceeding with the installation. If you suspect that the well may be contaminated, it is advised to conduct a water quality test and take appropriate measures to ensure the safety of the water supply.
By following these steps and preparing the well properly, you will set a solid foundation for the successful installation of a hand pump. Taking the time to shut off the power supply, remove the existing pumping system, and clean the well will ensure a smooth and efficient installation process, ultimately providing you with a reliable and sustainable source of water.
Installing The Hand Pump
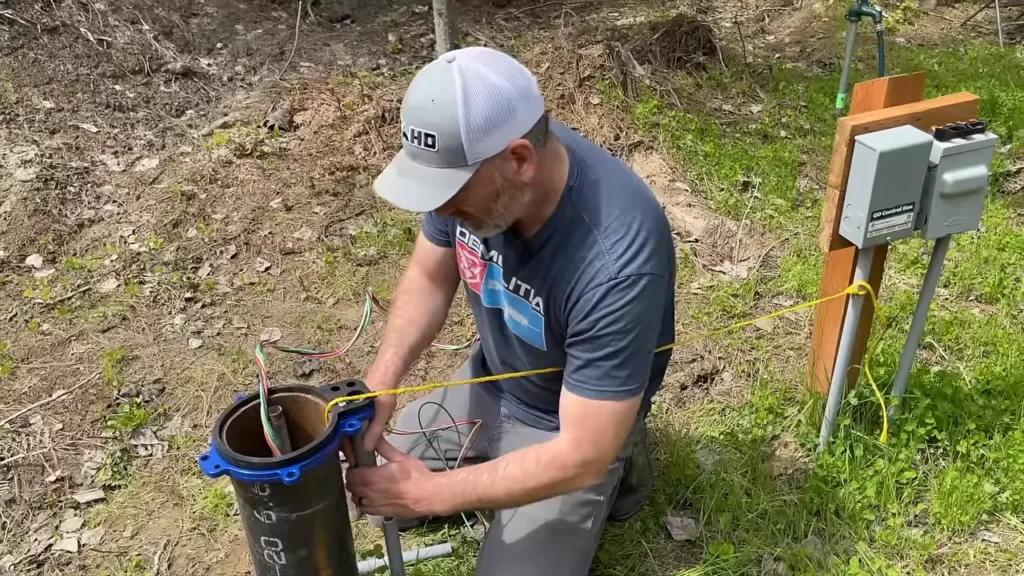
Attaching the hand pump to the well casing
Once you have prepared your existing well for installation, you can now begin the process of attaching the hand pump. This step is crucial as it ensures a secure and efficient connection between the pump and the well casing. To attach the hand pump to the well casing, follow these steps:
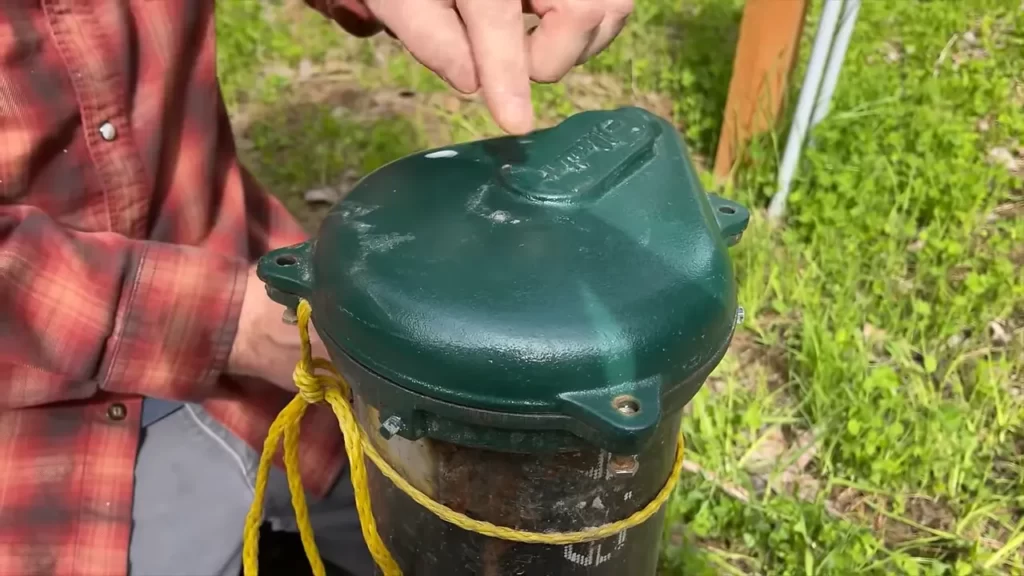
- First, locate the opening on top of the well casing. This is where the hand pump will be connected.
- Next, remove the cap or cover on the well casing opening. Ensure that the opening is clean and free from any debris or obstructions.
- Take the hand pump and carefully lower it onto the well casing opening. Align the mounting holes on the pump with the holes on the casing.
- Fasten the hand pump to the well casing using the provided screws or bolts. Make sure to tighten them securely but avoid over-tightening, as it can damage the pump or casing.
By attaching the hand pump to the well casing, you create a stable foundation for the pump assembly, allowing it to function effectively and safely.
Connecting the pump rod to the pump handle
Once the hand pump is securely attached to the well casing, the next step is to connect the pump rod to the pump handle. This connection allows you to operate the hand pump and extract water from the well. Follow these steps to achieve a proper connection:
- Locate the pump rod and the pump handle.
- Insert the pump rod into the hole on the pump handle, making sure it fits securely.
- Use the provided fastening mechanism, such as a bolt or pin, to secure the pump rod and handle together. Ensure a tight connection to prevent any movement during operation.
- Test the connection by gently moving the pump handle up and down. It should move smoothly without any looseness or wobbling.
Connecting the pump rod to the pump handle is a critical step in the installation process, as it allows you to manually operate the hand pump and access the water in your well.
Securing the pump assembly in place
After attaching the hand pump to the well casing and connecting the pump rod to the pump handle, the final step is to secure the entire pump assembly in place. This ensures stability and prevents any movement or displacement during use. Follow these steps to achieve a secure installation:
- Inspect the pump assembly to ensure all connections are properly tightened and secure.
- Identify any provided mounting brackets or straps that may be included with the hand pump.
- Position the mounting brackets or straps around the well casing and the pump assembly.
- Secure the brackets or straps tightly using the provided fastening mechanisms, such as screws or clamps.
- Check the pump assembly for any signs of movement or instability. If necessary, tighten the mounting brackets or straps further.
By properly securing the pump assembly in place, you ensure that it remains stable during operation, allowing for efficient and reliable water extraction from your well.
Priming And Testing The Hand Pump
Once you have successfully installed a hand pump into your existing well, the next crucial step is to prime and test the pump to ensure proper functionality. Priming the pump helps remove air and fill it with water, while testing it ensures that everything is working as intended. In this section, we will walk you through these essential steps in detail.
Priming the pump to remove air and fill it with water
To begin the priming process, locate the priming hole on the hand pump. This is usually situated near the pump handle or on top of the pump housing. Remove the priming cap or plug from the hole and set it aside in a safe place.
Next, take a bucket filled with water and pour it into the priming hole slowly. This water will help remove any air pockets within the pump and start filling it with water. Make sure to pour the water gradually, allowing it to fill the pump fully.
As you pour the water, keep an eye on the pump’s water level gauge. Once the water level reaches the recommended fill line, stop pouring and tightly seal the priming hole with the cap or plug you removed earlier. Ensure it is securely sealed to prevent any water leakage.
Testing the hand pump for proper functionality
Now that the pump is primed and filled with water, it’s time to test its functionality. Start by positioning a clean and empty bucket underneath the pump’s spout to catch the water that will be pumped out.
Gently pump the handle up and down in a smooth and controlled motion. Watch out for any abnormalities or unusual sounds during the pumping process. Ideally, the pump should operate smoothly, without any excessive resistance or strange noises.
Continue pumping until you see a steady flow of water being discharged into the bucket. The water should flow freely without any interruptions. If the flow is weak or interrupted, it may indicate a problem with the pump’s functioning or a blockage within the system.
Adjusting the pump settings if necessary
If you encounter any issues during the testing phase, such as weak water flow or strange noises, it may be necessary to adjust the pump settings. Refer to the manufacturer’s user manual or consult a professional for instructions on how to make these adjustments.
Remember, every hand pump model may have different settings and mechanisms, so it’s crucial to follow the specific guidelines provided by the manufacturer. Make any necessary adjustments carefully and ensure that you test the pump again after the changes to confirm their effectiveness.
In conclusion, priming and testing the hand pump are crucial steps in the installation process. By properly priming the pump and thoroughly testing its functionality, you can ensure that it will provide a reliable water supply for your needs. Remember to follow the manufacturer’s instructions and seek professional assistance if needed to troubleshoot any issues.
Ensuring Proper Maintenance And Troubleshooting
Regular maintenance to keep the hand pump in good condition
Maintaining your hand pump regularly is crucial to ensure its smooth functioning and longevity. Here are some maintenance tasks you should perform regularly:
- Clean the pump components: Regularly cleaning the hand pump components helps remove any debris or sediment that may accumulate over time. Use a soft cloth or brush to clean the handle, cylinder, and other parts to prevent blockages.
- Lubricate moving parts: Apply a suitable lubricant to the moving parts of the hand pump, such as the rod and handle, to reduce friction and ensure smooth operation. This helps prevent wear and tear and keeps the pump functioning optimally.
- Check for leaks: Inspect the pump system for any signs of leakage. Look for water puddles or moisture around the pump components. If you notice any leaks, address them promptly to prevent further damage to the pump and well.
- Test the pump regularly: Regular testing is essential to ensure the hand pump is functioning properly. Check if the pump dispenses water smoothly and if the water flow is consistent. If you experience any issues, move on to the troubleshooting steps below.
Troubleshooting common issues with hand pumps
Hand pumps can develop certain issues over time, but many common problems can be easily resolved. Here are some troubleshooting steps to help you address the most common issues:
- No water flow: If there is no water flow or it is minimal, it could indicate a blockage in the system. Check if the suction pipe or the foot valve is obstructed by debris or sediment. If so, clean these components and reassemble the pump before testing it again.
- Low water pressure: If you are experiencing decreased water pressure, it may be due to a worn-out or damaged piston seal. Inspect the seal and replace it if necessary. Additionally, check for any leaks in the system, as they can also cause a drop in water pressure.
- Pump handle resistance: If you encounter increased resistance when operating the pump handle, it could indicate a lack of lubrication. Apply lubricant to the moving parts of the pump and test it again. If the resistance persists, there may be an issue with the cylinder or the seal, which might require professional assistance.
- Inconsistent water flow: Inconsistent water flow can be caused by air being trapped in the system. To fix this issue, manually prime the pump by pumping water into it until the air is expelled. This should restore a consistent water flow.
Replacing worn-out parts or repairing any damages
Over time, some parts of the hand pump may wear out or become damaged. It is important to replace these parts promptly to ensure the optimal performance of the pump. Here are the steps to follow:
- Identify the damaged or worn-out part: Inspect the hand pump thoroughly to identify any parts that need replacement or repair. Common parts that may require attention include the piston seal, foot valve, or cylinder.
- Source the replacement part: Determine the make and model of your hand pump and find a suitable replacement part. Contact the manufacturer or a reliable supplier to obtain the correct part for your specific hand pump model.
- Follow the manufacturer’s instructions: Once you have the replacement part, carefully follow the manufacturer’s instructions to replace the damaged or worn-out component. Pay attention to any specific steps or precautions mentioned to ensure proper installation.
- Test the pump: After replacing the damaged part, test the hand pump to ensure it is working correctly. Check for any leaks, irregular water flow, or other issues. If everything seems to be in order, you can be confident that your hand pump is ready for use.
Benefits And Considerations Of Using A Hand Pump
Advantages of having a hand pump for your well
A hand pump can be a valuable addition to your existing well, offering several advantages. Here are some key benefits of using a hand pump:
- Reliability: Hand pumps are known for their durability and dependability. Unlike electric or solar pumps, hand pumps do not rely on external power sources, making them reliable even during power outages or emergencies.
- Cost-effectiveness: Hand pumps are an affordable alternative to electric or solar-powered pumps. They eliminate the need for electricity or fuel, resulting in significant cost savings over time.
- Easy installation: Installing a hand pump into your existing well is relatively simple and can be done without professional help in most cases. This makes it a convenient option for well owners looking to avoid complicated installation processes.
- Low maintenance: Hand pumps are designed to be low-maintenance, requiring minimal upkeep compared to other pumping systems. Regular lubrication and occasional replacement of rubber seals are usually the only maintenance tasks needed.
- Sustainable water source: Hand pumps offer a sustainable water source, as they can operate even without electricity or fuel. This makes them an ideal choice for remote locations or areas prone to power disruptions.
Factors to consider before installing a hand pump
Before installing a hand pump into your existing well, there are several factors to consider. These include:
- Depth of the well: The depth of your well plays a crucial role in determining the type of hand pump suitable for installation. Some hand pumps are designed specifically for shallow wells, while others can reach greater depths.
- Water table levels: It’s important to assess the water table levels in your area. If the water table is too low, a hand pump may not be an efficient option as it requires manual pumping to retrieve water.
- Well casing diameter: The diameter of your well casing will determine the size of the hand pump you can install. Ensure that the hand pump you choose matches the specifications of your well casing.
- Water usage requirements: Consider your water usage needs to determine if a hand pump can meet your requirements. Hand pumps are suitable for smaller-scale water needs but may not be suitable for high-volume usage.
Comparison between hand pumps and other pumping systems
When comparing hand pumps with other pumping systems, there are several factors to consider:
| Hand Pumps | Electric Pumps | Solar Pumps |
|---|---|---|
| Reliant on manual effort for pumping | Operate on electricity | Utilize solar power |
| Lower initial cost | Higher initial cost | Moderate initial cost |
| Low maintenance | May require regular maintenance | May require occasional maintenance |
| No electricity or fuel required | Reliant on electricity availability | Reliant on sunlight availability |
| Suitable for smaller-scale water needs | Can handle high-volume water requirements | Can handle moderate water usage |
By considering these factors, you can determine if a hand pump is the right choice for your well, or if an alternative pumping system would better suit your needs.
Frequently Asked Questions
Can You Add A Manual Pump To An Existing Well?
Yes, you can add a manual pump to an existing well. It is possible to install a manual pump alongside your existing system to provide an alternative water source. Please consult a professional to ensure proper installation and functionality.
How Much Does It Cost To Have A Hand Pump Installed On A Well?
The installation cost for a hand pump on a well varies, typically ranging from $500 to $1,500.
How Deep Of A Water Well Can You Use A Hand Pump?
Hand pumps can be used for water wells up to 300 feet deep.
Can You Tap Into An Existing Well?
Yes, it is possible to tap into an existing well.
Conclusion
To sum it up, installing a hand pump into an existing well is a straightforward process that can help ensure access to clean water without relying on electricity. By following the step-by-step guide and considering the important factors, you can enjoy the benefits of a reliable and cost-effective water supply system.
So why wait? Start your project today and embrace the convenience and sustainability hand pumps bring to your well.