To install a glass shower panel, measure the space, purchase the panel, apply silicone adhesive, and secure the panel in place using brackets or hinges. Are you considering upgrading your bathroom with a glass shower panel?
Installing a glass shower panel can add a touch of elegance and sophistication to your bathroom, creating a sleek and modern look. With a few simple steps, you can transform your shower space and enjoy a luxurious bathing experience. We will guide you through the process of installing a glass shower panel, from measuring the space to securing the panel in place.
By following these steps, you can successfully install a glass shower panel and enhance the aesthetic appeal of your bathroom.
Choosing The Right Glass Shower Panel
Installing a glass shower panel can be a fantastic way to add a touch of elegance and modernity to your bathroom. However, with a wide variety of options available on the market, it’s important to choose the right glass shower panel that suits your specific needs and preferences. In this section, we’ll explore some crucial factors to consider when selecting the perfect glass shower panel for your bathroom.
Consider the size and shape of your shower space
The first and foremost step in choosing the right glass shower panel is considering the size and shape of your shower space. Make sure to measure the dimensions accurately, so that you can select a panel that fits seamlessly into your bathroom. Whether you have a small corner shower or a spacious walk-in shower, it’s important to find a glass panel that complements the overall layout and design of your bathroom.
Determine the type of glass (tempered, frosted, etc.)
When it comes to the type of glass, there are various options to choose from. One of the most popular choices is tempered glass, a safety glass that is sturdy and resistant to breakage. Tempered glass is an excellent choice for families with children or individuals who prioritize safety. On the other hand, frosted glass allows for a higher level of privacy while still allowing natural light to filter through. Analyze your privacy needs and personal preferences to determine the type of glass that best suits your requirements.
Choose the frameless or framed option based on your preference
The next aspect to consider is whether you prefer a frameless or framed glass shower panel. Both options have their own advantages and aesthetic appeal. A frameless glass panel offers a sleek and minimalist look, providing an uninterrupted view of your beautiful tiles or fixtures. On the other hand, a framed glass panel presents a more traditional and classic appearance, with the added benefit of increased stability and support. Consider your bathroom style and personal taste when deciding between these two options.
Consider additional features like easy-clean coating
In addition to the basic factors, it’s worth considering additional features that can enhance the functionality and cleanliness of your glass shower panel. One such feature is an easy-clean coating, which helps to repel water spots and soap scum, making maintenance a breeze. With this protective coating, you can spend less time scrubbing and more time enjoying a sparkling clean shower. Explore the various additional features available, and choose those that align with your cleaning preferences and time constraints.
With these factors in mind, you can now confidently select the perfect glass shower panel that not only complements your bathroom but also meets your practical and aesthetic requirements. Remember to measure accurately, consider the type of glass, choose between framed and frameless options, and explore additional features. Happy shower panel shopping!

Preparing The Shower Space
Before installing a glass shower panel, it’s important to properly prepare the shower space. This ensures a smooth and hassle-free installation process, and guarantees the longevity and durability of the glass panel. To prepare the shower space, follow these simple steps:
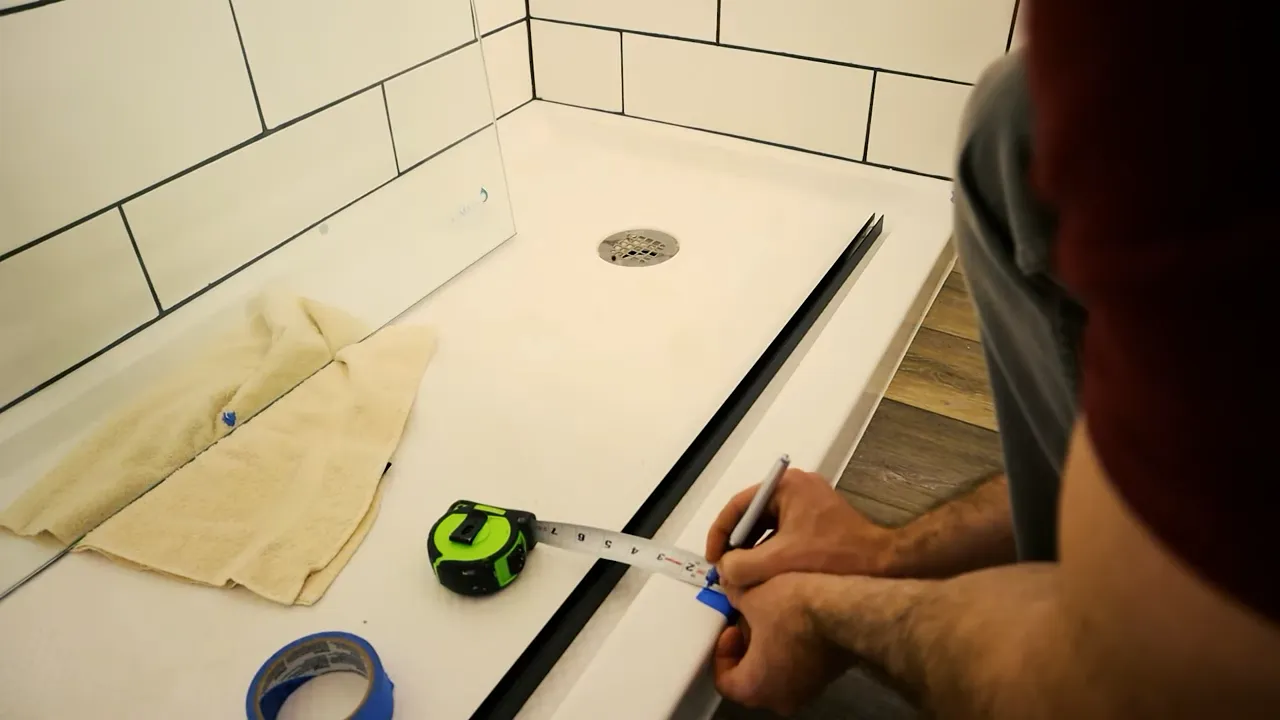
Measure the dimensions of the shower space
Start by measuring the dimensions of your shower space accurately. This will help you determine the size of the glass panel you need to purchase. Measure the width, height, and depth of the shower space, and note down these measurements. It’s essential to have precise measurements to ensure a perfect fit.
Ensure the walls are properly prepared and leveled
Next, make sure that the walls surrounding the shower space are properly prepared and leveled. Check for any cracks, uneven spots, or deterioration on the walls. If necessary, patch up any imperfections and smooth out the surface. Use a level to ensure that the walls are perfectly straight and that there are no slopes or slants. This will provide a stable and secure base for the glass panel installation.
Remove any existing shower doors or panels
If you have any existing shower doors or panels, you’ll need to remove them before installing the glass panel. Carefully unscrew and detach any hardware or fixtures that hold the doors or panels in place. Follow the manufacturer’s instructions for proper removal, as this may vary depending on the type and design of your existing shower enclosure.
Clean the shower space thoroughly before installation
Before proceeding with the installation, it’s crucial to clean the shower space thoroughly. Use a non-abrasive cleaner to remove any soap scum, mold, or residue that may have accumulated over time. Pay close attention to the corners and seams of the shower space, as these areas are prone to buildup. Ensure that the surface is dry and free from any debris before proceeding with the installation process.

Installing The Glass Shower Panel
Installing the Glass Shower Panel
When it comes to installing a glass shower panel, following a step-by-step process ensures a successful and secure installation. In this guide, we will go through each stage of the installation process, starting with gathering all the necessary tools and materials. Let’s dive right in!
Gather all the necessary tools and materials
Before starting the installation, it’s crucial to have all the required tools and materials within reach. This ensures a smooth installation process without any interruptions or delays. The following list outlines the essential items you will need:
– Screwdriver (Phillips or flathead, depending on the hardware)
– Drill
– Level
– Measuring tape
– Silicon sealant
– Anchors and screws (for mounting the hardware)
– Cleaning supplies (glass cleaner, cloth)
Prepare the glass panel for installation
Before handling the glass panel, it’s important to ensure it is clean and free from any dirt or debris. Use a glass cleaner and a soft cloth to wipe down both sides of the panel carefully. Make sure no streaks or smudges remain, as they can affect the overall appearance once installed.
Install any necessary hardware or brackets
Once the glass panel is prepared, it’s time to install any necessary hardware or brackets. Follow the manufacturer’s instructions to ensure proper placement and secure mounting. Use the drill and appropriate screws or anchors to attach the hardware firmly to the wall. Ensure the brackets or hardware are level and aligned correctly before proceeding further.
Carefully position and mount the glass panel
Next, carefully position the glass panel against the installed brackets or hardware. Ensure it lines up properly and fits securely. Set the level against the top edge of the panel to ensure it is straight and properly aligned. Make any adjustments as necessary to achieve the desired positioning.
Secure the glass panel in place
With the glass panel properly positioned, proceed to secure it in place. Apply a thin bead of silicon sealant along the edges where the glass meets the wall or hardware. This provides additional support and helps prevent water leakage. Be sure to smooth the sealant with a finger or tool to create a clean finish.
Check for proper alignment and stability
Once the glass panel is secured, take a final moment to check for proper alignment and stability. Use the level to ensure the panel remains straight and isn’t tilting or sagging. Test its sturdiness by gently applying pressure to different areas of the panel. A stable and aligned glass panel is essential for long-term durability and safety.
In conclusion, installing a glass shower panel requires careful preparation and execution. By following these steps – gathering the necessary tools, preparing the glass panel, installing hardware or brackets, positioning and mounting the panel, securing it in place, and checking for alignment and stability – you can achieve a successful installation that enhances the beauty and functionality of your bathroom.

Tips For Maintaining And Cleaning Glass Shower Panels
Maintaining and cleaning your glass shower panels is essential to keep them looking sparkling and beautiful. With regular care and attention, you can ensure your glass shower panels stay in top condition for years to come. Here are some tips to help you maintain and clean your glass shower panels effectively:
1. Use a mild, non-abrasive cleaner to clean the glass
When it comes to cleaning your glass shower panels, it is important to use a mild, non-abrasive cleaner that will not scratch or damage the glass. Avoid using harsh chemicals or abrasive cleaners, as they can leave behind residue or cause the glass to lose its shine. Instead, opt for gentle glass cleaners or a solution of vinegar and water. These cleaners are effective in removing soap scum and hard water deposits without harming the glass.
2. Regularly wipe down the glass to prevent soap scum buildup
One of the key ways to prevent soap scum buildup on your glass shower panels is to regularly wipe them down after each use. This simple step can go a long way in maintaining the cleanliness and clarity of your glass. After showering, grab a squeegee or a soft microfiber cloth and quickly wipe the entire surface of the glass panels. This will remove any water droplets or soap residue that may have accumulated and help prevent the buildup of scum.
3. Avoid using harsh chemicals or abrasive cleaners
Harsh chemicals and abrasive cleaners can damage the glass and its protective coating, leading to scratches and a dull appearance. It is important to avoid using these products on your glass shower panels. Instead, opt for mild cleaners that are specifically designed for glass surfaces. These cleaners are gentler on the glass and will effectively remove any dirt or grime without causing any damage.
4. Dry the glass panel after each use to prevent water spots
To prevent unsightly water spots on your glass shower panels, it is crucial to dry them thoroughly after each use. Use a clean, lint-free towel or a squeegee to remove any remaining moisture from the glass surface. Pay extra attention to the corners and edges where water tends to collect. This practice will help maintain the clarity and shine of your glass panels, making them look spotless and well-maintained.
5. Inspect and repair any loose or damaged hardware
In addition to keeping the glass clean, it is essential to inspect and repair any loose or damaged hardware on your glass shower panels. Regularly check the hinges, brackets, and handles for any signs of wear or damage. Tighten loose screws and bolts and replace any damaged or worn-out hardware promptly. By doing so, you will ensure that your glass shower panels are not only aesthetically pleasing but also safe and secure to use.
Maintaining and cleaning your glass shower panels doesn’t have to be a daunting task. By following these simple tips and incorporating them into your regular cleaning routine, you can enjoy the beauty and clarity of your glass shower panels for years to come!

Enhancing The Aesthetics Of Your Glass Shower Panel
Installing a glass shower panel can instantly elevate the look and feel of your bathroom. Not only does it create a sleek and modern appearance, but it also allows for more light and space in your shower area. However, why settle for a basic glass panel when you can enhance its aesthetics and turn it into a stunning focal point? Let’s explore some creative ideas to take your glass shower panel to the next level.
Consider Adding Decorative Elements or Patterns to the Glass
One way to make your glass shower panel stand out is by incorporating decorative elements or patterns onto the glass surface. These can be achieved through various techniques such as etching, frosted glass, or even custom-designed glass panels. By adding a unique design or pattern, you can personalize your shower space and create a visual interest that is sure to impress.
Install Lighting Fixtures to Create Ambiance
Lighting plays a crucial role in enhancing the ambiance of any space, and your glass shower panel is no exception. Consider installing lighting fixtures that are strategically placed to illuminate the glass panel, creating a beautiful glow. LED strip lights or recessed lighting can be installed along the sides or top of the shower panel to add a touch of sophistication. This not only enhances the aesthetics but also creates a relaxing and spa-like experience.
Use a Rain Showerhead or Other Unique Shower Accessories
Incorporating unique shower accessories can further enhance the aesthetics of your glass shower panel. Consider installing a rain showerhead, which not only provides a luxurious bathing experience but also adds a modern and stylish touch to your shower space. Other accessories such as body jets, handheld showerheads, or even built-in speakers can elevate the overall look and functionality of your glass shower panel.
Incorporate Plants or Natural Elements into the Shower Space
Bringing elements of nature into your shower space can create a serene and refreshing ambiance. Consider incorporating potted plants or natural elements such as pebbles, bamboo, or wood accents around your glass shower panel. These natural elements not only add a touch of greenery but also create a spa-like atmosphere, promoting relaxation and rejuvenation.
So why settle for a basic glass shower panel when you can transform it into a stunning work of art? With these creative ideas, you can enhance the aesthetics of your glass shower panel and create a truly luxurious and inviting shower experience.
Frequently Asked Questions
How Do You Install A Shower Screen Panel?
To install a shower screen panel, follow these steps: 1. Measure the space and choose the right size. 2. Mark the position and drill holes for mounting. 3. Attach the panel with screws or brackets. 4. Seal the edges with silicone caulk for waterproofing.
5. Clean and maintain regularly for longevity.
What Holds Shower Glass In Place?
U-shaped metal brackets, called clips, hold shower glass in place. These clips are secured to the wall and act as supports for the glass panels.
How Do You Seal Frameless Glass Shower Panels?
To seal frameless glass shower panels: 1. Clean the glass thoroughly with a glass cleaner. 2. Apply a silicone sealant along the edges of the panels. 3. Use a caulk gun to ensure a smooth and even application. 4. Wipe away any excess sealant with a damp cloth.
5. Allow the sealant to dry completely before using the shower.
Can You Install Shower Glass Yourself?
Yes, you can install shower glass yourself. But it requires careful handling and knowledge of the process. Make sure to measure accurately, use proper tools, and follow installation instructions to ensure a secure and watertight fit. If unsure, it’s best to consult a professional.
Conclusion
Installing a glass shower panel can bring a touch of elegance and functionality to your bathroom. With the right tools and steps, you can easily transform your shower space. From measuring and cutting the glass panel to properly securing it, we have covered all the essential steps in this guide.
By following these instructions, you can successfully install a glass shower panel and create a stunning focal point in your bathroom. Enjoy the beauty and practicality of your newly installed glass shower panel!