To install a Generac generator transfer switch, first, turn off the main power supply of your house, then mount the transfer switch next to the main electrical panel.
Assessing Power Needs And Safety Requirements*
Calculating power needs for your home
Before installing a Generac generator transfer switch, it is crucial to understand your home’s power needs. Determining the wattage required to keep your essential appliances and systems running smoothly is the first step in the installation process. Here’s how you can calculate your power needs:
- Create a list of all the essential items that you want to power during a power outage. This might include lighting, refrigeration, heating or cooling systems, and important electrical devices.
- Consult the manufacturer’s manuals or labels on each appliance to determine the wattage it requires.
- Add up the wattage of all the appliances and devices to find the total power needs of your home.
- Consider the starting wattage, also known as surge wattage, required by certain devices like air conditioners or refrigerators. This value is typically higher than their continuous running wattage.
By accurately calculating your power needs, you can ensure that your generator transfer switch and generator have the capacity to handle the load, keeping your household running smoothly during power outages.
Determining the right generator capacity
To select the appropriate generator capacity for your home, you need to consider both your power needs and the generator’s capacity to handle those needs. Here’s how you can determine the right generator capacity:
- Choose a generator that is capable of meeting or exceeding the total power needs of your home, as calculated earlier. It is recommended to have some additional wattage capacity to account for any unforeseen power demands.
- Consider the type of fuel available and the runtime requirements. Generators are available in various fuel types, such as propane, natural gas, or diesel. Additionally, decide on the desired runtime of the generator during an outage.
- Refer to the generator manufacturer’s specifications and guidelines to determine its capacity and features suitable for your home.
- Consult with a professional electrician or a Generac authorized dealer for expert advice on selecting the right generator capacity. They can perform a thorough evaluation of your power needs and suggest the most appropriate option.
It is essential to choose a generator with the appropriate capacity to ensure efficient power backup and avoid overloading the system, leading to potential electrical hazards.
Ensuring compliance with safety regulations
When it comes to installing a Generac generator transfer switch, ensuring compliance with safety regulations is of utmost importance. These regulations are in place to protect both your home and the utility workers who may be working on power lines. Here are some safety requirements to consider:
- Ensure that the installation is conducted by a licensed and experienced electrician who is familiar with local electrical codes and safety regulations.
- Install the transfer switch in a location that allows easy access and is clear of obstructions. The switch should be protected from the elements and placed in a well-ventilated area.
- Properly ground the generator and transfer switch to prevent electrical shocks and malfunctions.
- Regularly inspect and maintain the generator and transfer switch to ensure their continued safe operation.
By adhering to safety regulations and following proper installation procedures, you can ensure the safe and reliable use of your Generac generator transfer switch while protecting both your home and the electrical infrastructure.
Selecting The Right Generac Generator Transfer Switch
When it comes to installing a Generac generator transfer switch, selecting the right one is crucial for ensuring a seamless and reliable power transfer during an outage. The transfer switch is the brain of your backup power system, allowing you to switch from utility power to generator power with ease. In this article, we will walk you through the process of selecting the suitable Generac generator transfer switch for your needs, taking into consideration factors such as understanding different types of transfer switches, choosing the right one for your generator, and considering future expansion and backup power needs.
Understanding different types of transfer switches
Before diving into the selection process, it’s important to have a solid understanding of the different types of transfer switches available. Generac offers two main types: manual transfer switches and automatic transfer switches.
Manual transfer switches
Manual transfer switches require manual intervention to transfer power from the utility to the generator. They come equipped with a manual switch that needs to be operated by the user when an outage occurs. These types of switches are typically more cost-effective than automatic transfer switches, making them a popular choice for small-scale applications.
Automatic transfer switches
Automatic transfer switches, on the other hand, are designed to seamlessly and automatically transfer power from the utility to the generator when an outage is detected. These switches eliminate the need for manual intervention, providing convenience and peace of mind. Automatic transfer switches are ideal for larger properties or those with critical power needs.
Choosing the suitable transfer switch for your generator
When selecting a Generac generator transfer switch, it’s essential to choose one that is compatible with your generator model and capacity. Generac offers transfer switches in various sizes, ranging from 50 amps to 400 amps, allowing you to find the perfect match for your generator’s power output.
Additionally, consider the number of circuits you need to power during an outage. Generac transfer switches are available in different configurations, such as 8-circuit, 10-circuit, 16-circuit, and whole-house options. Determine your power needs and select a transfer switch that can accommodate the number of circuits you require.
Considering future expansion and backup power needs
When investing in a Generac generator transfer switch, it’s important to consider your future expansion plans and backup power needs. If you anticipate adding more appliances or circuits in the future, it’s wise to choose a transfer switch with additional slots or circuits to accommodate these potential expansions. This will save you from having to replace the transfer switch down the line.
Moreover, if you have specific power requirements, such as powering air conditioning units or other high-demand appliances, you may need a transfer switch with a higher amp rating to handle the load. Take into consideration not only your current backup power needs but also any potential future power demands that may arise.
By understanding the different types of transfer switches, selecting the appropriate one for your generator model and power needs, and considering future expansion plans, you can ensure that you choose the right Generac generator transfer switch that will provide seamless and reliable power transfer during outages.
Gathering The Necessary Tools And Materials
Before you begin installing a Generac generator transfer switch, it’s important to gather all the necessary tools and materials. This will ensure a smooth and hassle-free installation process. In this section, we will guide you through the steps of creating a checklist of required tools, gathering all the needed materials and components, and making sure you have the appropriate electrical wiring.
Creating a Checklist of Required Tools
To start off, it’s crucial to have a comprehensive checklist of all the tools you will need for this installation. Here is a list of essential tools:
| Tools |
|---|
| Screwdriver set |
| Wire strippers |
| Wire cutters |
| Hammer |
| Measuring tape |
| Level |
| Electrical pliers |
Make sure to double-check this list and ensure you have all the required tools readily available. Having everything in place will save you time and prevent any unnecessary delays during the installation process.
Gathering all the Needed Materials and Components
In addition to the tools, it’s equally important to gather all the necessary materials and components. Here are the items you will need for installing a Generac generator transfer switch:
- Generac generator transfer switch
- Electrical cables
- Wire nuts
- Junction boxes
- Mounting brackets
- Conduit
Again, it’s crucial to cross-check this list and ensure you have all the required materials and components before proceeding to the installation. This will help prevent any frustration or delays during the process.
Making Sure You Have the Appropriate Electrical Wiring
Lastly, before you start the installation, it’s imperative to ensure that you have the appropriate electrical wiring. This is crucial to ensure the safe and effective functioning of your Generac generator transfer switch.
Here are a few points to consider when checking your electrical wiring:
- Check the voltage and phase requirements of your generator and transfer switch.
- Make sure the wiring is properly grounded and meets the necessary electrical code standards.
- Inspect the existing electrical panel to determine if any upgrades or modifications are needed.
If you have any doubts or concerns about the electrical wiring, it’s highly recommended to consult a certified electrician. They will help ensure that the wiring is safe and up to code, providing you with peace of mind.
By gathering the necessary tools and materials and ensuring appropriate electrical wiring, you are now ready to move on to the next steps of installing your Generac generator transfer switch. In the next section, we will guide you through the process of preparing the installation site.
Obtaining The Required Permits And Permissions
Before you can begin installing your Generac generator transfer switch, it’s important to ensure that you have obtained all the necessary permits and permissions required by your local regulations. Taking the time to understand and adhere to these guidelines will help you avoid any potential legal issues and ensure a safe and compliant installation.
Understanding local regulations and requirements
The first step in obtaining the required permits and permissions is to familiarize yourself with the local regulations and requirements in your area. Each municipality may have its own set of guidelines for generator installations, so it’s crucial to research and understand them.
Local regulations often cover aspects such as the placement of the generator, noise restrictions, emissions, electrical codes, and zoning requirements. It’s essential to gather all the necessary information regarding these regulations before moving forward.
Applying for the necessary permits and permissions
Once you have a clear understanding of your local regulations, you can proceed with applying for the necessary permits and permissions. This step typically involves contacting your local building department or permitting office and submitting an application.
When applying, ensure that you provide all the required information, which may include the generator specifications, proposed installation plans, and any supporting documentation. Pay attention to any specific forms or fees that may need to be submitted along with your application.
It’s important to note that the application process can vary depending on your location. Some municipalities may require inspections or additional paperwork before granting the permits. Be prepared to follow any additional guidelines specified by the local authorities.
Following any additional guidelines or restrictions
Once you’ve obtained the necessary permits and permissions, it’s essential to adhere to any additional guidelines or restrictions that may have been imposed. These guidelines are put in place to ensure the safe and proper installation of your Generac generator transfer switch.
This may include guidelines on the distance from buildings or property lines, installation height requirements, ventilation, or even the type of fuel storage you’re allowed to use. Failure to comply with these guidelines can result in fines or even the revocation of your permits.
Make sure to carefully review and understand any additional guidelines or restrictions outlined in your permits to ensure a smooth and complaint installation process.
By taking the time to understand your local regulations, applying for necessary permits, and adhering to additional guidelines, you can ensure a safe and legal installation of your Generac generator transfer switch. Following these steps will not only provide peace of mind but also protect your investment in the long run.
Conducting A Site Survey
When it comes to installing a Generac generator transfer switch, conducting a site survey is a crucial step that shouldn’t be overlooked. By assessing the site and its surroundings, you can ensure a smooth and efficient installation process. In this section, we will focus on conducting a site survey, including identifying the ideal location for the transfer switch, assessing the accessibility and proximity to the generator, and considering any potential obstacles or challenges.
Identifying the ideal location for the transfer switch
Before you start the installation process, it’s important to determine the ideal location for your Generac generator transfer switch. This location should be easily accessible and should comply with local safety regulations. It’s recommended to choose a dry and well-ventilated area, away from direct sunlight.
Make sure the location is close to the main electrical panel to minimize wiring distance and ensure efficient power transfer during an outage. Additionally, consider a location that is convenient for the homeowner to access in case of any maintenance or troubleshooting needs.
Assessing the accessibility and proximity to the generator
The transfer switch should be situated in a location that allows for easy access during installation, as well as future maintenance and repairs. This will ensure that technicians can work efficiently and effectively. Consider the clearance requirements stated in the manufacturer’s guidelines and allow enough space around the transfer switch for safe operation.
Moreover, the proximity to the generator is crucial. Place the transfer switch within a reasonable distance from the generator to minimize the length of the electrical cables required. Shorter cables not only reduce the complexity of the installation process, but also help to minimize energy loss and potential signal degradation.
Considering any potential obstacles or challenges
When conducting a site survey for your Generac generator transfer switch, it’s important to assess any potential obstacles or challenges that may affect the installation. Obstacles could include structural features like walls or structural support beams that could hinder the wiring process or increase installation costs. Identifying these obstacles early on will allow you to plan accordingly and find effective solutions.
In addition, consider any challenges related to electrical wiring, such as the distance between the electrical panel and the transfer switch location. If the distance is too far, additional materials like conduit or wire may be required to connect the two. By considering and addressing these challenges during the site survey, you can ensure a smooth and streamlined installation process.
Shutting Off And Isolating Power
Safely shutting off the main power supply
Before installing a Generac generator transfer switch, safety should be the utmost priority. The first step in this process is to shut off the main power supply. This will ensure that there is no live electricity flowing through the electrical panel. Follow these steps to safely shut off the main power supply:
- Locate the main electrical panel in your home.
- Identify the main circuit breaker, which is typically larger than the other breakers.
- Flip the main circuit breaker to the “off” position.
- Verify that all power to the panel has been shut off by checking that lights and appliances are no longer functioning.
- Take special care not to touch any live wires or electrical components during this process.
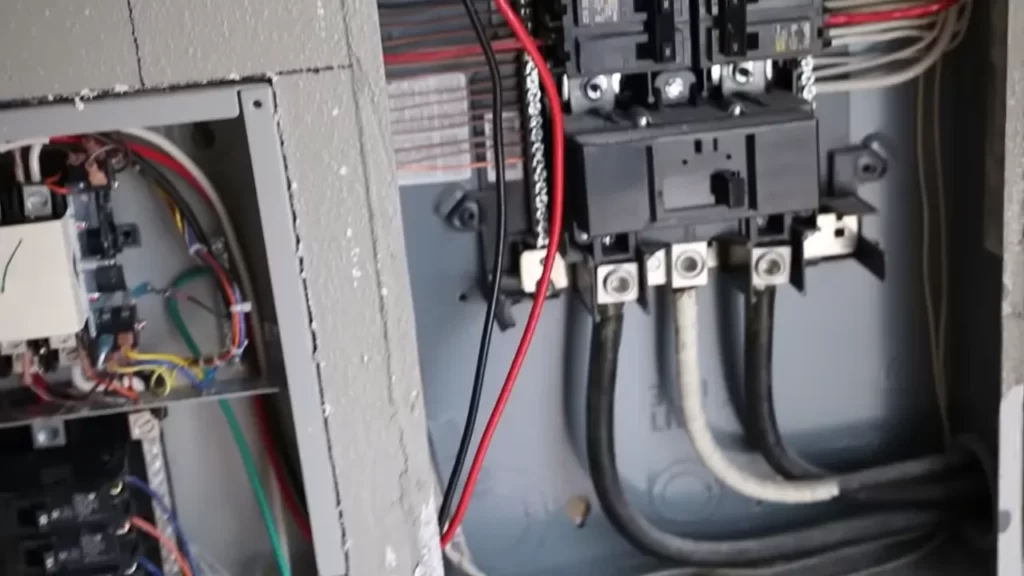
Disconnecting the utility power from the electrical panel
Once the main power supply is shut off, the next step is to disconnect the utility power from the electrical panel. This will ensure that the generator can provide power to your home without interference from the utility power. Follow these steps to safely disconnect the utility power:
- Locate the service entrance cables coming into your main electrical panel.
- Identify the main service disconnect switch, which is typically located near the electric meter or at the top of the panel.
- Flip the main service disconnect switch to the “off” position.
- Use a voltage tester to verify that there is no power coming into the electrical panel.
- Proceed with caution and ensure that no electrical connections are touched with bare hands.
Ensuring the entire system is isolated from the grid
After shutting off the main power supply and disconnecting the utility power, it is crucial to ensure that the entire system is isolated from the grid. This will prevent any potential backfeeding of power that could be dangerous for utility workers during an outage. Follow these steps to ensure a safe isolation from the grid:
- Locate the transfer switch panel that you will be installing.
- Follow the manufacturer’s instructions to properly wire the transfer switch to the electrical panel.
- Ensure that all wirings are correctly connected and secured.
- Double-check all connections to confirm that they are tight and properly insulated.
- Perform a final inspection to make sure that all connections are secure and that there are no visible signs of damage.
In conclusion, shutting off and isolating power properly is crucial for a safe generator transfer switch installation. By following these steps and taking necessary precautions, you can ensure a smooth and secure process.
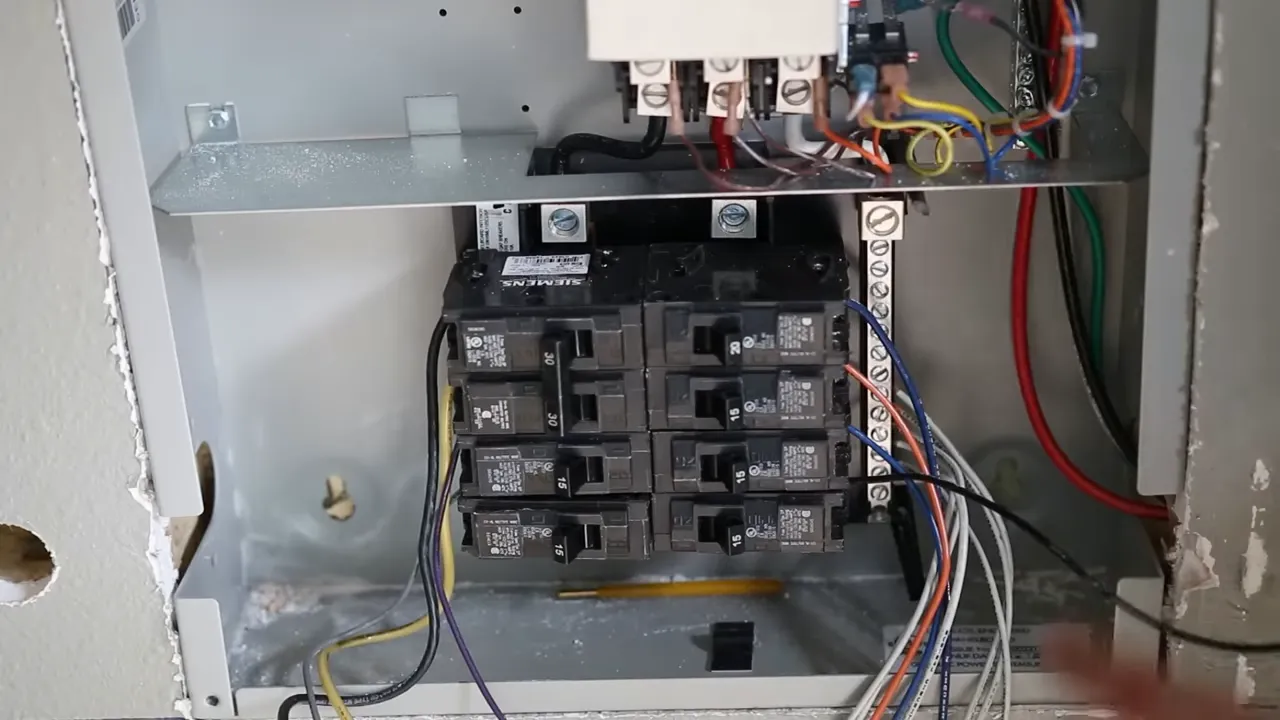
Mounting And Wiring The Transfer Switch
Mounting and wiring the transfer switch for your Generac generator is a crucial step in ensuring a seamless and safe operation. In this section, we will guide you through the process of mounting the transfer switch in the chosen location, connecting it to the main electrical panel, and properly routing and securing the electrical wires.
Mounting the transfer switch in the chosen location
Before mounting the transfer switch, it is essential to select an appropriate location that meets the installation requirements. Take into consideration factors such as accessibility, ventilation, and proximity to the main electrical panel. Once you have chosen the location, follow these steps:
- Begin by marking the position of the transfer switch on the wall or surface. Ensure that it is level and at a suitable height for easy access.
- Using the appropriate screws and anchors, securely mount the transfer switch to the marked location. Double-check that it is securely attached before proceeding.
- Next, remove the transfer switch cover by unscrewing the screws. This will expose the inner wiring components for connection.
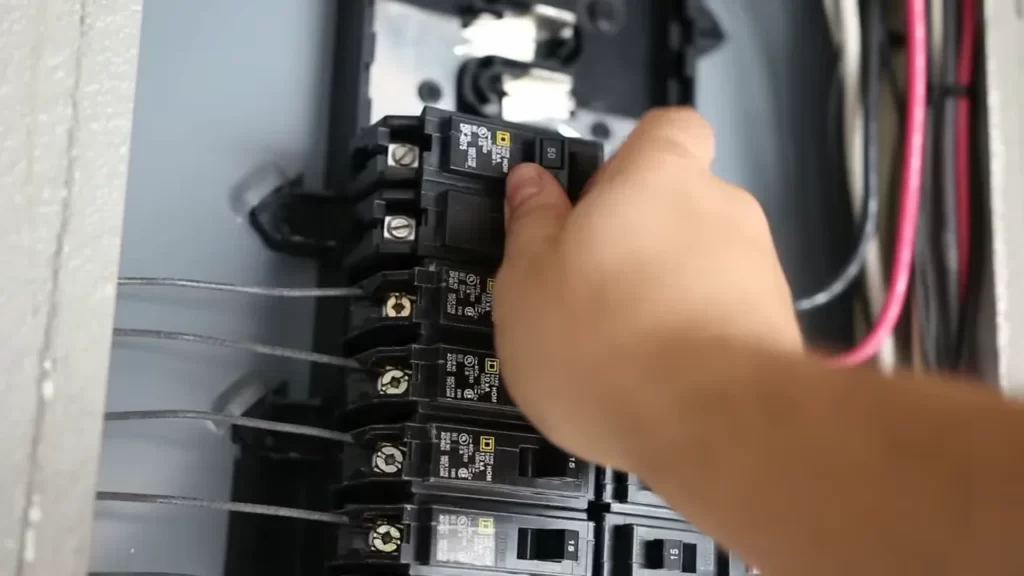
Connecting the transfer switch to the main electrical panel
Now that you have mounted the transfer switch, it’s time to establish the connection between the transfer switch and the main electrical panel. Follow these steps carefully:
- Locate the knockout hole on the bottom or side of the transfer switch, which will serve as the entry point for the electrical cable. Remove the knockout using pliers or a knockout punch tool.
- Measure and cut the electrical cable to the appropriate length, leaving extra slack for easy installation.
- Feed the cable through the knockout hole and connect it to the transfer switch using the provided wiring connectors. Make sure to follow the manufacturer’s instructions for proper wiring configuration.
- Once the connection is secured, route the other end of the electrical cable to the main electrical panel.
- Open the main electrical panel and locate an available knockout hole. Remove it using the same method mentioned earlier.
- Carefully feed the cable through the knockout hole and connect it to the designated breaker in the main electrical panel.
- Tighten the wiring connections in both the transfer switch and the main electrical panel to ensure a reliable electrical connection.
Properly routing and securing the electrical wires
Routing and securing the electrical wires is an essential step to prevent any hazards and ensure a clean and organized installation. Follow these guidelines:
- Carefully route the electrical wires from the transfer switch to the main electrical panel, avoiding any sharp edges or potential sources of damage.
- Secure the wires at regular intervals using appropriate cable clamps or wire straps. This will prevent excessive movement and minimize strain on the connections.
- Ensure that the wires are not bent or twisted excessively, as this can damage the insulation and compromise the electrical connection.
- Once you have routed and secured the wires, reattach the transfer switch cover to protect the inner wiring components.
With the transfer switch properly mounted and wired, you are now closer to enjoying the convenience of a Generac generator system. As always, refer to the manufacturer’s instructions and consult a licensed electrician if you are unsure about any aspect of the installation process.
Connecting The Generator To The Transfer Switch
Once you have successfully installed the generac generator transfer switch, the next step is to connect your generator to the transfer switch. This crucial step ensures that your generator can supply power to your home during an outage. In this section, we will guide you through the process of connecting the generator to the transfer switch, highlighting the key steps and considerations along the way.
Installing the Generator’s Inlet Box and Cord
The first step in connecting your generator to the transfer switch is to install the generator’s inlet box and cord. The inlet box serves as a connection point between the generator and the transfer switch. It allows the generator to supply power to the transfer switch, which then distributes the power to your home.
To install the inlet box, follow these steps:
- Choose a suitable location for the inlet box near your generator. Ensure that it is easily accessible and meets any local code requirements.
- Mount the inlet box securely to a wall or other appropriate surface using the provided hardware.
- Connect the inlet box to the generator using a suitable power cord. Make sure to use a cord that is compatible with your generator and transfer switch.
- Ensure that the power cord is securely connected to the inlet box and the generator. Check for any loose connections or exposed wiring.
- Test the connection by starting your generator and verifying that power is flowing to the inlet box.
Running the Power Cable from the Generator to the Transfer Switch
Once the inlet box is properly installed and connected to the generator, the next step is to run the power cable from the generator to the transfer switch. The power cable carries the electrical current from the generator to the transfer switch, allowing it to distribute the power to your home’s electrical system.
Here’s how you can run the power cable:
- Determine the most efficient and practical route for running the power cable from the generator to the transfer switch.
- Ensure that the power cable is properly sized and rated for the load it will be carrying.
- Install conduit or use other appropriate wiring methods to protect and secure the power cable along its route.
- Carefully thread the power cable through the conduit or other wiring methods, ensuring that it is properly supported and protected.
- Connect the power cable to the inlet box and the transfer switch, making sure to follow the manufacturer’s instructions.
- Inspect the power cable for any signs of damage or wear. Repair or replace it if necessary.
Making the Appropriate Connections between the Generator and Transfer Switch
Once the power cable is properly installed, the final step is to make the appropriate connections between the generator and transfer switch. These connections ensure that power is transmitted safely and efficiently between the two devices.
Follow these steps to make the connections:
- Refer to the manufacturer’s instructions to determine the specific wiring configuration for your generator and transfer switch.
- Ensure that the transfer switch is in the off position and that the generator is not running during the connection process.
- Make the necessary electrical connections between the generator and transfer switch, following the provided wiring diagram.
- Tighten all electrical connections securely using the appropriate tools.
- Perform a final inspection of all connections to ensure they are properly made and secure.
- Test the generator and transfer switch by starting the generator and transitioning the transfer switch to the generator power source. Verify that power is being distributed to your home.
By following these steps and making the necessary connections, you can ensure that your generator is properly connected to the transfer switch, ready to supply power to your home in the event of an outage.
Testing And Inspecting The Installation
Verifying the proper installation of all components
After successfully installing the Generac generator transfer switch, it is important to ensure that all components have been installed properly. This verification process ensures that the transfer switch will function correctly during power outages and provide reliable backup power to your home. Before proceeding with any tests or inspections, visually inspect the installation to check for any loose connections, damaged wires, or any other signs of incorrect installation. Additionally, refer to the installation manual provided by Generac for specific instructions and guidelines for your specific transfer switch model.
Performing necessary tests and inspections
Once you have verified the proper installation of all components, it is time to perform necessary tests and inspections to ensure the transfer switch functions correctly. Start by conducting a visual inspection of the transfer switch, checking for any physical damages or loose connections. Next, test each individual component of the transfer switch, such as the wiring, breakers, and control panel, to ensure they are functioning as intended. Pay close attention to any abnormal sounds or smells during testing, as these could indicate a faulty component that requires further inspection or replacement.
Ensuring the transfer switch functions correctly during power outages
One of the most important aspects of testing and inspecting the Generac generator transfer switch is ensuring that it functions correctly during power outages. To simulate a power outage, turn off the main power supply to your home and observe how the transfer switch automatically switches from utility power to generator power. Check that all circuits connected to the transfer switch are receiving power and operating as expected. It is also crucial to test the automatic transfer switch feature by restoring power and observing the switch’s ability to transfer back to utility power seamlessly.
In conclusion, testing and inspecting the installation of a Generac generator transfer switch is crucial for ensuring it functions correctly during power outages and provides reliable backup power to your home. By verifying the proper installation of all components, performing necessary tests and inspections, and ensuring the transfer switch functions correctly during power outages, you can have peace of mind knowing that your backup power system is ready to serve its purpose when needed.
Regular Maintenance For Optimal Performance
Ensuring the optimal performance of your Generac generator transfer switch is vital to keeping your backup power system running smoothly. Regular maintenance not only prolongs the lifespan of the switch but also helps to identify potential issues before they become major problems. In this section, we will explore the essential maintenance tasks you should perform on your Generac generator transfer switch to ensure it operates at its best.
Inspecting and Cleaning the Transfer Switch Annually
Regular inspection and cleaning are crucial for maintaining the reliability and durability of your Generac generator transfer switch. Dust, debris, and accumulated grime can impede the switch’s performance and cause issues down the line. To prevent this, make it a point to inspect and clean your transfer switch annually.
Start by disconnecting the switch from the power source and ensuring it is completely powered off. Once done, remove the cover of the transfer switch and visually inspect the internal components. Look for any signs of corrosion, loose connections, or physical damage. Inspect the wiring for fraying or wear and tear. If you notice any issues, it is essential to address them promptly to prevent further damage.
Next, clean the switch using a soft-bristle brush or a compressed air blowgun. Gently remove any dust or debris that may have accumulated over time. Pay attention to the contact points and terminals, ensuring they are free from any obstructions.
Checking for Loose Connections and Signs of Wear
Loose connections and signs of wear can potentially compromise the performance of your Generac generator transfer switch. To avoid any electrical hazards or interruptions, it is crucial to regularly check for loose connections and signs of wear.
Start by inspecting the terminal connections on the switch. Ensure all connections are tight and secure. Loose terminations can lead to heat buildup and electrical arcing, which may damage your system. Tighten any loose connections or replace any worn-out terminals as necessary.
Additionally, check for any signs of wear on the switch’s internal components. Look for burnt or discolored areas, which indicate excessive heat or electrical arcing. Address these issues promptly to prevent further damage and ensure uninterrupted power supply.
Replacing any Faulty Components as Needed
Despite regular maintenance, components of your Generac generator transfer switch may wear out or become faulty over time. It is crucial to promptly replace any defective or worn-out components to keep your system functioning optimally.
If you notice any component showing signs of malfunction, consult the user manual or seek professional assistance to identify the specific part that needs replacement. Generac provides a wide range of genuine spare parts for their generator transfer switches, ensuring compatibility and reliability. Replace the faulty component according to the manufacturer’s guidelines to ensure your system performs optimally.
Regular maintenance is key to the optimal performance and longevity of your Generac generator transfer switch. Inspecting and cleaning the switch annually, checking for loose connections and signs of wear, and replacing any faulty components as needed will ensure your backup power system is always ready to provide uninterrupted power supply when you need it the most.
Troubleshooting Common Issues
Even with proper installation, transfer switches can sometimes encounter issues that may hinder their functionality. Understanding and troubleshooting these common issues can help ensure your generator and transfer switch are operating smoothly. In this section, we will discuss some common problems that may arise with transfer switches, as well as how to troubleshoot issues related to both the switch and the generator.
Identifying Common Problems with Transfer Switches
Transfer switches are responsible for transferring power from the utility lines to the generator during an outage. While they are designed to be reliable, there are a few common issues that can occur:
- Failure to switch power sources
- Incomplete transfer or intermittent power supply
- Overheating
- Incorrect wiring
If you experience any of these issues, it is important to troubleshoot them promptly to ensure the proper operation of your transfer switch.
Troubleshooting Issues with the Switch or the Generator
When encountering problems with your transfer switch, it is essential to identify whether the issue lies with the switch itself or the generator:
- Inspect the switch: Check for any visible signs of damage, loose wires, or burnt connections. Ensure that all electrical connections are secure and properly tightened.
- Check the generator: Verify that the generator is in good working condition and has sufficient fuel supply. Ensure that there are no blockages in the fuel lines or air intake.
- Review the settings: Double-check the settings and configurations of both the switch and the generator, making sure they align with the recommended settings outlined in their respective manuals.
- Perform a test run: Run a test by manually switching the transfer switch between the utility and generator power sources to determine if the transfer is happening smoothly without any interruptions. Monitor the voltage levels to ensure they remain stable during the transfer.
Seeking Professional Assistance if Necessary
If you have exhausted all troubleshooting options and the issues persist, it is crucial to seek professional assistance. While troubleshooting can address many common issues, there may be underlying electrical or mechanical problems that require expert knowledge. Qualified electricians or generator technicians can diagnose and resolve complex problems, ensuring the safety and optimal operation of your generator transfer switch.
Frequently Asked Questions
Can I Install A Generator Transfer Switch Myself?
No, it is recommended to hire a professional for generator transfer switch installation to ensure safety and proper functioning.
How Much Does It Cost To Install A Transfer Switch On A Generac Generator?
The cost to install a transfer switch on a Generac generator varies, but it typically ranges from $500 to $1500. Keep in mind that additional expenses may apply based on factors like the size and complexity of the installation. It’s best to consult with a professional for an accurate estimate.
Can I Install A Generac Generator Myself?
Yes, you can install a Generac generator yourself. However, it is important to follow the manufacturer’s instructions carefully and have the necessary knowledge and skills. Consulting a professional is recommended to ensure proper installation and meeting safety standards
Where Is The Best Place To Put A Generator Transfer Switch?
The best place to install a generator transfer switch is near the main electrical panel. This allows for easy access and connection between the generator and the electrical system. It is important to consult with a professional electrician for proper installation and compliance with local codes.
Conclusion
Installing a Generac generator transfer switch is a practical solution for uninterrupted power supply during outages. By following the step-by-step guide provided in this blog post, you can ensure a smooth and safe installation process. Remember to consult the manufacturer’s instructions and seek professional assistance if needed.
With a reliable transfer switch in place, you can have peace of mind knowing that your essential appliances and systems will continue to function seamlessly when the power goes out.