To install a freestanding tub on a concrete slab, you need to first prepare the surface by verifying its levelness and ensuring it is stable and sturdy enough to support the weight of the tub. Once the surface is ready, follow the tub manufacturer’s instructions on how to position and secure the tub on the concrete slab, ensuring proper alignment and sealing to prevent any water leaks.
Factors To Consider
Installing a freestanding tub on a concrete slab involves several factors that need to be considered for a successful installation. These factors include the size and dimensions of the tub, material and style options, as well as weight capacity and structural support requirements. By understanding and addressing these considerations, you can ensure a seamless installation that not only enhances your bathroom but also provides a functional and enjoyable bathing experience. Here’s a closer look at each of these factors:
Size and Dimensions of the Tub
The size and dimensions of the freestanding tub play a crucial role in determining whether it can be installed on a concrete slab. It’s essential to measure the available space in your bathroom accurately to ensure the tub fits appropriately.
Consider the length, width, and height of the tub, as well as any additional features such as overflow drains or built-in fixtures. By knowing the dimensions beforehand, you can select a tub that not only meets your aesthetic preferences but also fits comfortably and securely on the concrete slab.
Material and Style Options
Freestanding tubs come in a variety of materials, including acrylic, cast iron, copper, stone, and more. Each material offers its unique benefits in terms of durability, heat retention, and aesthetic appeal. Additionally, consider the style options available, such as classic clawfoot designs, modern sleek lines, or transitional styles that blend traditional and contemporary elements. By choosing the right material and style that aligns with your preferences and bathroom decor, you can create a visually-appealing focal point while ensuring longevity and functionality.
Weight Capacity and Structural Support Requirements
One crucial consideration when installing a freestanding tub on a concrete slab is the weight capacity and structural support requirements. Freestanding tubs can be substantial, especially when filled with water and occupied. Therefore, it is essential to ensure that your concrete slab can support the weight of the tub without compromising its integrity.
This may require consulting with a professional contractor or structural engineer to assess the load-bearing capacity of the slab and make any necessary reinforcements. By addressing these weight capacity and structural support requirements, you can prevent any potential damage or safety hazards.

Preparing The Concrete Slab For Installation
Before installing a freestanding tub on a concrete slab, it is crucial to properly prepare the surface to ensure a stable, secure, and long-lasting installation. This involves assessing the condition of the slab, repairing any cracks or uneven surfaces, and ensuring proper drainage and plumbing connections. By following these steps, you can ensure a successful installation and enjoy your beautiful freestanding tub for years to come.
Assessing the Condition of the Slab
The first step in preparing the concrete slab is to assess its condition. Thoroughly inspect the entire surface for cracks, chips, or any signs of damage. Use a flashlight to examine the slab closely, as some cracks may be small and difficult to spot. It is important to address any existing issues before proceeding with the installation.
Repairing any Cracks or Uneven Surfaces
If you come across any cracks or uneven areas on the concrete slab, it is essential to repair them before installing the freestanding tub. Ignoring these imperfections can lead to further damage and compromise the stability of the tub. Depending on the severity of the cracks, you can choose from various repair methods:
- For small cracks, use a concrete crack filler or epoxy resin to seal them. Apply the filler according to the manufacturer’s instructions, ensuring that it penetrates the crack completely and creates a smooth surface.
- For larger cracks or deep crevices, consider using a concrete patching compound. Clean the crack thoroughly, then apply the compound using a trowel, smoothing it out until it is level with the surrounding surface.
- If you notice any significant unevenness on the slab, you may need to use a self-leveling compound. This compound will help create a flat and even surface for the tub to sit on. Follow the product instructions carefully to achieve the best results.
Ensuring Proper Drainage and Plumbing Connections
Proper drainage and plumbing connections are crucial for the functionality of your freestanding tub. Before installing the tub, ensure that the plumbing lines are in place and appropriately connected. If needed, consult a professional plumber to assist with any adjustments or modifications required.
In addition to plumbing connections, it is essential to ensure adequate drainage for the tub. Verify that the existing drain system is compatible with the freestanding tub’s specifications and can handle the increased water flow. If necessary, make any necessary adjustments to ensure proper drainage.
By thoroughly assessing the condition of the slab, repairing any cracks or uneven surfaces, and ensuring proper drainage and plumbing connections, you can prepare the concrete slab for the installation of your freestanding tub. Taking the time to complete these steps correctly will help create a solid foundation and ensure a secure and reliable tub installation that will provide you with years of relaxation and enjoyment.
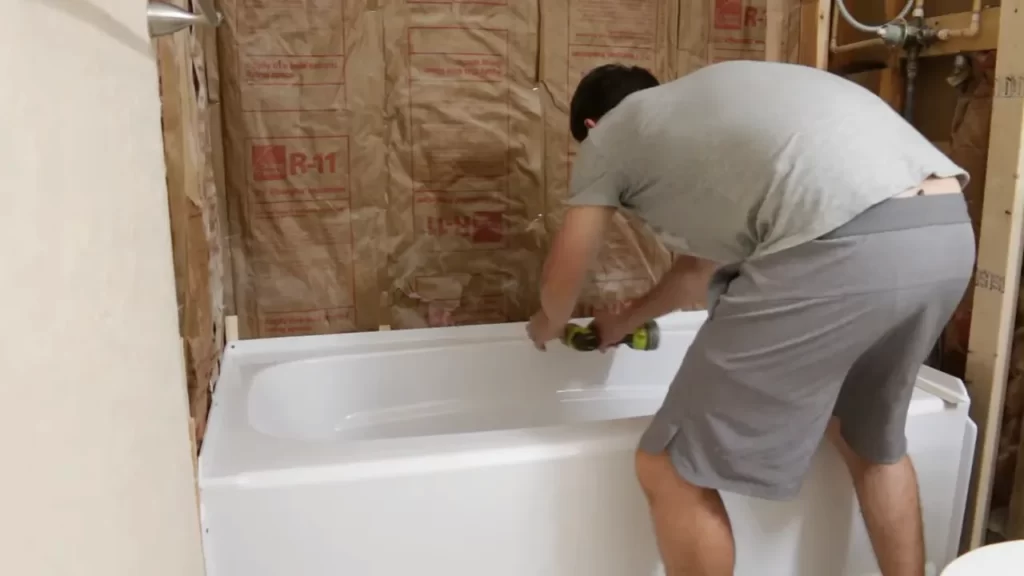
Installing The Freestanding Tub On Concrete Slab
When it comes to installing a freestanding tub on a concrete slab, there are a few important steps to follow to ensure a secure and stable installation. From positioning the tub in the desired location to securing it to the slab with appropriate mounting hardware, these steps will help you achieve a professional and durable installation. Let’s take a closer look at each of these steps to get started.
Positioning the tub in the desired location
The first step in installing a freestanding tub on a concrete slab is to accurately position the tub in the desired location. This requires careful measurements and planning. Start by marking the centerline of the tub on the concrete slab using a tape measure and a pencil. This will serve as a reference point for positioning the tub.
Next, align the tub with the centerline and ensure that it is centered within the designated space. Use a level to check that the tub is level from front to back and side to side. Adjust the position as needed until it is perfectly level.
Checking for level and stability
Checking for level and stability is crucial to ensure the proper functioning and longevity of the freestanding tub installation. Using a level, check that the tub is level from all angles. This includes checking the front, back, and sides of the tub to ensure it is perfectly level.
Additionally, it’s important to check for stability by applying gentle pressure to the tub from different directions. The tub should not wobble or move when pressure is applied. If there is any movement, adjust the leveling of the tub until it is stable and secure.
Securing the tub to the slab with appropriate mounting hardware
Once the tub is properly positioned and leveled, it’s time to secure it to the concrete slab using appropriate mounting hardware. This ensures that the tub remains securely in place, even with regular use.
Begin by selecting the appropriate mounting hardware for your specific freestanding tub. This may include anchor bolts, concrete screws, or other suitable fasteners. Follow the manufacturer’s instructions for the specific type of mounting hardware you are using.
Using a drill, create pilot holes in the concrete slab at the designated locations for the mounting hardware. Place the mounting hardware in the pilot holes and secure them tightly. Double-check the stability and security of the tub once the mounting hardware is in place.
In conclusion, installing a freestanding tub on a concrete slab requires careful positioning, checking for level and stability, and securing the tub with appropriate mounting hardware. By following these steps, you can ensure a professional and long-lasting installation of your freestanding tub on a concrete slab.
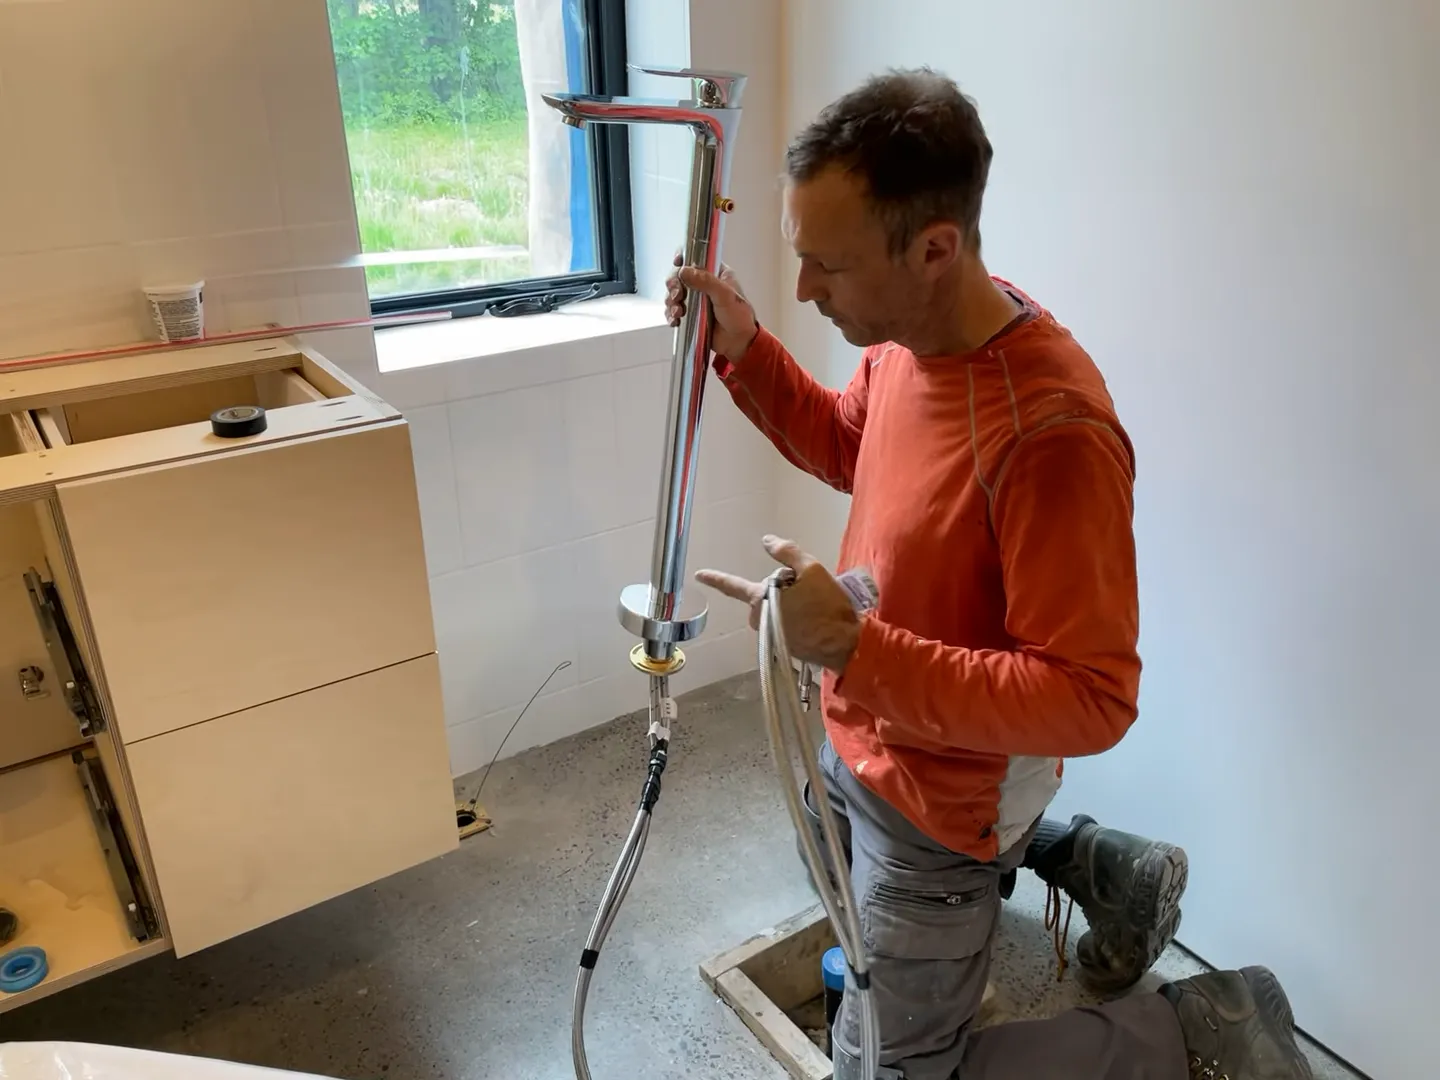
Plumbing Connections For The Freestanding Tub
Proper plumbing connections are vital for a freestanding tub on a concrete slab. Whether you’re installing a new tub or replacing an old one, ensuring the correct plumbing connections will guarantee a smooth and hassle-free experience. In this section, we will discuss how to connect the hot and cold water supply lines, choose the right valves and fittings, and ensure proper water flow and pressure for your freestanding tub.
Connecting hot and cold water supply lines
When it comes to connecting the hot and cold water supply lines for your freestanding tub, it is crucial to use the right materials and techniques to prevent leaks and ensure a reliable connection. Here’s a step-by-step guide to help you through the process:
- Start by Shutting off the main water supply to avoid any mishaps or accidents.
- Attach the hot and cold water supply lines to the appropriate valves. These valves should be installed near the location of your freestanding tub.
- Connect the other end of the water supply lines to the corresponding hot and cold water ports on your freestanding tub. Make sure to use the correct fittings and secure them tightly to avoid any leaks.
- Turn on the main water supply and check for any leaks. If you find any, tighten the fittings or replace them if necessary.
Choosing the right valves and fittings
Choosing the right valves and fittings for your freestanding tub is crucial to ensure its proper functionality. Here are a few factors to consider when selecting these essential components:
- Valves: Look for high-quality valves that are durable and resistant to corrosion. Ball valves or quarter-turn valves are recommended for their ease of use and reliability.
- Fittings: Use fittings made from materials such as brass or stainless steel, as they are known for their durability and resistance to corrosion. Ensure that the fittings match the size of your water supply lines.
- Seals: Don’t forget to use appropriate seals or gaskets with your valves and fittings to prevent any water leakage.
Ensuring proper water flow and pressure
Proper water flow and pressure are essential for an enjoyable bathing experience. To achieve this, follow these tips:
- Check the water pressure in your home. If it’s too low, consider installing a pressure booster or regulator to ensure sufficient water flow.
- Install an access panel near the tub’s plumbing connections to make maintenance and future adjustments easier.
- Consider installing a thermostatic mixing valve to regulate water temperature and prevent scalding.
By following these guidelines and ensuring proper plumbing connections, you’ll be able to enjoy your freestanding tub on a concrete slab without any plumbing-related issues.
Installing The Drainage System
Installing the drainage system for a freestanding tub on a concrete slab is a crucial step to ensure proper functionality and prevent any potential leaks. In this section, we will guide you through the process of selecting an appropriate drain assembly, connecting the drain to the tub’s waste outlet, and testing for leaks and proper drainage functionality.
Selecting an Appropriate Drain Assembly
When it comes to selecting a drain assembly for your freestanding tub on a concrete slab, it is essential to consider factors such as the tub’s style, size, and material. It is recommended to choose a drain assembly that is specifically designed for freestanding tubs to ensure a proper fit and optimal performance. Here are a few key points to keep in mind:
- Check the tub’s specifications: Take note of the tub’s waste outlet size and location. This information will help you choose a drain assembly that matches the tub’s requirements.
- Consider the aesthetic appeal: Look for a drain assembly that complements the overall design and style of your bathroom. Options range from sleek and modern to traditional and ornate.
- Quality and durability: Opt for a drain assembly made from high-quality materials such as brass or stainless steel. These materials offer durability and longevity, ensuring your drainage system will handle the test of time.
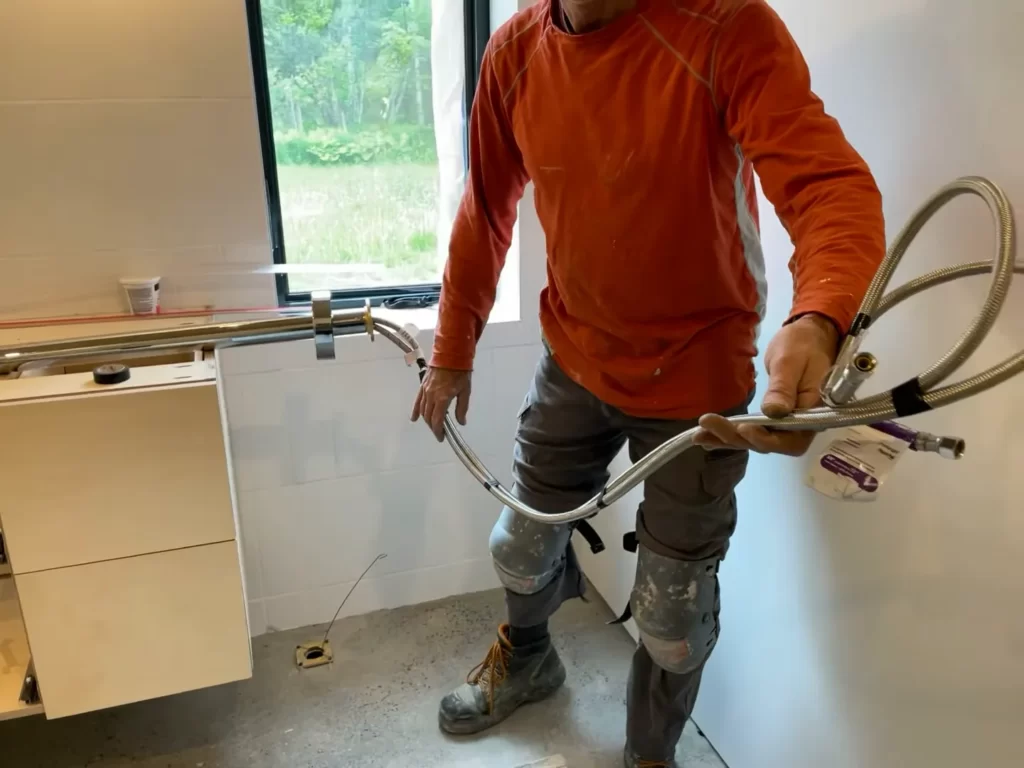
Connecting the Drain to the Tub’s Waste Outlet
Once you have selected an appropriate drain assembly, it’s time to connect it to the tub’s waste outlet. Follow these steps for a successful installation:
- Position the drain assembly: Place the drain assembly in the designated area on the concrete slab, aligning it with the tub’s waste outlet.
- Tighten the gasket and nut: Insert the drain assembly through the hole in the tub’s base, ensuring the gasket is in place. Secure it by tightening the nut underneath the tub.
- Connect the drainpipe: Attach the drainpipe to the drain assembly, ensuring a tight and secure connection. Use plumber’s tape to seal any potential leaks.
- Check for proper alignment: Double-check that the drain assembly and drainpipe are properly aligned with the tub’s waste outlet. This will ensure efficient water flow and prevent any future issues.
Testing for Leaks and Proper Drainage Functionality
Before considering your installation complete, it is crucial to test the drainage system for leaks and proper functionality. Follow these steps to ensure a reliable and efficient drainage system:
- Fill the tub with water: Fill the tub with an adequate amount of water, ensuring it reaches a level that triggers the drainage process.
- Observe for leaks: Pay close attention to the drain assembly, drainpipe, and connections while the water is draining. Look for any signs of leaks or drips. If detected, address them immediately by adjusting and tightening the necessary parts.
- Check drainage speed: Monitor the speed at which the water drains. A well-functioning drainage system should empty the tub efficiently without any slow-draining issues.
- Verify proper water flow: Ensure the water flows smoothly and consistently through the drain system, with no signs of blockages or delays.
By following these steps and paying close attention to the selection, connection, and testing processes, you can install a freestanding tub on a concrete slab with a reliable and fully functional drainage system.
Surrounding Materials And Aesthetics
When it comes to installing a freestanding tub on a concrete slab, paying attention to the surrounding materials and aesthetics is crucial. Not only does it add to the overall visual appeal of your bathroom, but it also helps to create a cohesive and functional space. In this section, we will explore the different aspects you need to consider when choosing the surrounding materials and enhancing the aesthetics of your freestanding tub installation.
Choosing a Suitable Surround Material (Tile, Stone, etc.)
The surround material you choose for your freestanding tub can make a significant difference in the overall look and feel of your bathroom. Whether you opt for tile, stone, or any other material, it’s essential to consider both the practicality and the aesthetic appeal. Here are a few factors to keep in mind when choosing a suitable surround material:
- Durability: Select a material that is resistant to moisture, stains, and scratches to ensure its longevity.
- Slip Resistance: Make sure the chosen material provides a non-slip surface, especially important in the bathroom area.
- Style and Aesthetics: Consider the overall theme and style of your bathroom and choose a surround material that complements and enhances it.
Ultimately, the surround material you choose should not only be visually appealing but also functional and long-lasting.
Sealing and Waterproofing the Surrounding Area
Once you have selected the surround material, it’s crucial to ensure the area around your freestanding tub is properly sealed and waterproofed. Since a freestanding tub sits directly on a concrete slab, it’s important to take the necessary steps to protect against water damage and leaks. Here’s what you need to do:
- Apply a waterproof membrane: Before installing the surround material, apply a high-quality waterproof membrane to the concrete slab to provide an extra layer of protection.
- Seal the joints and edges: Pay special attention to sealing the joints and edges around the tub and the surround material to prevent any water penetration.
- Regular maintenance: Regularly inspect the waterproofing and reapply sealing if necessary to ensure the longevity of your installation.
By properly sealing and waterproofing the surrounding area, you can enjoy your freestanding tub without worrying about any water-related issues.
Enhancing the Visual Appeal with Accessories and Fixtures
In addition to the surround material, you can further enhance the visual appeal of your freestanding tub installation by incorporating accessories and fixtures that complement the overall aesthetics of your bathroom. Here are a few ideas:
- Faucets and fixtures: Choose elegant and modern faucets and fixtures that not only serve their purpose but also add an element of sophistication to the bathroom.
- Lighting: Install appropriate lighting fixtures that enhance the ambiance of the space and highlight the beauty of the tub and its surroundings.
- Storage solutions: Consider adding functional storage options like shelves or cabinets near the tub area to keep towels, bath products, and other essentials within easy reach.
By carefully selecting these accessories and fixtures, you can create a visually stunning bathroom that complements your freestanding tub installation.
With the right surround material, proper sealing and waterproofing, and the right selection of accessories and fixtures, your freestanding tub on a concrete slab can become the centerpiece of your bathroom, adding both functionality and aesthetic appeal.
Tub Maintenance And Care
Cleaning and Maintenance Tips
To ensure the longevity and beauty of your freestanding tub on a concrete slab, regular cleaning and maintenance are essential. Here are some tips to keep your tub looking and functioning its best:
- Use the right cleaning products: When cleaning your tub, it’s important to use non-abrasive cleaners that won’t damage the surface. Avoid harsh chemicals or abrasive scrub brushes that can scratch the tub’s finish. Instead, opt for mild dish soap or a specially formulated tub cleaner.
- Regularly wipe down the tub: After each use, take a few moments to wipe down the tub with a soft cloth or sponge. This helps remove any soap residue or buildup that can accumulate over time.
- Prevent mold and mildew: To prevent mold and mildew growth, it’s important to keep your tub dry when not in use. Wipe away any excess water and ensure proper ventilation in the bathroom to reduce humidity levels.
- Deep clean periodically: While regular wipe-downs are important, it’s also necessary to give your tub a deep clean every few weeks. This can involve using a tub cleaner or a mixture of vinegar and water to remove any stubborn stains or mineral deposits.
- Maintain the finish: Depending on the material of your freestanding tub, it may require specific maintenance to keep the finish looking its best. For example, if you have a porcelain tub, applying a high-quality wax can help protect the surface and provide a beautiful shine.
Preventing Damage and Wear
Preventing damage and wear is crucial to preserving the quality and durability of your freestanding tub on a concrete slab. Follow these tips to keep your tub in optimal condition:
- Avoid abrasive materials: When cleaning or maintaining your tub, refrain from using abrasive materials, such as steel wool or rough scrub brushes. These can scratch or damage the surface, compromising the tub’s beauty and functionality.
- Install floor protectors: To prevent scratching or denting the tub’s surface, place floor protectors or non-slip mats under the tub’s feet. This helps distribute the weight evenly and reduces the risk of damage caused by movement or friction.
- Regularly inspect for cracks or leaks: As part of your tub maintenance routine, it’s important to inspect for any signs of cracks or leaks. If you notice any damage, address it promptly to prevent further issues.
- Consider re-caulking: Over time, the caulk around your tub may deteriorate or become discolored. Regularly inspect the caulk and consider re-caulking if necessary. This helps maintain a proper seal and prevents water damage.
Troubleshooting Common Issues
Even with proper maintenance, occasional issues may arise with your freestanding tub on a concrete slab. Here are some common problems and their solutions:
| Issue | Solution |
|---|---|
| Drainage problems | If your tub is draining slowly or not at all, it could be due to a clog. Use a plunger or a drain snake to clear the blockage. If the problem persists, it may require professional assistance. |
| Leaking faucets | If you have a leaky faucet, it’s often due to a worn-out washer or seal. Replace the faulty parts to fix the leak. If you’re unsure, consult a plumber. |
| Surface stains | To remove surface stains caused by hard water or other substances, create a paste using baking soda and water. Apply the paste to the stained areas, let it sit for a few minutes, and then gently scrub away the stains with a soft cloth or sponge. |
| Chipped or scratched surface | If your tub’s surface has chips or scratches, you can repair minor damage using a porcelain touch-up kit. Follow the instructions provided with the kit for best results. For more extensive damage, consider consulting a professional for repair or refinishing. |
By following these cleaning and maintenance tips, taking preventative measures, and troubleshooting common issues, you can ensure that your freestanding tub on a concrete slab remains a luxurious centerpiece in your bathroom for years to come.
Safety Measures And Building Codes
When installing a freestanding tub on a concrete slab, it is crucial to prioritize safety and adhere to local building codes and regulations. These measures not only ensure the longevity and stability of the tub installation but also guarantee the safety of those using it.
Meeting local building codes and regulations
Before embarking on any installation project, it is essential to familiarize yourself with the specific building codes and regulations of your local area. Each municipality might have its own set of guidelines pertaining to the installation of freestanding tubs. Here are a few key points to consider:
- Check the maximum weight capacity of the concrete slab to ensure it can safely support the weight of the tub, along with the added weight of water and occupants.
- Ensure proper spacing between the tub and surrounding walls, taking into account accessibility requirements and any ventilation needs.
- Follow guidelines for plumbing and drainage to prevent potential water damage and leaks.
Ensuring proper ventilation and electrical safety
Proper ventilation is essential to prevent moisture buildup and potential mold growth. Additionally, electrical safety is paramount when installing a freestanding tub on a concrete slab. Here are some steps to ensure both:
- Install a ventilation fan in the bathroom to promote air circulation and prevent excess moisture.
- Ensure any electrical outlets near the tub are equipped with ground fault circuit interrupters (GFCIs) to protect against electrical shock.
- Consider installing a dedicated circuit for the tub to prevent overloading the existing electrical system.
Implementing anti-slip measures and accessibility considerations
Another important aspect to consider when installing a freestanding tub on a concrete slab is the safety and accessibility of the tub for users of all ages and abilities. Here are a few measures to implement:
- Choose a tub with a textured bottom or install anti-slip strips or mats to minimize the risk of slipping and falling.
- Install handrails or grab bars near the tub to provide additional support and stability.
- Ensure there is enough clearance around the tub for individuals using mobility aids such as wheelchairs or walkers.
By following these safety measures and adhering to local building codes and regulations, you can install a freestanding tub on a concrete slab with confidence, knowing that it is not only aesthetically pleasing but also safe for use.
Frequently Asked Questions
Can You Put A Freestanding Bath On A Concrete Floor?
Yes, you can place a freestanding bath on a concrete floor.
How Are Freestanding Tubs Secured To The Floor?
Freestanding tubs are secured to the floor using different methods like adjustable legs, adhesive, or brackets. The tub’s position is leveled and adjusted using the legs, then firmly attached using adhesive or brackets for stability.
How Far Off The Wall Should A Freestanding Tub Be?
A freestanding tub should be placed a few inches away from the wall for proper installation. Make sure there is enough space between the tub and the wall to access the drain and ensure a comfortable bathing experience.
Does A Freestanding Tub Go On Top Of Flooring?
Yes, a freestanding tub can be installed on top of flooring.
Conclusion
Installing a freestanding tub on a concrete slab may seem challenging, but by following the step-by-step process outlined in this blog post, you can easily accomplish this task. From preparing the concrete surface to securing the tub in place, we’ve provided all the necessary information to ensure a successful installation.
Remember to take proper safety precautions and consult professional help if needed. With the right tools and techniques, you can transform your bathroom into a luxurious oasis. Enjoy the beauty and relaxation that a freestanding tub on a concrete slab can bring to your space!