To install a freestanding tub filler on a concrete slab, follow these steps carefully. First, use a hammer drill to create holes in the concrete.
Then, insert anchor bolts into the holes and tighten them securely. Finally, attach the tub filler to the anchor bolts and ensure it is level before tightening any remaining screws or bolts. Now you can enjoy your freestanding tub on a sturdy concrete slab.
Factors To Consider When Selecting A Freestanding Tub Filler
Installing a freestanding tub filler on a concrete slab can be a challenging task, but with the right considerations, it can be done smoothly. There are several factors you need to keep in mind when selecting a freestanding tub filler for your project. In this article, we will explore these factors in detail to help you make an informed decision.
Tub Filler Design and Style
The design and style of the freestanding tub filler can greatly impact the overall aesthetic of your bathroom. It’s important to choose a design that complements the existing decor and adds a touch of elegance to the space. Whether you prefer a modern, contemporary, or traditional style, there are plenty of options available to suit your taste.
Material and Finish Options
When selecting a freestanding tub filler, pay attention to the material and finish options. The material should be durable and resistant to corrosion, ensuring longevity and optimal performance. Popular materials for tub fillers include brass, stainless steel, and chrome. Additionally, consider the finish options such as polished, brushed, or matte, to match your bathroom fixtures and create a cohesive look.
Height and Reach of the Filler
The height and reach of the freestanding tub filler are crucial factors to consider. The height should be sufficient to allow comfortable filling of the tub, while the reach should ensure easy access to the water without straining. Measure the height and depth of your tub to ensure compatibility with your chosen tub filler.
Installation Requirements and Compatibility
Before finalizing your tub filler selection, consider the installation requirements and compatibility. Some freestanding tub fillers require specific installation methods, such as floor-mounted or wall-mounted options, while others may have adjustable height settings. Ensure that the tub filler you choose is compatible with your existing plumbing system and meets the installation requirements of your concrete slab.
In conclusion, when selecting a freestanding tub filler for installation on a concrete slab, consider the factors of design and style, material and finish options, height and reach, as well as installation requirements and compatibility. By carefully evaluating these factors, you can find the perfect tub filler that not only enhances the functionality of your bathroom but also elevates its overall visual appeal.
Gathering The Necessary Tools And Materials
Before you start the installation process for a freestanding tub filler on a concrete slab, it is essential to gather all the necessary tools and materials. This will ensure a seamless installation from start to finish. In this section, we will cover the required tools for installation, the materials needed for secure installation on a concrete slab, and additional accessories that will make the entire process easier.
Required Tools for Installation
Having the right tools is crucial for a successful installation. Here is a list of the tools you will need:
- Adjustable wrench
- Allen wrench set
- Drill
- Masonry drill bit
- Level
- Tape measure
- Screwdriver set
- Pliers
- Hacksaw
- Bucket or container for debris
It’s important to have these tools readily available before you begin the installation process to ensure a smooth and efficient workflow.
Materials Needed for Secure Installation on a Concrete Slab
To securely install a freestanding tub filler on a concrete slab, you will need the following materials:
| Materials | Quantity |
|---|---|
| Freestanding tub filler | 1 |
| Concrete anchors | As per the manufacturer’s recommendations |
| Waterproof pipe sealant | 1 tube |
| Teflon tape | 1 roll |
| Flexible water supply lines | 2 |
| Plumber’s putty | 1 container |
| Concrete mix | As per the manufacturer’s recommendations |
Ensuring you have the right materials beforehand will save you time and allow you to complete the installation process seamlessly.
Additional Accessories for a Seamless Installation Process
In addition to the required tools and materials, there are a few additional accessories that can further enhance the installation process. These accessories include:
- Caulk gun
- Silicone caulk
- Plumber’s tape
- Plumber’s wrench
- Protective gloves and safety goggles
Having these accessories within reach will ensure a safe and efficient installation experience.
By gathering all the necessary tools and materials, including any additional accessories, you’ll be well-prepared to tackle the installation process of a freestanding tub filler on a concrete slab. Stay tuned for the next section, where we will guide you through the step-by-step process of installing a freestanding tub filler securely.
Preparing The Concrete Slab For Installation
If you’re planning to install a freestanding tub filler on a concrete slab, it’s important to make sure the slab is fully prepared. This will ensure a stable and secure foundation for your tub filler, increasing its lifespan and preventing any potential damage or issues in the future.
Assessing the slab’s condition and stability
Before you begin the installation process, take the time to assess the condition and stability of the concrete slab. This step is crucial as it allows you to identify any existing issues that may affect the installation or cause future problems. Here’s how you can do it:
- Inspect the entire surface of the slab, checking for any cracks, chips, or uneven areas. It’s important to note the severity and extent of any damage.
- Look out for signs of structural issues such as sagging, shifting, or settling. If you notice any of these problems, it’s advisable to consult a professional before proceeding.
- Ensure that the slab is level and doesn’t have any significant slopes or depressions. A level surface will ensure the proper installation and functioning of your freestanding tub filler.
Cleaning and leveling the slab surface
Once you’ve assessed the condition and stability of the concrete slab, the next step is to thoroughly clean and level the surface. This is crucial for ensuring a strong and secure installation. Follow these steps:
- To remove any dirt, dust, or debris, start by sweeping the entire slab surface. Use a stiff-bristle broom to dislodge any stubborn dirt or grime.
- For deep cleaning, you can use a power washer or a hose with a high-pressure nozzle. Make sure to remove all stains and lingering dirt from the surface.
- Once the slab is clean and dry, use a leveling compound to address any minor imperfections. Follow the manufacturer’s instructions for mixing and applying the compound, ensuring an even and level surface.
- Allow the leveling compound to dry completely before proceeding to the next step.
Repairing any cracks or damage
If you’ve identified any cracks or damage during the assessment, it’s crucial to repair them before installing the freestanding tub filler. This will prevent any further deterioration and ensure a sturdy installation. Follow these steps:
- To repair small cracks, you can use a concrete patching compound. Fill the cracks with the compound, making sure to smooth and level the surface.
- For larger cracks or significant damage, it’s recommended to consult a professional who specializes in concrete repairs. They will have the expertise and tools to properly address the issue.
- Allow the repaired areas to fully cure before continuing with the installation process.
By following these steps to prepare your concrete slab for the installation of a freestanding tub filler, you’ll ensure a stable and secure foundation. This will not only enhance the functionality and longevity of your tub filler but also provide you with a relaxing bathing experience. Take the time to assess, clean, level, and repair your slab to enjoy a hassle-free installation process.
Creating Anchor Points On The Slab For Structural Stability
Determining the proper position for the filler
Before you can start creating anchor points on the concrete slab for your freestanding tub filler, it’s important to determine the proper position for the filler itself. This will ensure optimal functionality and aesthetic appeal. Begin by considering your tub’s design and dimensions, as well as the desired location in your bathroom. Take into account any existing plumbing connections and make sure the filler will be within reach of your water supply. Once you have determined the ideal positioning, you can move on to marking the anchor point locations.
Marking anchor point locations
Now that you have determined where your freestanding tub filler will be installed, it’s time to mark the anchor point locations on the concrete slab. For this step, you will need a measuring tape and a marker.
- Start by measuring and marking the distance between the center of the tub filler’s base and the center of the tub itself.
- Next, find the center point of the installation location on the concrete slab. This will serve as your reference point.
- Measure and mark the distances you previously calculated from the reference point.
- Repeat this process for any additional anchor points the filler may require.
Drilling holes and inserting anchors into the slab
With the anchor point locations clearly marked on the concrete slab, it’s time to start drilling holes and inserting anchors. You will need a drill with a masonry bit, anchors suitable for concrete installation, a hammer, and a wrench or socket set.
- Attach the masonry bit to your drill, making sure it is securely in place.
- Position the drill over the first anchor point and apply steady pressure as you begin drilling. Be sure to wear protective eyewear and follow all safety precautions.
- Continue drilling until the hole is deep enough to accommodate the anchor, usually around 1 ½ to 2 inches.
- Once the hole is drilled, remove any dust or debris from the opening.
- Insert the anchor into the hole and tap it gently with a hammer until it is flush with the surface of the slab.
- Repeat this process for each anchor point, making sure to install the anchors securely.
- Finally, attach the freestanding tub filler to the anchors using a wrench or socket set, ensuring that it is stable and level.
By following these steps, you can create anchor points on your concrete slab that will provide the structural stability necessary for installing a freestanding tub filler. With your filler securely in place, you can now enjoy a luxurious bathing experience in your beautifully designed bathroom.
Connecting The Plumbing And Water Lines To The Filler
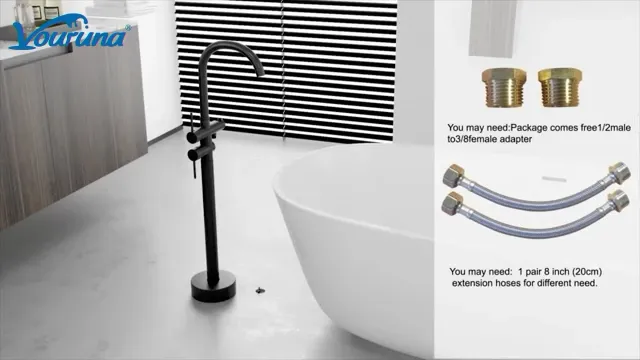
Once you have positioned your freestanding tub filler near the water source and installed the necessary plumbing connections, the next step is to connect the water lines securely. This crucial step ensures that your tub filler functions properly and delivers a steady flow of water for a relaxing bathing experience. In this section, we will guide you through the process of connecting the plumbing and water lines to the filler, ensuring a seamless installation on your concrete slab.
Positioning the Filler near the Water Source
The first step in connecting the plumbing and water lines to the freestanding tub filler is to position the filler near the water source. Make sure the filler is placed within reach of the supply lines, allowing for easy access during installation. This ensures a smooth connection and minimizes the risk of leaks or damage to the plumbing system.
Installing Necessary Plumbing Connections
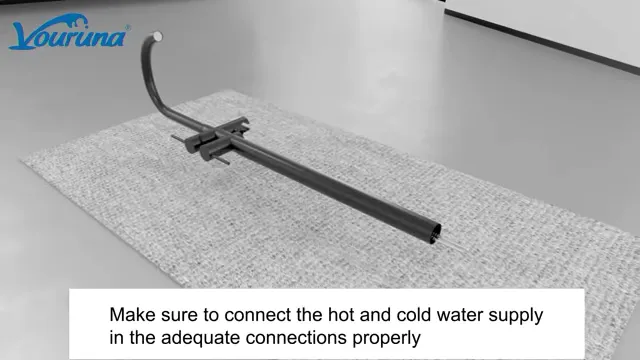
Before connecting the water lines, it is important to install the necessary plumbing connections. This ensures a secure and reliable connection between the filler and the water supply. Here is a step-by-step guide to installing the necessary plumbing connections:
- Check the manufacturer’s instructions for specific requirements regarding the plumbing connections.
- Install the appropriate valves, such as a shut-off valve, to control the flow of water to the filler.
- Use Teflon tape or plumber’s putty to seal the threaded connections and prevent leaks.
- Tighten the connections using an adjustable wrench or pipe wrench, ensuring they are snug but not over-tightened to avoid damaging the plumbing.
- Inspect the connections for any signs of leakage and make any necessary adjustments before proceeding.
Connecting the Water Lines Securely
With the plumbing connections in place, it’s time to connect the water lines securely. Properly connecting the water lines is crucial to ensure a consistent water flow and prevent leaks. Follow these steps to connect the water lines:
- Attach one end of the water lines to the designated connections on the filler, ensuring they are tightly secured.
- Connect the other end of the water lines to the corresponding connections on the plumbing system.
- Tightly fasten the connections using an adjustable wrench or pipe wrench, ensuring they are snug and secure.
- Turn on the water supply and check for any leaks. If you notice any leaks, tighten the connections further or apply additional sealing materials as needed.
- Once you have confirmed that there are no leaks, test the tub filler by turning on the water flow and checking the water pressure.
By following these steps and ensuring secure connections, you can successfully connect the plumbing and water lines to your freestanding tub filler on a concrete slab. Remember to always consult the manufacturer’s instructions for specific guidance on your particular filler model, and seek professional assistance if needed. With proper installation, you can enjoy a luxurious bathing experience in your stylish freestanding tub.
Securing And Stabilizing The Freestanding Tub Filler
Assembling and Attaching the Filler Components
Before securing and stabilizing the freestanding tub filler on a concrete slab, it is crucial to assemble and attach the necessary components. To ensure a smooth installation process, follow these simple steps:
- Begin by unpacking the tub filler and organizing its components. Lay them out in a well-lit, spacious area, making sure to keep all the parts organized and easily accessible.
- Identify and connect the hoses and pipes included with the tub filler. Ensure that the connections are tightened properly using a wrench or a similar tool, taking care not to overtighten, which could damage the fittings.
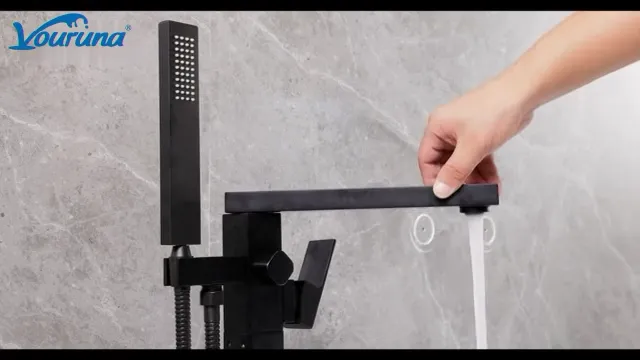
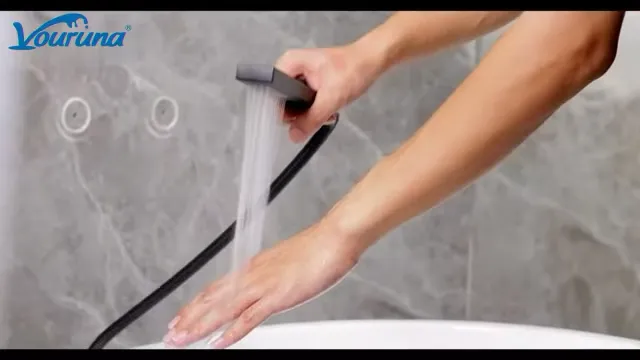
- Attach the handheld showerhead to the main filler pipe, following the manufacturer’s instructions. This component typically screws onto the pipe, and with a quick test to ensure no leaks are present, you can move on to the next step.
- Check the manufacturer’s instructions to determine if any additional components need to be attached to the filler. Some tub fillers may require the installation of handles, knobs, or decorative covers.
- Once all the components are assembled, carefully position the filler near the installation area on the concrete slab. Take into account the desired location in relation to the bathtub and the plumbing connections.
- Inspect the filler to ensure it is level and plumb. Use a spirit level to check both the vertical and horizontal alignment to guarantee a stable installation.
Adjusting the Height and Reach of the Filler
Once the filler components are assembled and attached, it’s time to adjust the height and reach for optimal functionality:
- Measure the desired height of the tub filler, taking into consideration the bathtub’s rim height and personal preference. This measurement will guide you in adjusting the filler accordingly.
- Using an adjustable wrench, loosen the locking nut or collar located near the base of the filler pipe. This will allow you to slide the filler pipe up or down to achieve the desired height.
- Once the filler pipe is at the desired height, tighten the locking nut or collar securely to hold it in place. Test the stability of the filler by gently pushing and pulling on it to ensure it does not move or wobble.
- If the tub filler includes an extendable arm or swivel function, adjust it to achieve the desired reach. A longer reach will offer greater convenience, allowing you to comfortably fill the bathtub from a standing position.
Ensuring Stability and Balance for Safety
Ensuring stability and balance is crucial to guarantee the safety and longevity of your freestanding tub filler installation. Follow these steps to achieve a safe and secure setup:
- Inspect the area of the concrete slab where the filler will be installed. Clear away any debris or uneven surfaces that could compromise stability or cause the filler to shift.
- If necessary, use a hammer drill to create holes in the concrete slab for proper anchoring. Consult the manufacturer’s recommendations for the specific type and size of anchors needed.
- Place the filler base over the holes and use the appropriate anchors to secure it to the concrete slab. Ensure the anchors are tightened securely to prevent any movement or instability.
- Once the filler is anchored, double-check the stability and balance by gently applying pressure from different angles. If it feels secure and shows no signs of movement, you can proceed with the installation with confidence.
By ensuring the proper assembly, adjusting the height and reach, and securing the freestanding tub filler on a solid concrete slab, you can enjoy a functional and safe addition to your bathroom space. Now that the filler is secured and stabilized, the next step is completing the necessary plumbing connections. Stay tuned for our upcoming blog post on that topic!
Checking For Proper Water Flow And Functionality
Turning on the water supply and checking for leaks
Before you can test the functionality of your newly installed freestanding tub filler on a concrete slab, it’s crucial to first turn on the water supply and check for any potential leaks. Follow these steps to ensure a smooth and hassle-free installation:
- Locate the main water supply valve for your bathroom or the specific water line serving your tub filler. It’s usually found near the water meter or in a utility room.
- Carefully turn the valve clockwise to fully open the water supply. This will allow water to flow into the pipework leading to your tub filler.
- Inspect the connections and joints of the water supply lines for any visible signs of leakage. Look for drips, puddles, or moist areas around the pipes.
- If you notice any leaks, you may need to tighten the connection or replace faulty washers or gaskets. This will help prevent water damage and ensure proper water flow to your freestanding tub filler.
Once you’re confident that the water supply is on and there are no leaks, it’s time to move on to testing the functionality of your tub filler.
Testing the tub filler for proper flow and temperature control
After successfully installing a freestanding tub filler on a concrete slab, it’s essential to check if it functions as expected. Follow these steps to test the flow and temperature control:
- Turn the handle or knobs on the tub filler to activate the flow of water. Make sure the water comes out steadily and without any obstructions or spluttering.
- Adjust the temperature control knobs or lever to check if the water heats up or cools down accordingly. The temperature should be comfortable and easily adjustable.
- If you notice any irregularities in the flow or temperature control, you may need to troubleshoot the issue. Common problems could include a clogged aerator, a faulty cartridge, or insufficient water pressure.
- Refer to the manufacturer’s instructions or contact a professional plumber if you need assistance in troubleshooting or resolving any functionality issues.
By following these steps and ensuring the proper water flow and functionality of your freestanding tub filler on a concrete slab, you can enjoy a luxurious bathing experience with peace of mind.
Making Any Necessary Adjustments And Finishing Touches
Once you have installed your freestanding tub filler on a concrete slab, it’s time to focus on making any necessary adjustments and finishing touches to ensure it looks perfect in your bathroom. Taking the time to fine-tune the position and angle of the filler, adding decorative finishing elements, and cleaning up the installation area will give your tub filler a polished and professional appearance.
Adjusting the filler position and angle if needed
After installing the freestanding tub filler, you may find that the position and angle need some adjustments to achieve the desired look and functionality. Here are the steps to make these adjustments:
- Start by evaluating the position of the filler. Make sure it is aligned with your bathtub and has enough clearance to fill the tub properly without splashing water.
- Use a level to check if the filler is perfectly vertical. If it is leaning to one side, adjust the position by loosening the anchor bolts slightly and gently nudging the filler to the desired angle.
- Tighten the anchor bolts once you have achieved the desired position and angle. Ensure that the filler remains stable and secure.
Adding any decorative finishing elements
To enhance the aesthetic appeal of your freestanding tub filler, consider adding some decorative finishing elements. These elements can add a touch of luxury and personalization to your bathroom. Here are a few ideas:
- Add a decorative escutcheon around the base of the filler to create a sleek and finished look.
- Install a matching wall plate to cover the plumbing connections behind the filler, giving it a clean and seamless appearance.
- Consider adding a decorative tile accent or a backsplash behind the tub filler to create a focal point in your bathroom.
Cleaning up the installation area
After completing the necessary adjustments and adding decorative finishing elements, it’s important to clean up the installation area to ensure a tidy and professional finish. Here’s what you need to do:
- Remove any debris or construction materials from the installation area, including dust, adhesive residue, or excess grout.
- Wipe down the tub filler and surrounding surfaces with a damp cloth to remove any fingerprints or smudges that may have occurred during the installation process.
- Inspect the area for any visible gaps or imperfections and consider using a silicone caulk to fill and seal them for a seamless look.
By following these steps, you can make any necessary adjustments and add the finishing touches to your freestanding tub filler installation on a concrete slab. Take the time to ensure the position and angle are perfect, add decorative elements to enhance the aesthetic appeal, and clean up the installation area for a professional finish.
Frequently Asked Questions
Can You Put A Freestanding Bath On A Concrete Floor?
Yes, you can install a freestanding bath on a concrete floor without any issues. The sturdy concrete provides a stable foundation for the bath, ensuring proper support and functionality.
How Do You Install A Free Standing Tub Filler?
To install a free-standing tub filler, follow these steps: 1. Position the filler near the tub and measure the distance between the filler and water supply. 2. Install the appropriate valves and connections. 3. Attach the filler to the water supply using the provided fittings.
4. Secure the filler to the floor using anchors or screws. 5. Test the filler for any leaks or issues before using.
How Do You Secure A Freestanding Acrylic Tub To The Floor?
To secure a freestanding acrylic tub to the floor, follow these steps: 1. Position the tub in the desired location and ensure it is level. 2. Use adjustable feet or a leveling kit to stabilize the tub. 3. Apply a layer of silicone adhesive around the base of the tub.
4. Carefully lower the tub onto the adhesive and press firmly. 5. Allow the adhesive to dry completely before using the tub.
Where Should I Place Tub Filler?
The tub filler should be placed near the tub to ensure convenient access. It is typically installed on the wall above the tub or on the tub deck. The placement should be based on personal preference and the design of the bathroom.
Consider factors such as ease of use and aesthetics when determining the location of the tub filler.
Conclusion
Installing a freestanding tub filler on a concrete slab may seem challenging, but with the right steps and tools, it can be accomplished easily. By following this guide, you can ensure a secure installation that will enhance your bathroom’s aesthetics and functionality.
Remember to measure accurately, use the appropriate materials, and take safety precautions throughout the process. With patience and attention to detail, you’ll have a beautifully installed freestanding tub filler that will elevate the overall look of your bathroom.