To install a freestanding tub faucet, you need to follow these steps: Cease the water supply, assemble the faucet, connect the supply lines, and secure the faucet to the floor. Freestanding tub faucets add elegance and functionality to any bathroom.
They provide a luxurious bathing experience while enhancing the overall aesthetic of your space. Installing a freestanding tub faucet may seem complex, but with the right tools and knowledge, it can be done easily. In this guide, we will walk you through the step-by-step process of installing a freestanding tub faucet.
By following these instructions, you can have your new faucet up and running in no time, allowing you to enjoy a relaxing and stylish bathing experience.
Factors To Consider When Selecting A Faucet
Before you start installing a freestanding tub faucet, it’s important to consider a few key factors to ensure you choose the right one for your bathroom. From the style and design to the material and finish, each factor plays a crucial role in both the aesthetics and functionality of your faucet. Let’s dive deeper into these considerations.
Style and Design
The style and design of the faucet can greatly impact the overall look and feel of your bathroom. Whether you prefer a modern, sleek design or a more traditional, classic look, there are various styles and designs to choose from. It’s important to consider the existing decor and theme of your bathroom and select a faucet that complements it seamlessly. From angular shapes to curved edges, each style can bring a unique touch to your freestanding tub.
Material and Finish
The material and finish of the faucet not only contribute to its durability but also add to its visual appeal. Common materials used for faucets include brass, stainless steel, and zinc alloy. Each material offers its own benefits in terms of durability and resistance to corrosion. Additionally, the finish of the faucet, such as chrome, brushed nickel, or oil-rubbed bronze, can add a touch of elegance to your bathroom. Consider the overall aesthetic you want to achieve and choose a material and finish that aligns with it.
Overall Height and Reach
The overall height and reach of the faucet are crucial factors to consider, especially when it comes to the functionality and convenience of your freestanding tub. The height of the faucet should be compatible with the height of your tub to ensure easy access. Moreover, consider the reach of the faucet spout to ensure sufficient water coverage in the tub. Measure the dimensions of your tub and select a faucet with suitable height and reach to make your bathing experience effortless and enjoyable.
By taking these factors into account, you can confidently select a freestanding tub faucet that not only enhances the aesthetics of your bathroom but also meets your functional needs. With the perfect faucet installed, you can elevate your bathing experience and create a space that exudes both style and functionality.
Determining The Faucet Type That Suits Your Tub
Installing a freestanding tub faucet can instantly enhance the look and functionality of your bathroom. However, before you start the installation process, it’s important to determine the type of faucet that suits your tub best. There are three common types of freestanding tub faucets: floor-mounted faucets, deck-mounted faucets, and wall-mounted faucets. Each type offers its own unique advantages and considerations. In this article, we will explore each type in detail to help you make the right decision for your bathroom.
Floor-Mounted Faucets
Floor-mounted faucets are an elegant and popular choice for freestanding tubs. As the name suggests, these faucets are installed on the bathroom floor, near the tub. This type of faucet provides a seamless and clean look, as there are no visible fixtures running up the wall or across the tub deck.
When choosing a floor-mounted faucet, it’s essential to consider the height and reach of the spout. The faucet should be tall enough to comfortably fill the tub, while the spout should have sufficient reach to prevent water from splashing outside the tub area. Additionally, consider the style of the faucet and how it complements the overall design of your bathroom.
Deck-Mounted Faucets
Deck-mounted faucets are installed directly on the deck of the freestanding tub. This type of faucet offers versatility in terms of placement, as it can be positioned at the center, one side, or even on both sides of the tub. Deck-mounted faucets can be an excellent option if you have a tub with a flat deck surface.
When selecting a deck-mounted faucet, consider the number of faucet handles you prefer and whether you want to incorporate additional features such as a handheld showerhead or a sprayer. Measure the width of your tub deck to ensure there is enough space for the faucet and any additional components.
Wall-Mounted Faucets
Wall-mounted faucets are a popular choice for freestanding tubs that are positioned against a wall. These faucets are installed on the wall above the tub and can be an excellent space-saving option, as they eliminate the need for a separate tub deck or floor space.
When choosing a wall-mounted faucet, it’s important to consider the distance between the faucet and the tub. Ensure that the spout reaches into the tub comfortably without any obstructions. Additionally, determine the height at which the faucet should be installed for easy access and functionality.
By determining the faucet type that suits your tub, you can create a stunning and functional centerpiece for your bathroom. Whether you choose a floor-mounted, deck-mounted, or wall-mounted faucet, consider the height, reach, and style to ensure a seamless installation that enhances the overall look and feel of your space.
Gathering The Necessary Tools And Materials
If you’re planning on installing a freestanding tub faucet, you’ll need to gather some essential tools and materials before getting started. Having everything you need at hand will make the process much smoother and hassle-free. In this section, we’ll discuss the various tools and materials you’ll need to ensure a successful installation.
Wrenches and Screwdrivers
Having the right wrenches and screwdrivers is crucial for installing a freestanding tub faucet. These tools will help you securely attach the faucet to your tub and ensure a tight fit. Make sure you have both adjustable wrenches and screwdrivers in different sizes to handle various components of the faucet.
Here’s a quick list of the types of wrenches and screwdrivers you’ll need:
- Adjustable wrench
- Phillips screwdriver
- Flathead screwdriver
- Hex key set
- Pipe wrench (if required)
Plumbers Tape and Putty
Plumbers tape and putty are essential for creating watertight seals and preventing leaks in your installation. Plumbers tape, also known as Teflon tape, is used to wrap around the threaded connections to ensure a secure and leak-free joint. Putty, on the other hand, is used to seal any gaps or openings between the tub and the faucet base.
Make sure you have these supplies ready before you begin:
- Plumbers tape
- Plumbers putty
Caulking Gun and Silicone Sealant
A caulking gun and silicone sealant are essential for providing a waterproof barrier between the tub and the surrounding area. Silicone sealant is flexible, durable, and resistant to moisture, making it an ideal choice for sealing gaps and preventing water damage. A caulking gun will allow you to apply the sealant smoothly and evenly.
Here’s what you’ll need:
- Caulking gun
- Silicone sealant
With these tools and materials ready, you’re now equipped to start installing your freestanding tub faucet. Taking the time to gather everything beforehand will save you from any unnecessary delays or interruptions during the installation process.

Turning Off The Water Supply
Locate the Water Shut-Off Valves
Before installing a freestanding tub faucet, it’s essential to turn off the water supply. Start by locating the water shut-off valves in your home. These valves are typically found near the fixture you’ll be working on, such as the bathtub. Look for two valves, one for hot water and one for cold water. They are usually chrome or brass, and you might find them next to the tub, on the wall, in a basement, or even under the sink.
Close the Valves to Stop the Water Flow
Once you have found the shut-off valves, it’s time to close them to stop the water flow. Grab a wrench or pliers to turn the valves clockwise. This motion will shut off the water supply to the tub faucet. Make sure to close both the hot and cold water valves. Closing the valves prevents any accidental water leakage during the installation.
Remember, safety comes first. Turning off the water supply ensures you don’t face any unexpected water damage or unwelcome surprises while working on your freestanding tub faucet.
Removing The Existing Faucet (If Applicable)
Disconnecting Water Supply Lines
Before you can remove the existing faucet, you need to disconnect the water supply lines. Start by turning off the water supply using the shut-off valves located underneath the sink. To ensure you don’t accidentally flood your bathroom, place a bucket or towels underneath the faucet to catch any remaining water in the lines.
Once the water supply is turned off, use a wrench or pliers to loosen and disconnect the water supply lines from the faucet. Begin by loosening the nuts that connect the lines to the shut-off valves and then proceed to remove the lines from the faucet itself. If the nuts are difficult to loosen, applying a bit of penetrating oil can help to loosen them up. Be careful not to damage the supply lines or other plumbing components while disconnecting them.
Unscrewing the Faucet Components
Now that the water supply lines are disconnected, you can move on to unscrewing the faucet components. Start by removing any decorative caps or handles that may be covering the screw or nut holding the faucet in place. Use a screwdriver or pliers to unscrew or remove the nuts or screws that secure the faucet to the countertop or wall.
Once the nuts or screws are loosened, you can lift the faucet up and away from the sink or bathtub. Depending on the type of faucet you have, there may be additional components, such as a spout or sprayer, that need to be unscrewed or removed separately. Refer to the manufacturer’s instructions for specific details on how to disassemble your particular faucet.
It’s worth noting that removing an old faucet may require some force or maneuvering, especially if the faucet has been in place for a long time or if it’s corroded. If you’re having trouble, try using a wrench or a faucet removal tool to help loosen the faucet. Just be careful not to damage the surrounding plumbing or fixtures in the process.
Once you’ve successfully removed the old faucet and all its components, you’re ready to move on to the next step in installing your new freestanding tub faucet.
Installing The Faucet Standpipe
Installing a freestanding tub faucet is an essential part of creating a luxurious and functional bathroom. One crucial step in this process is installing the faucet standpipe. The standpipe provides stability and support for your faucet, ensuring it remains secure. In this section, we will guide you through the steps involved in installing the faucet standpipe, from measuring and marking the placement to assembling the standpipe components and securing it to the floor. Let’s get started!
Measuring and Marking the Placement
Before you start installing the faucet standpipe, you need to measure and mark the area where it will be placed. This step is important to ensure proper alignment and functionality of the faucet. Here’s how you can proceed:
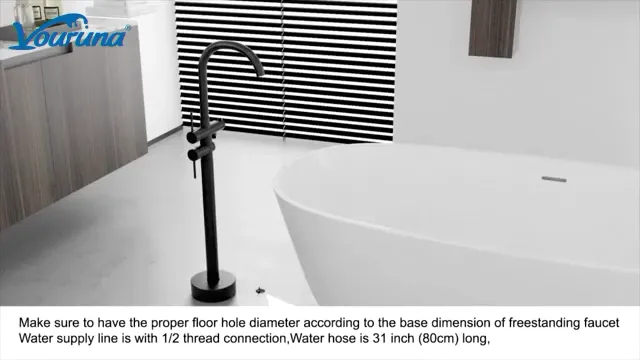
- Begin by determining the ideal height for your faucet standpipe. This will depend on various factors, such as the size of your tub and your personal preference. Generally, a height of around 36 to 42 inches is recommended.
- Using a measuring tape, measure the distance from the floor to the desired height of the standpipe. Mark this measurement on the wall where the standpipe will be installed.
- Next, locate the center point of your freestanding tub. Measure the distance from the center point to the wall and mark it on the floor. This will help you position the standpipe correctly.
- Now, measure the width of your tub. Divide this measurement by two to determine the center point along the wall. Mark this point on the wall.
- Using a level, connect the mark on the wall with the mark on the floor to create a plumb line. This will ensure that your standpipe is installed straight and vertically aligned.
Assembling the Standpipe Components
Once you have marked the placement for the standpipe, it’s time to assemble the components. Here’s a step-by-step guide:
- Gather all the necessary components, including the standpipe, couplings, and any other parts provided with your faucet.
- Start by attaching the couplings to the bottom of the standpipe. Ensure they are tightly secured to prevent any leaks.
- Next, connect any additional parts provided with your faucet, such as a diverter or handheld shower attachment, following the manufacturer’s instructions.
- Double-check all connections to ensure they are secure and properly aligned. This will help prevent any issues later on.
Securing the Standpipe to the Floor
Now that you have assembled the standpipe components, the final step is to secure it to the floor. Here’s how you can do it:
- Place the standpipe in the marked position on the floor, aligning it with the plumb line you created earlier.
- Using a drill, carefully make pilot holes through the holes provided on the base of the standpipe.
- Insert screws into the pilot holes and tighten them to secure the standpipe to the floor. Ensure that the standpipe is stable and doesn’t wobble.
- Inspect the standpipe connections once again to confirm they are tight and properly sealed.
By following these steps, you can successfully install a freestanding tub faucet standpipe. Now that the standpipe is securely in place, you can proceed with the remaining steps of installing your freestanding tub faucet. Stay tuned!
Connecting The Faucet To The Standpipe
Installing a freestanding tub faucet is a great way to add style and functionality to your bathroom. Once you have successfully assembled the standpipe for your freestanding tub, the next step is connecting the faucet trim kit to the standpipe. This essential step will ensure that your faucet operates properly and securely.
Attaching the Faucet Trim Kit
Before connecting the faucet trim kit, ensure that you have all the necessary components. The trim kit usually includes the faucet handles, spout, and any additional accessories like a hand shower. Refer to the manufacturer’s instructions to identify each component and its intended location.
- Begin by attaching the faucet handles to the base of the standpipe. Most freestanding tub faucets have handles that require simple screw attachments. Insert the screws into the designated holes and tighten them using a screwdriver or an appropriate tool provided with the trim kit.
- Next, mount the spout onto the standpipe. Carefully align the spout with the pre-drilled holes on the standpipe and secure it in place. Again, follow the manufacturer’s instructions for the specific attachment method.
- If your trim kit includes a hand shower, attach it to the designated bracket on the standpipe. Make sure it is securely fastened to avoid any potential leaks or accidents.
Ensuring a Secure Connection
Once you have attached all the components of the faucet trim kit, it is crucial to ensure a secure connection to prevent any issues in the future. A loose connection can result in leaks or even damage to the standpipe.
- Carefully inspect each connection point to ensure that all screws and fittings are tightened properly. Use a wrench or the recommended tool to tighten any loose connections.
- If necessary, apply plumber’s tape to the threading on each connection to create a watertight seal. This extra step can significantly reduce the chances of leaks.
- Inspect the entire assembly for any signs of instability or movement. Gently wiggle the faucet handles, spout, and hand shower (if applicable) to ensure they are firmly attached to the standpipe. If you notice any wobbling or loosening, disassemble the components and reattach them using the correct method.
Testing for Proper Functionality
Before considering the installation complete, it is important to test the faucet for proper functionality. This step will ensure that everything is working as intended and there are no leaks or malfunctions.
Here’s how you can test for proper functionality:
| Step | Description |
|---|---|
| 1 | Turn on the water supply and check for any leaks. Pay close attention to all connection points, including the handles, spout, and hand shower (if applicable). |
| 2 | Turn the faucet handles on and off to ensure smooth operation. The handles should move easily and without any resistance. |
| 3 | If your trim kit includes a hand shower, test its functionality by turning it on and off. Check for proper water flow and adequate pressure. |
| 4 | Check for any unusual sounds or vibrations during the water flow. These can indicate underlying issues that need to be addressed. |
If you encounter any problems during the testing process, refer to the manufacturer’s instructions or seek professional assistance to resolve the issue. Taking the time to ensure proper functionality will save you from potential headaches down the road.
With the faucet securely connected to the standpipe and properly tested, your freestanding tub is now ready to provide you with a luxurious bathing experience. Enjoy the aesthetic appeal and convenience that a freestanding tub faucet brings to your bathroom!
Installing The Water Supply Lines
Installing the Water Supply Lines
When installing a freestanding tub faucet, one of the essential steps is connecting the water supply lines. This involves connecting the hot and cold water lines correctly, applying plumber’s tape for a tight seal, and checking for leaks. In this section, we will guide you through each step, ensuring a successful installation.
Connecting the Hot and Cold Water Lines
To connect the hot and cold water lines, follow these simple steps:
1. Begin by locating the hot and cold water shut-off valves underneath the sink. Turn off both valves to cut off the water supply.
2. Ensure that the tub faucet comes with flexible water lines. These can be easily attached to the shut-off valves. Place the rubber gasket over the end of each water line to create a watertight seal.
3. Connect the hot water line to the shut-off valve labeled ‘hot.’ Use an adjustable wrench to tighten the nut securely, ensuring there are no leaks.
4. Repeat the same process for the cold water line, connecting it to the shut-off valve labeled ‘cold.’ Again, tighten the nut with an adjustable wrench.
Applying Plumbers Tape for a Tight Seal
To ensure a watertight seal, it is crucial to apply plumber’s tape properly. Follow these steps:
1. Start by wrapping the threaded end of the water supply lines with plumber’s tape. This step creates a secure seal and prevents leaks from occurring.
2. Hold the end of the tape firmly against the threads and wrap it clockwise around the threads, ensuring full coverage.
3. Continue wrapping the tape around the threads three to four times, exerting gentle pressure to create a snug fit.
Checking for Leaks
After connecting the water supply lines and applying plumber’s tape, it’s essential to check for leaks before finalizing the installation. Here’s what you need to do:
1. Slowly turn on the hot and cold water supply valves underneath the sink. Observe the connections and joints for any signs of leakage.
2. Pay close attention to the areas where the water lines connect to the shut-off valves and the tub faucet. Look for drips, water puddles, or any moisture indicating a leaky connection.
3. If you notice any leaks, tighten the connections with an adjustable wrench until the leaking stops. Be cautious not to overtighten, as this can damage the pipes or fittings.
By following these simple instructions for connecting the water supply lines, applying plumber’s tape, and checking for leaks, you can confidently install your freestanding tub faucet. Don’t forget to turn off the water supply valves when the tub faucet is not in use to prevent any potential damage or leaks. Now that you’ve mastered this step, let’s move on to the next phase of your installation.
Sealing Gaps And Gasket Placement
When it comes to installing a freestanding tub faucet, one crucial step is sealing any gaps and ensuring proper gasket placement. This ensures a leak-free and secure connection that will stand the test of time. In this section, we will walk you through two essential aspects of this process: applying silicone sealant around the standpipe and securing the gasket for a waterproof seal.
Applying Silicone Sealant around the Standpipe
To start, it is important to apply silicone sealant around the standpipe. This will create a watertight seal that prevents any leakage or water damage. Follow these steps:
- Clean the surface of the standpipe thoroughly to remove any dirt or debris.
- Using a high-quality silicone sealant appropriate for wet environments, apply a continuous bead of sealant around the base of the standpipe.
- Smooth the sealant using your finger or a caulking tool, ensuring it covers the entire circumference of the standpipe.
- Allow the sealant to cure as per the manufacturer’s instructions before proceeding further.
By properly applying silicone sealant around the standpipe, you create a strong barrier against moisture and ensure a tight connection that prevents any potential leaks.
Securing the Gasket for a Waterproof Seal
Another crucial step in achieving a waterproof seal is securing the gasket. The gasket acts as an additional layer of protection and helps create a watertight connection between the faucet and the tub. Follow these steps:
- Place the gasket on the bottom of the faucet, ensuring it fits snugly into the designated groove.
- Align the faucet with the standpipe, ensuring the gasket is in proper position and centered.
- Tightly screw the faucet onto the standpipe, compressing the gasket to create a waterproof seal.
- Double-check the tightness of the faucet and ensure the gasket is properly secured.
Securing the gasket effectively is essential to prevent any water leakage and maintain the integrity of the installation. Take your time to ensure it is correctly aligned and tightened for a reliable and durable connection.
In conclusion, sealing gaps and proper gasket placement play a vital role in the installation of a freestanding tub faucet. By following these steps, you can achieve a leak-free and secure connection that will enhance the functionality and aesthetics of your bathroom.
Testing The Faucet And Making Adjustments
Turning on the Water Supply
After successfully installing your freestanding tub faucet, it’s time to test it out and ensure everything is in perfect working order. The first step in the testing process is turning on the water supply.
To do this, locate the water shut-off valves and turn them clockwise to open the flow of water. Make sure to turn the valves slowly and gently to avoid any sudden pressure surges in the pipes.
Once the water supply is turned on, listen for any unusual sounds, such as rattling or banging, which could indicate air trapped in the plumbing system. If you do hear any strange noises, don’t worry, as they should dissipate over time as the system purges itself of air.
Checking for Proper Water Flow and Temperature
Once the water supply is turned on, the next step is to check for proper water flow and temperature.
Start by turning the faucet handle to the full hot position. Check if the water flows smoothly and consistently without any sputtering or uneven flow. If there are any issues, such as low water pressure or irregular flow, it may indicate a clogged aerator or a problem with the valve.
After checking the hot water flow, gradually turn the handle to the full cold position and repeat the same process. Make sure there aren’t any drastic fluctuations in water temperature or irregularities in flow. Consistency in both temperature and flow is essential for a satisfying bathing experience.
Making any Necessary Adjustments
During the testing process, you may discover the need for adjustments to ensure optimal performance of your freestanding tub faucet.
If you’re experiencing low water pressure, one possible solution is to clean or replace the aerator. Over time, minerals can build up and clog the aerator, affecting water flow. Unscrew the aerator from the spout and rinse it thoroughly under running water. If cleaning doesn’t solve the issue, consider purchasing a new aerator.
Additionally, if you notice inconsistent water temperature, you may need to adjust the temperature limiter on your faucet. Consult the manufacturer’s instructions to locate and adjust the limiter to your desired temperature range.
Remember to test the faucet after each adjustment to ensure the issue is resolved.
By following these steps and thoroughly testing your freestanding tub faucet, you can make necessary adjustments to ensure a smooth flow of water with the perfect temperature. By getting everything just right, you’ll be able to fully enjoy your luxurious bathing experience.
Cleaning Up And Finishing Touches
Once you have successfully installed your freestanding tub faucet, it’s time to clean up and add those finishing touches to make it shine. In this section, we will cover how to remove excess caulk and sealant, clean the faucet and surrounding area, and finally, how to enjoy your newly installed freestanding tub faucet!
Removing Excess Caulk and Sealant
First, it’s important to remove any excess caulk and sealant that has accumulated during the installation process. This will not only give your faucet a cleaner appearance but also ensure a tight and secure seal. To do this:
- Take a utility knife or a caulk removal tool and carefully scrape off any excessive caulk or sealant around the base of the faucet.
- Use a damp cloth or sponge to wipe away the residue, making sure to remove any traces of caulk or sealant.
- Inspect the area to ensure all caulk and sealant is completely removed.
Cleaning the Faucet and Surrounding Area
Now that the excess caulk and sealant are gone, it’s time to clean your faucet and the surrounding area to give it a polished look. Here’s how you can do it:
- Fill a bucket or basin with warm water and add a small amount of mild soap.
- Dampen a soft cloth or sponge in the soapy water and gently wipe down the faucet, paying close attention to any hard-to-reach areas.
- For any stubborn stains or mineral deposits, you can use a mixture of equal parts vinegar and water. Apply it to the affected areas and let it sit for a few minutes before wiping it clean.
- After thoroughly cleaning the faucet, rinse off any soap or vinegar residue with clean water.
- Dry the faucet and surrounding area with a soft, lint-free cloth to prevent any water spots or streaks.
Enjoying Your Newly Installed Freestanding Tub Faucet!
Congratulations! You have successfully installed and cleaned your freestanding tub faucet. Now it’s time to enjoy the luxurious experience it brings to your bathroom. Fill up your tub, control the water temperature and flow using your new faucet, and indulge in a relaxing soak.
Remember to regularly check for any signs of leaks or loose fittings, and promptly address them to maintain the optimal performance of your freestanding tub faucet.
Frequently Asked Questions
Where Do You Put The Faucet On A Freestanding Tub?
The faucet on a freestanding tub is typically placed on the rim of the tub, near the side or end.
How Close Should The Freestanding Faucet Be To The Tub?
Place the freestanding faucet next to the tub at a comfortable distance for easy access.
Does A Freestanding Tub Faucet Need A Valve?
Yes, a freestanding tub faucet needs a valve. The valve controls the flow and temperature of water, allowing you to adjust it as per your preference. It is an essential component for the functioning of the faucet.
How Does A Freestanding Tub Filler Work?
A freestanding tub filler works by connecting to the hot and cold water supply lines. When the faucet is turned on, water flows through the filler and into the tub. The filler can be adjusted to control the water temperature and flow rate, providing a luxurious and convenient bathing experience.
Conclusion
To successfully install a freestanding tub faucet, follow these simple steps. Begin by gathering the necessary tools and materials, such as a wrench and plumber’s tape. Next, ensure the tub’s plumbing connections are compatible with the chosen faucet. Then, carefully attach the faucet to the floor and connect the water supply lines.
Finally, test for any leaks and make adjustments as needed. By following these instructions, you can effortlessly install a freestanding tub faucet and enhance the aesthetic appeal of your bathroom. Happy plumbing!