To install a freestanding tub, first, ensure that the floor is level and sturdy. Then, position the tub in the desired location and connect the drain and water supply lines.
Installing a freestanding tub can add a touch of elegance and luxury to any bathroom. Whether you’re renovating or building a new home, a freestanding tub can be a stunning centerpiece that enhances the overall aesthetic appeal of the space.
However, the installation process requires careful planning and attention to detail to ensure a successful outcome. This guide outlines the essential steps to install a freestanding tub, from preparing the floor to connecting the necessary plumbing. By following these instructions, you’ll be well on your way to enjoying the indulgence and relaxation a freestanding tub provides in your own home.
Choosing The Right Freestanding Tub
When it comes to creating a luxurious and relaxing bathroom environment, installing a freestanding tub is a popular choice. Not only do these tubs add a touch of elegance to any bathroom, but they also provide a spa-like experience for homeowners. However, with so many options available, choosing the right freestanding tub can be a daunting task.
In this article, we will guide you through the factors to consider when selecting a freestanding tub, measuring the space for the tub, and assessing the plumbing requirements for installation. By the end, you’ll be equipped with the knowledge you need to make an informed decision and transform your bathroom into a tranquil oasis.
Factors to consider when selecting a freestanding tub
Choosing the perfect freestanding tub involves more than just selecting a style that matches your bathroom decor. There are several factors to consider to ensure that the tub you choose meets your specific needs and preferences. Let’s take a look at these key factors:
- Size: Determine the available space in your bathroom and select a tub that fits comfortably without overcrowding the room. Keep in mind that freestanding tubs tend to be larger than traditional built-in tubs.
- Material: Freestanding tubs are available in various materials such as acrylic, cast iron, and stone. Each material has its own benefits and drawbacks in terms of durability, heat retention, and maintenance. Consider your priorities and choose a material that aligns with them.
- Style: There is a wide array of styles available, ranging from classic clawfoot tubs to modern and sleek designs. Think about the overall aesthetic of your bathroom and select a style that complements it.
- Features: Some freestanding tubs come with additional features such as built-in jets for a therapeutic massage, ergonomic designs for added comfort, or integrated overflow systems. Determine which features are important to you and prioritize accordingly.
Measuring the space for the tub
Before purchasing a freestanding tub, it’s essential to measure the available space in your bathroom to ensure a proper fit. Here’s a step-by-step guide to help you measure your bathroom space accurately:
- Start by measuring the length and width of the area where you plan to install the tub.
- Take into account any obstructions such as pipes, faucets, or electrical outlets that may affect the positioning of the tub.
- Consider the doorways and hallways that the tub will need to pass through during installation. Measure these areas to ensure the tub can be maneuvered without any issues.
- Make note of the height of the tub as well, ensuring it will fit comfortably under any ceilings or fixtures in your bathroom.
Assessing plumbing requirements for installation
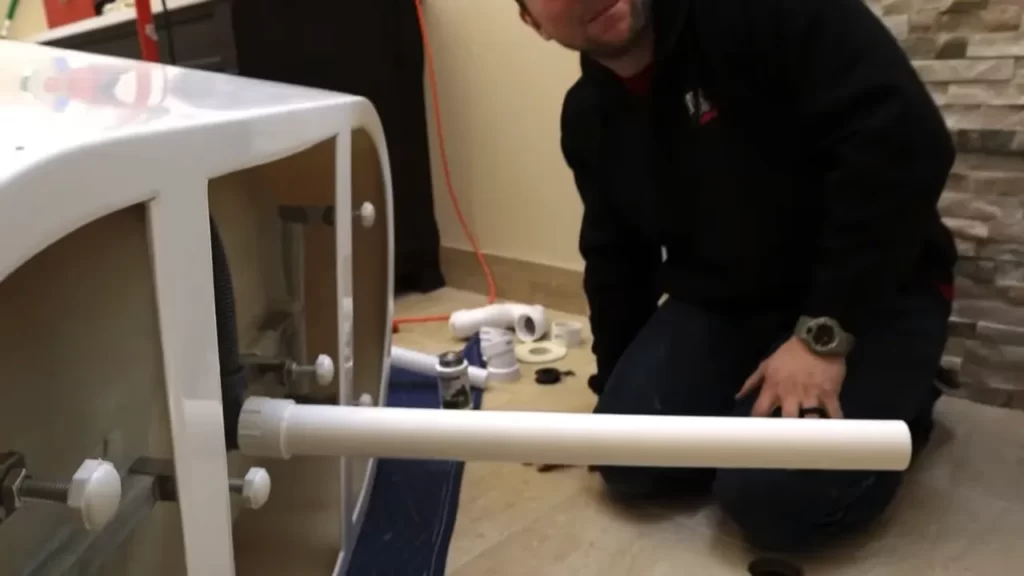
Installing a freestanding tub requires careful consideration of plumbing requirements to ensure a successful installation. Here are some steps to assist you in assessing the plumbing needs:
- Determine the location of the drain and existing plumbing lines in your bathroom. A freestanding tub can be positioned anywhere in the room, but it’s essential to plan for the placement of the drain.
- Measure the distance from the tub’s drain to the existing drainpipe to ensure they align properly.
- Consider the water supply lines. There should be accessible water supply valves near the tub for convenient use.
- If necessary, consult a professional plumber to assess and make any required modifications to your plumbing system.
By considering these factors, measuring your space accurately, and assessing the plumbing requirements, you’ll be well-prepared to choose and install the perfect freestanding tub for your bathroom. So go ahead, create a serene sanctuary that you can indulge in every day!
Preparing The Bathroom For Installation
Before installing a freestanding tub in your bathroom, it is important to prepare the space properly. This involves several crucial steps, including clearing the area, making necessary adjustments to the floor and walls, and ensuring proper ventilation. By following these steps, you can ensure a successful installation and create a stunning centerpiece in your bathroom. Let’s dive into each of these steps in detail.
Clearing the area for installation
First and foremost, you need to clear the area where you plan to install the freestanding tub. Remove any obstacles or furniture that might hinder the installation process. Make sure there is enough space around the tub to allow for easy access and movement. This will not only make the installation easier but also enable you to enjoy a relaxing bathing experience without any obstructions.
Making necessary adjustments to the floor and walls
Once the area is clear, consider making any necessary adjustments to the floor and walls to ensure proper support for the freestanding tub. Check the floor for any unevenness or damage, and if needed, use self-leveling compound to create a smooth and level surface. Similarly, inspect the walls for any structural issues or plumbing obstacles that may need to be addressed before the installation. Taking these steps will help ensure the stability and longevity of your new freestanding tub.
Ensuring proper ventilation in the bathroom
Proper ventilation is crucial in any bathroom, especially when installing a freestanding tub. Without adequate ventilation, moisture can accumulate and lead to mold and mildew growth, causing potential damage to both the tub and the bathroom itself. To prevent this, ensure that your bathroom has proper ventilation, such as an exhaust fan or a window that can be opened to allow for airflow. This will help maintain a dry and comfortable environment, ensuring the longevity of your freestanding tub.
By following these steps and properly preparing your bathroom for installation, you can enjoy a smooth and successful process. Clearing the area, making necessary adjustments to the floor and walls, and ensuring proper ventilation are crucial for a safe and long-lasting installation of your freestanding tub. So, roll up your sleeves, gather your tools, and get ready to transform your bathroom into a luxurious oasis!
Installing The Freestanding Tub
Installing the Freestanding Tub
When it comes to creating a luxurious and relaxing bathroom space, installing a freestanding tub is the ultimate addition. Not only does it add a touch of elegance, but it also creates a spa-like atmosphere that can transform your everyday routine into a rejuvenating experience. However, the installation process may seem daunting if you’re not familiar with the necessary steps. Don’t worry though, because in this guide we will walk you through each step of the installation process, starting with placing the tub in the desired position, connecting the drain and overflow, and finally securing the tub to the floor.
Placing the tub in the desired position
The first step in installing a freestanding tub is to place it in the desired position. Before doing so, make sure to measure the dimensions of your bathroom and the tub to ensure a proper fit. Once you have determined the ideal location for your tub, carefully move it into place. It is crucial to have at least two people to lift and position the tub to avoid any damage or injury.
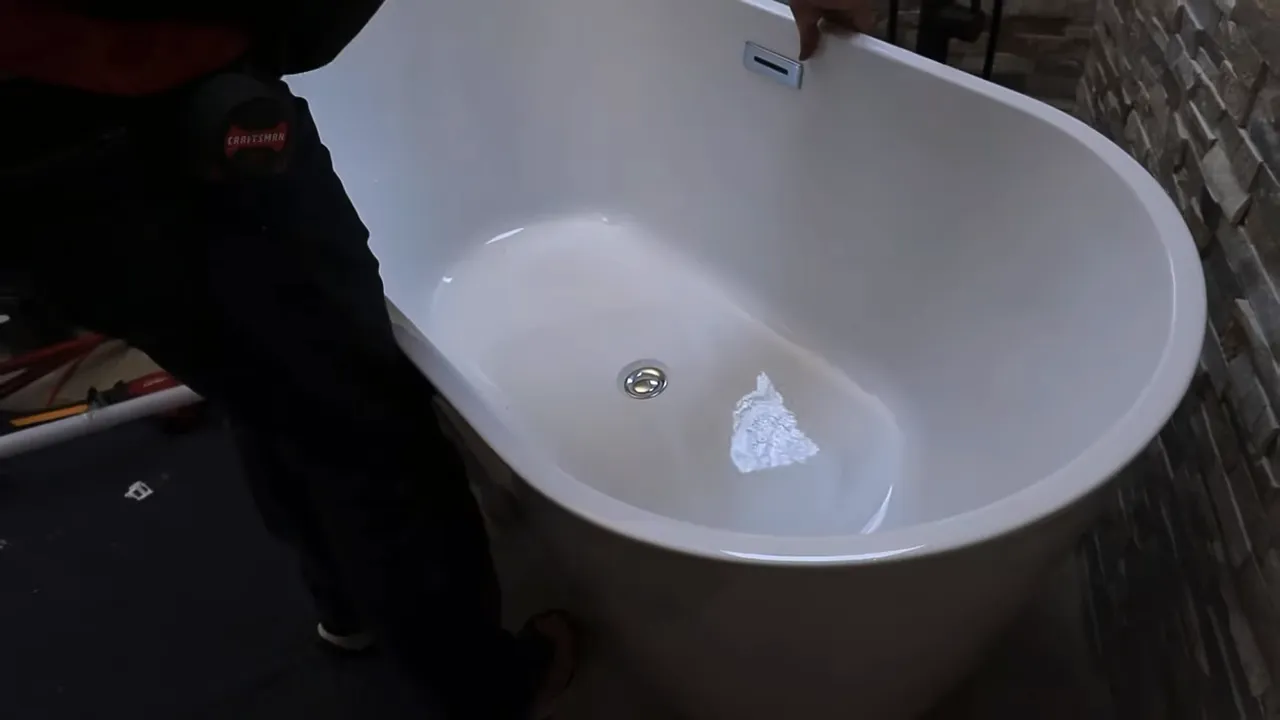
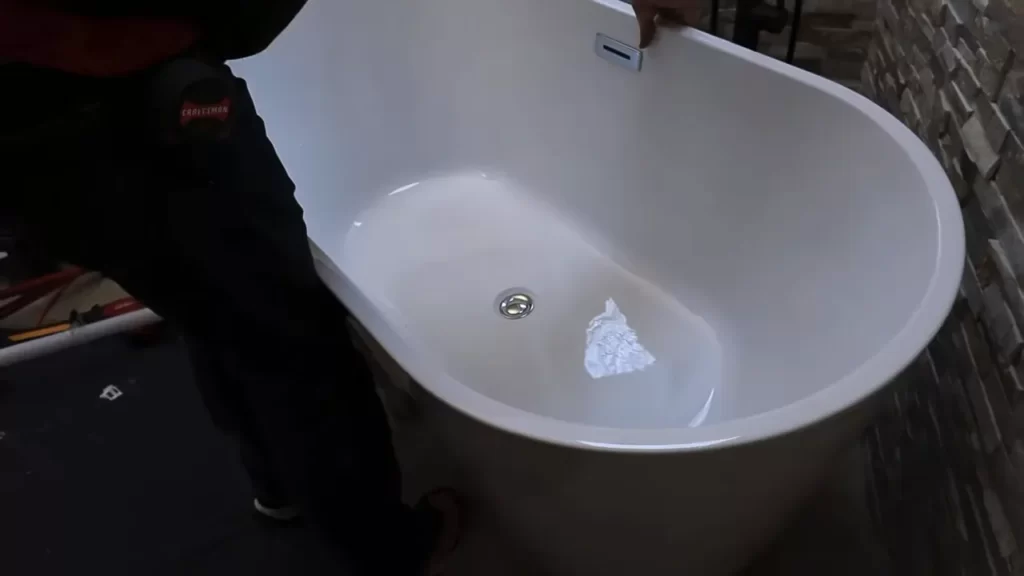
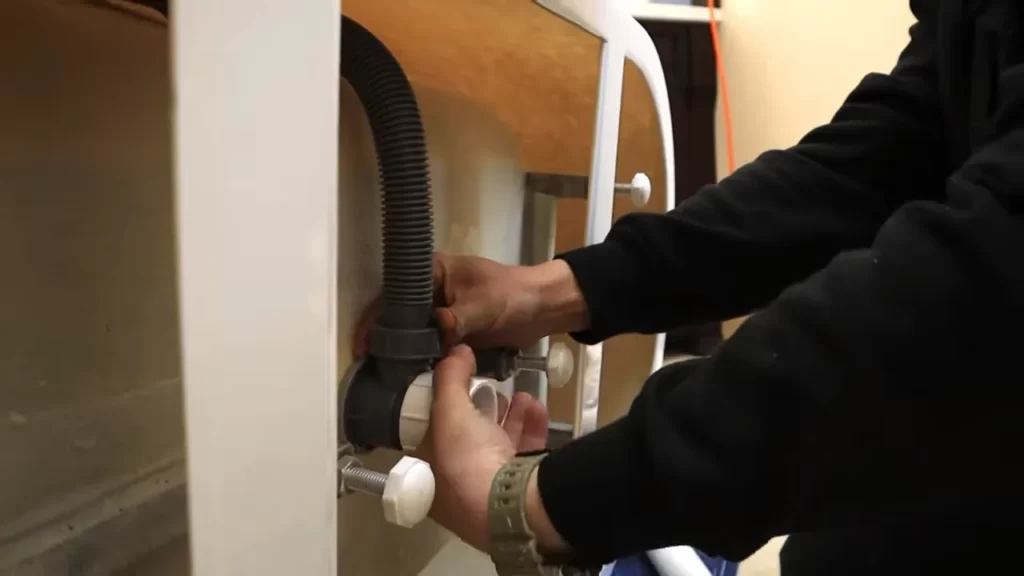
Connecting the drain and overflow
After the tub is in its designated spot, the next step is to connect the drain and overflow. Start by locating the drain hole at the base of the tub. Insert the drain assembly into the hole, ensuring a tight fit. Use plumber’s putty or silicone sealant to create a watertight seal around the drain assembly. Next, attach the overflow cover to the overflow opening on the side of the tub. Secure it in place using the provided screws or any necessary hardware.
Securing the tub to the floor
To ensure stability and prevent any movement, it is essential to secure the tub to the floor. Begin by checking the manufacturer’s instructions for any specific recommendations on anchoring the tub. If no instructions are provided, you can use adjustable feet or shims to level the tub and create a stable base. Once the tub is leveled, use a pencil or marker to mark the position of the feet on the floor. Then, remove the tub and drill pilot holes at the marked spots. Finally, secure the feet or anchors to the floor using screws or bolts, and reposition the tub on top of them.
Conclusion
Properly installing a freestanding tub requires careful attention to detail and following the necessary steps. By placing the tub in the desired position, connecting the drain and overflow, and securing it to the floor, you can ensure a safe and stylish installation. Transform your bathroom into a luxurious oasis with a freestanding tub and enjoy the relaxation and tranquility it brings to your space.
Finishing Touches And Maintenance
Once your freestanding tub is installed, there are a few finishing touches and maintenance tasks you’ll want to take care of to ensure it remains a stunning centerpiece in your bathroom. Adding a decorative base or surround to the tub, caulking and sealing it properly, and regular cleaning and maintenance are all essential steps to preserve its beauty and functionality.
Adding a decorative base or surround to the tub
One way to enhance the aesthetic appeal of your freestanding tub is by adding a decorative base or surround. This not only adds a touch of personal style to your bathroom but also helps to protect the floor from any potential water damage. There are various options available, including wood, stone, or tile bases, each offering a unique look and feel.
If you decide to go with a wood base, it’s important to ensure that it is properly sealed to prevent moisture penetration. This can be done using a high-quality waterproof sealant, such as polyurethane or marine varnish. For stone or tile bases, ensure that the materials are securely affixed and grouted to prevent any movement or loosening over time.
Caulking and sealing the tub properly
Caulking and sealing the area around the freestanding tub is an essential step to prevent water leakage and damage. To begin, thoroughly clean the area around the tub to remove any dirt, dust, or debris. Next, apply a bead of waterproof silicone caulk along the joint where the tub meets the floor or base. Smooth the caulk using a caulk-smoothing tool or your finger, ensuring complete coverage and a neat appearance.
When caulking, be sure to pay extra attention to any gaps or seams between the tub and the base or surround. These areas are prone to water penetration and can lead to mold or mildew growth if not properly sealed. Regularly inspect the caulking for any signs of wear or cracking and reapply as necessary to maintain an effective seal.
Regular cleaning and maintenance of the freestanding tub
To keep your freestanding tub looking its best, regular cleaning and maintenance are key. Use a mild, non-abrasive cleaner specifically formulated for your tub’s material to remove any dirt or soap scum. Avoid using harsh chemicals or abrasive cleaners, as these can damage the tub’s surface.
In addition to regular cleaning, it’s important to address any stains or discoloration promptly. For stubborn stains, you may need to use a specialized cleaner or gentle abrasive, such as baking soda or a soft sponge. Always follow the manufacturer’s instructions and test any new cleaning products on a small, inconspicuous area first to ensure compatibility.
To maintain the finish of your freestanding tub, avoid using abrasive scrub brushes or harsh cleaning tools that can scratch or dull the surface. Instead, opt for a soft cloth or sponge and gentle cleaning techniques. Regularly drying the tub after each use can also help prevent water spots or mineral buildup.
By following these simple steps, you can ensure the proper finishing touches and maintenance for your freestanding tub, allowing it to remain a beautiful and functional centerpiece in your bathroom for years to come.
Frequently Asked Questions
Are Freestanding Tubs Hard To Install?
No, freestanding tubs are not hard to install. Their design allows for easy installation, and they do not require any complex plumbing work. With basic DIY skills and some helpful instructions, you can easily install a freestanding tub in your bathroom.
How Do You Secure A Freestanding Tub To The Floor?
To secure a freestanding tub to the floor, follow these steps: 1. Place the tub in the desired position on the floor. 2. Ensure the surface is level and stable. 3. Use a pencil to mark the position of the tub’s feet on the floor.
4. Drill pilot holes into the marked spots. 5. Insert screws through the tub’s feet and into the pilot holes to secure it firmly to the floor.
Should A Free Standing Tub Be Secured To The Floor?
A free standing tub does not necessarily need to be secured to the floor, but it is recommended for safety and stability reasons. Securing the tub to the floor will prevent any accidental movement or tipping, ensuring a more secure bathing experience.
Do You Need To Tile Under A Freestanding Tub?
Yes, it is recommended to tile under a freestanding tub. Tiling underneath ensures proper support and stability, protects the subfloor from potential water damage, and creates a cohesive and finished look in the bathroom. Additionally, it helps prevent moisture buildup and mold growth.
Conclusion
By following these step-by-step instructions, you can easily install a freestanding tub in your bathroom. From gathering the necessary tools to connecting the plumbing, this process can be completed with relative ease. Remember to carefully measure and plan the placement of the tub, and take your time during the installation to ensure a secure and stable result.
With a little patience and effort, you can enjoy the luxury and relaxation of a freestanding tub in your own home.