
To install a floor sink, start by removing the floor covering and preparing the space according to the sink’s dimensions. Then, position the sink and secure it in place by using construction adhesive or screws.
Choosing The Right Location For Your Floor Sink
When it comes to installing a floor sink, choosing the right location is crucial. The placement of your floor sink plays a significant role in its functionality and efficiency. In this section, we will discuss the important factors to consider when selecting the perfect spot for your floor sink and highlight the importance of proper placement.
Factors to Consider
Before finalizing the location for your floor sink, it’s essential to take various factors into account. Considering these factors will help ensure that your floor sink is positioned optimally and serves its purpose effectively.
Here are some key factors to consider:
- Drainage Requirements: Determine the volume of water that the floor sink will be draining and choose a location that is easily accessible to the plumbing system.
- Site Accessibility: Select a location that allows easy accessibility for cleaning and maintenance. This will save you time and effort in the long run.
- Usage: Think about the intended use of the area where the floor sink will be installed. If it will be frequently used, consider placing it in a central location to minimize the need for long drainage lines.
- Proximity to Hazardous Substances: If the floor sink will be utilized in an environment where hazardous substances are present, ensure that it is positioned in a safe distance from those substances. This will prevent any potential contamination or accidents.
- Gravity Flow: Gravity plays a significant role in proper drainage. Opt for a location where the floor sink can take advantage of gravity to facilitate efficient draining.
Importance of Proper Placement
The proper placement of your floor sink is crucial in maximizing its functionality and avoiding potential problems in the future. When the floor sink is installed in the right location, it ensures:
- Efficient Drainage: Proper placement allows for efficient and smooth drainage, preventing any blockages or backups.
- Easy Cleaning and Maintenance: Placing the floor sink in an accessible area makes it easier to clean and maintain, ensuring its longevity and cleanliness.
- Prevention of Contamination: Correctly positioning the floor sink away from hazardous substances or cross-contamination sources helps maintain a safe and healthy environment.
- Optimized Workflow: With a well-placed floor sink, you can streamline your workflow as it will be conveniently located for the tasks at hand.
Taking the time to carefully select the right location for your floor sink is essential. By considering the factors mentioned above and understanding the importance of proper placement, you can ensure that your floor sink functions efficiently and effectively, enhancing both the functionality and cleanliness of your space.
Gathering The Necessary Tools And Materials
Installing a floor sink is a practical solution for keeping excess water and debris away from your floors. Whether you’re dealing with a commercial kitchen or a laundry room, having a floor sink ensures proper drainage and prevents water damage. Before you start the installation process, it’s crucial to gather all the necessary tools and materials to make the job smooth and efficient.
List of tools required
Here is a comprehensive list of tools you will need to install a floor sink:
| Tool | Function |
|---|---|
| Measuring tape | To accurately measure the sink’s dimensions |
| Adjustable wrench | To tighten and loosen nuts and bolts |
| Hacksaw | To cut through pipes and other materials |
| Power drill | To create holes for screws and anchors |
| Pipe cutter | To cut and resize pipes as needed |
| Screwdriver | To tighten or loosen screws |
| Plumber’s putty | To create a watertight seal around the sink |
Important materials needed
Alongside the tools, you’ll also need several important materials to complete the floor sink installation:
- Action of the material
- Action of the material
- Action of the material
- Action of the material
“Remember, gathering all the necessary tools and materials beforehand will save you time and frustration during the installation process. It’s always better to be prepared, ensuring that you have everything you need at your fingertips.”
Preparing The Work Area
Before you start installing a floor sink, it is crucial to thoroughly prepare the work area. This not only ensures a smooth installation process but also promotes safety and efficiency. In this section, we will discuss the necessary steps to clear the space and take the required safety precautions.
Clearing the Space
The first step in preparing the work area is to clear the space around where the floor sink will be installed. Removing any obstacles and debris is essential to create a clean and accessible work environment. Here are a few key points to keep in mind:
- Remove any furniture, appliances, or other items that may obstruct the installation process.
- Sweep or vacuum the area to remove any loose dirt or debris. This will ensure a clean surface for installation.
- If there are existing floor coverings such as tiles or carpets, consider removing them to expose the bare floor. This will make the installation process easier.
- Ensure sufficient workspace around the installation area to allow for easy movement and access during the installation process.
Taking Necessary Safety Precautions
Safety should always be the top priority when working on any installation project. Installing a floor sink is no exception. Here are some important safety precautions to take:
- Wear appropriate personal protective equipment (PPE) such as gloves, goggles, and a dust mask to protect yourself from any potential hazards.
- Ensure the work area is well-ventilated to prevent the buildup of any fumes or gases that may be generated during the installation process.
- Turn off any electrical power sources in the vicinity of the work area and ensure all electrical outlets are safely covered to avoid any accidents.
- Keep a fire extinguisher nearby and familiarize yourself with its operation in case of any emergencies.
- If you are working with others, establish clear communication and designate specific roles to ensure a coordinated and safe installation process.
By clearing the space and taking the necessary safety precautions, you will be well-prepared to install a floor sink confidently and efficiently. In the next section, we will discuss the steps to properly install the floor sink itself.
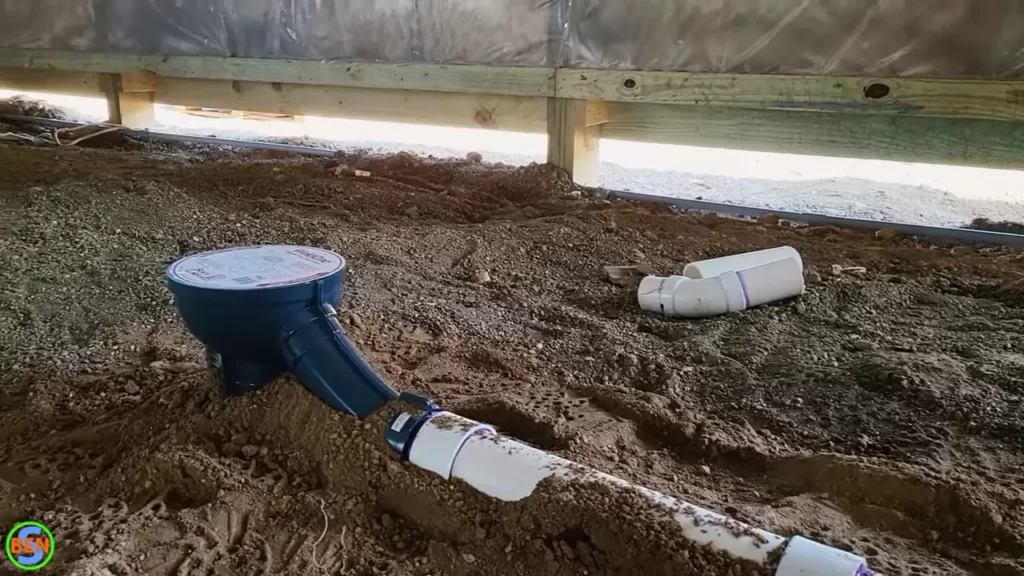
Installing The Floor Sink Drainage System
If you are planning on installing a floor sink in your home or commercial space, it is important to understand the proper installation process for the drain system. The drain system plays a crucial role in keeping your floor sink functional and efficient. In this guide, we will walk you through the step-by-step process of installing the drain system, ensuring that it is done correctly and effectively.
Selecting the Appropriate Drain System
Before you begin the installation process, it is essential to select the appropriate drain system for your floor sink. There are various types of drain systems available, each with its own unique features and benefits. Here are a few factors to consider when selecting the drain system:
- The size of the floor sink: The drain system should be compatible with the size of your floor sink to ensure proper drainage.
- The material of the drain system: Depending on the purpose and location of your floor sink, you may need to choose a drain system made of stainless steel, PVC, or cast iron.
- The load-bearing capacity: If your floor sink will be exposed to heavy loads or foot traffic, you need to select a drain system that can withstand the weight.
By carefully considering these factors, you can choose the most suitable drain system for your floor sink, ensuring durability and functionality.
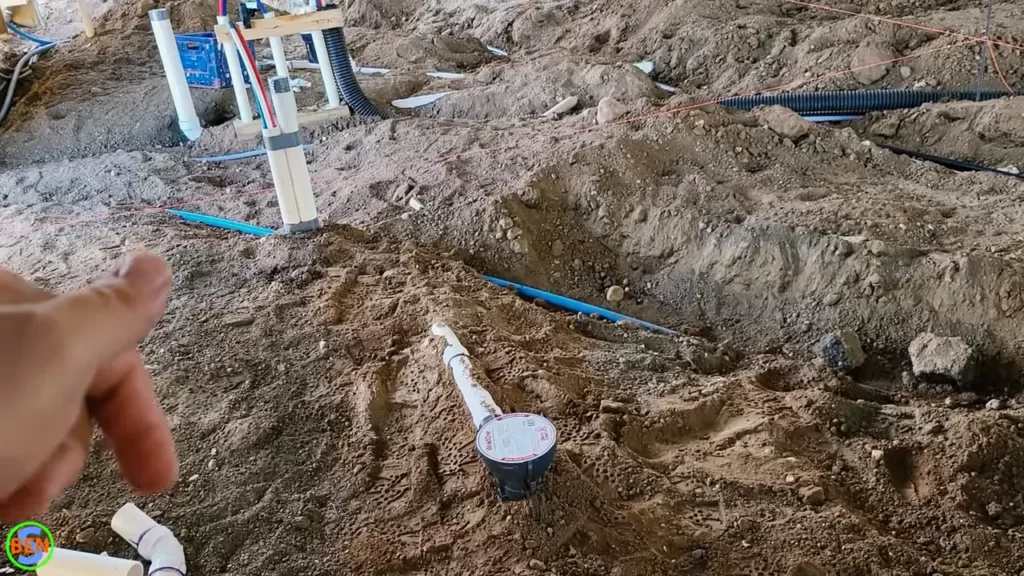
Step-by-step Guide to Installing the Drain System
Once you have selected the appropriate drain system, it is time to begin the installation process. Follow these step-by-step instructions to install the drain system for your floor sink:
- Prepare the area: Start by clearing the area where the floor sink will be installed. Remove any existing flooring or debris that may interfere with the installation.
- Mark the location: Use a measuring tape and a pencil to mark the exact location where the floor sink will be installed. Double-check the measurements to ensure accuracy.
- Create an opening: Using a saw or drill, carefully create an opening in the floor according to the marked location. Take caution to avoid damaging any underlying pipes or wires.
- Install the drain body: Place the drain body into the opening, ensuring that it fits securely. Apply a layer of sealant around the edges to prevent leakage.
- Connect the piping: Attach the appropriate piping to the drain body, ensuring a tight and secure connection. Use plumber’s tape or sealant to prevent any leaks.
- Test for leaks: Once the drain system is installed, it is crucial to test for any leaks. Pour water into the floor sink and observe if there are any signs of leakage. Make any necessary adjustments or repairs.
- Secure the drain cover: Finally, secure the drain cover on top of the drain system. Ensure that it fits properly and is tightly secured to prevent any accidents or blockages.
By following these step-by-step instructions, you can successfully install the drain system for your floor sink. Remember to follow safety precautions and consult a professional if needed. Now that you have completed the installation of the drain system, you can enjoy the benefits of a fully functional and efficient floor sink.
Connecting The Water Supply
Connecting the water supply to your floor sink is a crucial step in the installation process. This ensures that water flows smoothly and efficiently through the sink, providing you with a reliable drainage system. In this section, we will guide you through the process of identifying the water source and properly connecting it to your floor sink.
Identifying the water source
The first step in connecting the water supply is to identify the source of water. This could be a water line running from your main water supply or a dedicated line specifically for the floor sink. To locate the water source:
- Turn off the water supply to your building or specific area where the floor sink will be installed.
- Locate the main water line or the dedicated line for the floor sink. This can usually be found near the area where the sink will be installed, such as in a utility closet or mechanical room.
- Ensure that the water line is in good condition and free from any leaks or damages. If there are any issues, it is recommended to consult a professional plumber for repairs or replacements.
Properly connecting the water supply
Once you have identified the water source, it is important to properly connect it to your floor sink. Follow these steps to ensure a secure and efficient connection:
- Measure and cut the appropriate length of water supply pipe. Use a pipe cutter to obtain a clean and precise cut.
- Remove any burrs or rough edges from the cut end of the pipe using a deburring tool or sandpaper. This will prevent any obstructions or restrictions in the water flow.
- Attach one end of the pipe to the water source using a pipe fitting or valve. Ensure that it is tightly secured to prevent any leaks.
- Attach the other end of the pipe to the floor sink using a pipe fitting or adapter. Again, make sure it is securely fastened to avoid any potential leaks.
- Turn on the water supply and check for any leaks. If you notice any, tighten the fittings or connections accordingly.
It is recommended to test the water flow through the floor sink to ensure everything is functioning properly. Run water through the sink and check for any clogs or slow drainage. If any issues arise, troubleshoot or consult a professional plumber for assistance.
By properly connecting the water supply to your floor sink, you can ensure a reliable and efficient drainage system. Following the steps outlined above will help you complete this task with ease and expertise.
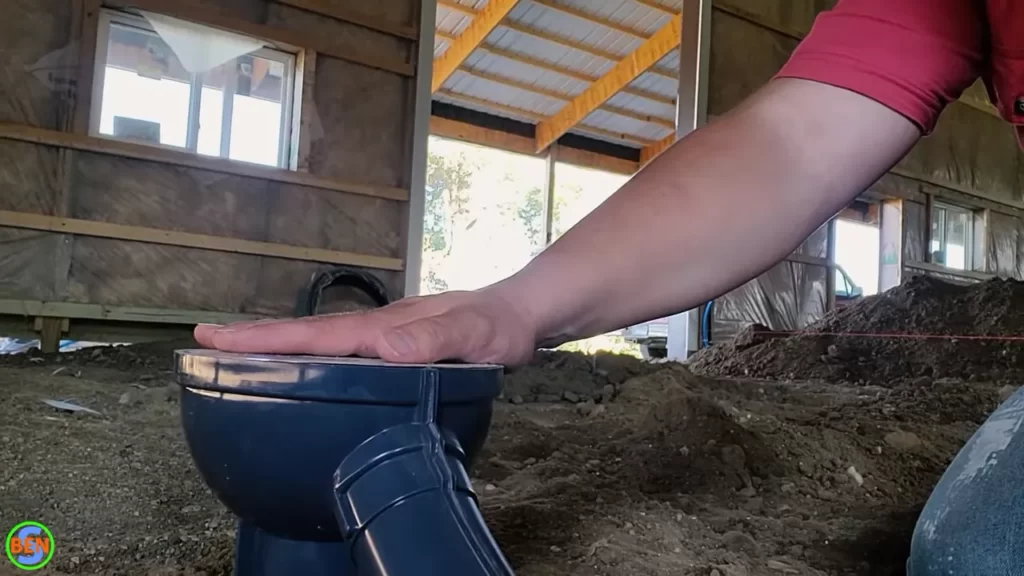
Securing The Floor Sink In Place
Securing the floor sink properly is crucial to ensure its stability and prevent any potential leaks or damage. By following the steps below, you can securely install your floor sink and have peace of mind knowing it will stay in place.
Ensuring Stability
Before you secure the sink to the floor, it’s essential to ensure that the sink itself is stable and level. This will help prevent any future issues and simplify the installation process. To check the stability of the sink, follow these steps:
- Place a level on top of the sink and check if it is horizontal. If it’s not level, adjust the sink’s legs or the supporting structure until it is.
- Ensure that there are no wobbles or movements when pressure is applied to the sink. Use shims if necessary to eliminate any unevenness.
- Inspect the drain assembly to ensure it is properly aligned with the hole in the floor. Adjust as needed to guarantee a perfect fit.
Securing the Sink to the Floor
Once you’ve confirmed the stability of the floor sink, it’s time to secure it in place. This will prevent any shifting or movement over time. Follow these simple steps:
- Apply a layer of adhesive to the bottom of the sink’s legs or base, ensuring even coverage.
- Gently place the sink in position, making sure it is aligned with the drain hole in the floor. Apply slight pressure to allow the adhesive to bond properly.
- Use screws or bolts (preferably made of stainless steel) to secure the legs or base of the sink to the floor. Place the screws evenly around the sink to distribute the weight and provide adequate support.
- Tighten the screws or bolts gradually and evenly to ensure equal pressure on all sides of the sink. This will prevent any warping or damage to the sink itself.
- Check the sink’s stability again by applying pressure and verifying that it doesn’t move or wobble. Make any necessary adjustments before continuing with the installation process.
By securing the floor sink properly, you can enjoy a stable and sturdy installation that will withstand daily use and prevent potential issues down the line.
Installing The P-Trap And Drain Pipe
When it comes to installing a floor sink, one of the most crucial steps is properly installing the P-Trap and drain pipe. The P-Trap plays a vital role in preventing sewer gas from entering your space, while the drain pipe ensures proper drainage. In this step-by-step guide, we will walk you through the process of installing the P-Trap and drain pipe, ensuring that your floor sink functions smoothly.
Understanding the Importance of the P-Trap
The P-Trap is an essential component in any plumbing system, including your floor sink. It gets its name from its shape, resembling the letter “P”. The primary purpose of the P-Trap is to trap water in its bend, creating a barrier that prevents sewer gases from rising up through the drain. Without a properly installed P-Trap, you run the risk of unpleasant odors and potential health hazards.
Step-by-Step Guide to Installing the P-Trap
Now that you understand the importance of the P-Trap, let’s dive into the step-by-step process of installing it. Follow these instructions carefully to ensure a successful installation:
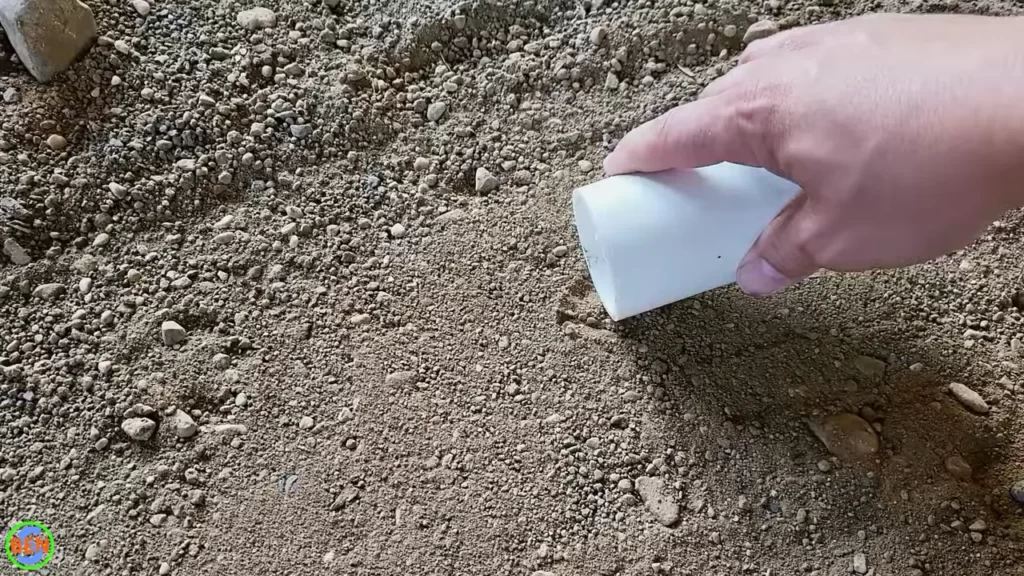
- Begin by gathering all the necessary tools and materials. You will need a hacksaw, pipe wrench, adjustable pliers, PVC cement, P-Trap assembly, and appropriate-sized PVC pipe.
- Measure the distance between the outlet of the floor sink and the drainpipe. Use the hacksaw to cut a piece of PVC pipe to this length.
- Apply PVC cement to one end of the PVC pipe and attach it to the floor sink drain outlet.
- Next, take the P-Trap assembly and fit it onto the other end of the PVC pipe. Ensure that it is tightly secured.
- Measure the distance between the outlet of the P-Trap assembly and the drainpipe. Cut another piece of PVC pipe to this length.
- Apply PVC cement to one end of the PVC pipe and attach it to the P-Trap outlet.
- Finally, attach the other end of the PVC pipe to the drainpipe, ensuring a secure connection.
Once you have completed these steps, double-check all connections to ensure they are tight and leak-free. This will ensure the proper functioning of your floor sink and prevent any potential issues in the future.
With the P-Trap and drain pipe successfully installed, your floor sink is ready for use. It’s essential to follow these steps carefully and consult a professional if you have any doubts or concerns. By taking the time to install the P-Trap and drain pipe correctly, you can enjoy a fully functional floor sink with optimal performance.
Testing And Checking For Leaks
Once you have successfully installed your floor sink, it is crucial to test and check for leaks before considering the job complete. This step is important as it ensures that the sink functions properly and prevents any unwanted water damage in the future.
Importance of Testing
Testing the floor sink is imperative to ensure that it operates as expected. Ignoring this step may result in leaks, which can cause extensive damage to your flooring and infrastructure over time. By conducting thorough testing, you can catch any potential issues early on and address them before they escalate into major problems.
Step-by-step guide to checking for leaks
Follow these simple steps to test and check for leaks in your floor sink:
- Prepare the sink: Make sure the sink is free from any obstructions or debris. Fill it with a small amount of water, up to the overflow level if applicable.
- Observe the water level: Let the water sit in the sink for a few minutes and check if the water level decreases. If it remains steady, proceed to the next step. If it lowers, there may be a leak that needs to be addressed.
- Inspect the drain connections: Carefully examine the connections between the drain pipes and the sink. Look for any signs of moisture, drips, or water staining. If you notice any issues, tighten the connections or replace any faulty seals to prevent leaks.
- Check the P-trap: Inspect the P-trap, which is located beneath the sink and helps prevent sewer odors from entering your space. Look for any signs of leaking, such as water pooling or wetness around the trap. If necessary, reposition the trap or replace any worn-out components.
- Verify proper drainage: After checking for leaks, let the water drain from the sink. Observe if it drains efficiently and without any blockages. Slow drainage or gurgling sounds while draining may indicate a clog that needs to be addressed.
- Clean up and retest: Once you have completed the necessary repairs or adjustments, remove the water from the sink and clean up any remaining moisture. Fill the sink again and repeat the testing process to ensure that the leaks have been resolved.
By following these steps and thoroughly testing your floor sink, you can rest assured that it is functioning properly and will provide you with reliable performance in the long run.
Additional Tips For A Successful Installation
When it comes to installing a floor sink, there are several additional tips to keep in mind to ensure a successful installation. These expert recommendations and troubleshooting common issues can help you avoid any potential problems and make the process smoother.
Expert Recommendations
Following expert recommendations can greatly contribute to the success of your floor sink installation. Here are a few tips from the experts:
- Choose the right location: One of the most important factors to consider is the location of the floor sink. Ensure that it is placed in an area that is easily accessible and where water can efficiently drain.
- Proper preparation: Before installing the floor sink, make sure to thoroughly clean the area and remove any debris or obstacles that may hinder the installation process.
- Use quality materials: Investing in high-quality materials for the installation, such as durable pipes and fittings, can contribute to the longevity and reliability of the floor sink.
- Follow manufacturer’s instructions: Each floor sink may have specific installation instructions provided by the manufacturer. It is crucial to carefully read and follow these instructions to ensure a proper installation.
- Seek professional help if needed: If you are unsure about any aspect of the installation process or encounter any challenges, it is always best to seek the assistance of a professional plumber or installer.
Troubleshooting Common Issues
Despite thorough preparation and following expert recommendations, it’s possible to run into some common issues during the floor sink installation. Understanding these issues can help you troubleshoot and overcome them with ease.
| Common Issue | Solution |
|---|---|
| Leakage around the drain | Ensure that the drain gasket is properly installed and tightened. If the issue persists, consider applying plumber’s putty or silicone caulk to create a watertight seal. |
| Improper water flow | Check for any obstructions in the pipes or drain system. Make sure the pipes have the correct slope for water to flow freely. Clear any blockages or adjust the slope as necessary. |
| Odor issues | Ensure that the floor sink trap is properly installed and has a sufficient level of water to create an effective barrier against sewer gases. Regularly clean and maintain the floor sink to prevent any buildup of debris or organic matter that could contribute to unpleasant odors. |
| Inadequate support | If the floor sink feels unstable or wobbly, check if it is securely attached to the floor. Reinforce the support by adding additional brackets or anchors if necessary. |
By following these expert recommendations and troubleshooting common issues, you can ensure a successful floor sink installation. Remember, proper installation and maintenance of the floor sink is essential for its functionality and longevity.
Maintaining Your Floor Sink
After successfully installing a floor sink, it’s important to understand how to properly maintain it to ensure its longevity, functionality, and efficient performance. Regular cleaning and maintenance are paramount to keep your floor sink in optimal condition. In this section, we will provide you with some valuable tips on how to maintain your floor sink.
Regular cleaning and maintenance tips
Maintaining the cleanliness of your floor sink is essential to prevent clogging, odors, and potential damage. Incorporate these cleaning practices into your routine to keep your floor sink in top shape:
- Regular debris removal: Remove any debris, food particles, or other solid substances that may accumulate in your floor sink. Use a strainer or grate to catch larger particles and prevent them from entering the drain.
- Frequent flushing: Regularly flush your floor sink with hot water, which helps to remove any residue, grease, or buildup. For a more thorough cleaning, consider using a mild detergent or a specialized enzymatic cleaner.
- Preventing stains: Avoid leaving standing water or caustic substances in your floor sink for an extended period, as they can cause stains and damage the surface. Promptly clean up any spills to prevent stains and maintain a clean appearance.
- Schedule deep cleanings: In addition to your regular cleaning routine, it’s beneficial to schedule deep cleanings periodically. This involves removing the drain cover and thoroughly cleaning all the components, ensuring that no residue or debris remains.
By adhering to these regular cleaning and maintenance tips, you can ensure that your floor sink remains in optimal condition and performs effectively.
Ensuring longevity and functionality
Aside from regular cleaning, certain practices can enhance the longevity and functionality of your floor sink. Consider the following tips to maximize its lifespan:
- Inspect and repair leaks: Routinely inspect your floor sink for any signs of leaks or dripping water. If you detect any issues, such as loose or damaged seals, promptly repair them to prevent further damage and ensure the efficient operation of your floor sink.
- Maintain a proper slope: Check periodically if the floor sink has the correct slope for effective drainage. Ensure that the slope promotes water flow towards the drain and prevents pooling or standing water, which can lead to unpleasant odors and damage.
- Manage grease accumulation: If your floor sink is utilized in a commercial kitchen or an area where grease is present, it’s crucial to implement measures to prevent grease buildup. This can include installing a grease trap or using specialized enzymes to break down and remove grease effectively.
- Address any mechanical issues promptly: If you notice any malfunctions or mechanical issues with your floor sink, such as slow drainage or strange noises, don’t delay in addressing them. Prompt repair or professional assistance can rectify these problems before they escalate and disrupt the functionality of your floor sink.
By following these tips, you can ensure the longevity, functionality, and efficiency of your floor sink, allowing you to enjoy its benefits for an extended period.
Frequently Asked Questions
Do You Need To Vent A Floor Sink?
Yes, it is necessary to vent a floor sink. Venting allows proper air flow, preventing clogs and odors. Proper ventilation ensures efficient drainage and helps maintain a healthy and functional plumbing system for the floor sink.
How Do You Plumb A Floor Drain To A Sink?
To plumb a floor drain to a sink, you’ll need a PVC pipe and some basic plumbing tools. First, connect the drain pipe from the floor to the P-trap under the sink. Then, connect the P-trap to the sink’s drain pipe.
Lastly, ensure all connections are secure and test for any leaks.
What Is The Difference Between A Floor Sink And A Floor Drain?
A floor sink is typically used in commercial kitchens to collect wastewater, while a floor drain is used to remove excess water in areas like bathrooms or basements. Both help prevent water damage, but have different purposes and features.
How Do You Install A Pedestal Sink With A Floor Drain?
To install a pedestal sink with a floor drain, follow these steps: 1. Shut off the water supply and disconnect the existing sink. 2. Place the sink’s pedestal on the floor against the wall and align the drain pipe. 3.
Attach the sink basin to the pedestal using bolts or screws. 4. Connect the drain pipe to the sink’s drain opening. 5. Install the faucet and water supply lines. Test for leaks and turn on the water supply.
Conclusion
To sum up, installing a floor sink doesn’t have to be a daunting task. By following the step-by-step guidelines outlined in this blog post, anyone can successfully put in a floor sink. Remember to gather the necessary materials, prepare the area, and carefully follow the installation process.
With a little patience and attention to detail, you’ll have a functional and efficient floor sink in no time. So go ahead and confidently tackle your next plumbing project!