To install a floating sink, first, you need to locate and mark the position for the sink on the wall. Then, install a solid blocking on the wall to support the sink.
Finally, attach the sink brackets to the wall and secure the sink onto the brackets. Introducing a floating sink into your bathroom can add a touch of elegance and modernity to the space. These sleek, wall-mounted sinks not only provide a unique aesthetic but also offer practical advantages, such as creating the illusion of a more spacious area.
Installing a floating sink is a straightforward process that requires careful measurements, proper tools, and attention to detail. In this guide, we will take you through the step-by-step process of installing a floating sink to help you achieve the desired look and functionality for your bathroom.
Why Choose A Floating Sink For Your Bathroom
Are you looking to update your bathroom fixtures? Consider the sleek and modern appeal of a floating sink. With its space-saving design, modern aesthetic, and easy installation, a floating sink is a perfect choice for any bathroom. Let’s dive into the reasons why a floating sink is an excellent addition to your bathroom.
Space-saving design
A floating sink is an ideal solution for small bathrooms or powder rooms that have limited space. Unlike traditional pedestal or vanity sinks, a floating sink is mounted directly to the wall, freeing up valuable floor space. This design allows for a clean and uncluttered look, making your bathroom appear spacious and organized.
Modern aesthetic
When it comes to contemporary bathroom designs, a floating sink offers a sleek and stylish option. Its minimalist design and clean lines create a visually appealing centerpiece for your bathroom. The floating effect gives a sense of lightness and airiness, enhancing the overall modern vibe of the space. Whether you have a traditional or modern bathroom, a floating sink can seamlessly blend in and enhance the aesthetics.
Easy installation
Installing a floating sink is a straightforward process that can be completed in no time. With the right tools and materials, you can easily mount the sink to the wall. The floating design eliminates the need for additional cabinetry or supports, making the installation process even easier. Whether you are a seasoned DIY enthusiast or a beginner, installing a floating sink is a hassle-free experience.
In conclusion, opting for a floating sink in your bathroom is a wise decision. Its space-saving design, modern aesthetic, and easy installation make it a popular choice among homeowners. So, go ahead and enhance your bathroom with the elegance and functionality of a floating sink.

Tools And Materials Needed
Before you start installing a floating sink in your bathroom, make sure you have all the necessary tools and materials. Having everything ready will ensure a smooth and efficient installation process, saving you time and frustration. Here are the key items you will need:
Floating sink kit
A floating sink kit is the foundation of your installation. It typically includes the sink basin, wall-mounting brackets, and any necessary hardware. Make sure to choose a kit that matches your desired style and fits the dimensions of your bathroom.
Wall-mounting hardware
Wall-mounting hardware is essential for securely attaching the sink to the wall. This hardware usually consists of screws or bolts, brackets, and anchors. Ensure that the hardware is compatible with your floating sink kit and suitable for the type of wall material in your bathroom.
Level
A level is crucial for ensuring that your floating sink is installed evenly and straight. It will help you achieve a professional and visually pleasing result. Make sure to choose a reliable level that is long enough to span the width of your sink.
Drill
A drill will be needed to create holes in the wall for attaching the wall-mounting hardware. Depending on the type of wall material, you may need a specific drill bit. Having a drill with adjustable speed and torque settings will allow you to work effectively and prevent damage.
Screwdriver
A screwdriver is essential for tightening screws and other fasteners during the sink installation process. Look for a screwdriver with a comfortable handle that provides a good grip, making it easier to secure the various components of your floating sink.
Measuring tape
Accurate measurements are crucial when installing a floating sink. A measuring tape will help you determine the proper positioning of the sink and ensure that it is aligned with other elements in the bathroom. Look for a measuring tape with clear markings and a sturdy construction.
Pencil
A pencil is necessary for marking the wall and indicating where to drill holes or attach hardware. Opt for a high-quality pencil that writes well on different surfaces and has an eraser, allowing you to make adjustments and corrections as needed.
By having these tools and materials ready, you can proceed with confidence and successfully install your floating sink. Make sure to double-check everything before you begin, as having the right resources at your disposal will make the entire process much more enjoyable and efficient.
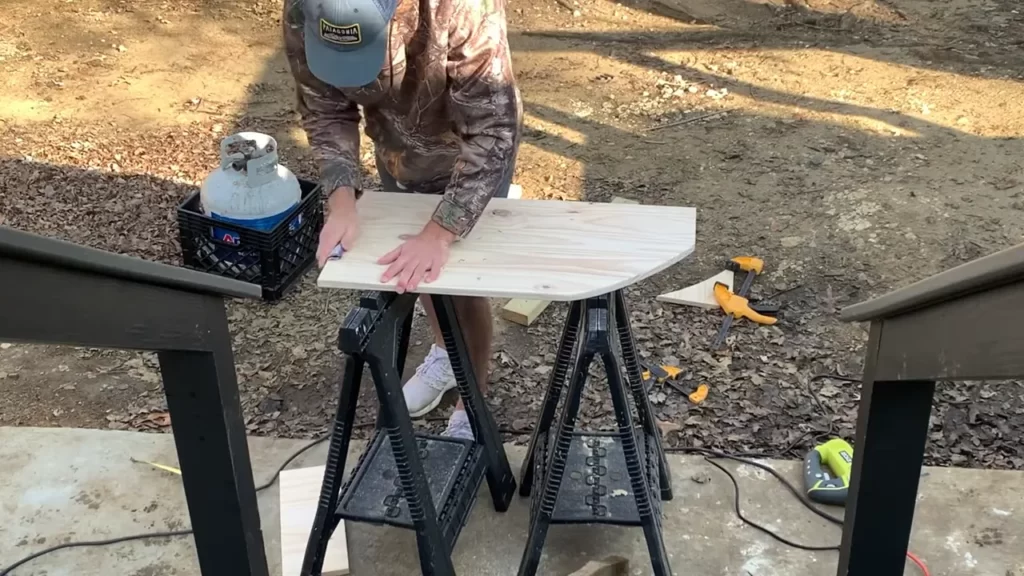
Preparing The Wall
When installing a floating sink, proper preparation of the wall is crucial to ensure a secure and aesthetically pleasing installation. This involves several key steps, including determining the sink height, locating studs, using a level, and drilling pilot holes for wall-mounting hardware. Here’s a guide on how to prepare the wall for installing a floating sink.
Determine the sink height and mark the wall
Before you begin installing the floating sink, it’s important to determine the desired height and mark it on the wall. This will help ensure that the sink is positioned at the right level for your comfort and convenience. Use a measuring tape to determine the ideal height from the floor, and use a pencil to mark this measurement on the wall.
Locate studs for secure installation
Locating the studs in the wall is essential for a secure installation of the floating sink. Studs are vertical wooden or metal beams behind the wall that provide additional support. To locate the studs, you can use a stud finder or tap gently on the wall to listen for a solid sound. Once you’ve located the studs, mark their positions on the wall with a pencil. This will help you determine where to attach the wall-mounting hardware for the sink.
Use a level to ensure accuracy
An important step in the installation process is ensuring that the sink is perfectly level. This will not only give the sink a professional look but also prevent water from pooling and causing damage. To achieve a level installation, use a carpenter’s level and position it horizontally across the marked height on the wall. Adjust the position as necessary until the level bubble is centered, indicating that the sink will be perfectly level when installed.
Drilling pilot holes for wall-mounting hardware
Once you’ve determined the sink height, located the studs, and ensured levelness, it’s time to drill pilot holes for the wall-mounting hardware. Pilot holes are small, pre-drilled holes that help guide the screws into the wall. Use an appropriate drill bit size for the screws you will be using, and drill the holes into the marked positions on the wall. Ensure that each hole is drilled straight and at the desired depth for optimal stability.
By following these steps, you can effectively prepare the wall for installing a floating sink. Taking the time to properly prepare the wall ensures a secure and successful installation, resulting in a beautiful and functional addition to your bathroom or kitchen.
Installing The Wall-Mounting Hardware
When it comes to installing a floating sink, one of the crucial steps is to secure the sink to the wall using the wall-mounting hardware. This not only provides stability but also gives the sink a sleek and modern appearance. In this section, we will guide you through the process of attaching the mounting brackets to the wall, securing them with screws, and ensuring the sink is level and aligned.
Attach the mounting brackets to the wall
To begin, you will need the wall-mounting hardware that came with your sink. Start by locating the desired placement of your sink on the wall. Make sure it is at a comfortable height and provides enough space for plumbing connections. Using a stud finder, locate the studs in the wall and mark their positions.
Next, measure the distance between the holes on the back of the sink, and transfer these measurements to the wall. Using a level, align the brackets on the marked positions and mark the location for pilot holes. These pilot holes will ensure a secure attachment to the wall.
Secure the brackets with screws
After marking the pilot hole locations, use an appropriately sized drill bit to create the pilot holes. This will prevent any damage to the wall. Once the pilot holes are made, hold the brackets against the wall and insert screws into the holes, making sure they are firmly attached to the wall and the studs.
Take extra care not to overtighten the screws, as this can cause damage to the wall or brackets. Use a screwdriver or a drill with adjustable torque to avoid overtightening.
Double-check the level and alignment
With the brackets securely attached to the wall, it’s essential to ensure the sink will hang level and align properly. Using a level, place it on top of the sink to check for any sagging or misalignment. Adjust the brackets if needed to achieve a perfect level.
Additionally, check the alignment of the sink with other elements in the room, such as the mirror or vanity. This will ensure a visually pleasing installation. Make any necessary adjustments before proceeding further.
By following these steps and properly installing the wall-mounting hardware, you will be one step closer to enjoying your new floating sink. In the next section, we will discuss how to connect the plumbing and complete the installation process.
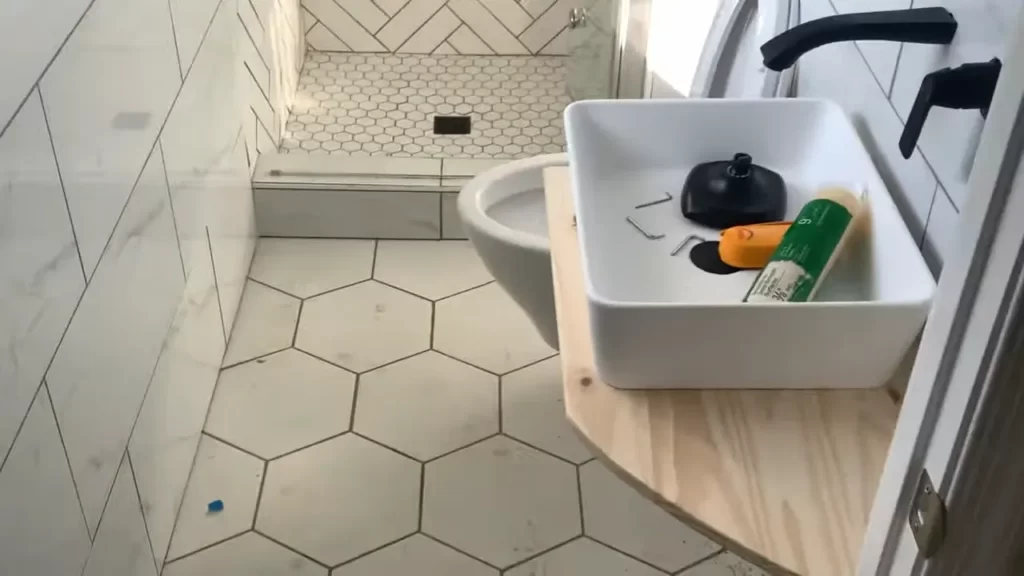
Assembling The Floating Sink
Once you have prepared the mounting area and gathered all the necessary tools, it’s time to start assembling your floating sink. This process involves following the sink manufacturer’s instructions, attaching the sink basin to the mounting brackets, and connecting the water supply lines and drain.
Follow the sink manufacturer’s instructions
Before you begin, make sure you carefully read and understand the instructions provided by the sink manufacturer. Each sink may have its own unique installation requirements, so following these instructions is crucial to ensure a successful installation.
Attach the sink basin to the mounting brackets
To attach the sink basin to the mounting brackets, you will need to locate the mounting holes on the underside of the sink. These holes are designed to fit the mounting brackets securely in place. Align the sink basin with the brackets and insert the mounting screws through the holes. Use a screwdriver to tighten the screws until the sink basin is firmly attached to the brackets.
Connect the water supply lines and drain
With the sink basin securely attached, it’s time to connect the water supply lines and drain. First, locate the water supply valves under the sink. Attach the flexible supply lines to the valves, ensuring a tight connection. Use an adjustable wrench to tighten the fittings.
Next, connect the drain. Apply plumber’s putty around the drain opening on the sink basin to create a watertight seal. Insert the drain assembly into the opening and tighten the nut from beneath the sink to secure it in place. Finally, connect the other end of the drain assembly to the existing plumbing system.
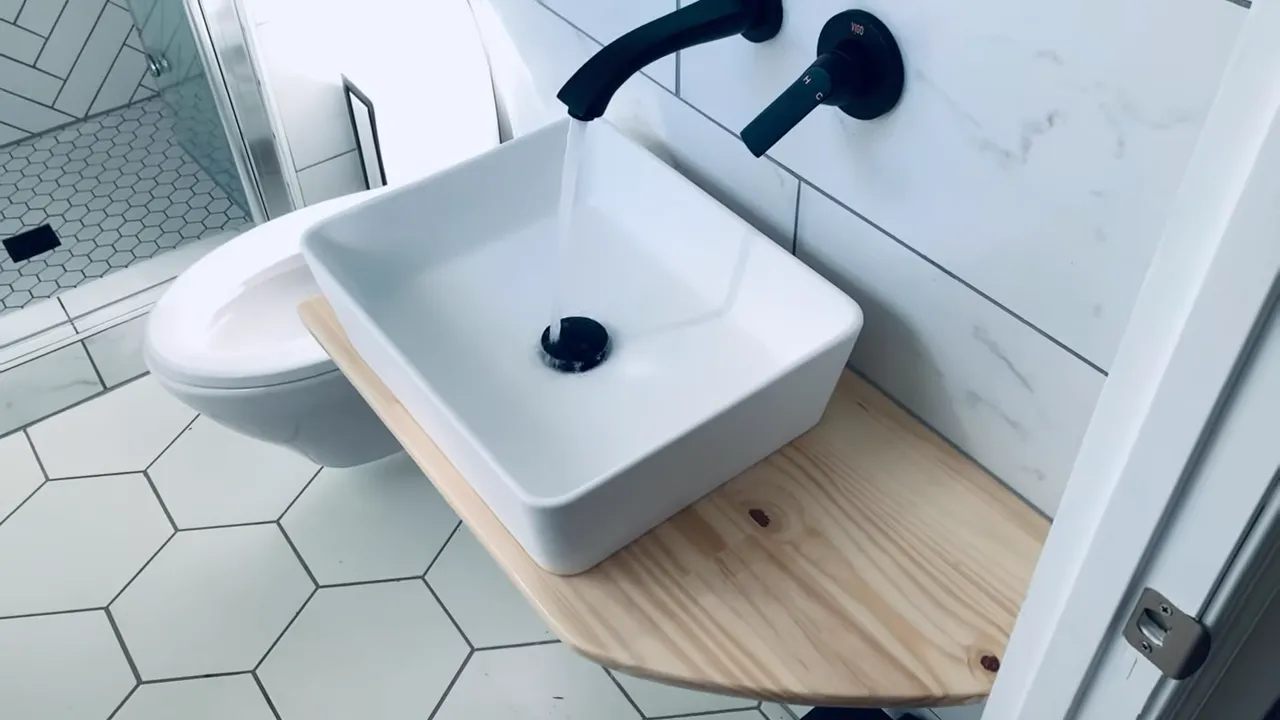
Once you have completed these steps, double-check all connections to ensure they are secure and leak-free. Turn on the water supply valves and let the water run for a few minutes to check for any leaks. If everything looks good, your floating sink is now assembled and ready to be used!
Mounting The Floating Sink
Mounting the Floating Sink
Installing a floating sink can instantly transform the look of your bathroom, giving it a modern and sleek appeal. The first step in this process is mounting the sink onto the wall. This crucial step ensures that the sink is secure and stable, and will last for years to come. In this article, we will guide you through the process of mounting a floating sink, covering everything from lifting the sink to securing it onto the mounting brackets. So, let’s get started!
Lift the sink and place it on the mounting brackets
The first task is to lift the sink and position it onto the mounting brackets. This must be done carefully to avoid any damage to the sink or the walls. To begin, ensure that the mounting brackets are properly installed at the desired height on the wall. Then, with the help of a partner, lift the sink and place it onto the brackets. Make sure the sink sits evenly on the brackets, with no wobbling or instability. This step is vital in ensuring a solid foundation for your floating sink.
Adjust the sink to the desired position
Once the sink is resting on the mounting brackets, it’s time to adjust it to the desired position. This is an important step as it determines the final look and functionality of your floating sink. Your sink should not only be aesthetically pleasing but also functional and convenient to use. Carefully adjust the sink from side to side to ensure it is level. Use a level tool to check if the sink is perfectly horizontal. Also, consider the height and distance from other bathroom fixtures to ensure proper functionality. Take your time with this step, as it is crucial in achieving the desired outcome.
Secure the sink to the brackets
Now that you have adjusted the sink to your liking, it’s time to secure it onto the mounting brackets. Use the appropriate screws and a screwdriver to attach the sink securely to the brackets. Start by inserting the screws through the holes provided on the underside of the sink and into the corresponding holes on the brackets. Tighten the screws firmly but be careful not to overtighten as it may damage the sink or the brackets. Ensure that the sink is sturdy and does not move or wobble.
In conclusion, mounting a floating sink involves lifting the sink onto the mounting brackets, adjusting it to the desired position, and securing it onto the brackets. Following these steps will ensure a secure and visually appealing floating sink installation. Take your time, follow the instructions carefully, and enjoy your newly installed floating sink for years to come.
Connecting The Plumbing
Install the P-trap and drain assembly
Once you have secured the floating sink to the wall and countertop, it’s time to connect the plumbing. The first step is to install the P-trap and drain assembly. The P-trap is responsible for trapping debris and preventing sewer gas from entering your bathroom. Here’s how you can do it:
- Place the P-trap under the sink drain. Make sure the curved end of the P-trap faces the wall.
- Connect one end of the P-trap to the sink drain by hand tightening it. Avoid using excessive force to prevent any damage.
- Attach the other end of the P-trap to the wall drain. This can be done by using a slip nut and a washer. Ensure the connection is secure but not too tight.
By following these steps, you will have successfully installed the P-trap and drain assembly for your floating sink.
Connect the water supply lines
After connecting the P-trap and drain assembly, the next step is to connect the water supply lines. These lines will provide water to your sink for everyday use. Here’s how you can do it:
- Locate the water supply valves under the sink. These valves are usually located behind the vanity or wall.
- Turn off the water supply by shutting the valves clockwise. This will prevent any water leakage during the installation process.
- Connect one end of the water supply line to the hot water valve and the other end to the corresponding hot water inlet on the sink.
- Repeat the same steps for connecting the cold water supply line.
Ensure that each connection is tightened properly but not overly tightened to avoid any leaks or damage to the plumbing system.
Check for any leaks and make necessary adjustments
After you have completed the installation of the P-trap, drain assembly, and water supply lines, it’s crucial to check for any leaks. Leaks can cause damage to your bathroom and result in expensive repairs. Follow these steps to detect and fix any leaks:
- Turn on the water supply valves and let the water flow into the sink.
- Observe if there are any water drips or puddles around the connections.
- If you notice any leaks, tighten the connection slightly with a wrench. Be careful not to overtighten and cause damage.
- Continue observing the connections for a few minutes to ensure there are no further leaks.
By following these steps, you can ensure that your floating sink is properly connected, and there are no leaks in the plumbing system.
Now that you have successfully connected the plumbing for your floating sink, you can enjoy its modern and sleek design while also having a functional and efficient bathroom fixture.
Finishing Touches
When it comes to installing a floating sink, the finishing touches can make all the difference in achieving a professional and polished look. With just a few final steps, you’ll be able to complete the installation of your floating sink and enjoy its sleek and modern design in your bathroom. In this section, we will guide you through the necessary steps to apply silicone caulk around the edges of the sink, clean the sink and surrounding area, and ultimately, how to enjoy your newly installed floating sink!
Apply Silicone Caulk Around the Edges of the Sink
Once the sink is securely mounted to the wall, it’s important to apply silicone caulk around the edges to create a watertight seal. Follow these steps:
- Cut the tip of the silicone caulk tube at a 45-degree angle.
- Insert the tube into a caulk gun and apply a continuous bead of silicone along the edge of the sink where it meets the wall or countertop.
- Use a caulk smoothing tool or your finger to smooth out the caulk, ensuring it forms a tight seal.
- Wipe away any excess caulk with a damp cloth.
Clean the Sink and Surrounding Area
Now that the sink is fully installed, it’s time to clean up any dust or debris that may have accumulated during the installation process. Follow these steps:
- Use a non-abrasive cleaner or a mild dish soap mixed with warm water to clean the sink basin.
- Gently scrub the sink with a soft sponge or cloth, paying special attention to any areas that may have adhesive residue.
- Rinse the sink thoroughly with warm water and dry it with a clean towel or cloth.
- Wipe down the surrounding area, including the countertop, backsplash, and any adjacent fixtures, to ensure a clean and polished appearance.
Enjoy Your Newly Installed Floating Sink!
With the finishing touches complete, it’s time to step back and enjoy your newly installed floating sink! Take a moment to appreciate the modern and elegant aesthetic it brings to your bathroom. Admire the seamless integration of the sink into your space, the clean lines, and the functionality it provides. Whether it’s for your own personal use or to impress guests, your floating sink is now ready to be enjoyed!
Floating Sink Maintenance Tips
Proper maintenance is essential to keep your floating sink looking its best and functioning optimally. Here are some important maintenance tips to follow:
Regular cleaning with mild soap and water
To keep your floating sink clean and free from dirt and grime, it’s important to regularly clean it with a mild soap and water solution. This will help remove any stains or residue that may accumulate over time. Use a soft, non-abrasive cloth or sponge to gently wipe the sink surface, making sure to clean all areas, including the basin and around the edges. Rinse thoroughly with clean water and dry with a soft cloth to prevent water spots.
Avoid abrasive cleaners to prevent damage
While it may be tempting to use tough cleaners or abrasive materials to tackle stubborn stains or build-up, it’s best to avoid them when cleaning your floating sink. Harsh chemicals and abrasive cleaners can damage the sink’s surface, causing scratches or discoloration. Instead, stick to mild, non-abrasive cleansers and gentle scrubbing to maintain the sink’s original appearance and finish.
Check for any potential leaks or loose connections
Regularly inspect your floating sink for any signs of leaks or loose connections. Start by checking the drain and supply lines to ensure they are securely fastened and not leaking. If you notice any leaks or loose connections, tighten them immediately or seek professional help if needed. Ignoring such issues can lead to water damage or further damage to the sink’s mounting brackets. Additionally, keep an eye out for any signs of water pooling around the sink, as this can indicate an underlying plumbing issue that needs to be addressed promptly.
By following these simple maintenance tips, you can ensure that your floating sink remains in excellent condition for years to come. Remember, regular cleaning, avoiding abrasive cleaners, and checking for leaks are key to maintaining the beauty and functionality of your floating sink.
Frequently Asked Questions
How Do You Install A Hanging Sink?
To install a hanging sink, follow these steps: 1. Find the ideal spot for the sink. 2. Measure and mark the position on the wall. 3. Install the sink bracket securely. 4. Attach the sink to the bracket. 5. Connect the plumbing and check for leaks.
How Do You Install A Freestanding Sink?
To install a freestanding sink, follow these steps: 1. Position the sink in the desired location. 2. Connect the sink drain to the existing plumbing. 3. Attach the faucet to the sink according to the manufacturer’s instructions. 4. Secure the sink to the wall or floor for stability.
5. Test the sink for leaks and make any necessary adjustments.
How High Should Floating Sink Be?
A floating sink should be installed at a height that is comfortable for the user. Make sure the sink is easy to reach and use without straining or bending. The ideal height is typically around 32 to 34 inches from the floor to the top of the sink.
How Do You Anchor A Sink To The Wall?
To anchor a sink to the wall, follow these steps: first, locate the wall studs. Next, position the sink against the wall and mark the holes for the mounting brackets. Drill pilot holes and attach the brackets using screws. Finally, secure the sink to the brackets using nuts and washers.
Conclusion
Installing a floating sink can greatly enhance the aesthetic appeal of your bathroom while maximizing space. By following our step-by-step guide, you can easily complete the installation process on your own. Remember to gather all the necessary tools and materials before starting, and take your time to ensure a secure and level installation.
With these simple instructions, you’ll be enjoying your newly installed floating sink in no time. Happy DIY-ing!