To install a drop-in bathtub, first, ensure the area is prepared and the plumbing is ready. Then, set the tub in place, connect the drain and overflow, and secure it to the framing.
Finally, finish the installation by sealing the edges and attaching any accessories or fixtures. Are you planning to install a drop-in bathtub? Having a bathtub that perfectly blends with your bathroom décor can provide comfort and relaxation. However, the installation process requires attention to detail and careful preparation.
In this guide, we will take you through the necessary steps to install a drop-in bathtub seamlessly. From preparing the area, connecting the plumbing, to finally securing and sealing the tub, we’ve got you covered. Let’s dive into the installation process and create a serene bathing space that meets your preferences and needs.
Key Considerations For Installing A Drop-In Bathtub
Installing a drop-in bathtub can add a touch of luxury and functionality to your bathroom. However, before you embark on this home improvement project, there are several key considerations that you should keep in mind. From understanding the dimensions and specifications to assessing the structural requirements, being well-prepared will ensure a smooth and successful installation. In this article, we will explore each of these considerations in detail to help you achieve a professional-quality installation for your drop-in bathtub.
Understanding the Dimensions and Specifications
Before you begin installing a drop-in bathtub, it is essential to have a thorough understanding of its dimensions and specifications. This will help you determine if the bathtub is suitable for your bathroom space and whether any modifications are required.
Start by measuring the available space in your bathroom to ensure that the bathtub will fit properly. Take note of the length, width, and depth of the tub to ensure a proper fit. Additionally, familiarize yourself with the manufacturer’s specifications, such as the recommended framing and support requirements, to ensure that your bathtub installation is compliant with safety standards.
Assessing the Structural Requirements
Another crucial consideration when installing a drop-in bathtub is assessing the structural requirements of your bathroom. The weight of a fully-filled bathtub can be substantial, and it is essential to ensure that your bathroom floor and subfloor can support this weight. Check the integrity of your floor joists and subfloor, paying close attention to any signs of sagging or weakness.
Reinforcing the subfloor and installing additional support beams may be necessary to provide adequate stability. Ignoring the structural requirements can lead to future problems, such as floor damage or even a collapsed bathtub. Therefore, taking the time to assess and address any structural issues is crucial for a successful installation.
Gathering the Necessary Tools and Materials
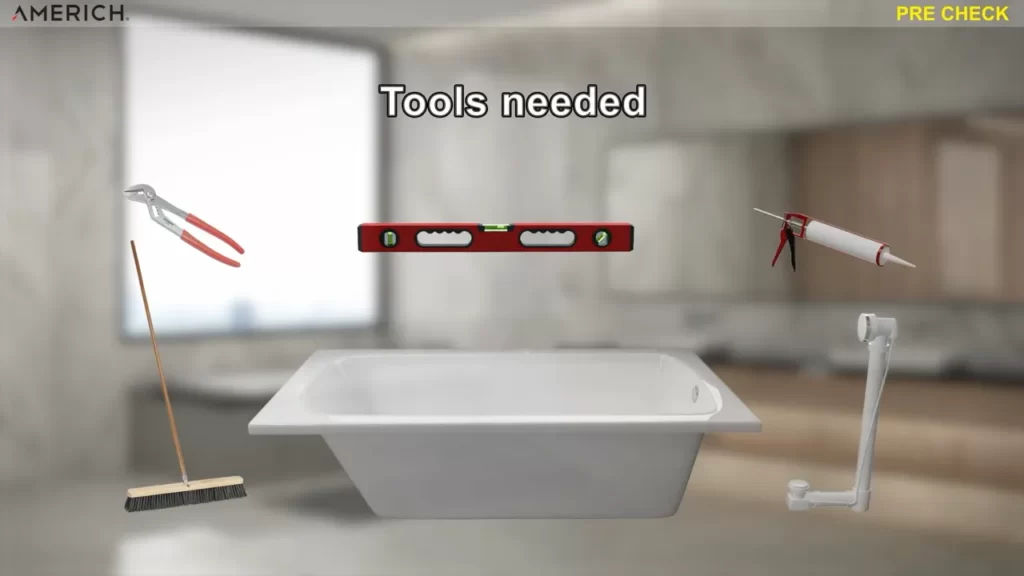
Once you have a clear understanding of the dimensions and structural requirements, it’s time to gather the necessary tools and materials for the installation. Having the right tools and materials on hand will not only streamline the installation process but also ensure that you achieve a professional finish. Some of the essential tools and materials you will need include:
- (1) Caulking gun
- (2) Drill
- (3) Level
- (4) Screwdriver set
- (5) Pipe wrench
- (6) Tape measure
- (7) Putty knife
- (8) Hammer
- (9) Safety goggles
- (10) Plumbing supplies (drain, overflow drain, P-trap, etc.)
Gathering these tools and materials in advance will save you time and energy during the installation, ensuring that you have everything you need within reach.
By focusing on these key considerations, you will be well-prepared to install a drop-in bathtub in your bathroom. Understanding the dimensions and specifications, assessing the structural requirements, and gathering the necessary tools and materials are crucial steps that will contribute to a successful installation. So, roll up your sleeves, get ready, and transform your bathroom into a relaxing oasis of comfort and luxury!

Measuring And Marking The Location For The Bathtub
Installing a drop-in bathtub can be a great way to add elegance and comfort to your bathroom. However, before you begin the installation process, it is crucial to measure and mark the location accurately. This ensures that your bathtub fits perfectly and allows for a smooth installation. In this section, we will guide you through the steps of determining the ideal placement and marking the dimensions on the floor, giving you confidence and a clear plan for your installation.
Determining the Ideal Placement
Before you start measuring, it is important to determine the ideal placement of your drop-in bathtub. Keep in mind two key factors – functionality and aesthetics. You want to ensure that your bathtub is easily accessible and also visually pleasing. Here are some points to consider:
- Your bathtub’s proximity to the plumbing fixtures. Try to position it close to the existing plumbing connections, as this will make installation easier.
- The available space in your bathroom. Measure the area where the bathtub will be placed, taking into account any surrounding fixtures or obstacles that may impact the positioning.
- The overall layout of your bathroom. Consider the door swing, windows, and other fixtures when determining where your bathtub would fit best.
Marking the Dimensions on the Floor
Once you have determined the ideal placement for your drop-in bathtub, the next step is to mark the dimensions of the bathtub on the floor. This will provide you with a clear visual guide and help ensure precise installation:
- Start by measuring the length and width of your bathtub. Use a tape measure to accurately measure these dimensions.
- Using painter’s tape or a pencil, mark the outline of the bathtub’s footprint on the floor. Take care to align the marks with the measurements you took, ensuring the shape is accurate.
- If your bathtub has a curved shape, use a flexible curve ruler or a string to mark the outline more precisely.
- Double-check your measurements and adjustments before proceeding. This will help prevent any errors during the installation process.
By determining the ideal placement and marking the dimensions on the floor, you are setting the foundation for a successful drop-in bathtub installation. Taking the time to measure and mark accurately ensures a seamless fit and a visually appealing outcome for your bathroom project. In the next section, we will guide you through the steps of preparing the space for installation, ensuring a smooth and efficient process. Stay tuned!
Preparing The Plumbing And Drainage
Before installing a drop-in bathtub, it is essential to properly prepare the plumbing and drainage to ensure a smooth and hassle-free installation process. By following these steps, you can ensure that the water supply is shut off properly, existing fixtures are disconnected and removed, and the plumbing lines are adjusted as needed.
Shutting Off the Water Supply
The first step in preparing the plumbing for a drop-in bathtub installation is to shut off the water supply. This is crucial to prevent any leaks or water damage during the installation process. To shut off the water supply, locate your main water shut-off valve, usually found near the water meter or in the basement. Turn the valve clockwise until it is fully closed.
Disconnecting and Removing Existing Fixtures
Once the water supply is shut off, it is time to disconnect and remove any existing fixtures that may interfere with the installation of the drop-in bathtub. This includes faucets, showerheads, and any other accessories that are attached to the wall or the current bathtub. Use an adjustable wrench to loosen and remove any nuts or bolts connecting the fixtures to the plumbing. Carefully set aside these fixtures for future use or replacement.
Adjusting the Plumbing Lines
Once the fixtures have been removed, it is important to adjust the existing plumbing lines to accommodate the drop-in bathtub. This may include repositioning the pipes or extending them to properly align with the new bathtub’s drainage and water supply connections. Ensure that the pipe fittings are securely tightened to prevent any leaks or water damage in the future. It is also advisable to check for any signs of wear or damage, such as corrosion or leaks, and repair or replace the pipes if necessary.
By following these steps and properly preparing the plumbing and drainage, you can ensure a successful installation of your drop-in bathtub. Remember to consult the manufacturer’s instructions and seek professional help if needed to ensure a safe and efficient installation process.
Properly Preparing The Subfloor
Removing the Existing Flooring
Before installing a drop-in bathtub, it’s crucial to properly prepare the subfloor. This begins with removing the existing flooring. Whether you have tile, hardwood, or vinyl, removing it is necessary to ensure a level and stable base for your new bathtub.
To start, gather the necessary tools such as a pry bar, utility knife, and a hammer. Carefully remove the baseboards around the perimeter of the room using the pry bar. Once the baseboards are removed, use the utility knife to score and cut the flooring into manageable sections. Begin removing the flooring by prying up one corner of a section and gradually lifting it with the pry bar. Repeat this step until the entire flooring is removed.
Assessing and Repairing the Subfloor
With the flooring out of the way, you can now assess the condition of the subfloor. Look for any signs of water damage, rot, or unevenness. If you notice any issues, it’s crucial to address them before proceeding with the installation. A sturdy and level subfloor is essential for a long-lasting and reliable bathtub installation.
If there are any damaged areas, you’ll need to repair them. This can involve removing and replacing sections of the subfloor or adding support beams to reinforce weakened areas. Ensure that the repaired subfloor is level and stable before moving on to the next step.
Applying Waterproofing Membrane
To protect your subfloor from water damage, applying a waterproofing membrane is a wise step. This will prevent any water that may seep through the bathtub from reaching the subfloor, maintaining its integrity over time.
To apply the waterproofing membrane, start by cleaning the subfloor thoroughly. Remove any dust, debris, or loose particles that may prevent proper adhesion. Next, follow the manufacturer’s instructions for applying the membrane. This may involve using a trowel to spread it evenly over the subfloor or using a roller to apply a pre-made membrane.
Once the membrane is applied, allow it to dry completely before proceeding with the installation of your drop-in bathtub. This drying time is essential to ensure a reliable and secure bond between the membrane and the subfloor.
Properly preparing the subfloor is a crucial step when installing a drop-in bathtub. By removing the existing flooring, assessing and repairing the subfloor, and applying a waterproofing membrane, you’ll create a solid foundation for your bathtub that will withstand the test of time. This careful preparation will not only protect your investment but also provide you with peace of mind knowing that your bathtub is securely installed on a stable surface.
Positioning And Leveling The Bathtub
Installing a drop-in bathtub requires careful positioning and precise leveling to ensure a secure and functional installation. This step is crucial for creating a seamless and professional-looking finish to your bathroom renovation. In this section, we will guide you through the process of moving the bathtub into place and using a level to ensure an even installation.
Moving the Bathtub Into Place
Before you begin the installation, make sure you have cleared the area and removed any obstructions that may hinder the movement of the bathtub. It’s important to have enough space to maneuver the bathtub without causing damage or straining yourself. If necessary, enlist the help of a friend or family member to assist you.
- Measure the dimensions of your bathtub and compare them to the allotted space in your bathroom. Ensure you have enough clearance for the bathtub to fit comfortably.
- If required, remove any doors or fixtures that may obstruct the path of the bathtub during installation.
- Carefully lift the bathtub and position it near the installation site. Be cautious not to damage the bathtub or injure yourself while moving it.
- Slide the bathtub into place, ensuring it is aligned with the drainage and plumbing connections.
Using a Level to Ensure Even Installation
Once the bathtub is in position, it’s essential to check for levelness to avoid any water pooling or incorrect drainage. The following steps will help you achieve an even installation:
- Place a level across the edges of the bathtub to determine any areas that need adjustment.
- If the bathtub is not level, use shims or leveling materials to achieve an even surface. Ensure the adjustments are made in all directions to maintain stability.
- Recheck the levelness after making adjustments to ensure the bathtub is correctly positioned.
- Secure the bathtub in place using the appropriate fasteners, following the manufacturer’s instructions.
By properly positioning and leveling your drop-in bathtub, you can ensure a safe and functional installation. Taking the time to get this step right will pay off in the long run, providing you with a gorgeous and structurally sound addition to your bathroom.
Securing The Bathtub In Place
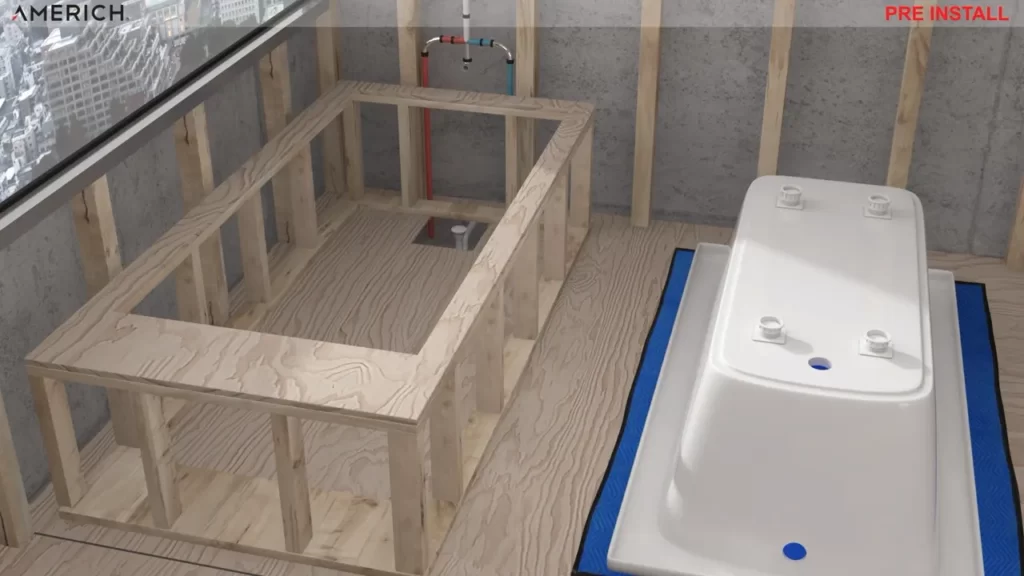
After properly leveling and aligning the drop-in bathtub, the next step is to secure it in place to ensure a sturdy and long-lasting installation. This process involves attaching support frames or brackets and fastening the bathtub to the studs. Follow these steps to securely anchor your bathtub:
Attaching Support Frames or Brackets
The first step in securing the bathtub is to attach support frames or brackets. These frames provide additional stability and help distribute the weight of the bathtub evenly. Here’s how to attach them:
- Measure the distance between the bottom of the bathtub rim and the floor. This will help determine the height of the support frames or brackets.
- Cut pieces of pressure-treated lumber or metal brackets to the measured height.
- Place the support frames or brackets along the sides of the bathtub, ensuring they are level.
- Secure the support frames or brackets to the bathtub and the surrounding wall using screws or nails.
- Double-check the alignment and stability of the support frames or brackets before proceeding to the next step.
Fastening the Bathtub to the Studs
Once the support frames or brackets are in place, it’s time to fasten the bathtub to the studs. This will provide the necessary strength and prevent any movement or shifting of the bathtub during use. Follow these steps to fasten the bathtub securely:
- Locate the studs behind the wall, using a stud finder or by tapping gently to detect the solid areas.
- Mark the positions of the studs on the upper edge of the bathtub.
- Drill pilot holes through the marked positions on the bathtub.
- Use screws to secure the bathtub to the studs. Make sure the screws are long enough to pass through the bathtub’s flange and penetrate the studs.
- Tighten the screws firmly but be cautious not to overtighten them, as it may damage the bathtub or cause it to crack.
- Repeat this process for each stud, ensuring that the bathtub is securely fastened at multiple points along the rim.
By properly attaching support frames or brackets and fastening the bathtub to the studs, you can ensure a secure installation that will withstand regular use for years to come. Take the time to double-check the alignment and stability of each step before proceeding to the next, as it is crucial to have a safe and reliable drop-in bathtub.
Connecting The Plumbing And Drainage
Once you have successfully installed your drop-in bathtub, the next step is to connect the plumbing and drainage system. This crucial step ensures that your bathtub functions properly and prevents any potential issues down the line. In this section, we will walk you through the process of installing the faucets and fixtures, connecting the drainage system, and testing for leaks.
Installing the Faucets and Fixtures
The first step in connecting the plumbing system is to install the faucets and fixtures. This is an important aspect as it determines the functionality and overall aesthetics of your bathtub. Follow these steps to ensure a smooth installation process:
- Start by placing the rubber gaskets and washers over the faucet holes on the bathtub.
- Insert the faucet stems into the corresponding holes, making sure they are aligned correctly.
- Tighten the mounting nuts from underneath the bathtub to secure the faucets in place.
- Attach the supply lines to the hot and cold water connections on the faucets, ensuring proper tightening.
- Install any additional fixtures, such as a handheld showerhead or a sprayer, following the manufacturer’s instructions.
Connecting the Drainage System
Once the faucets and fixtures are securely installed, it’s time to connect the drainage system. Here’s how you can do it:
- Locate the drain hole on the bottom of the bathtub and remove the protective cover.
- Attach the drain tailpiece to the drain hole, securing it with a rubber gasket and slip nut.
- Connect the P-trap to the drain tailpiece, ensuring a tight seal.
- Extend the P-trap to reach the main drain line, making sure it is aligned properly.
- Secure the P-trap to the main drain line using slip nuts and washers.
Remember to check for any leaks during and after the installation process. A leaky plumbing system can cause damage to your bathroom and increase your water bills. So, it’s important to go through the necessary steps to ensure a watertight connection.
Testing for Leaks
Testing for leaks is a crucial step to ensure that your newly installed plumbing system is functioning properly. Here’s how you can test for leaks:
- Turn on the water supply and let it fill the bathtub.
- Inspect all the connections, including the faucets, fixtures, and drain, for any signs of leaks.
- If you notice any leaks, tighten the connections or replace any faulty parts.
- Once you are confident that everything is sealed tightly, drain the water from the bathtub and check for leaks again.
- Make any necessary adjustments to ensure a leak-free plumbing system.
By following these steps and performing a thorough check, you can ensure a properly functioning plumbing and drainage system for your drop-in bathtub. Remember, a well-installed system will not only provide you with convenience but also save you from potential headaches in the future.
Sealing And Caulking
Sealing and caulking your drop-in bathtub is an essential step to ensure a watertight installation. It not only provides a barrier against leaks but also prevents water damage to the surrounding areas. In this section, we will guide you through the process of applying waterproof sealant and caulking the edges of the bathtub.
Applying Waterproof Sealant
Before you begin sealing the bathtub, it is important to choose the right waterproof sealant for the job. Look for a high-quality, silicone-based sealant that is specifically designed for use in wet areas such as bathrooms. This will ensure long-lasting protection against moisture and prevent any potential leaks.
Follow these steps to apply the waterproof sealant:
- Clean the surface: Start by thoroughly cleaning the edges of the bathtub to remove any dirt, grime, or old sealant. Use a mild detergent and warm water to scrub the surface.
- Dry the surface: After cleaning, make sure the bathtub edges are completely dry before applying the sealant. Wipe them down with a clean, dry cloth.
- Apply the sealant: Load the silicone sealant into a caulking gun and cut off the tip of the nozzle at a 45-degree angle. Start at one corner of the bathtub and apply a continuous bead of sealant along the edges. Use steady pressure on the caulking gun to ensure an even application.
- Smooth the sealant: Once you have applied the sealant, use a wet finger or a caulk smoothing tool to smooth out the bead. This will not only create a neater finish but also help the sealant to adhere better to the surface.
- Let it cure: Allow the sealant to cure according to the manufacturer’s instructions. This usually takes around 24 to 48 hours. During this time, avoid using the bathtub to ensure the sealant fully sets and creates a strong bond.
Caulking the Edges of the Bathtub
After sealing the bathtub, the next step is to caulk the edges to provide an additional layer of protection against water infiltration. Here’s how to do it:
- Clean the surface: Make sure the edges of the bathtub are clean and dry before you start caulking. Remove any existing caulk or residue using a caulk remover tool or a putty knife.
- Cut the tip: Using a caulking gun, cut the tip of the caulk tube at a 45-degree angle. The size of the opening will depend on the width of the gap you need to fill.
- Apply the caulk: Hold the caulking gun at a 45-degree angle and slowly squeeze the trigger to apply a steady and even bead of caulk along the edges of the bathtub. Move along the entire length, ensuring the caulk fills the gap completely.
- Smooth the caulk: Wet your finger or a caulk smoothing tool and run it along the caulk line to smooth out any unevenness. This will give the caulk a professional, seamless finish.
- Remove excess caulk: Use a damp cloth or sponge to remove any excess caulk from the surface. This will create a cleaner look and prevent the caulk from smearing.
- Allow it to dry: Let the caulk dry completely according to the product’s instructions before using the bathtub. This drying period will ensure that the caulk forms a strong, waterproof seal.
By properly sealing and caulking your drop-in bathtub, you can enjoy a well-protected and leak-free bathing experience. Take the time to apply the sealant and caulk carefully, and your bathtub will not only look great but also provide years of enjoyment.
Completing The Surrounding Area
Once you have successfully installed your drop-in bathtub, it’s time to focus on completing the surrounding area. This step is crucial as it not only adds aesthetic appeal but also ensures the functionality of the bathtub. There are three key aspects to consider when completing the surrounding area: installing tile or finishing material around the bathtub, reconnecting the water supply, and testing the water. Let’s dive deeper into each step to ensure your drop-in bathtub installation is seamless.
Installing Tile or Finishing Material around the Bathtub
When it comes to installing tile or finishing material around the bathtub, it’s essential to choose a material that not only complements the design but also provides durability and water resistance. Tiles are a popular choice as they offer a wide range of design options and are relatively easy to clean. To install the tile, follow these steps:
- Prepare the surface by removing any debris or adhesive residue.
- Apply a thin layer of adhesive or mortar using a trowel.
- Place the tiles in the desired pattern, leaving room for grout lines.
- Once the adhesive has dried, apply grout using a grout float, making sure to fill in all the gaps.
- Wipe off any excess grout with a damp sponge.
- Allow the grout to dry, then seal it to prevent staining and moisture damage.
If tiles are not your preferred choice, there are various other finishing materials available such as stone, marble, or even a solid surface material. These materials can give your bathtub surround a unique and luxurious look. Whichever option you choose, make sure to follow the manufacturer’s instructions for proper installation and maintenance.
Reconnecting and Testing the Water Supply
After completing the tile or finishing material installation, the next step is to reconnect the water supply to the bathtub. This ensures that your drop-in bathtub is fully functional and ready for use. Follow these steps to reconnect and test the water supply:
- Locate the water supply valves and ensure that they are fully closed.
- Attach the water supply lines to the appropriate connections on the bathtub.
- Tighten the connections using a wrench, ensuring they are secure and leak-proof.
- Turn the water supply valves back on and check for any leaks.
- If there are no leaks, let the water flow into the bathtub for a few minutes to ensure proper water pressure.
Conclusion
Completing the surrounding area of a drop-in bathtub involves installing tile or finishing material, reconnecting the water supply, and testing the water. By following the above steps, you can seamlessly complete the installation process and enjoy a functional and aesthetically pleasing bathtub. Remember to choose materials that not only enhance the overall look but also offer durability and water resistance. With attention to detail and proper installation, your drop-in bathtub will become the centerpiece of your bathroom.
Cleaning Up And Final Inspection
Once you’ve successfully installed a drop-in bathtub, it’s important to clean up the area and perform a final inspection to ensure everything is in proper order. This step is crucial as it guarantees a smooth and functional installation, leaving you with a beautiful and enjoyable bathing experience. In this section, we’ll focus on removing debris and cleaning the area, checking for any installation issues, and finalizing the installation process.
Removing Debris and Cleaning the Area
Before conducting a final inspection, it’s essential to remove any debris that may have accumulated during the installation process. This will give you a clear view of the bathtub and help identify any loose screws or dirt that needs to be cleaned up.
Here’s a step-by-step guide to effectively clean up the area:
- Start by using a vacuum cleaner or broom to remove any loose debris such as wood chips, sawdust, or packaging materials. Make sure to reach all corners and crevices.
- Next, wipe down the bathtub with a damp cloth to remove any surface dirt or dust. Use a mild cleaning solution or plain water, depending on the material of the bathtub. Ensure the cleaning agent is suitable for the specific type of finish.
- To tackle any stubborn stains or marks, consider using a non-abrasive cleaner recommended by the manufacturer. Apply it to the affected areas and gently scrub with a soft sponge or brush. Rinse thoroughly to remove any residue.
- Finally, dry the bathtub with a clean towel to prevent water spots or streaks. Ensure the surrounding area is also free from any cleaning agents or excess moisture.
Checking for Any Installation Issues
After cleaning the bathtub and its surroundings, it’s time to check for any potential installation issues that may have been overlooked.
To conduct a thorough inspection, follow these steps:
- Inspect the edges and corners of the bathtub for any visible gaps or misalignments. These could indicate improper installation or inadequate sealing.
- Check the stability of the bathtub by applying gentle pressure to different areas. Ensure there is no excessive movement or wobbling, which may suggest a loose or insecure installation.
- Examine the water connections and drains to ensure they are properly connected and leak-free. Look for any signs of water seepage or dripping underneath or around the bathtub.
- If applicable, test the functionality of any additional features such as jets, faucets, or showerheads to ensure they are working correctly.
Finalizing the Installation Process
Once you’ve completed the necessary clean-up and inspection, it’s time to finalize the installation process and make sure everything is in order.
Consider the following steps for a seamless finalization:
- Tighten any loose screws or fittings that were identified during the inspection. This will ensure the stability and structural integrity of the bathtub.
- Apply a high-quality sealant around the edges of the bathtub to create a watertight barrier and prevent any potential leaks. Follow the manufacturer’s instructions for the most effective application.
- Allow the sealant to dry and cure completely before using the bathtub.
- Double-check all the connections and fixtures to confirm they are secure and functioning as intended.
- Finally, run a test-fill the bathtub with water to ensure there are no leaks or issues. Monitor the area around the bathtub during this process to catch any signs of water seepage or drainage problems.
By following these steps, you’ll complete the final phase of installing a drop-in bathtub and assure its cleanliness, functionality, and longevity. Now, it’s time to relax and enjoy your newly installed bathtub!
Frequently Asked Questions
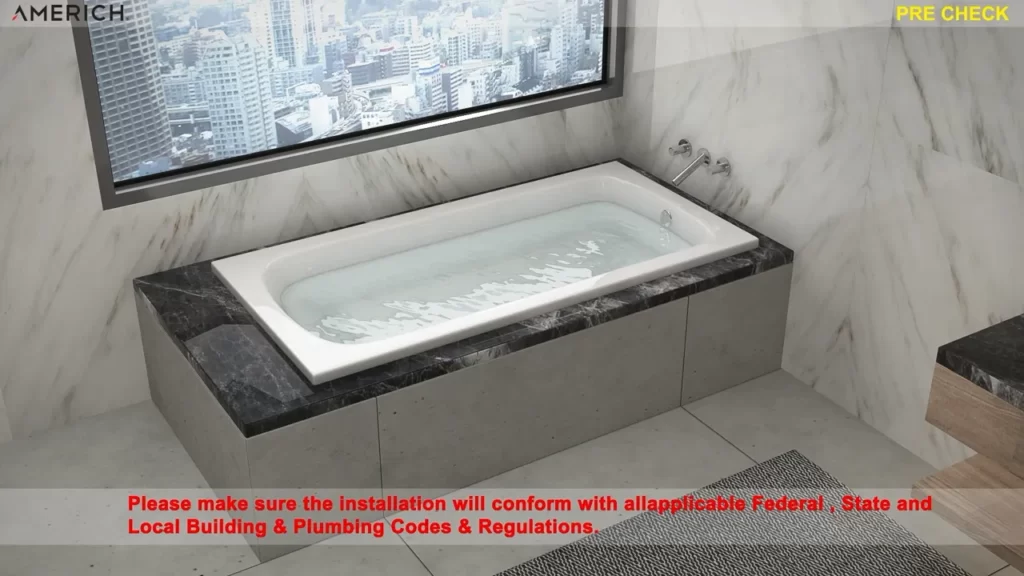
What Does A Drop In Tub Sit On?
A drop-in tub sits on a platform or deck that is built specifically for it.
Do You Tile Before Or After Drop In Tub?
Tile installation should be done before installing a drop-in tub.
Can You Put A Drop In Tub Against The Wall?
Yes, you can install a drop-in tub against the wall.
How Do You Enclose A Drop In Tub?
To enclose a drop-in tub, follow these steps: 1. Measure the space for the enclosure accurately. 2. Purchase a compatible tub surround or build a custom enclosure. 3. Install the tub surround or enclosure securely, ensuring a tight fit. 4. Seal any gaps between the tub and the enclosure to prevent water leakage.
5. Test the enclosure for stability and waterproofness before use.
Conclusion
Installing a drop-in bathtub may seem intimidating at first, but with the right tools and guidance, you can accomplish it successfully. By following the step-by-step instructions in this blog post, you can create a beautiful and functional addition to your bathroom.
Remember to take your time, ensure proper measurements, and seek professional help if needed. With patience and careful execution, your new drop-in bathtub will become the centerpiece of relaxation in your bathroom oasis. Happy installing!