
To install a countertop dishwasher, first, carefully read the manufacturer’s instructions. Then, follow the step-by-step guide provided for installation.
Countertop dishwashers offer a convenient solution for those who have limited space in their kitchen or need a portable option. These compact and efficient appliances can be easily installed on your countertop, eliminating the need for a permanent installation. Whether you’re a renter or a homeowner, installing a countertop dishwasher doesn’t have to be a complex process.
We will provide you with a concise and accurate guide on how to install a countertop dishwasher. By following these instructions, you’ll be able to enjoy the convenience and efficiency of a dishwasher without the hassle of a full-size installation. So, let’s get started on your journey to a more convenient and time-saving dishwashing experience.
Choosing The Right Countertop Dishwasher
When it comes to choosing a countertop dishwasher, there are several factors that you should consider. Assessing your kitchen space and compatibility, as well as determining the ideal size and capacity for your needs, is crucial in making the right decision. In this section, we will delve into these factors in more detail, helping you choose a countertop dishwasher that will meet your requirements.
Factors to consider when selecting a countertop dishwasher
Before you dive into the world of countertop dishwashers, it’s important to be aware of the key factors that can impact your decision. These factors include:
- Size and compatibility
- Capacity
- Energy efficiency
- Installation requirements
- Price and budget
By taking these factors into account, you can narrow down your options and make an informed decision.
Assessing your kitchen space and compatibility
Before purchasing a countertop dishwasher, it is essential to assess your kitchen space and ensure compatibility. You need to consider the dimensions of your countertop and the available space near your sink for the dishwasher’s connections.
One way to assess compatibility is by measuring the height, width, and depth of your countertop space. This will help you determine the maximum dimensions that the dishwasher can have to fit perfectly.
Additionally, you should also check if your sink has the necessary connections for the dishwasher’s water inlet and drain hoses. If these connections are not available, you might need to consider alternative installation methods or make some modifications to your sink.
Determining the ideal size and capacity for your needs
Size and capacity are key considerations when selecting a countertop dishwasher. These factors will depend on the amount of dishes you typically need to wash and the available space in your kitchen.
To determine the ideal size, consider the number of place settings you typically use. Countertop dishwashers usually range from holding 4 to 6 place settings, so choose a size that can accommodate your needs without taking up excessive space.
Capacity is another important aspect to consider. A dishwasher with a larger capacity can handle more dishes per load, saving you time and energy. However, if space is limited, you might need to opt for a smaller capacity dishwasher.
| Size | Capacity |
|---|---|
| Compact | 4 place settings |
| Standard | 6 place settings |
By considering your kitchen space and desired capacity, you can find a countertop dishwasher that fits your needs perfectly.
Preparing Your Kitchen For Installation
Preparing Your Kitchen for Installation
When it comes to installing a countertop dishwasher in your kitchen, proper preparation is key. Before you begin the installation process, it is important to organize and clear the countertop space, ensure proper electrical and plumbing connections, and secure the necessary tools and materials for a seamless installation. Follow these steps to get your kitchen ready for the installation.
H3: Organizing and Clearing the Countertop Space
To ensure a successful installation, start by organizing and clearing the countertop space where the dishwasher will be placed. Follow these steps:
1. Remove any items currently occupying the countertop area. This includes small appliances, decorative items, and anything else that may be in the way.
2. Wipe down the countertop to remove any dust or debris. This will provide a clean surface for the dishwasher to be installed on.
3. Measure the available countertop space to ensure that it is suitable for the dimensions of the countertop dishwasher you have purchased. Refer to the specifications provided by the manufacturer for accurate measurements.
H3: Ensuring Proper Electrical and Plumbing Connections
Proper electrical and plumbing connections are essential for the functioning of your countertop dishwasher. Follow these steps to ensure everything is set up correctly:
1. Locate an electrical outlet near the installation area. Ensure that the outlet meets the voltage requirements specified by the manufacturer.
2. If necessary, hire a licensed electrician to install a new electrical outlet or make any modifications to the existing wiring to accommodate the dishwasher. Remember, electrical work should always be done by a professional to ensure safety.
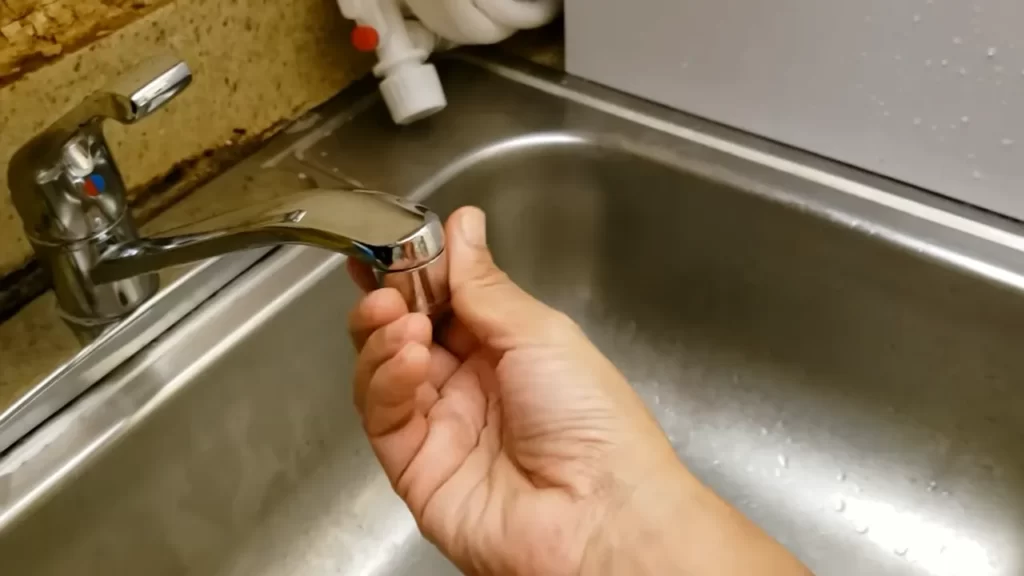
3. Check that the plumbing is compatible with the dishwasher. Most countertop dishwashers require a standard faucet connection. However, if your kitchen does not have a suitable hookup, consider installing a compatible faucet adapter or a dishwasher hookup kit.
H3: Securing Necessary Tools and Materials for Installation
To ensure a smooth installation process, make sure you have all the necessary tools and materials on hand. Here is a list of what you will need:
1. Screwdriver or drill: You’ll need this for removing and installing screws during the installation process.
2. Adjustable wrench: This will help with any plumbing connections that need to be adjusted.
3. Level: Use a level to ensure the dishwasher is properly aligned and balanced.
4. Teflon tape: This waterproof tape is used to seal plumbing connections and prevent leaks.
5. Dishwasher installation kit: This typically includes hoses, clamps, and other necessary components for connecting the dishwasher to the water supply and drain.
6. Safety goggles and gloves: Protect yourself during the installation process by wearing safety goggles and gloves.
By following these steps and ensuring that your kitchen is properly prepared for installation, you can be confident in achieving a successful countertop dishwasher installation. Remember to always refer to the manufacturer’s instructions for specific installation guidelines and consult a professional if needed. With a well-prepared kitchen, you can look forward to the convenience and efficiency that a countertop dishwasher brings to your home.
Step-By-Step Installation Process
Are you tired of washing dishes by hand every day? Installing a countertop dishwasher can be a great solution to make your life easier. With its compact size and ease of installation, a countertop dishwasher can fit in any kitchen and provide efficient cleaning for your daily dishes. In this step-by-step installation guide, we will walk you through the process of unboxing and inspecting the countertop dishwasher, connecting the water supply and drainage lines, and finally installing the dishwasher under the sink.
Unboxing and inspecting the countertop dishwasher
Before you start the installation process, it is important to unbox and inspect the countertop dishwasher to ensure it is free from any damage and contains all the necessary parts. Here is a simple breakdown of the steps:
- Carefully remove the countertop dishwasher from the packaging, ensuring not to damage any parts.
- Inspect the dishwasher for any visible signs of damage, such as cracks or dents. If you notice any damage, contact the manufacturer immediately.
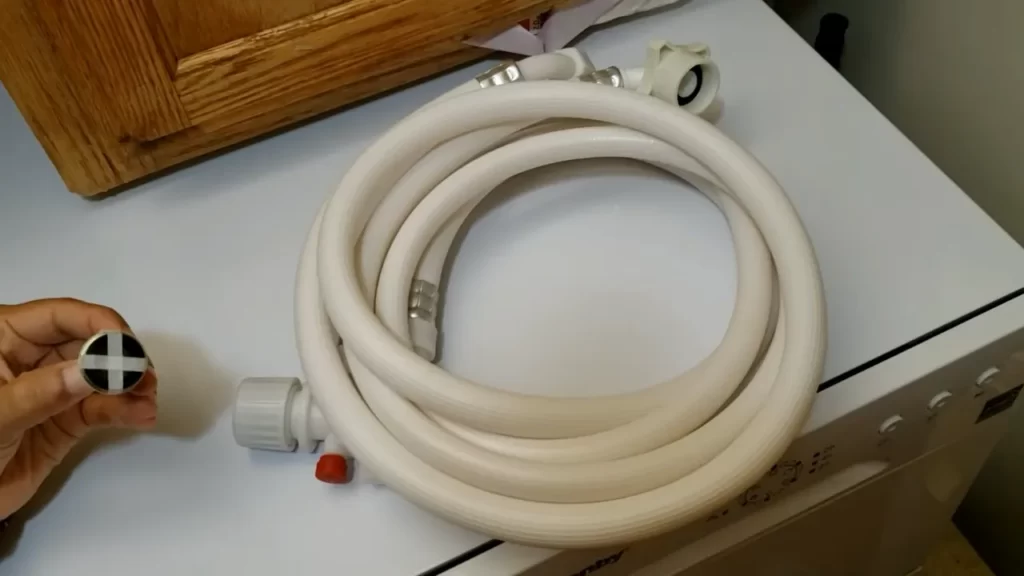
- Check if all the required components are present, including the power cord, drain hose, inlet hose, and any additional accessories mentioned in the manual.
Connecting the water supply and drainage lines
The next step in the installation process is to connect the water supply and drainage lines. Here’s what you need to do:
- Locate the water supply valve under your sink and shut off the water.
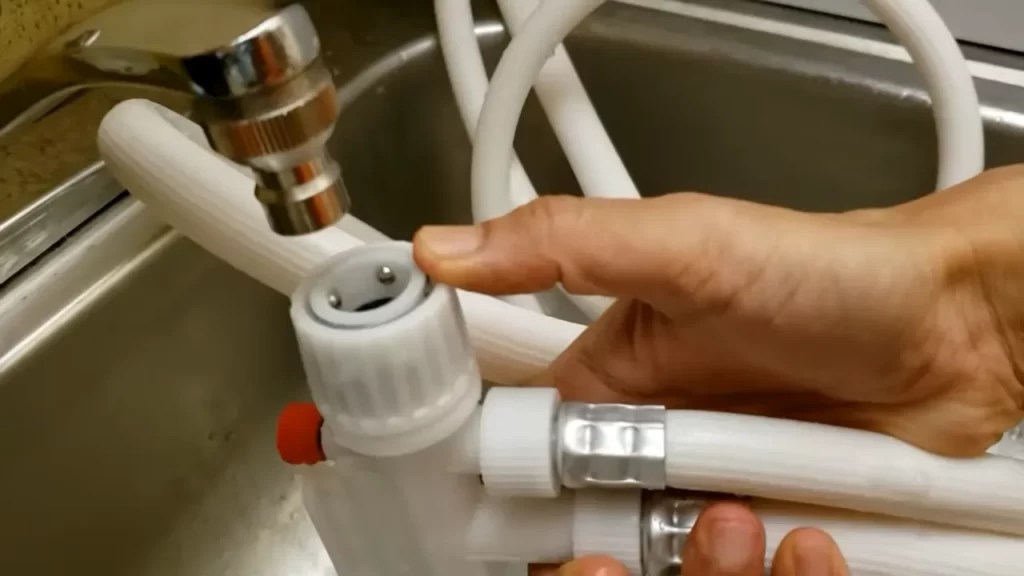
- Connect the inlet hose provided with the countertop dishwasher to the water supply valve.
- Ensure that the inlet hose is securely attached to both the water supply valve and the dishwasher inlet.
- Next, locate the drainage pipe under your sink and carefully remove the existing P-trap.
- Attach the drain hose provided with the countertop dishwasher to the drainage pipe.
- Make sure the drain hose is tightly secured to both the dishwasher and the drainage pipe.
Installing the countertop dishwasher under the sink
Now that you have connected the water supply and drainage lines, it’s time to install the countertop dishwasher under the sink. Follow these steps:
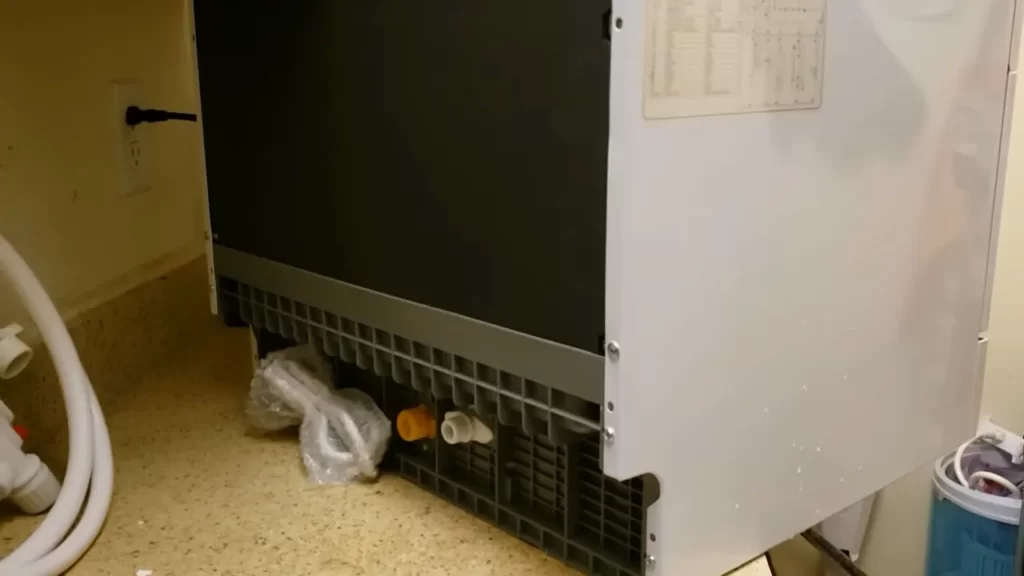
- Carefully slide the dishwasher into the designated space under the sink.
- Ensure that the dishwasher is level and aligned with the front of the cabinet.
- If necessary, adjust the dishwasher’s feet to achieve the desired level.
- Once the dishwasher is in place, secure it to the underside of the countertop or cabinet using the mounting brackets provided.
- Double-check all the connections and make sure everything is tightly secured.
Now that your countertop dishwasher is installed, you can fill it with dishes, add detergent, and start enjoying the convenience of automated dishwashing. Remember to read the manufacturer’s instructions and recommendations for optimal performance and maintenance.
Securing Proper Electrical Connections
Determining the Appropriate Power Source and Voltage Requirements
Before installing your countertop dishwasher, it is crucial to determine the appropriate power source and voltage requirements. Each dishwasher model may have specific requirements, so it’s essential to consult the manufacturer’s instructions or the product manual.
To determine the power source, inspect the area where you plan to install the dishwasher. Check for an existing electrical outlet nearby that meets the voltage requirements of the dishwasher. It’s important to note that different dishwashers may require different voltage levels, such as 120V or 220V.
Ensure that the voltage supply matches the dishwasher requirements to avoid electrical issues or damage to the appliance.
Connecting the Dishwasher to the Electrical Outlet
Once you have determined the appropriate power source, you can proceed with connecting the dishwasher to the electrical outlet. Follow these steps carefully to ensure a secure and proper connection:
- Turn off the circuit breaker or unplug the power supply to the outlet where you will connect the dishwasher. This step is crucial to ensure your safety during the installation process.
- Remove the cover plate from the electrical box, exposing the wiring and outlet.
- Identify the different wires: black (hot), white (neutral), and bare copper or green (ground).
- Connect the black wire from the dishwasher’s power cord to the hot wire in the electrical box. Use a wire connector to secure the connection properly.
- Connect the white wire from the dishwasher’s power cord to the neutral wire in the electrical box. Again, ensure a secure connection using a wire connector.
- Connect the bare copper or green wire from the dishwasher’s power cord to the ground wire in the electrical box. Use a wire connector to bond the wires together.
- Tightly screw the electrical box cover plate back into place, ensuring the wires are organized and secure inside.
- Plug the dishwasher’s power cord into the electrical outlet.
Double-check all the connections to ensure they are tightly secured and properly insulated to prevent any electrical hazards during operation.
Now that you have successfully connected your countertop dishwasher to the electrical outlet, you can proceed with the remaining installation steps to enjoy the convenience and efficiency of your new appliance.
Connecting The Water Supply And Drainage Lines
Exploring different connection options (direct or indirect)
When installing a countertop dishwasher, it is crucial to properly connect the water supply and drainage lines. There are different options available for these connections, and it’s important to understand the advantages and disadvantages of each option.
One option is a direct connection, where the dishwasher is directly connected to the water supply and drainage lines. This option provides a more permanent and efficient solution as there are no additional hoses or connections required. However, it may require professional assistance to ensure the connections are correctly made.
Another option is an indirect connection, where the dishwasher is connected to the water supply and drainage lines through adapters and hoses. This option allows for flexibility as the dishwasher can be easily moved or replaced without much hassle. However, it may require more maintenance and monitoring to ensure the connections remain secure and leak-free.
Attaching the water inlet and drainage hose properly
Once you have decided on the connection option that works best for your countertop dishwasher installation, it is vital to attach the water inlet and drainage hose properly. A secure and leak-free connection is essential to ensure the dishwasher operates smoothly.
To attach the water inlet hose, follow these steps:
- Locate the water inlet valve on the dishwasher and identify the connection point.
- Insert one end of the water inlet hose into the valve.
- Tighten the connection using a wrench or pliers, ensuring it is firmly secured.
- Connect the other end of the hose to the water supply line.
- Turn on the water supply and check for any leaks. If there are any leaks, tighten the connection further.
To attach the drainage hose, follow these steps:
- Locate the drainage outlet on the dishwasher and identify the connection point.
- Insert one end of the drainage hose into the outlet.
- Secure the connection using a hose clamp.
- Connect the other end of the hose to the drainage pipe.
- Ensure the drainage hose is properly positioned and free from any kinks or obstructions.
By following these steps and ensuring each connection is properly made, you can successfully connect the water supply and drainage lines for your countertop dishwasher installation. Remember to always check for leaks and make any necessary adjustments to ensure a reliable and efficient operation.
Installing The Countertop Dishwasher Under The Sink
Installing the countertop dishwasher under the sink is an efficient and space-saving solution for those who want the convenience of a dishwasher without sacrificing counter space. In this section, we will guide you through the process of installing the countertop dishwasher under your sink so that you can enjoy clean dishes with ease.
Adjusting the height and leveling the dishwasher
Before securing the dishwasher under the sink, it’s important to adjust its height and level it properly. Here are the steps to follow:
- Start by measuring the height of your countertop dishwasher and the available space under your sink. This will help you determine if any adjustments need to be made.
- If the dishwasher is too tall for the space, you may need to remove the legs or adjust them to a shorter height. This can usually be done by turning the leveling feet clockwise or counterclockwise.
- Once you have adjusted the height, use a level to ensure that the dishwasher is perfectly level both front to back and side to side. This is important for proper drainage and to avoid any leaks.
- If needed, you can use shims or adjustable feet to fine-tune the leveling of the dishwasher. Make sure to check the level again after making any adjustments.
Fastening the dishwasher to the cabinet securely
After adjusting the height and leveling the dishwasher, it’s time to securely fasten it to the cabinet under the sink. Follow these steps:
- Start by positioning the dishwasher under the sink, making sure it fits snugly and aligns properly with the cabinets.
- Using brackets or screws, attach the dishwasher to the cabinet walls or the sides of the sink cabinet. This will help anchor it and prevent any movement during operation.
- Be sure to use the appropriate tools and hardware recommended by the manufacturer to securely fasten the dishwasher. This will ensure its stability and prevent any accidents.
- Once the dishwasher is fastened to the cabinet, double-check that it is still level and adjusts if necessary. This will ensure optimal performance and prevent any leaks or drainage issues.
By following these steps, you can successfully install your countertop dishwasher under the sink and enjoy the convenience of a compact dishwasher that saves valuable counter space. With proper installation, you’ll have clean and sparkling dishes with the push of a button.
Testing And Troubleshooting
Testing and troubleshooting are essential steps when installing a countertop dishwasher. It ensures that the installation has been done properly and that the dishwasher performs effectively. In this section of the blog post, we will discuss how to run a test cycle to ensure proper installation, identify and resolve common installation issues, and provide troubleshooting tips for effective dishwasher performance. Let’s dive into each of these aspects in detail.
Running a test cycle to ensure proper installation:
Running a test cycle is crucial to verify that the countertop dishwasher has been installed correctly. To run a test cycle, you can follow these steps:
1. Select a suitable location for your countertop dishwasher near the sink, ensuring that there is enough space for water connections and an electrical outlet.
2. Connect the water inlet hose to the faucet using the adapter provided. Ensure that the connection is tight and secure.
3. Connect the drain hose to the sink or a suitable drain pipe. Make sure there are no kinks or blocks in the hose that could hinder proper drainage.
4. Plug the power cord into a grounded electrical outlet. Double-check that the outlet is providing power.
5. Fill the dishwasher with detergent specifically designed for dishwashers. Follow the manufacturer’s instructions regarding the amount of detergent needed.
6. Load the dishwasher with a few dishes, cups, and cutlery. Ensure that the items are placed securely and not obstructing the spray arms or the detergent dispenser.
7. Close the dishwasher door and select a suitable wash cycle and options based on your needs.
8. Start the dishwasher and let it run through the entire cycle. Pay close attention to any unusual noises or leaks during the operation.
9. Once the cycle is complete, open the dishwasher door and inspect the dishes for cleanliness. They should come out sparkling clean.
By running a test cycle, you can ensure that the countertop dishwasher has been properly installed and functions as intended.
Identifying and resolving common installation issues:
During the installation process, you may encounter some common issues that need to be addressed. Here are a few potential problems and their solutions:
1. Water leakage: Check for any loose connections in the water inlet hose and make sure it is tightly secured. If leakage persists, inspect the hose for damages and replace it if necessary.
2. Improper drainage: If the dishwasher is not draining properly, check for any clogs in the drain hose or the sink drain. Clear any obstructions and ensure that the drain hose is connected at an appropriate height.
3. Electrical problems: If the dishwasher does not power on, check the power cord and the outlet for any damages. Ensure that the electrical connections are secure. If needed, test the outlet using another device.
4. Poor cleaning performance: If the dishes are not coming out clean, ensure that the spray arms are not clogged. Clean them if necessary. Also, check that the water temperature is adequate for effective cleaning.
Troubleshooting tips for effective dishwasher performance:
To ensure optimal performance from your countertop dishwasher, consider the following troubleshooting tips:
1. Regular maintenance: Clean the dishwasher regularly, removing any food debris or residue that may have accumulated. This prevents clogs and ensures proper functioning.
2. Proper loading: Load the dishes in a way that allows water and detergent to reach all surfaces. Avoid overloading, as it can hinder proper cleaning.
3. Water temperature: Ensure that the water temperature is suitable for the wash cycle selected. For effective cleaning, most dishwashers require a temperature of around 120°F (49°C).
4. Detergent usage: Use the appropriate amount of detergent as recommended by the manufacturer. Using too much can lead to excess sudsing, while using too little may result in subpar cleaning.
5. Maintenance checks: Regularly inspect the spray arms, filters, and seals for any signs of damage or blockages. Clean or replace them as necessary to maintain optimal performance.
By following these troubleshooting tips, you can resolve minor issues and ensure that your countertop dishwasher performs effectively, providing you with clean and sparkling dishes every time.
In conclusion, testing and troubleshooting are vital steps to guarantee the proper installation and optimal performance of a countertop dishwasher. By running a test cycle, identifying and resolving common installation issues, and implementing troubleshooting tips, you can reap the full benefits of this convenient kitchen appliance.
Maintenance And Care Tips
Proper maintenance and care of your countertop dishwasher are crucial to keep it running smoothly and extend its lifespan. By following these guidelines for regular cleaning, avoiding common mistakes, and implementing practices to maximize its durability, you can ensure that your countertop dishwasher remains efficient and reliable for years to come.
Regular cleaning and maintenance guidelines
Keeping your countertop dishwasher clean is essential for optimal performance. Regular cleaning helps prevent clogs, removes food residue, and eliminates unpleasant odors. Here are some easy steps to follow:
- 1. Run hot water: Before starting a cleaning cycle, run hot water through the faucet closest to your dishwasher to ensure that it reaches the desired temperature.
- 2. Check the spray arms: Inspect the dishwasher’s spray arms for any blockages or debris. Remove any clogs carefully using a toothpick or small brush.
- 3. Clean the interior and exterior: Wipe down the interior surfaces, including the rack, with a mixture of warm water and mild dish soap. Pay special attention to the filter, removing and rinsing it thoroughly.
- 4. Run a cleaning cycle: Occasionally, run an empty cycle with dishwasher cleaner or a mixture of vinegar and baking soda to remove any stubborn residue and maintain its cleanliness.
- 5. Dry the dishwasher: After each cycle, leave the dishwasher open for some time to air dry, preventing the growth of mold and mildew.
Avoiding common mistakes that can damage the dishwasher
It’s important to be mindful of potential mistakes that could jeopardize the functionality and longevity of your countertop dishwasher. Avoid the following errors to prevent unnecessary damage:
- 1. Overloading: Resist the temptation to overload the dishwasher, as it can cause strain on the motor and hinder proper water circulation.
- 2. Improper loading: Ensure that dishes do not obstruct the spray arms or overlap each other, allowing for efficient cleaning.
- 3. Using excessive detergent: Stick to the recommended amount of dishwasher detergent. Using too much can result in residue buildup and leave spots on your dishes.
- 4. Neglecting maintenance: Regularly clean and maintain your dishwasher as suggested in the manufacturer’s instructions. Neglecting this can lead to inefficiency and potential breakdowns.
Extending the lifespan of your countertop dishwasher
By implementing the following best practices, you can extend the lifespan of your countertop dishwasher and enjoy its benefits for years to come:
- 1. Use high-quality detergents: Opt for reputable dishwasher detergents that are specifically designed for the type of water in your area and the dishwasher itself.
- 2. Ensure proper installation: Make sure your countertop dishwasher is correctly installed, with all the necessary connections securely in place.
- 3. Check for leaks: Regularly inspect hoses, connections, and valves for any signs of leaks. Promptly address any issues to prevent water damage.
- 4. Protect against power surges: Consider using a surge protector to safeguard your dishwasher from potential electrical damage caused by power fluctuations.
- 5. Schedule professional maintenance: Periodically have your countertop dishwasher inspected and serviced by a qualified technician to address any underlying issues and ensure optimal performance.
By following these maintenance and care tips, you can keep your countertop dishwasher in excellent condition, minimize repairs, and enjoy its convenience for years to come.
Frequently Asked Questions
Do Countertop Dishwashers Have To Be Plumbed In?
No, countertop dishwashers do not have to be plumbed in. They are designed to connect directly to the kitchen faucet, eliminating the need for permanent plumbing installation.
How Does A Table Top Dishwasher Connect?
A table top dishwasher connects using a standard faucet adapter that hooks up to the sink. Simply attach the adapter to the faucet, connect the hose from the dishwasher, and ensure a tight fit. Then, turn on the water supply and start the dishwasher for quick and easy dishwashing.
Can You Connect A Countertop Dishwasher Under The Sink?
Yes, you can connect a countertop dishwasher under the sink.
Do You Leave The Faucet On For A Countertop Dishwasher?
No, you do not leave the faucet on for a countertop dishwasher. The dishwasher has its own water supply and doesn’t require a continuous flow of water from the faucet.
Conclusion
Installing a countertop dishwasher can be a game-changer in your kitchen, providing convenience and efficiency. By following the step-by-step instructions in this blog post, you can successfully install a countertop dishwasher even if you’re not a professional. Remember to carefully read and understand the manufacturer’s guidelines, gather the necessary tools, and take your time throughout the installation process.
With a little patience and effort, you’ll soon be enjoying the benefits of your newly installed countertop dishwasher. Happy dishwashing!