To install a chandelier with a chain, you will need to follow a few key steps. Here is a concise guide on how to do it properly.
Installing a chandelier with a chain can add a touch of elegance and sophistication to any room. However, the installation process may seem daunting if you have never done it before. Fortunately, with the right tools and a step-by-step approach, you can easily complete this task.
In this guide, we will walk you through the process of installing a chandelier with a chain, ensuring that you can enjoy the beautiful lighting fixture in no time. Whether you are replacing an existing chandelier or installing one for the first time, these instructions will help you achieve a successful and visually appealing installation. Follow these steps to bring a radiant glow to your space.
Gathering The Necessary Tools And Materials
Before you begin installing your chandelier with a chain, it’s important to gather all the necessary tools and materials to ensure a smooth installation process. Having everything you need at hand will save you time and frustration along the way. Here’s a breakdown of the essential tools and materials you’ll need:
Choosing the right chandelier for your space
First and foremost, it’s important to choose a chandelier that suits your space and complements your overall interior design. Consider factors such as the size, style, and finish of the chandelier. You can visit your local home improvement store or browse online to explore a variety of options.
Measuring the height and weight requirements
Once you’ve chosen the perfect chandelier, it’s crucial to measure the height and weight requirements of your desired installation location. You don’t want to end up with a chandelier that is too big or too heavy for your space. Measure the distance from the ceiling to the desired position of the chandelier and ensure it’s within the manufacturer’s recommended parameters.
Checking for appropriate electrical connections
Before you start the installation process, it’s important to check if you have appropriate electrical connections in place. Ensure that you have a junction box or ceiling outlet available for connecting the chandelier. If not, you may need to hire a professional electrician to install one before proceeding.
Gathering necessary tools
Now that you have assessed your space and electrical connections, it’s time to gather the necessary tools for the actual installation. Here is a list of tools you may need:
| Tools | Materials |
|---|---|
|
|
Make sure you have all these tools and materials readily available before you start the installation process to prevent unnecessary delays.
By gathering the necessary tools and materials at the beginning, you can ensure you have everything you need to successfully install your chandelier with a chain. This preparation will help make the installation process much smoother and more efficient.

Preparing The Installation Area
Before you begin the installation process for your chandelier with chain, it’s important to properly prepare the installation area. This involves taking a few necessary steps to ensure a safe and efficient installation. In this section, we’ll guide you through the process, covering important tasks such as turning off the power supply, clearing the area of furniture and obstructions, marking the locations for the chandelier and ceiling receptacle, and installing a support brace if needed.
Turning off the power supply
The first step in preparing the installation area is to turn off the power supply. This is crucial to prevent any electrical mishaps while working on the chandelier. Locate the circuit breaker box in your home and identify the switch or switches that control the power to the area where you’ll be working. Flip the appropriate switch(es) to the “off” position, ensuring that the power is completely shut off.
Clearing the area of furniture and obstructions
Next, you’ll want to clear the area of furniture and any other obstructions that may hinder the installation process. Remove any tables, chairs, or other items from the vicinity of the installation area. This will provide you with ample space to work and ensure that you have a clear path to maneuver the chandelier when it comes time to hang it.
Marking the locations for the chandelier and ceiling receptacle
Once the area is clear, it’s time to mark the locations for the chandelier and ceiling receptacle. Determine the desired placement for your chandelier and use a pencil to mark the spot on the ceiling where it will be installed. Additionally, mark the location where the ceiling receptacle will be situated to ensure proper alignment with the chandelier.
Installing a support brace if needed
In some cases, you may need to install a support brace to properly secure and stabilize the chandelier. This is especially true if you’re replacing an existing light fixture that doesn’t have adequate support for the weight of the chandelier. Follow the manufacturer’s instructions to install the support brace, making sure it is securely fastened to the ceiling joists.
By taking the time to properly prepare the installation area, you’ll set yourself up for a smoother and safer chandelier installation process. Now that you’ve turned off the power supply, cleared the area, marked the locations, and potentially installed a support brace, you’re ready to move on to the next steps in installing your chandelier with chain.
Installing The Chandelier
Installing a chandelier can be a beautiful way to add elegance and statement lighting to your home. With the right tools and a little know-how, you can easily install a chandelier yourself. In this guide, we’ll take you through the steps of attaching the mounting bracket to the ceiling receptacle, connecting the supply wires and grounding wire, attaching the chandelier canopy, and finally installing the chandelier bulbs and shades.
Attaching the Mounting Bracket to the Ceiling Receptacle
The first step in installing a chandelier is attaching the mounting bracket to the ceiling receptacle. This bracket securely holds the weight of the chandelier and ensures it stays in place. Here’s how you can do it:
- Begin by turning off the power to the chandelier at the circuit breaker.
- Remove the old fixture, if there is one, by unscrewing the mounting screws.
- Locate the ceiling receptacle and **remove the electrical box cover**.
- Position the mounting bracket over the electrical box and **align the screw holes**.
- Secure the bracket to the ceiling by **inserting the screws** through the bracket and into the screw holes.
- Tighten the screws with a screwdriver to ensure a secure fit.
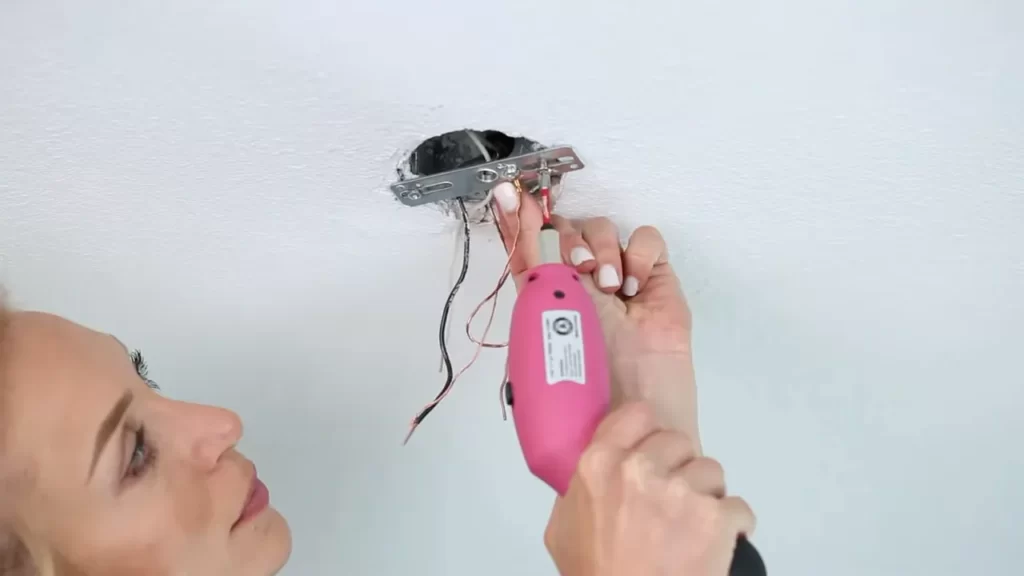
Connecting the Supply Wires and Grounding Wire
After attaching the mounting bracket, the next step is to connect the supply wires and grounding wire. This step is crucial for ensuring the chandelier functions properly and is safe to use. Follow these steps:
- Identify the supply wires from the ceiling and the wires from the chandelier. They are usually color coded, with black or red for hot wires, white for neutral wires, and green or copper for grounding wires.
- Strip about 1/2 inch of insulation from the ends of the supply wires and chandelier wires.
- Twist the same-colored wires together: black to black, white to white, and green/copper to green/copper.
- Secure the connections by **twisting wire nuts** onto each pair of wires.
- Gently tug on the wires to ensure they are securely connected.
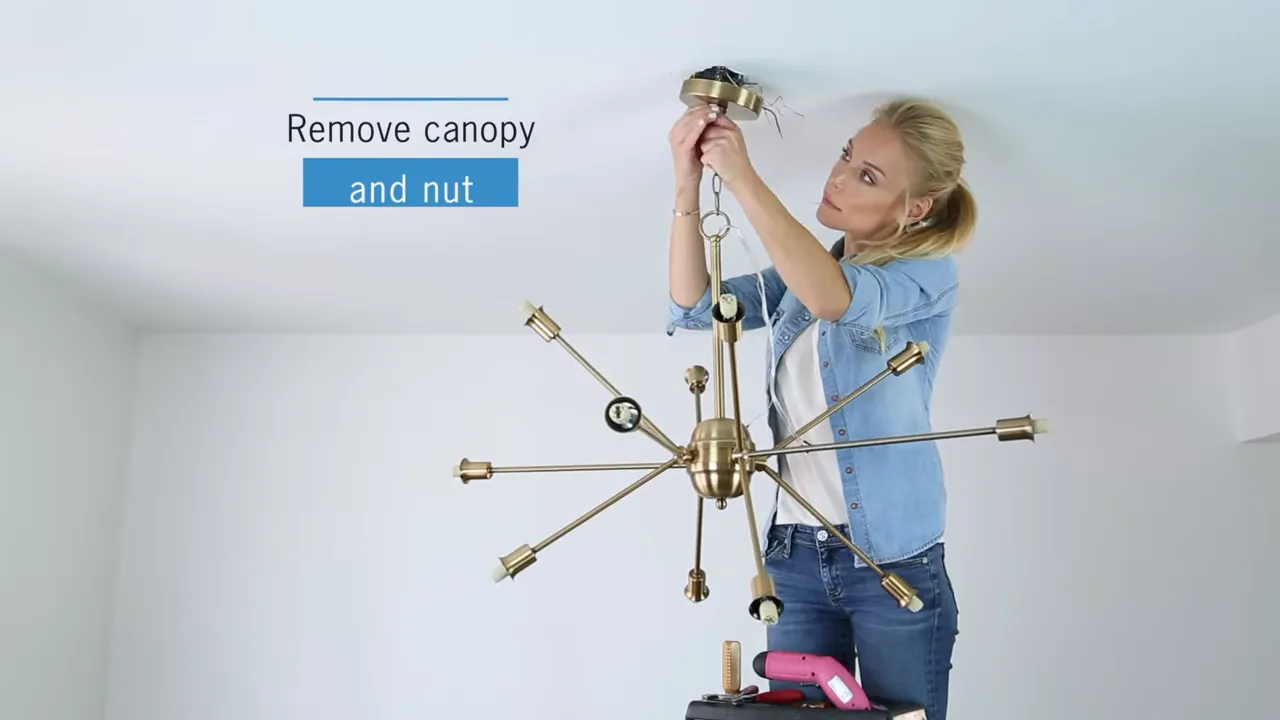
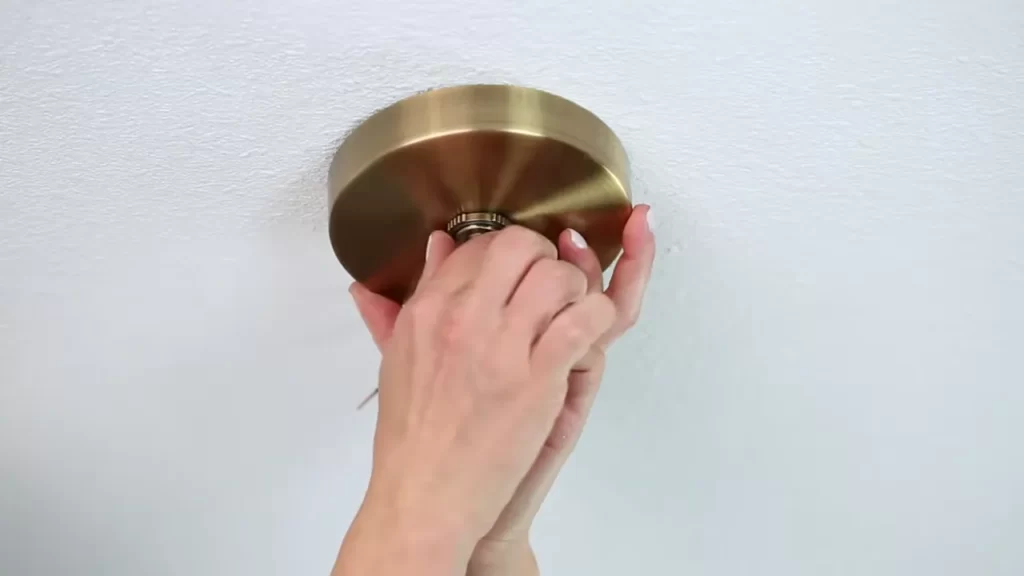
Attaching the Chandelier Canopy
Now that the supply wires and grounding wire are connected, it’s time to attach the chandelier canopy. The canopy is the decorative cover that conceals the wiring and electrical components. Here’s how to do it:
- Slide the canopy onto the hanging chain or rod so that it rests against the ceiling.
- Secure the canopy by **tightening the mounting screws**. Make sure it is snug against the ceiling.
- Ensure that the chain or rod is properly attached to the mounting bracket by giving it a gentle tug.
Installing Chandelier Bulbs and Shades
The final step is installing the chandelier bulbs and shades. This is where you can get creative and personalize the look of your chandelier. Follow these simple steps:
- Install the desired bulbs into the chandelier sockets, making sure they are **screwed in securely**.
- Attach the chandelier shades, if included, by sliding them over the bulb and **securing them in place**.
- Double-check all the connections and ensure that the chandelier is firmly attached to the ceiling.
With these easy-to-follow steps, you can successfully install a chandelier with chain and transform your space with striking and sophisticated lighting. Remember, if you ever feel unsure or uncomfortable with any step of the installation, it’s always best to consult a professional electrician for assistance.
Adjusting The Chain Length
When installing a chandelier with a chain, it’s important to ensure that the chain length is adjusted to the desired height. This not only helps in achieving the desired aesthetic look but also ensures that the chandelier is securely attached to the ceiling. In this section, we will discuss the step-by-step process of adjusting the chain length for your chandelier installation.
Measuring and marking the desired chain length
The first step in adjusting the chain length is to measure and mark the desired length for your chandelier. It’s essential to have a clear idea of how low or high you want the chandelier to hang from the ceiling. To do this, you can follow these simple steps:
- Use a tape measure to measure the distance from the ceiling to the desired height of your chandelier.
- Make a small mark on the chain at the measured length using a marker or a piece of tape. This mark will help you in cutting the chain later.
Opening the chain links using pliers
Once you have marked the desired length, the next step is to open the chain links using pliers. This will allow you to remove or add chain links as required to achieve the desired chain length. Here’s how you can do it:
- Align the jaws of the pliers with the side of a chain link.
- Gently squeeze the pliers to open the link. Be careful not to apply too much force to prevent damaging the chain link.
- Repeat the process for all the chain links that need to be opened.
Adjusting the chain length and securing it to the chandelier
Now that you have opened the necessary chain links, it’s time to adjust the chain length and secure it to the chandelier. Follow these steps:
- Hold the chain from the bottom and remove the excess links by disconnecting them from the chandelier.
- Reattach the chain to the chandelier at the desired length by connecting the opened links to the appropriate hooks or loops on the chandelier.
- Ensure that the chain is securely attached to the chandelier and that there is no slack or tension in the links.
- Once you are satisfied with the length and attachment of the chain, tighten any fastening screws or nuts to secure it in place.
By following these steps, you can easily adjust the chain length of your chandelier and achieve the desired height for your installation. Remember to double-check the stability and security of the chain before completing the installation process.

Testing And Finalizing The Installation
Once you have successfully installed the chandelier with the chain, it’s time to test and finalize the installation. There are a few important steps you need to follow to ensure that the chandelier is working properly and is securely in place. In this section, we will walk you through the essential steps to test and finalize the installation of your chandelier.
Restoring the power supply
Before you can test the chandelier, you need to restore the power supply. Locate the circuit breaker that controls the chandelier’s electrical circuit and switch it back on. Ensure that you are following the necessary safety precautions while working with electricity.
Checking for proper electrical connection
Once the power supply is restored, visually inspect the electrical connections of the chandelier. Look for any exposed or loose wires, and make sure all connections are secure. It’s important to double-check the connections to prevent any electrical issues or malfunctions.
Adjusting the chandelier position and level
Next, you’ll want to check the positioning and level of the chandelier. Use a level tool to ensure that the chandelier hangs straight and does not tilt to one side. Adjust the chain length as needed to achieve the desired height and position of the chandelier.
Securing all nuts and bolts
Once the chandelier is properly positioned and leveled, go through all the nuts and bolts that hold the chandelier together. Ensure that each one is securely tightened to prevent any wobbling or loosening over time. This step is crucial for the long-term stability and safety of the chandelier.
Cleaning up the installation area
Finally, take the time to clean up the installation area around the chandelier. Use a soft cloth or duster to wipe away any dust or debris that might have accumulated during the installation process. This will not only enhance the overall appearance of the chandelier but also provide a clean and clutter-free environment.
By following these steps to test and finalize the installation of your chandelier with a chain, you can be confident that your chandelier is installed correctly, safe to use, and will provide you with beautiful lighting for years to come.
Troubleshooting And Safety Tips
When installing a chandelier with a chain, it’s important to ensure both proper installation and ongoing safety. In this section, we will discuss common installation issues, how to overcome them, and provide valuable tips for ensuring safety during the installation process.
Common Installation Issues and How to Overcome Them
Installing a chandelier with a chain can sometimes present challenges, but with the right knowledge and approach, these issues can be easily overcome. Here are some common installation issues and their solutions:
| Issue | Solution |
|---|---|
| The chandelier is too heavy for the chain | Ensure that the chain used can bear the weight of the chandelier by checking its weight capacity. If needed, install a sturdier chain that can handle the load. |
| The chain is too long | If the chain is too long, you can shorten it by removing links. Use pliers to disconnect the desired number of links, making sure to maintain an even appearance. |
| The chain is too short | In situations where the chain is too short for your desired length, you can purchase additional chain links or extensions. Match the style of the existing chain and follow the manufacturer’s instructions to add the extension. |
Ensuring Safety During Installation
Installing a chandelier with a chain involves working with electrical components, so it’s crucial to prioritize safety throughout the process. Here are some tips to ensure a safe installation:
- Turn off the power: Before starting any installation work, turn off the power supply to the area where the chandelier will be installed. This prevents electrical accidents and helps keep you safe during the installation.
- Use proper tools: Use the appropriate tools for the installation, such as wire strippers, pliers, and a voltage tester. Using the right tools not only ensures the job is done correctly but also reduces the risk of accidents.
- Securely mount the electrical box: Make sure the electrical box is securely fastened to the ceiling, as this provides a stable foundation for the chandelier. Use the appropriate hardware to ensure it is properly attached.
- Follow the manufacturer’s instructions: Always read and follow the installation instructions provided by the manufacturer. Each chandelier may have specific guidelines that need to be followed for proper installation.
- Double-check connections: Before turning the power back on, ensure all electrical connections are secure. Loose connections could result in electrical hazards, so it’s essential to double-check each connection.
Hiring a Professional Electrician if Necessary
While installing a chandelier with a chain can be a DIY project for some, it’s important to know your limitations. If you are unsure of your abilities or feel uncomfortable working with electrical components, it’s best to hire a professional electrician. They have the expertise and knowledge to ensure the installation is done correctly and safely. Additionally, hiring a professional eliminates the risk of electrical accidents and provides peace of mind.
Maintenance And Care
Proper maintenance and care are essential to ensure that your chandelier with chain remains in excellent condition and continues to shine brightly. Regular cleaning, replacing bulbs when necessary, and inspecting for any loose connections or damage over time are key aspects of maintaining your chandelier.
Regular cleaning and dusting of the chandelier
To keep your chandelier with chain looking its best, regular cleaning and dusting are crucial. Dust particles can dull the shine of your chandelier and make it appear less attractive. Here are some steps you can follow for effective and safe cleaning:
- Turn off the power: Before you begin cleaning, ensure that you turn off the power to the chandelier at the electrical panel.
- Prepare a cleaning solution: Mix a mild detergent or dish soap with warm water in a bucket or basin.
- Use a soft cloth or sponge: Dip a soft cloth or sponge into the cleaning solution and gently wipe down each individual crystal, chain, and metal part of the chandelier. Be careful not to apply too much pressure, as this can damage the delicate components.
- Rinse and dry: After cleaning, rinse the cloth or sponge with clean water and go over the chandelier again to remove any remaining soap residue. Finally, use a clean, dry cloth to carefully dry each component of the chandelier.
By regularly cleaning and dusting your chandelier, you not only enhance its appearance but also increase its lifespan.
Replacing bulbs when necessary
Proper lighting is essential for your chandelier to create a captivating ambiance. Over time, bulbs may burn out or become less efficient, causing the chandelier to lose its sparkle. It is important to check the bulbs regularly and replace any that are no longer working. Follow these steps for replacing bulbs:
- Turn off the power: Before replacing any bulbs, ensure that you turn off the power to the chandelier at the electrical panel.
- Identify the faulty bulb: Carefully inspect the chandelier to identify the specific bulbs that need to be replaced.
- Remove the old bulb: Gently twist and remove the faulty bulb counterclockwise.
- Install the new bulb: Take the new bulb and align its pins with the socket. Insert the bulb and twist it clockwise until it is securely in place.
- Restore power and test: Once you have replaced all the necessary bulbs, restore power to the chandelier and test that all the bulbs are functioning correctly.
Regularly replacing bulbs ensures that your chandelier maintains its brilliance and keeps your space well-illuminated.
Inspecting for any loose connections or damage over time
As your chandelier ages, it is important to periodically inspect it for any signs of loose connections or damage. Over time, vibrations and environmental factors can lead to loosening of the chain connections or potential damage to the electrical wiring. Here are some steps you can follow to ensure its safety and functionality:
- Turn off the power: Before inspecting the chandelier, turn off the power at the electrical panel to avoid any potential electric shock.
- Check the connections: Examine the chain connections, ensuring that each link is securely fastened. If you notice any loose connections, use pliers or a wrench to tighten them.
- Inspect the wiring: Carefully inspect the electrical wiring for any signs of fraying or damage. If you notice any issues, it is recommended to contact a qualified electrician to repair or replace the wiring.
- Test the chandelier: Once you have ensured that all connections and wiring are secure, restore power and test the chandelier to verify that it is functioning correctly.
Regularly inspecting your chandelier for loose connections or damage prevents potential hazards and ensures the longevity of your lighting centerpiece.
Frequently Asked Questions
How Do You Attach A Chandelier To The Ceiling?
Attach your chandelier to the ceiling by following these steps: 1. Locate the electrical box and ensure it can support the weight. 2. Install a mounting bracket onto the box. 3. Connect the chandelier’s mounting strap to the bracket. 4.
Secure the wiring and attach the chandelier to the strap. 5. Test the installation before turning on the power.
How Do You Hang A Pendant Light With A Chain?
To hang a pendant light with a chain, start by attaching the chain to the light fixture. Next, determine the desired height and use a ceiling hook to attach the chain. Adjust the length of the chain as needed, making sure the light hangs evenly.
Finally, connect the light to the power source and test it.
How Do You Open A Chain Link On A Chandelier?
To open a chain link on a chandelier, gently twist and pull the link apart using your fingers or pliers. Be cautious not to damage the chain or surrounding parts.
How Do I Know Which Wire Is Hot On My Chandelier?
To determine which wire is hot on your chandelier, use a non-contact voltage tester. Point the tester toward the wires, and it will indicate the live wire by lighting up or beeping. Remember to turn off the power before testing to ensure safety.
Conclusion
To conclude, installing a chandelier with a chain may seem daunting at first, but by following these step-by-step instructions, it can be a manageable task. Remember to turn off the power, measure the height, and assemble the necessary tools. With patience and careful handling, you’ll have a beautiful chandelier adorning your space in no time.
Enjoy the elegance and charm it brings to your home!