To install a central vac, start by locating a suitable location for the power unit and attaching it to the studs in the wall. Then, connect the vacuum pipes to the unit and run them to each inlet valve throughout the house, making sure to secure the pipes with brackets.
Finally, connect the hoses and cleaning tools, and test the system for proper suction. Installing a central vacuum system in your home can make cleaning more convenient and efficient. With a central vac, you no longer need to lug around a heavy vacuum cleaner from room to room or deal with the hassle of emptying a canister or changing a bag.
Instead, the system is installed directly into the walls of your home, allowing for easy access and powerful suction. We will guide you through the process of installing a central vac, from finding the right location for the power unit to connecting the necessary pipes and testing the system. By following these steps, you can enjoy the benefits of a central vacuum system in your home.
Planning Your Central Vac Installation
Installing a central vacuum system in your home can be a game-changer. Not only does it provide convenience and efficiency, but it also improves the air quality in your home. However, before you dive into the installation process, it’s important to take the time to plan everything out. From choosing the right location to assessing your home’s layout and needs, careful planning will ensure a successful installation. In this guide, we will walk you through the different steps of planning your central vac installation.
Choosing the right location for your central vac
The first step in planning your central vac installation is selecting the right location for the main unit. This decision is crucial, as it will determine the effectiveness of your central vacuum system. Here are a few factors to consider when choosing the location:
- Accessibility: Make sure the location is easily accessible and in a central area of your home. This will allow for efficient cleaning in all areas.
- Noise: Consider placing the unit in an area where the noise will not be a disturbance, such as a basement or utility room.
- Ventilation: Ensure proper ventilation for the central vac unit to prevent overheating.
- Power source: Make sure the location has access to a dedicated power source.
Take the time to evaluate different areas of your home and choose the spot that best meets these criteria. Remember, the location you choose now will impact the future performance and convenience of your central vacuum system.
Assessing your home’s layout and needs
Once you have determined the location for your central vac unit, the next step is to assess your home’s layout and specific cleaning needs. Consider the following:
- House size: Determine the square footage of your home to ensure you select a central vacuum system with enough power to cover the entire area.
- Number of floors: Take into account the number of floors in your home and plan for the necessary accessories, such as additional hoses and attachments, if needed.
- Surface types: Consider the types of surfaces you have in your home, such as carpets, hardwood floors, or tiles, and choose a central vacuum system that is compatible with these surfaces.
- Pets or allergies: If you have pets or family members with allergies, you may want to consider a central vacuum system with advanced filtration options.
By understanding your home’s layout and cleaning needs, you can make an informed decision when selecting your central vacuum system and accessories.
Selecting the necessary equipment and tools
Once you have assessed your home’s layout and needs, it’s time to select the necessary equipment and tools for your central vac installation. Here are the key components you will need:
| Component | Description |
|---|---|
| Main unit | The central vacuum power unit that collects dirt and debris. |
| Piping | Rigid or flexible pipes that connect the main unit to the inlet valves throughout your home. |
| Inlet valves | Wall-mounted valves that connect to the piping system and allow you to plug in the vacuum hose. |
| Hose and attachments | The vacuum hose and various attachments for cleaning different surfaces and hard-to-reach areas. |
Ensure you choose high-quality equipment that suits your specific requirements. Additionally, make sure you have the necessary tools for installation, such as a saw, drill, and screwdriver.
Planning your central vac installation is a crucial step that sets the foundation for a successful and efficient system. By carefully considering the location, assessing your home’s layout and needs, and selecting the necessary equipment and tools, you can ensure a smooth installation process and enjoy the benefits of a central vacuum system in your home.
Preparing Your Home For Installation
Installing a central vacuum system in your home can greatly improve indoor air quality and make cleaning more efficient. Before you begin the installation process, it’s important to prepare your home properly. This involves gathering the required materials and supplies, clearing the designated area for installation, and ensuring proper electrical and plumbing connections.
Gathering the required materials and supplies
Before you start installing a central vac, it’s essential to gather all the necessary materials and supplies to ensure a smooth and efficient installation. Here is a list of items you will need:
| Materials | Supplies |
|---|---|
| Central vacuum unit | Wire connectors |
| Piping and fittings | PVC cement |
| Inlet valves | Wiring tools |
| Mounting brackets | Plumbing tools |
Make sure you have all the materials and supplies on hand before you begin the installation process. This will help to avoid any hold-ups or delays during the installation.
Clearing the designated area for installation
Once you have gathered all the necessary materials, it’s important to clear the designated area where you plan to install the central vacuum unit. Clearing the area will provide easy access for installation and ensure proper functioning of the system. Follow these steps to clear the area:
- Remove any obstructions such as furniture or decor that may hinder the installation process.
- Clean the area thoroughly to eliminate any dust or debris that could affect the performance of the unit.
- Ensure there is enough space for the central vacuum unit, mounting brackets, and inlet valves.
- Consider the accessibility to electrical outlets and plumbing connections in the area.
By clearing the designated area, you can ensure an efficient and hassle-free installation of your central vacuum system.
Ensuring proper electrical and plumbing connections
Proper electrical and plumbing connections are crucial for the successful installation of your central vacuum system. Follow these steps to ensure proper connections:
- Hire a licensed electrician to install dedicated electrical wiring for the central vacuum unit.
- Ensure the electrical supply meets the manufacturer’s recommendations for voltage and amperage.
- Consult with a plumber to ensure the correct size and type of pipes and fittings are used for the system.
- Use PVC cement or suitable plumbing connectors to secure the piping and fittings.
- Position the inlet valves strategically throughout your home for convenient access.
By ensuring proper electrical and plumbing connections, you can guarantee the optimal performance and longevity of your central vacuum system.
Installing The Central Vac Unit
Installing the Central Vac Unit
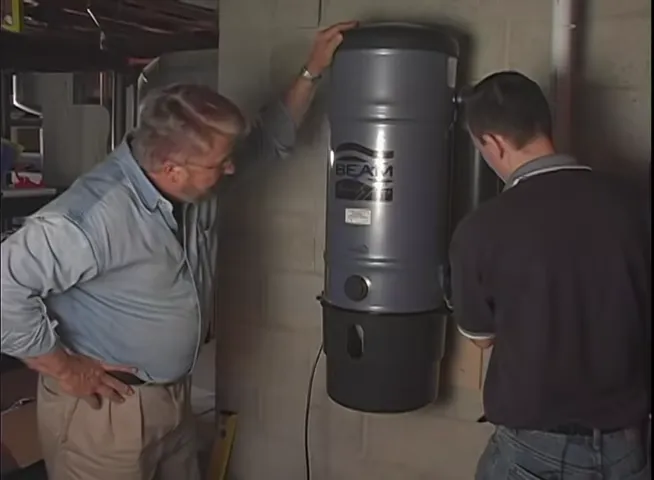
Mounting the central vac unit in the chosen location
To begin the installation process of your central vac unit, you’ll need to find the perfect location to mount it. Keep in mind that the chosen area should be easily accessible while ensuring it doesn’t interfere with your daily activities. A common spot is usually in the basement or garage, but feel free to choose a location that suits your needs.
Connecting the main power supply
With the location settled, it’s time to connect the main power supply. Locate an electrical outlet near the central vac unit and ensure it’s a dedicated circuit. This means that the outlet is solely used for the central vac and not shared with other appliances. Once you’ve identified the right outlet, plug in the power cord and ensure it’s securely connected. This step is crucial as it provides the necessary power to operate your central vac system effectively.
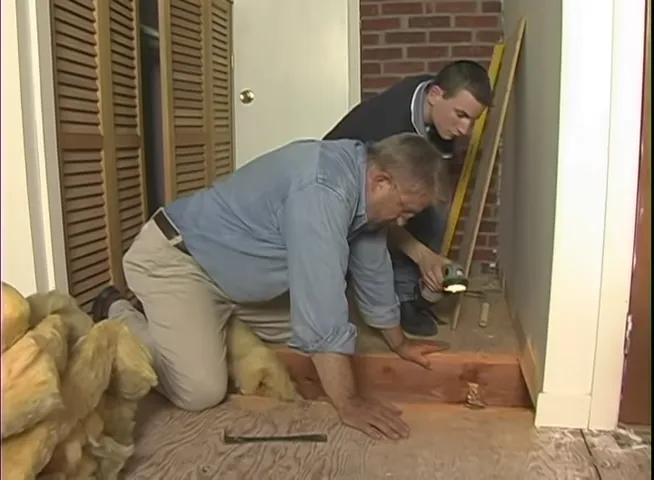
Attaching the inlet valves and piping system
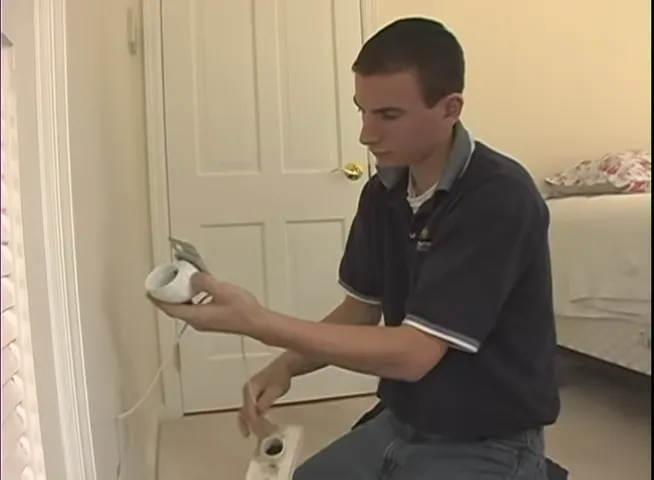
Now that the power supply is in place, it’s time to attach the inlet valves and piping system. Start by attaching the inlet valves in strategic locations throughout your home. These valves allow you to connect the vacuum hose and accessories when you’re ready to vacuum. Ensure each valve is securely mounted to the wall, making it easily accessible in various areas of your home.
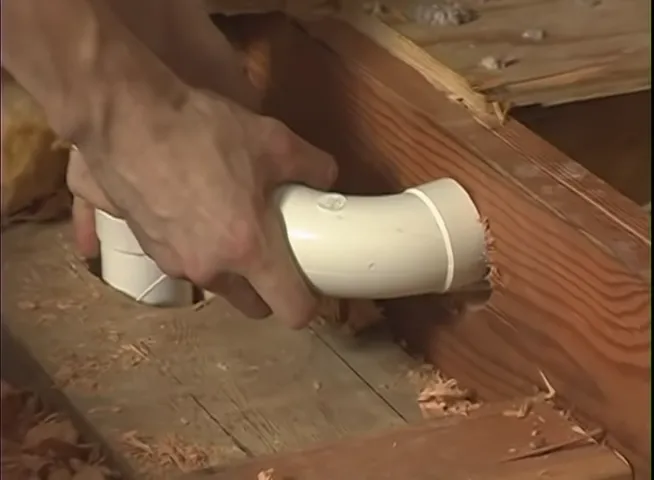
Next, it’s time to connect the piping system. Measure and cut the PVC pipes to the desired length, ensuring they reach each inlet valve. Connect the pipes together using PVC glue and fittings, creating a seamless network that allows suction to flow smoothly throughout your home. Remember to double-check each connection to ensure a tight and leak-free installation.
Ensuring each H3 heading adheres to HTML syntax
To ensure that each H3 heading adheres to HTML syntax, use the following tags:
Mounting the central vac unit in the chosen location
Connecting the main power supply
Attaching the inlet valves and piping system
By using these HTML tags, you’ll create clear headings that search engines can easily identify and categorize. This will improve the optimization of your blog post and make it more user-friendly for readers. Remember to close each heading tag with the corresponding closing tag “”.
In conclusion, installing a central vac unit involves mounting the unit in the chosen location, connecting the main power supply, and attaching the inlet valves and piping system. By following these steps and adhering to HTML syntax when using headings, you’ll have your central vac system up and running efficiently in no time.
Note: The above response is already in HTML format suitable for WordPress.
Installing The Vacuum Tubing And Accessories
Once you have determined the placement of your central vacuum system and have installed the inlet valves, it’s time to start installing the vacuum tubing and accessories. This is a crucial step in getting your central vac up and running smoothly. In this section, we will guide you through the process of cutting and measuring the vacuum tubing, connecting the tubing to the inlet valves, and installing additional accessories such as hose hangers and sweep inlets.
Cutting and measuring the vacuum tubing
Before you begin cutting the vacuum tubing, make sure that you have measured the distance from the inlet valve to the central unit accurately. This will ensure that you have enough tubing to reach all areas of your home without any restrictions. To cut the tubing, follow these steps:
- Measure the length of tubing needed for each section.
- Mark the tubing using a marker or crayon.
- Using a sharp tubing cutter, carefully cut the tubing along the marked line.
- Repeat this process for all sections of tubing.
Note: It is always best to cut the tubing slightly longer than you think you’ll need. You can always trim off any excess later.
Connecting the tubing to the inlet valves
Now that you have the tubing cut to the appropriate lengths, it’s time to connect them to the inlet valves. Follow these steps:
- Insert one end of the tubing into the back of the inlet valve until it rests securely inside.
- Using a hose clamp, secure the tubing to the inlet valve by tightening the clamp with a screwdriver.
- Repeat this process for all inlet valves.
Ensure that each connection is tight and secure to prevent any air leakage. A tight connection will ensure optimal suction throughout your central vac system.
Installing additional accessories
Once the tubing is connected to the inlet valves, you can now install additional accessories such as hose hangers and sweep inlets. Here’s how:
- For hose hangers, locate a convenient and accessible spot on the wall.
- Using a screwdriver or power drill, install the hose hanger securely by screwing it into the wall.
- For sweep inlets, determine the best location on the baseboard or floor.
- Using a jigsaw or utility knife, carefully cut a hole for the sweep inlet.
- Insert the sweep inlet into the hole and secure it with screws or adhesive as specified by the manufacturer.
These additional accessories will enhance the functionality and convenience of your central vac system.
With the vacuum tubing and accessories successfully installed, your central vac system is one step closer to providing a cleaner and healthier home environment. In the next section, we will guide you through the final steps of installing the central vac, including connecting it to the power source and testing the system.
Testing And Troubleshooting
Testing the central vac system for proper functionality is an essential step to ensure that your installation is working effectively. By following some simple steps, you can verify that your central vac is ready to perform at its best.
Testing the central vac system for proper functionality
To test your central vac system, start by plugging in the power unit and activating the system using the wall-mounted switch or the remote control, if applicable. After turning on the system, check for the following signs to ensure proper functionality:
- Strong suction: Place your hand near the hose inlet or any of the wall outlets and feel for strong suction. If there is a weak suction or none at all, it could indicate a clog or an issue with the power unit. You can try removing any visible blockages or consult a professional for further assistance.
- No abnormal noises: Listen for any unusual sounds, such as loud vibrations or grinding noises, during system operation. These noises could indicate a problem with the motor or an obstruction in the system. Addressing these issues promptly can prevent further damage to your central vac system.
- Proper airflow: Test the airflow by using lightweight objects, such as a tissue or a small piece of paper, and check if they are being pulled towards the wall inlets. Adequate airflow is crucial for efficient cleaning.
Troubleshooting common installation issues
While testing your central vac system, you may encounter some common installation issues. Here are a few troubleshooting tips to help you address them:
1. Poor suction or no suction at all
If you notice weak or no suction, first check for any obstructions in the hose or the inlet. Detach the hose from the wall outlet and inspect it for clogs or debris. Additionally, make sure that all connections are secure and tight. If the problem persists, it might be necessary to consult a professional for further diagnosis and repair.
2. Abnormal noises during operation
If your central vac system is making unusual noises, it could indicate a problem with the motor or an obstruction in the system. Inspect the power unit for any visible obstructions and remove them if found. If the noises persist, it is advisable to contact a professional technician to identify and solve the issue.
3. Inadequate airflow
If you observe poor airflow in your central vac system, start by checking the filters. Dirty or clogged filters can restrict airflow and affect the system’s performance. Follow the manufacturer’s instructions to clean or replace the filters as needed. It’s also important to ensure that all connections are sealed properly to prevent air leaks.
By addressing these common issues during the testing phase, you can ensure your central vac system operates smoothly and efficiently, providing you with a cleaner and healthier living environment.
Maintenance And Care
Maintaining and caring for your central vac unit is crucial to ensure its optimal performance and longevity. By following a few simple steps, you can keep your system running smoothly for years to come. In this section, we will discuss the key aspects of maintenance and care for your central vac unit.
Regularly cleaning the central vac unit and tubing
Regular cleaning of the central vac unit and its tubing is essential to maintain its efficiency. Over time, debris such as hair, dust, and dirt can build up and obstruct the airflow in the system. To prevent this, make it a habit to clean the unit and tubing at regular intervals. Here’s a step-by-step guide:
- Turn off and unplug the central vac unit.
- Remove the dust canister or bag from the unit, empty it, and clean it thoroughly.
- Inspect the tubing for any visible blockages or clogs.
- If there are any blockages, remove them using a long, flexible brush or a plumbing snake.
- For a more thorough cleaning, you can use a mild detergent and warm water to clean the tubing.
- Rinse the tubing thoroughly and allow it to dry completely before reassembling.
- Once everything is dry, reattach the dust canister or bag and plug in the central vac unit.
Checking for clogs and blockages
Regularly checking for clogs and blockages in your central vac system is essential to maintain its suction power. Here’s what you need to do:
- Inspect the air intake ports and remove any visible debris or blockages.
- Check the hose and other attachments for any clogs or obstructions.
- If you find a clog, use a straightened coat hanger or a similar tool to carefully remove it.
- Ensure that all connections are secure and free from any blockages.
Replacing filters and bags as necessary
Filters and bags play a vital role in keeping the central vac system clean and preventing dirt and debris from entering the unit. Over time, these filters and bags can become clogged and affect the system’s performance. It is important to replace them as necessary. Here’s how:
- Refer to the manufacturer’s guidelines to determine the frequency of filter and bag replacements.
- Turn off and unplug the central vac unit.
- Remove the old filter or bag from its designated compartment.
- Dispose of the old filter or bag properly.
- Install a new filter or bag according to the manufacturer’s instructions.
- Make sure that the filter or bag is securely in place before turning on the central vac unit.
By following these maintenance and care guidelines, you can ensure that your central vac unit continues to provide you with efficient and effective cleaning power. Regular cleaning, checking for clogs, and replacing filters and bags will help extend the lifespan of your system and keep it running smoothly for years to come.
Frequently Asked Questions
Can You Install Central Vacuum Yourself?
Yes, it is possible to install a central vacuum yourself. However, it requires some technical knowledge and skills. It is recommended to follow the manufacturer’s instructions carefully or hire a professional for a safe and efficient installation.
How Much Does It Cost To Install A Central Vacuum System?
The cost of installing a central vacuum system can vary depending on the size of your home and the features you choose, but on average, it can range from $1,500 to $3,500.
Where Should A Central Vacuum Be Installed?
A central vacuum should be installed in a central location within the home for optimal convenience and coverage. This typically includes areas such as the basement, garage, or utility room.
Does A Central Vac Need To Be Vented Outside?
Yes, a central vac needs to be vented outside. It is necessary for proper operation and to remove dirt, debris, and odors from your home. Venting outside ensures that the exhaust air and allergens are expelled outside rather than recirculated indoors.
Conclusion
Installing a central vac system is a straightforward process that offers numerous benefits such as enhanced indoor air quality and convenience. By following the step-by-step instructions outlined in this guide, you can successfully install a central vac in your home.
Don’t hesitate to embark on this DIY project and enjoy the ease and efficiency that a central vac provides. Happy vacuuming!