To install a cast iron tub, start by ensuring the area is prepared and leveled. Then, position the tub and secure it in place by attaching it to the wall studs with screws.
Finally, connect the necessary plumbing fixtures and test for leaks before completing the installation process. Introducing a cast iron tub into your bathroom can add a classic and timeless touch to your space. Installation can be completed with proper preparation and attention to detail, ensuring a secure and durable fixture.
This article will provide step-by-step guidance on how to install a cast iron tub, covering everything from preparation to plumbing connections. By following these instructions, you can achieve a successful and hassle-free installation, resulting in a stunning addition to your bathroom. So, let’s dive into the details of how to install a cast iron tub and enjoy the luxurious experience it offers.
Planning For A Cast Iron Tub Installation
Before diving into the exciting world of cast iron tub installation, proper planning is key. Taking the time to research the types of cast iron tubs available, measuring your bathroom space, and determining the best location for the tub will ensure a smooth and successful installation process.
Researching the types of cast iron tubs available
When it comes to cast iron tubs, there are various options available in the market. Before making a purchase, it is important to research and understand the different types of cast iron tubs to find the one that best suits your needs and preferences.
Here are a few factors to consider during your research:
- Size and shape: Cast iron tubs come in various sizes and shapes, including clawfoot, freestanding, and alcove. Analyze your bathroom space and determine which size and shape will fit best.
- Style: Cast iron tubs offer a range of styles, from vintage-inspired to contemporary designs. Think about the overall aesthetic you want to achieve in your bathroom.
- Faucet options: Consider the type of faucets that can be installed on the tub. Some cast iron tubs have pre-drilled holes for faucets, while others require wall-mounted or freestanding fixtures.
Measuring the bathroom space and ensuring compatibility
Before bringing that beautiful cast iron tub into your bathroom, you need to ensure it will fit perfectly in the available space.
To accurately measure your bathroom space, follow these steps:
- Measure the length, width, and height of the area where the tub will be placed. Take into account any structural elements, such as walls or windows, that may affect the placement of the tub.
- Ensure there is sufficient clearance around the tub for easy access and maintenance.
- Check the doorway and stairwell dimensions to make sure the tub can be maneuvered into the bathroom without any issues.
Once you have the measurements, compare them with the dimensions of the cast iron tub you wish to install. This step is crucial to ensure compatibility and avoid any surprises during the installation process.
Determining the best location for the tub in the bathroom
The placement of your cast iron tub can greatly impact the overall functionality and aesthetics of your bathroom. Carefully consider the best location for your tub before starting the installation.
Here are a few factors to keep in mind:
- Accessibility: Choose a location that allows easy entry and exit from the tub. Consider factors such as proximity to the bathroom door and the position of other fixtures.
- Plumbing considerations: Ensure the chosen location has proper access to existing plumbing lines. This will minimize the need for extensive modifications and reduce installation costs.
- Aesthetic appeal: Think about how the tub will fit within the overall layout and design of the bathroom. It should complement the existing décor and create a visually pleasing focal point.
By narrowing down your options and carefully planning the location, you can optimize the functionality and visual appeal of your cast iron tub for years to come.

Preparing The Bathroom For The Installation
Before installing a cast iron tub in your bathroom, it’s important to prepare the space properly. This ensures that the installation process goes smoothly and avoids any unforeseen issues. In this section, we will discuss three crucial steps to prepare your bathroom for the installation: removing any existing fixtures or furniture in the installation area, assessing the flooring for stability and making necessary repairs, and checking the plumbing system for any issues or necessary upgrades.
Removing any existing fixtures or furniture in the installation area
Before you begin the installation process, it’s essential to clear out the area where the cast iron tub will be placed. This includes removing any existing fixtures or furniture that may obstruct the tub’s installation. You want to create a clean and open space to ensure easy maneuverability during the process.
Assessing the flooring for stability and making any necessary repairs
The stability of your bathroom flooring is crucial when installing a cast iron tub. Ensure that the floor is capable of supporting the weight of the tub and any additional weight when it is filled with water. To assess the flooring’s stability, carefully inspect the area beneath the tub’s intended location for any signs of damage, such as sagging or soft spots. If any issues are identified, they should be addressed before proceeding with the installation. Necessary repairs may include reinforcing the floor with additional support beams or replacing damaged sections.
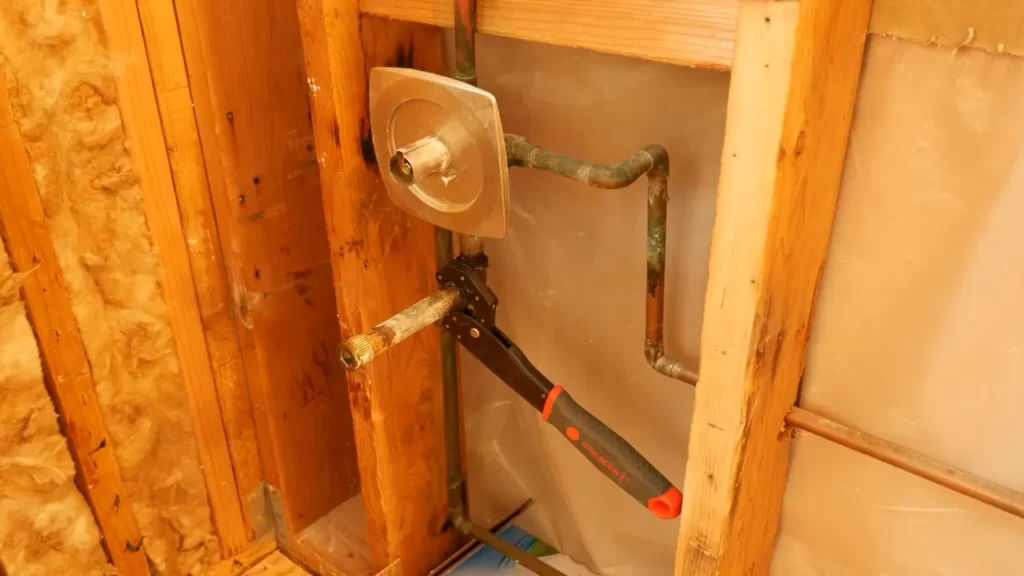
Checking the plumbing system for any issues or necessary upgrades
Before installing a cast iron tub, it’s important to check the plumbing system to ensure it is up to code and capable of supporting the tub’s needs. Start by inspecting the existing pipes for any signs of leaks, corrosion, or damage. Replace any faulty pipes or fittings to prevent potential issues in the future.
In addition to assessing the condition of the plumbing, it’s also necessary to determine if any upgrades or modifications are needed. This includes ensuring that the water supply and drainage systems can accommodate the requirements of a cast iron tub. If necessary, it may be advisable to consult a professional plumber to make any necessary upgrades or modifications.
Preparing the bathroom for the installation of a cast iron tub is a critical step in ensuring that the process goes smoothly and without any hiccups. By removing existing fixtures or furniture, assessing the flooring for stability, and checking the plumbing system for any issues or necessary upgrades, you can create a solid foundation for a successful installation. Following these steps will not only save you time and effort but will also provide long-lasting results, allowing you to enjoy your new cast iron tub for years to come.
Installing The Cast Iron Tub
Installing a cast iron tub can be a challenging task, but with the right tools and materials, as well as careful planning and execution, you can achieve a successful installation. In this section, we will take you through the step-by-step process of installing a cast iron tub, including gathering the required tools and materials, securing the tub in the designated location, and connecting the plumbing fixtures and ensuring proper drainage.
Gathering the required tools and materials
Before you begin the installation process, it is important to gather all the necessary tools and materials. By having everything you need on hand, you can avoid delays and interruptions during the installation. Here are the essential tools and materials you will need:
| Tools | Materials |
|---|---|
|
|
Securing the tub in the designated location
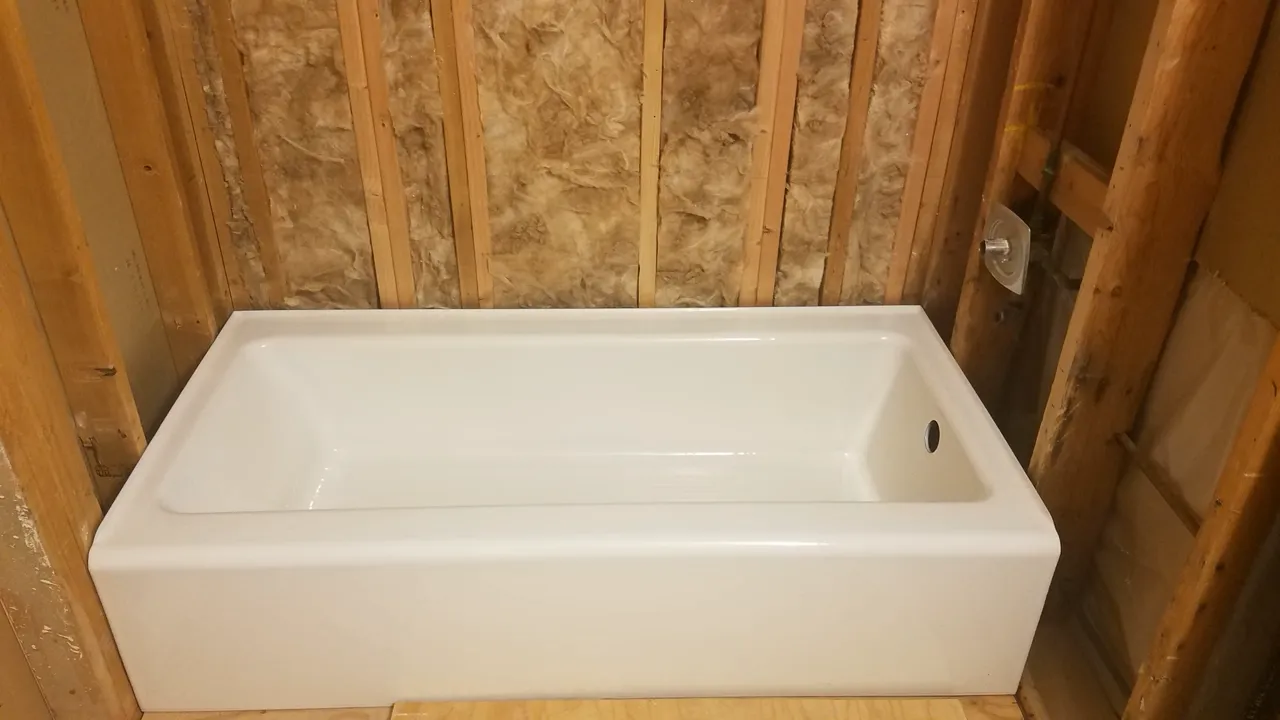
Once you have all the necessary tools and materials, it’s time to secure the cast iron tub in the designated location. It is important to ensure that the tub is properly supported and level for a secure and stable installation. Here are the steps to follow:
- Prepare the floor by removing any debris and ensuring it is clean and level.
- Position the tub in the desired location and mark its outline on the floor.
- Apply silicone sealant along the marked outline to create a watertight seal.
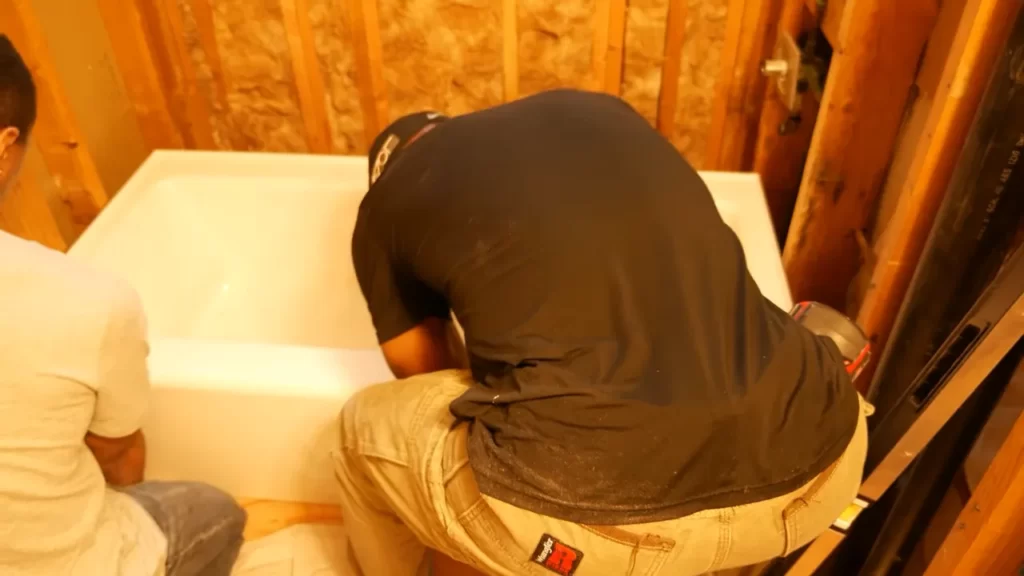
- Carefully lower the tub into the sealant, making sure it is aligned with the plumbing drain.
- Use a level to check that the tub is properly aligned and adjust as necessary.
- Secure the tub to the floor by drilling holes and inserting screws or anchors.
Connecting the plumbing fixtures and ensuring proper drainage
With the tub securely in place, the next step is to connect the plumbing fixtures and ensure proper drainage. This involves connecting the drain assembly, overflow drain, and plumbing pipes. Follow these steps:
- Attach the drain assembly to the tub drain, ensuring a tight and secure connection.
- Connect the overflow drain to the designated opening on the tub.
- Measure and cut the plumbing pipes to the appropriate length, using a hacksaw if necessary.
- Attach the pipe fittings to the plumbing pipes, using plumber’s tape for a watertight seal.
- Connect the plumbing pipes to the drain assembly and overflow drain, ensuring proper alignment.
- Test the drainage by filling the tub with water and checking for any leaks or clogs.
By following these steps and paying attention to detail during the installation process, you can ensure a successful and long-lasting installation of your cast iron tub. Now that you have completed the installation, you can enjoy the luxurious and timeless beauty of your new tub.
Sealing And Finishing The Installation
Once you have successfully installed your cast iron tub, it’s important to properly seal and finish the installation to ensure its longevity and prevent any future issues such as leaks. This involves applying a sealant around the edges of the tub, installing an overflow drain if necessary, and adding any desired finishing touches such as a shower curtain rod or accessories.
Applying a Sealant around the Edges of the Tub to Prevent Leaks
Preventing leaks is crucial when it comes to ensuring the functionality and durability of your cast iron tub. To accomplish this, you will need to apply a sealant around the edges of the tub. Follow these steps to properly seal your tub:
- Clean the surface area around the edges of the tub to remove any dirt or debris that can hinder the effectiveness of the sealant.
- Using a silicone-based tub sealant, start applying a thin and even layer along the edges of the tub.
- Smooth out the sealant with a caulk tool or your finger, ensuring it adheres firmly to the tub and the adjacent wall or floor.
- Allow the sealant to dry completely before using the tub.
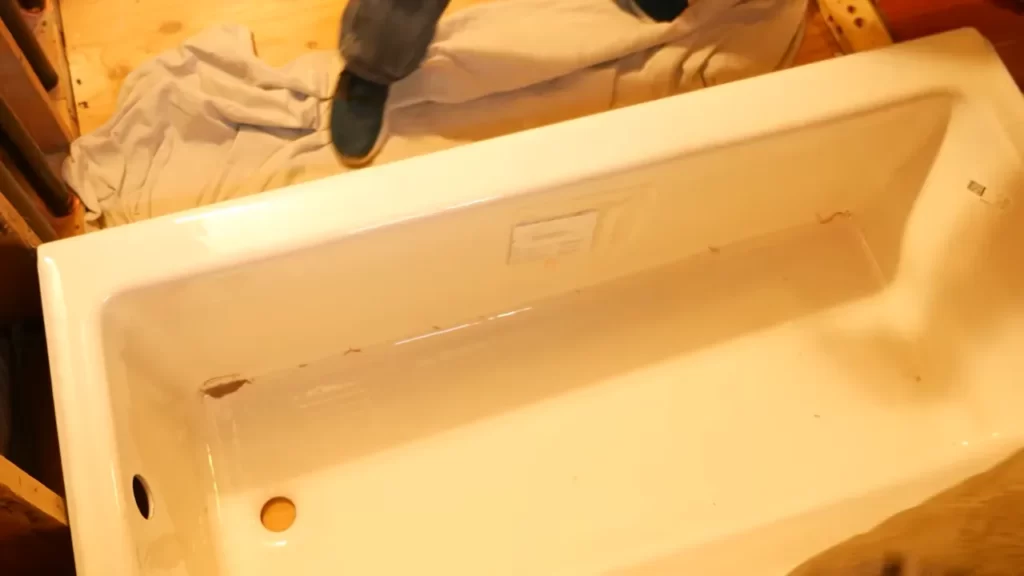
Installing an Overflow Drain, If Necessary
An overflow drain is a crucial component of a cast iron tub, as it helps to prevent water from overflowing and causing damage. If your tub requires an overflow drain, you can follow these steps to install it:
- Measure and mark the desired location for the overflow drain on the tub.
- Drill a hole through the marked spot using a power drill and an appropriate drill bit size.
- Insert the overflow drain assembly into the hole, ensuring it fits snugly.
- Tighten the retaining nut from the underside of the tub to secure the assembly in place.
Adding Any Desired Finishing Touches
Once your cast iron tub is sealed and the overflow drain is installed, you can add the finishing touches to enhance its functionality and aesthetic appeal. Consider the following options:
- Install a shower curtain rod to allow for a shower curtain and create a more versatile bathing experience.
- Add accessories such as soap dishes, towel racks, or bath caddies to provide convenience and organization.
- Consider refinishing the surface of the tub if desired, utilizing epoxy or enamel coatings to restore its original beauty.
By properly sealing your cast iron tub, installing an overflow drain if necessary, and adding the finishing touches, you can enjoy a durable and visually appealing addition to your bathroom. With these steps completed, your tub is ready to provide you with a relaxing and enjoyable bathing experience for years to come.
Testing And Finalizing The Installation
After completing the installation process of your new cast iron tub, it’s crucial to thoroughly test and finalize the installation to ensure everything is in proper working order. This step involves checking for any leaks or issues with the plumbing connections, testing the tub for functionality and stability, and cleaning up the bathroom area around the tub. Let’s delve into each aspect of testing and finalizing the installation.
Checking for any leaks or issues with the plumbing connections
To avoid any potential water damage or plumbing issues in the future, it is essential to check for leaks or problems with the plumbing connections. Start by examining all the connections, including the faucets, drains, and overflow pipes. Run the water and observe closely for any signs of leakage, like dripping water or damp areas.
If you notice any leaks, they need to be addressed promptly. Tighten any loose connections, replace damaged washers or gaskets, and apply plumber’s tape on threaded connections if necessary. It’s crucial to fix any leaks before proceeding with the finalization process to avoid any potential damage.
Testing the tub for proper functionality and stability
Now that the plumbing connections have been checked for leaks, it’s time to thoroughly test the tub for functionality and stability. Start by filling the tub with water up to an appropriate level and let it sit for a while. Observe if the water drains properly and if there are any issues with the drainage system.
In addition to testing the drainage, it’s also important to check the stability of the tub. Gently apply pressure on different areas of the tub to ensure that it doesn’t shift or wobble. If you notice any instability, consider adjusting the leveling feet or consulting a professional to ensure a secure and stable installation.
Cleaning and tidying up the bathroom area around the tub
With the testing phase complete, it’s time to give your bathroom a final touch by cleaning and tidying up the area around the tub. Start by wiping the tub and surrounding surfaces with a damp cloth to remove any dust, debris, or fingerprints that may have accumulated during the installation process.
Next, ensure that the caulking around the tub is neat and even. If necessary, carefully remove any excess or uneven caulking and apply fresh caulking for a clean and finished look. Additionally, organize and put away any tools or materials used during the installation, leaving the bathroom area tidy and clutter-free.
By thoroughly testing for leaks, ensuring proper functionality and stability, and cleaning up the bathroom area around the tub, you can confidently say that your cast iron tub installation is complete. Enjoy the luxurious experience of bathing in your newly installed tub!
Maintaining And Caring For The Cast Iron Tub
Maintaining and Caring for the Cast Iron Tub
One of the joys of owning a cast iron tub is its timeless beauty and durability. With proper care and maintenance, your cast iron tub can remain a centerpiece of your bathroom for years to come. In this section, we will explore some essential tips for maintaining and caring for your cast iron tub. From regular cleaning to preventing rust and preserving the tub’s appearance, these guidelines will help you keep your tub in excellent condition. So, let’s dive in!
Regular cleaning and maintenance tips for the tub’s surface
To keep your cast iron tub looking pristine, regular cleaning and maintenance are essential. Here are a few tips to help you get started:
- Use a mild, non-abrasive cleaner: When cleaning the surface of your cast iron tub, it’s important to avoid using harsh, abrasive cleaners that can damage the finish. Opt for a mild soap or a specialized cast iron cleaner specifically designed for use on these types of tubs.
- Wipe down after each use: After each use, make it a habit to wipe down the tub’s surface with a soft, damp cloth or sponge. This will help remove any dirt or soap residue, preventing stains and buildup.
- Avoid standing water: Standing water can leave behind mineral deposits and increase the chances of staining. To avoid this, make sure to drain the tub completely after each use.
Avoiding abrasive cleaners that can damage the finish
The finish of your cast iron tub is delicate and can be easily damaged by abrasive cleaners or rough scrubbing. To protect the finish and maintain the tub’s beauty, follow these guidelines:
- Avoid using harsh chemicals: Harsh chemicals such as bleach or ammonia can strip away the finish of your cast iron tub. Stick to mild, non-abrasive cleaners specifically formulated for cast iron surfaces.
- Use soft non-scratch scrubbers: When scrubbing the surface of your tub, opt for soft non-scratch scrubbers like nylon brushes or microfiber cloths. Avoid using steel wool or abrasive sponges that can scratch the finish.
- Rinse thoroughly: After cleaning the tub, make sure to rinse it thoroughly with warm water to remove any remaining cleaning product residue.
Preventing rust and maintaining the tub’s appearance over time
Rust can be a common issue with cast iron tubs, but with proper care, you can prevent it and maintain the tub’s appearance over time:
| Tips for preventing rust: | Tips for maintaining the tub’s appearance: |
|---|---|
|
|
By following these regular cleaning and maintenance tips, avoiding abrasive cleaners, and taking steps to prevent rust, you can ensure that your cast iron tub remains a beautiful feature in your bathroom for years to come. Remember, proper care and maintenance will not only enhance the tub’s longevity but also preserve its timeless charm.
Frequently Asked Questions
Can My Floor Support A Cast Iron Tub?
Yes, it is important to determine if your floor can support a cast iron tub. Consider the weight of the tub when filled with water and occupants. Consult a structural engineer to ensure your floor can handle the load.
What Are The Cons Of A Cast Iron Tub?
The cons of a cast iron tub include its heavy weight, making it difficult to install and move. It can also be prone to chipping and scratching, requiring regular maintenance. Additionally, cast iron tubs can be expensive compared to other materials.
Does A Cast Iron Tub Need A Ledger?
No, a cast iron tub does not need a ledger.
How Hard Is It To Remove A Cast Iron Tub?
Removing a cast iron tub can be challenging. It requires careful planning, tools, and strength. It is best to seek professional help to ensure it is safely and properly removed without causing any damage or injury.
Conclusion
Installing a cast iron tub can be a rewarding DIY project that adds value and luxury to your bathroom. By following the step-by-step instructions outlined in this guide, you can ensure a smooth and successful installation process. Remember to gather all the necessary tools and materials, take accurate measurements, and carefully prepare the area before starting.
With patience and attention to detail, you can enjoy the beauty and functionality of a cast iron tub in your home for years to come.