Installing a bidet is a simple process that requires a few basic steps. First, turn off the water supply to your toilet.
Next, remove the existing toilet seat and connect the bidet’s T-valve to the toilet’s water supply line. Finally, attach the bidet to the toilet bowl, ensuring a secure fit, and turn the water supply back on.
Getting Started
Installing a bidet in your bathroom can enhance your hygiene routine and provide a more comfortable experience. While the idea of installing a bidet may seem daunting at first, it’s actually a straightforward process that you can easily accomplish on your own. In this guide, we will walk you through the steps of installing a bidet, starting with the basics and then moving on to assessing feasibility and gathering the necessary tools and materials.
Understanding the basics of bidets
Before you dive into installing a bidet, it’s important to have a good understanding of what it is and how it works. Essentially, a bidet is a plumbing fixture that is designed to clean and rinse your genital and anal areas after using the toilet. It typically consists of a basin and a water supply, with some models offering additional features such as heated seats or adjustable water pressure. By incorporating a bidet into your bathroom, you can enjoy a more thorough and refreshing clean.
Assessing the feasibility of installing a bidet
While bidets are growing in popularity, it’s essential to determine if your bathroom is suitable for bidet installation. Start by checking the available space in your bathroom and ensure that there is enough room for the bidet fixture. Additionally, you need to have access to a water supply and a power source if your bidet requires electricity. If you are unsure about any of these factors, consulting a professional plumber can provide you with the guidance you need to determine if installing a bidet is feasible for your specific bathroom.
Gathering the necessary tools and materials
Before you begin the installation process, you’ll need to gather the necessary tools and materials. Here’s a list of common items you may need:
| 1 | Bidet fixture |
| 2 | Water supply line |
| 3 | Teflon tape |
| 4 | Adjustable wrench |
| 5 | Screwdriver |
| 6 | Bucket or towel |
| 7 | Level |
Having these tools and materials on hand will make the installation process smoother and more efficient. Make sure to double-check your bidet’s instruction manual for any additional items that may be required.
Now that you have a basic understanding of bidets, have assessed the feasibility of installation in your bathroom, and have gathered the necessary tools and materials, you are ready to move on to the next steps of the bidet installation process. In the next section, we will guide you through preparing your bathroom for the installation.

Preparing The Bathroom
Before you can begin installing a bidet in your bathroom, it’s important to make some preparations. This will ensure a smooth and hassle-free installation process. The following steps will guide you through the necessary preparations:
Shutting off the water supply
The first step in preparing your bathroom for bidet installation is to shut off the water supply. Locate the shut-off valve near the base of your toilet and turn it clockwise until it is fully closed. This will prevent water from flowing into the toilet as you work.
Removing the existing toilet seat
Once the water supply is shut off, you can proceed to remove the existing toilet seat. To do this, follow these simple steps:
- Locate the bolts attaching the toilet seat to the bowl.
- Using a wrench, unscrew the nuts that secure the bolts in place.
- Lift the toilet seat straight up to detach it from the bowl.
Ensure that you keep the bolts and nuts in a safe place, as you may need them later for installing the bidet.
Cleaning and disinfecting the toilet bowl
Before proceeding further, take a moment to thoroughly clean and disinfect the toilet bowl. This will help create a hygienic environment for the bidet installation. Use a toilet bowl cleaner and a scrub brush to remove any stains or residue.
Make sure to rinse the bowl well with water after cleaning to remove any remaining cleaning products.
Note: When cleaning a toilet bowl, it’s recommended to wear gloves and use a toilet brush specifically designated for this purpose.
By following these steps to prepare your bathroom, you are now ready to move on to the next phase of bidet installation. Stay tuned for the next section, which will cover the actual installation process.
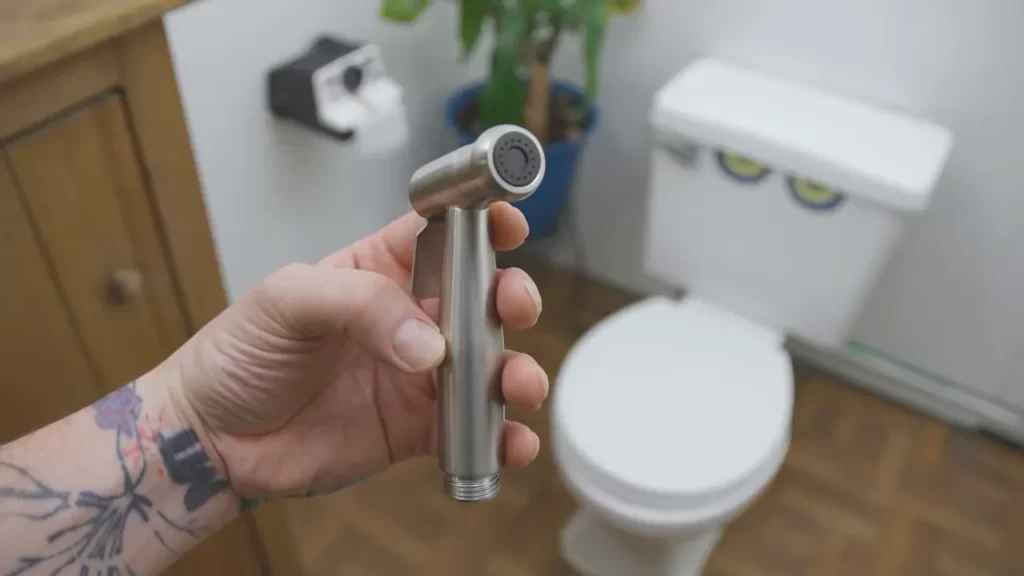
Installing The Bidet
Installing a bidet in your bathroom can bring added comfort and hygiene to your daily routine. However, figuring out how to install a bidet can seem like a daunting task. Don’t worry, we’ve got you covered! In this guide, we’ll walk you through the step-by-step process of installing a bidet, starting with attaching the bidet seat to the toilet.
Attaching the Bidet Seat to the Toilet
The first step in installing a bidet is attaching the bidet seat to your existing toilet. Follow these simple steps:
- Start by turning off the water supply to the toilet. Locate the shut-off valve usually located near the wall behind the toilet.
- Remove the toilet seat by unscrewing the bolts that hold it in place. Set the old seat aside.
- Take the bidet seat and position it on the toilet bowl. Make sure the hinges align with the holes on the bowl.
- Insert the provided bolts through the holes and tighten them using a screwdriver or wrench. Be careful not to overtighten to avoid damaging the seat or toilet.
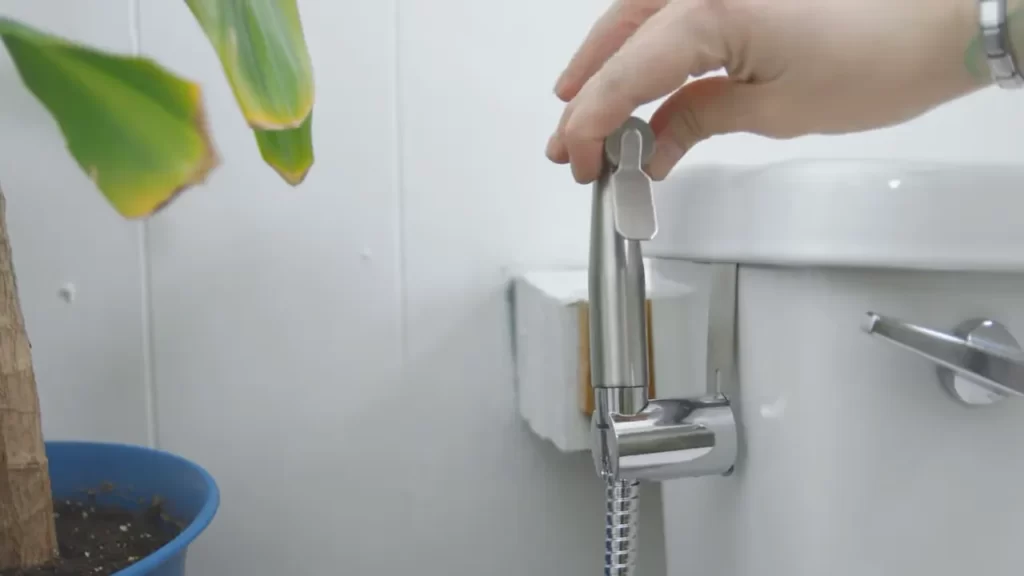
Once you have successfully attached the bidet seat to your toilet, it’s time to proceed to the next step: connecting the water supply.
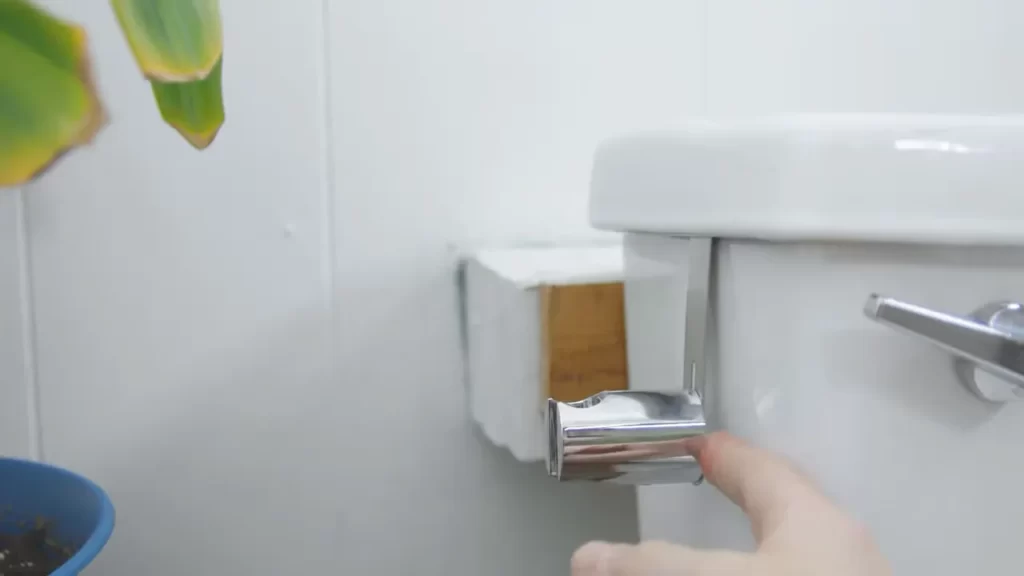
Connecting the Water Supply
To ensure your bidet functions properly, it’s essential to connect it to the water supply correctly. Follow these instructions:
- Locate the water supply valve near the bottom of the toilet tank and turn it off.
- Detach the water supply hose connected to the bottom of the tank. Have a bucket or towel ready to catch any water that may spill.
- Connect the bidet’s water supply hose to the valve on the bottom of the tank. Make sure it is securely attached.
- With the bidet’s water supply hose connected, turn the water supply valve back on to allow water flow.
Now that you have successfully connected the bidet to the water supply, it’s time to move on to the final step: testing for leaks and adjusting water pressure.
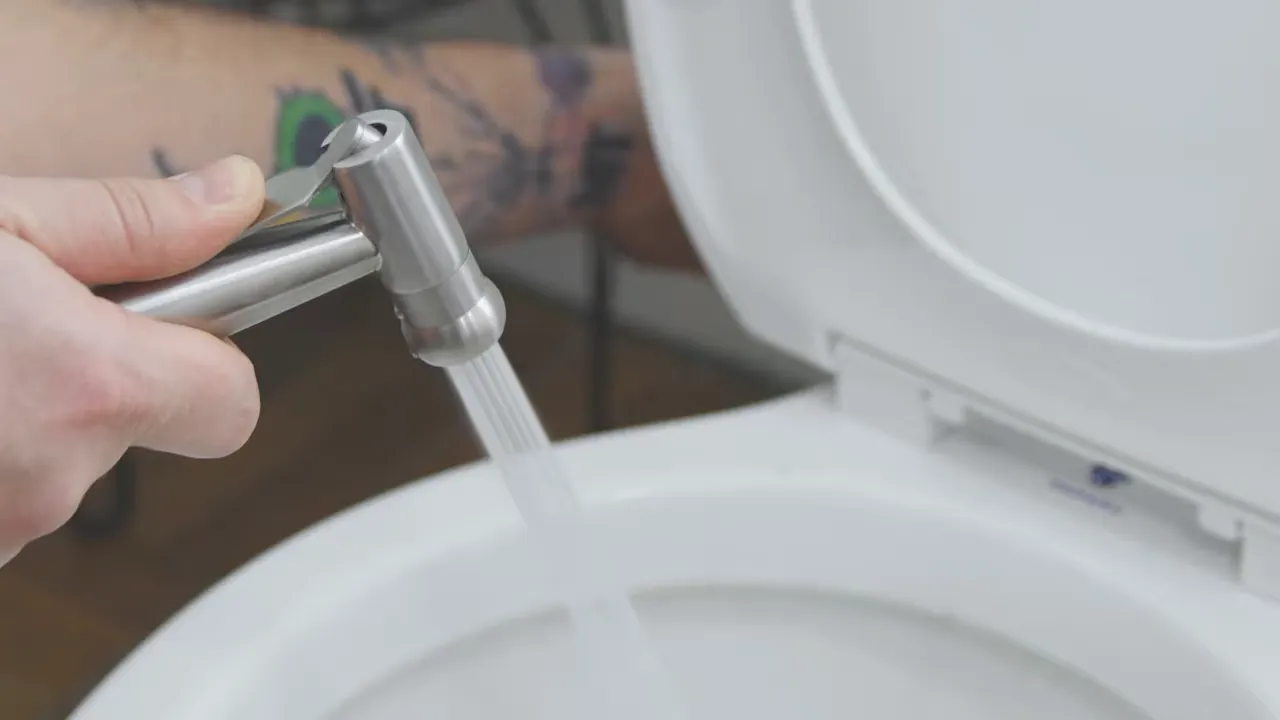
Testing for Leaks and Adjusting Water Pressure
Before you start using your bidet, it’s crucial to test for leaks and adjust the water pressure. Here’s what you need to do:
- Inspect the connections between the bidet seat and toilet to ensure there are no visible leaks. If you notice any leaks, try tightening the connections.
- Turn on the bidet and let the water flow. Check for any water leakage around the bidet seat or water supply hose.
- If there are no leaks, sit on the bidet and adjust the water pressure according to your preference. Most bidets have a control knob or lever that allows you to regulate the water pressure.
Once you are satisfied with the installation and have ensured there are no leaks while testing, you’re ready to start enjoying the benefits of your new bidet!
Proper Use And Maintenance
Proper use and maintenance are crucial in ensuring the longevity and optimal performance of your bidet. By following the operating instructions, cleaning and sanitizing the bidet seat regularly, as well as troubleshooting common issues effectively, you can enjoy a hygienic and hassle-free bidet experience for years to come.
Operating the bidet effectively
When it comes to operating the bidet effectively, it’s essential to familiarize yourself with the control panel and functions. Here’s a step-by-step guide that will help you make the most out of your bidet:
- Step 1: Start by adjusting the water temperature and pressure settings to your preferred levels. Most bidets offer options for warm water temperatures and adjustable spray strengths.
- Step 2: Position yourself comfortably on the bidet seat and activate the cleansing function. Depending on the bidet model, you may have different options such as rear cleansing, front cleansing, or even a pulsating spray for a massage-like sensation.
- Step 3: Use the adjustable nozzle position feature to ensure precise cleansing. You can adjust the nozzle forwards or backward, as well as change the spray width to customize your cleaning experience.
- Step 4: Once you have finished using the bidet, gently pat yourself dry or use a small amount of toilet paper to wipe off any remaining moisture. It’s important not to flush excessive amounts of toilet paper or other materials down the bidet, as it may cause clogs or damage the system.
- Step 5: Finally, deactivate the bidet and clean the control panel with a damp cloth to remove any residue or bacteria.
Cleaning and sanitizing the bidet seat
To maintain a clean and sanitary bidet seat, regular cleaning and sanitization are crucial. Follow these steps for optimal cleanliness:
- Step 1: Ensure that the bidet is turned off and disconnected from any power source before cleaning.
- Step 2: Use a mild, non-abrasive cleanser or soap and warm water to wipe down the bidet seat, paying special attention to the nozzle area.
- Step 3: For hard-to-reach areas, such as the nozzle cleaning port or hinges, use a soft brush or toothbrush to remove any buildup or debris.
- Step 4: Rinse the bidet seat thoroughly with clean water to remove any cleaning solution residue.
- Step 5: Once the bidet seat is clean, sanitize it by wiping it down with a disinfectant specially designed for electronic devices. Refer to the manufacturer’s instructions for any specific recommendations.
Troubleshooting common issues
If you experience any common issues with your bidet, don’t worry. Most problems can be easily resolved with a few simple steps. Here are a few troubleshooting tips:
| Issue | Solution |
|---|---|
| Nozzle not extending/retracting | Check if the nozzle is obstructed or dirty. Clean the nozzle and ensure there are no blockages. If the problem persists, contact the manufacturer for further assistance. |
| Inconsistent water temperature | Verify that the water heater is properly connected and functioning. Adjust the temperature settings accordingly. If the issue continues, consult the manufacturer or a professional for repair. |
| Weak water pressure | Check if there are any restrictions in the water supply line or filters. Clean or replace them if necessary. Additionally, ensure there are no kinks in the water hose. |
By following these tips, you’ll be able to troubleshoot and resolve common bidet issues effectively, saving both time and money.
In conclusion, proper use and maintenance are vital to ensure the functionality and hygiene of your bidet. By understanding how to operate the bidet effectively, regularly cleaning and sanitizing the bidet seat, and troubleshooting common issues, you can enjoy a refreshing and hassle-free bidet experience for years to come.
Enhancing The Bidet Experience
Installing a bidet in your bathroom can take your hygiene routine to the next level. But did you know that there are additional features and accessories that can enhance your bidet experience even further? In this section, we will explore the optional features and accessories that you can consider incorporating into your bidet setup for ultimate comfort and convenience.
Optional features and accessories
When it comes to bidets, there are various optional features and accessories that you can choose from based on your preferences and needs. These add-ons can truly transform your bidet experience and make it personalized just for you. Let’s take a look at some of the most popular optional features and accessories:
1. Heated Seats:
A heated seat is a luxurious feature that can provide comfort during those chilly winter mornings. No more sitting on a cold toilet seat! With a bidet that has a heated seat option, you can enjoy a warm and cozy experience every time you sit down. It’s the perfect way to start your day!
2. Adjustable Water Temperature:
Everyone has different preferences when it comes to water temperature. Having the ability to adjust the water temperature on your bidet ensures that you can tailor your cleaning experience to your liking. Whether you prefer a soothing warm temperature or a refreshing cool temperature, this feature allows you to find your perfect balance.
3. Air Dryer:
Forget about using toilet paper! An air dryer feature eliminates the need for toilet paper by gently drying you with a stream of warm air after cleaning. Not only does this reduce waste and environmental impact, but it also provides a more hygienic and comfortable drying experience.
4. Nightlight:
Are you tired of stumbling your way to the bathroom in the middle of the night? A bidet with a built-in nightlight can solve that problem. The soft glow of the nightlight provides enough illumination to navigate your way without disturbing your sleep or blinding you with bright lights.
Choosing the right bidet for your needs
Now that we’ve explored some of the optional features and accessories, it’s time to choose the right bidet for your needs. With so many options available in the market, it can be overwhelming. Here are a few factors to consider when making your decision:
- The size of your bathroom and the available space.
- Your budget and the price range you are comfortable with.
- The type of bidet (e.g., electric, non-electric) that suits your requirements.
- The installation process and whether you can do it yourself or need professional help.
- The water pressure and temperature options that the bidet offers.
Exploring advanced bidet functionalities
Lastly, let’s delve into the world of advanced bidet functionalities. These innovative features can take your bidet experience to a whole new level:
- Massage function: Some bidets offer a massage feature that provides a gentle pulsating water stream for added relaxation and comfort.
- Self-cleaning nozzles: Advanced bidets come equipped with self-cleaning nozzles that ensure hygiene and prevent buildup of bacteria, keeping your bidet clean and maintenance-free.
- Wireless remote control: With a wireless remote control, you can easily adjust settings and access different functionalities without having to reach for the control panel.
By exploring these advanced bidet functionalities and carefully considering the optional features and accessories, you can create a bidet experience that is tailored to your specific needs and preferences. Say goodbye to traditional toilet paper and hello to a cleaner, more hygienic, and luxurious bidet experience!
Frequently Asked Questions
Can You Add A Bidet To A Regular Toilet?
Yes, you can easily add a bidet to a regular toilet without any hassle.
What Plumbing Is Needed For A Bidet?
Bidets typically require access to a water source and a drain. Therefore, plumbing for a bidet usually involves connecting the bidet to the water supply line and installing a separate drainage system. It is advisable to consult a professional plumber for the proper installation of a bidet.
How Hard Is It To Attach A Bidet?
Attaching a bidet is not difficult! It’s a simple process that can be done by following the instructions provided. Just connect the bidet to your existing toilet, making sure to tighten the connections securely. It’s an easy DIY project that anyone can handle.
Where Does A Bidet Connect To The Toilet?
A bidet connects to the toilet through a T-valve or an adapter, which diverts the water supply from the toilet tank to the bidet.
Conclusion
Installing a bidet may seem like a daunting task, but with the right guidance, it can be a straightforward process. By following this step-by-step guide, you can transform your bathroom experience and enjoy the numerous benefits of a bidet. Remember to gather the necessary tools, consult the instruction manual, and take your time during installation.
With a little effort and patience, you’ll soon appreciate the enhanced hygiene and comfort that a bidet provides. So, why wait? Upgrade your bathroom today!