
To install a bathtub spout, first, turn off the water supply, then remove the old spout.
Choosing The Right Bathtub Spout
When it comes to installing a bathtub spout, selecting the right one is crucial for both functionality and aesthetics. With a variety of options available, choosing a bathtub spout can seem overwhelming. However, by considering the different types of spouts and the factors that should be taken into account, you can ensure you make the right choice for your bathroom.
Types of Bathtub Spouts
Before diving into the selection process, let’s discuss the different types of bathtub spouts that are available in the market:
- Wall-Mounted Spouts: Wall-mounted spouts are the most common type and are installed on the wall of the bathtub. They come in various designs, including straight, curved, or angled spouts.
- Deck-Mounted Spouts: Deck-mounted spouts are installed on the bathtub deck and offer a unique look. They are a great choice for freestanding bathtubs.
- Freestanding Spouts: As the name suggests, freestanding spouts are not attached to the bathtub or the wall. They provide a contemporary and sleek look to your bathroom.
Each type of spout has its own advantages and can be chosen based on your personal preference, bathroom layout, and the style you aim to achieve.
Factors to Consider when Selecting a Bathtub Spout
Now, let’s explore the important factors to consider when choosing the right bathtub spout:
- Style: Consider the overall style of your bathroom and choose a spout that complements it. Whether you have a traditional or modern design, there is a spout that will match your aesthetic preferences.
- Compatibility: Check the compatibility of the spout with your existing plumbing system. Measure the distance between the wall or tub deck and the existing water supply lines to ensure a proper fit.
- Finish: The finish of the spout is another important aspect to consider. Opt for a finish that matches your other bathroom fixtures, such as faucets, showerheads, and towel bars. Popular finishes include chrome, brushed nickel, bronze, and brass.
- Functionality: Think about the features you desire in a spout. Some spouts offer adjustable water flow, while others have built-in diverters to switch between a bath spout and a showerhead. Choose a spout that meets your specific needs.
- Budget: Set a budget for your bathtub spout and choose one that fits within it. Remember to factor in the cost of installation if you are not doing it yourself.
By considering these factors and understanding the different types of bathtub spouts available, you can make an informed decision that enhances both the functionality and aesthetics of your bathroom.
Prep Work Before Installation
Before you dive into installing a bathtub spout, it’s important to complete some preparatory steps to ensure a smooth and successful installation process. This will help you avoid any unnecessary hiccups along the way.
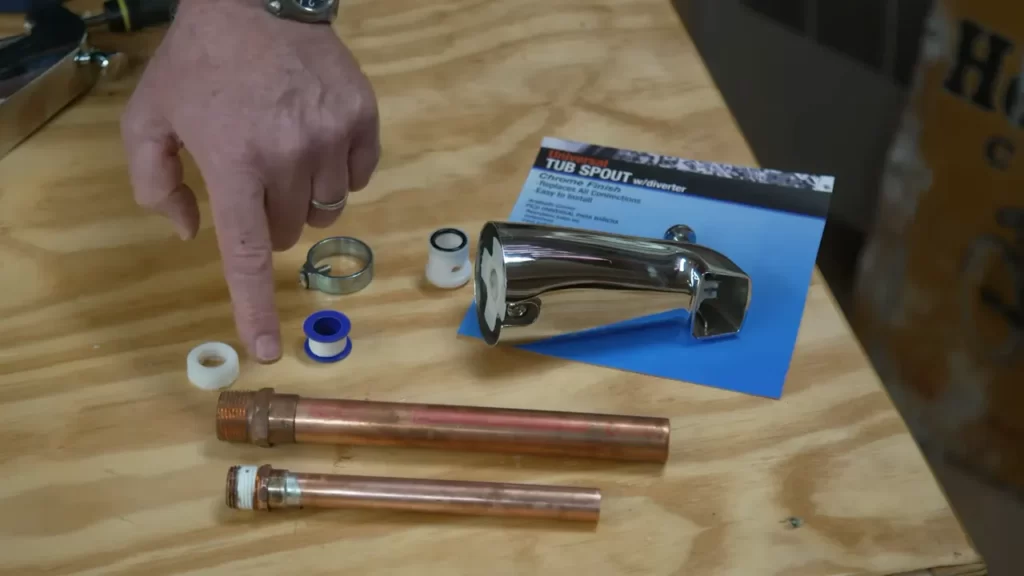
Gathering necessary tools
To begin, gather all the tools you will need for the installation process. Having everything in one place will save you time and frustration. Here is a list of the essential tools:
| Tool | Description |
| Adjustable wrench | A wrench with a movable jaw that allows you to adjust its size |
| Screwdriver | Both flathead and Phillips screwdrivers may be required |
| Plumber’s tape | A thin white tape used to create a watertight seal |
| Pipe compound | A sealant used to ensure a leak-free connection |
| Towel or rag | For wiping away any excess water or debris |
Shutting off the water supply
Before you can remove the old spout, it’s crucial to turn off the water supply to your bathtub. This will prevent any water from flowing while you work and avoid potential accidents. Follow these steps to shut off the water supply:
- Locate the main water shut-off valve for your home.
- Turn the valve clockwise to close it and stop the water flow.
- Test the water supply to make sure it’s completely shut off by turning on a faucet in another part of your house. If no water comes out, you can proceed with confidence.
Removing the old spout
Now that the water supply is turned off, it’s time to remove the old bathtub spout. Follow these steps to ensure a proper removal:
- Inspect the spout for any visible screws or fasteners.
- Using the appropriate screwdriver, remove any screws or fasteners holding the spout in place.
- Gently twist and pull the spout to detach it from the wall pipe.
- Wipe away any excess water or debris from the wall pipe using a towel or rag.
With the prep work completed, you’re now ready to move on to the exciting part – installing your new bathtub spout! Stay tuned for the next section of this blog post, where we will guide you through the installation process step by step.
Installing The New Bathtub Spout
Inserting the spout onto the pipe
Once you have removed the old bathtub spout, it’s time to install the new one. To begin, follow these steps:
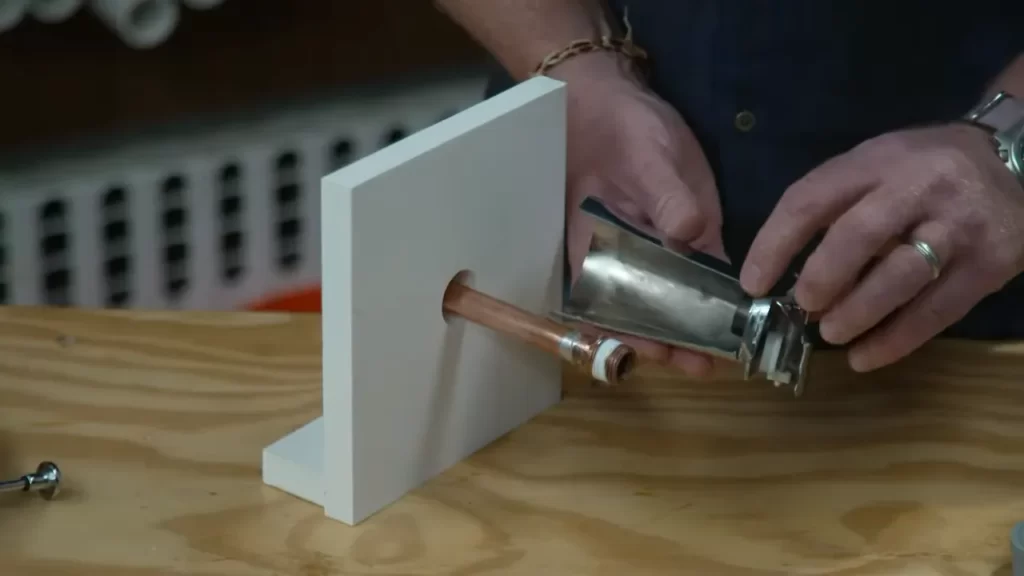
- Apply plumber’s tape to the threads of the pipe to ensure a tight seal. This will help prevent any leaks.
- Insert the new bathtub spout onto the pipe, making sure it fits snugly. Twist the spout clockwise until it is securely in place.
- Ensure that the spout is properly aligned with the wall, with the opening facing down towards the bathtub.
Connecting and tightening the spout
After inserting the spout onto the pipe, it’s time to connect and tighten it. Follow these steps:
- Use an adjustable wrench to tighten the spout onto the pipe. Be careful not to overtighten, as this can damage the spout or cause leaks.
- Make sure the spout is securely fastened to the wall by giving it a gentle tug. It should not move or wiggle.
- If your spout has any decorative elements or trim, make sure they are aligned correctly and tightened accordingly.
Testing for leaks and proper water flow
Once the new bathtub spout is installed and tightened, it’s crucial to test for leaks and proper water flow. Here’s what you should do:
- Turn on the water supply to the bathtub.
- Inspect the spout for any signs of leakage, such as dripping or pooling water.
- Check that the water flows smoothly and evenly through the spout. Any irregularities may indicate an installation issue.
- Run the water for a few minutes to ensure there are no hidden leaks.
If you notice any leaks or poor water flow, double-check the installation steps and make any necessary adjustments. Remember, a properly installed bathtub spout should provide a seamless and reliable water flow, ensuring a comfortable bathing experience.
Common Issues And Troubleshooting
Installing a bathtub spout may seem like a straightforward task, but sometimes, common issues can arise that require troubleshooting. In this section, we will address three common issues that you may encounter during the installation process: leaking spout connections, low water pressure, and water temperature regulation. Let’s dive into each of these issues and find the solutions.
Leaking Spout Connections
A leaking spout connection can be frustrating, but fortunately, there are a few steps you can take to fix this issue. Here’s what you can do:
- Check the connection: The first thing you should do is ensure that the spout is tightly connected to the plumbing pipe. Loosen and re-tighten the connection to make sure it is secure.
- Inspect the O-ring: The O-ring is a small rubber ring located inside the spout’s connection area. Over time, it may wear out or become damaged, leading to leaks. Check the O-ring for any signs of wear and tear and replace it if necessary.
- Apply plumber’s tape: To prevent any leakage, wrap plumber’s tape around the threaded portion of the spout’s connection. This tape creates a watertight seal, ensuring a proper connection.
- Use a plumber’s putty: If the spout has a larger gap between the wall and the pipe, you may need to apply plumber’s putty. Roll the putty into a thin rope and wrap it around the base of the spout before connecting it to the pipe. This will help create a watertight seal.
Low Water Pressure
Experiencing low water pressure can be frustrating, especially when trying to enjoy a relaxing bath. To troubleshoot this issue, follow these steps:
- Check for clogs: Low water pressure can often be caused by clogged aerators or showerheads. Remove the spout and inspect the aerator for any debris. Clean it thoroughly or replace it if necessary.
- Inspect the pipes: Examine the pipes leading to the spout for any obstructions or mineral buildup. If you notice any blockages, use a pipe brush or descaling solution to remove the deposits.
- Adjust water pressure valve: Check if your bathtub has a water pressure valve installed. This valve regulates the water flow. Make sure it is fully open to allow maximum water pressure.
Water Temperature Regulation
Having control over the water temperature is crucial for a comfortable bathing experience. If you are facing issues with water temperature regulation, here’s what you can do:
- Check the mixing valve: The mixing valve is responsible for blending hot and cold water to reach the desired temperature. Ensure that it is properly adjusted and not blocked by debris. Clean or replace the valve if needed.
- Inspect the supply lines: Examine the hot and cold water supply lines for any kinks, blockages, or leaks. Straighten out any kinks and clear any obstructions to ensure a consistent water flow.
- Consider a thermostatic valve: If you want precise control over the water temperature, you may want to upgrade to a thermostatic valve. These valves allow you to set the desired temperature and maintain it throughout your bath.
By troubleshooting these common issues and following the solutions provided, you can successfully install a bathtub spout and enjoy a smooth and problem-free bathing experience. Remember, if you encounter any difficulties beyond your expertise, don’t hesitate to seek professional assistance to ensure everything is properly installed.
Maintaining And Cleaning Your Bathtub Spout
Proper maintenance and regular cleaning of your bathtub spout are essential for ensuring its longevity and optimal performance. Over time, soap scum, mineral deposits, and clogs can accumulate, causing reduced water flow and potential damage to the spout. By following these simple yet effective cleaning methods and techniques, as well as implementing preventive measures, you can keep your bathtub spout sparkling clean and free from obstructions.
Regular cleaning methods and techniques
To maintain a clean and functioning bathtub spout, regular cleaning is necessary. Here are some tried and tested methods and techniques you can employ:
- Vinegar solution: Create a mixture of equal parts white vinegar and water. Dip a soft cloth or sponge into the solution and gently wipe the surface of your bathtub spout, paying close attention to the aerator and any crevices where dirt and grime may accumulate. Rinse thoroughly with clean water.
- Baking soda paste: Make a paste by mixing baking soda with a small amount of water. Apply the paste to a soft cloth or sponge and scrub the spout in a circular motion. This method helps remove tough stains and residue. Rinse the spout thoroughly to remove any remaining paste.
- Commercial cleaners: There are various commercial cleaners available specifically designed for bathtub spouts. Follow the manufacturer’s instructions carefully when using these products, and ensure proper ventilation in the bathroom to avoid inhaling any strong fumes.
Preventing clogs and mineral buildup
Preventing clogs and mineral buildup is crucial for maintaining the efficiency of your bathtub spout. Here are some preventive measures to consider:
- Remove hair and debris: After each use, take a moment to remove any hair or debris that may have accumulated around the spout and drain area. This simple step can help prevent clogs and ensure proper water flow.
- Install a filter: Consider installing a filter or screen on your bathtub spout to catch larger particles and prevent them from entering the plumbing system. These filters are often easy to install and can be found at most home improvement stores.
- Regular maintenance: Schedule periodic maintenance checks to inspect the spout for any signs of mineral buildup or damage. If you notice any issues, address them promptly to prevent further damage and ensure optimal performance.
By implementing these cleaning methods and preventive measures, you can take proactive steps towards maintaining a clean and well-functioning bathtub spout. Remember, regular cleaning and preventive maintenance play a significant role in prolonging the lifespan of your spout and ensuring a hassle-free bathing experience.
Enhancing Your Spout Installation: Additional Features
Installing a bathtub spout is a great way to upgrade your bathroom, but did you know that there are additional features you can consider to enhance your installation even further? From diverter spouts for shower attachment to decorative options and accessories, these extra features not only add functionality but also aesthetics to your bathtub. Read on to explore some exciting options and take your spout installation to the next level!
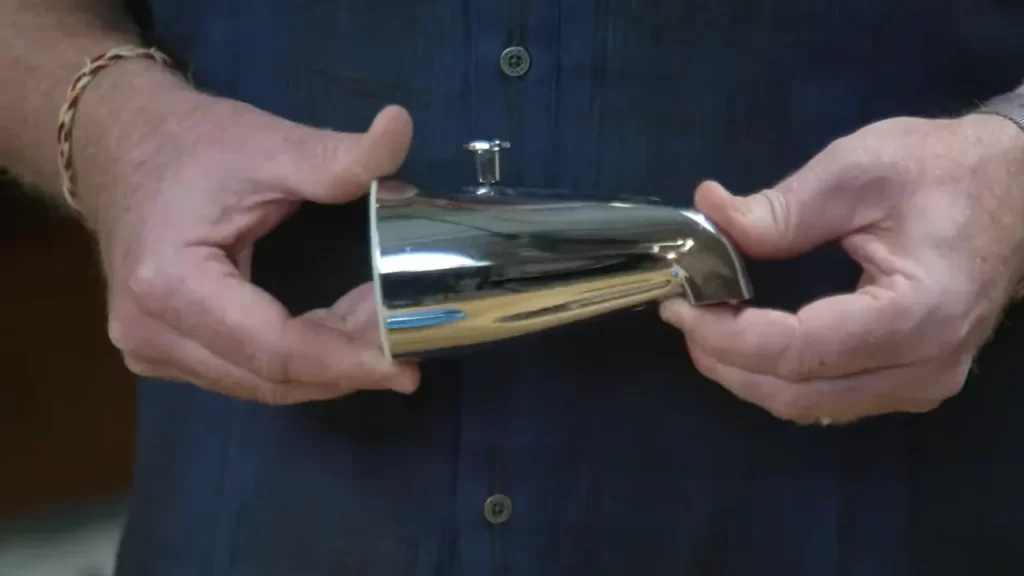
Diverter spouts for shower attachment
One option to consider when enhancing your spout installation is a diverter spout for shower attachment. This feature allows you to easily switch between using your bathtub and taking a shower, providing flexibility and convenience. With a simple pull or twist, you can divert the water flow from the spout to your showerhead, eliminating the need for separate fixtures. Whether you prefer a handheld showerhead or a traditional one mounted on the wall, a diverter spout can seamlessly accommodate your preferences.
Decorative options and accessories
Why settle for a plain and utilitarian bathtub spout when you can choose from a wide range of decorative options and accessories? These additions can elevate the overall look of your bathroom and create a more visually pleasing bathing experience. Consider options such as beautifully designed spout handles, decorative flanges, or even a luxurious waterfall spout. These accessories not only serve a practical purpose but also add a touch of elegance and personal style to your bathtub installation.
If you’re looking to create a cohesive bathroom aesthetic, you can also explore the possibilities of matching your bathtub spout with other accessories like towel racks, soap dispensers, or even the faucet. By coordinating the design elements in your bathroom, you can create a harmonious and visually appealing space that reflects your personal taste.
Additionally, don’t forget about the smaller details that can make a big impact on your spout installation. Make sure to choose high-quality and durable materials for your spout, such as chrome or brushed nickel, for long-lasting functionality and a polished look. Proper installation of the spout, including a tight and secure fit, is also crucial to ensure optimal performance and prevent leaks.
Remember, the goal is not just to install a bathtub spout, but to create an inviting and stylish bathing atmosphere. By considering additional features such as diverter spouts and decorative options, you can enhance your spout installation and transform your bathroom into a haven of relaxation and beauty.
Frequently Asked Questions
How Do You Install A Slip Fit Tub Spout?
To install a slip fit tub spout, follow these steps: 1. Remove the old spout by twisting it counterclockwise. 2. Clean the pipe threads and apply Teflon tape. 3. Slide the new spout onto the pipe and twist it clockwise until snug.
4. Use a wrench to tighten the spout securely. 5. Test the spout for proper water flow.
How Do I Know If My Tub Spout Is Slip On Or Threaded?
To determine if your tub spout is slip-on or threaded, visually inspect the spout’s connection to the pipe. If the spout easily slides on and off with no visible threading, it is likely slip-on. If there are visible threads on the pipe and spout, it is threaded.
How Do You Install A Tub Spout With A Set Screw?
To install a tub spout with a set screw, follow these steps: 1. First, locate the set screw on the underside of the spout. 2. Loosen the set screw using an Allen wrench. 3. Slide the spout onto the pipe, ensuring a tight fit.
4. Once in place, tighten the set screw to secure the spout. 5. Test the spout to ensure proper functionality.
Do You Need To Caulk A Tub Spout?
Yes, it is necessary to caulk a tub spout. Caulking helps prevent water from seeping behind the spout, which can cause damage to the wall or surrounding area. Proper caulking ensures a tight seal, protecting against leaks and maintaining the overall integrity of the tub spout installation.
Conclusion
Installing a bathtub spout doesn’t have to be a daunting task. By following the step-by-step guide provided in this blog post, you can easily replace or install a new spout in your bathroom. Remember to gather the necessary tools, prepare the area, and carefully follow each instruction to ensure a successful installation.
With the right approach and a little patience, you’ll have your bathtub spout in place and enjoying a relaxing bath in no time.