Installing a bathtub liner involves measuring the tub, attaching the adhesive, and placing the liner securely. Make sure to follow these steps carefully for a successful installation.
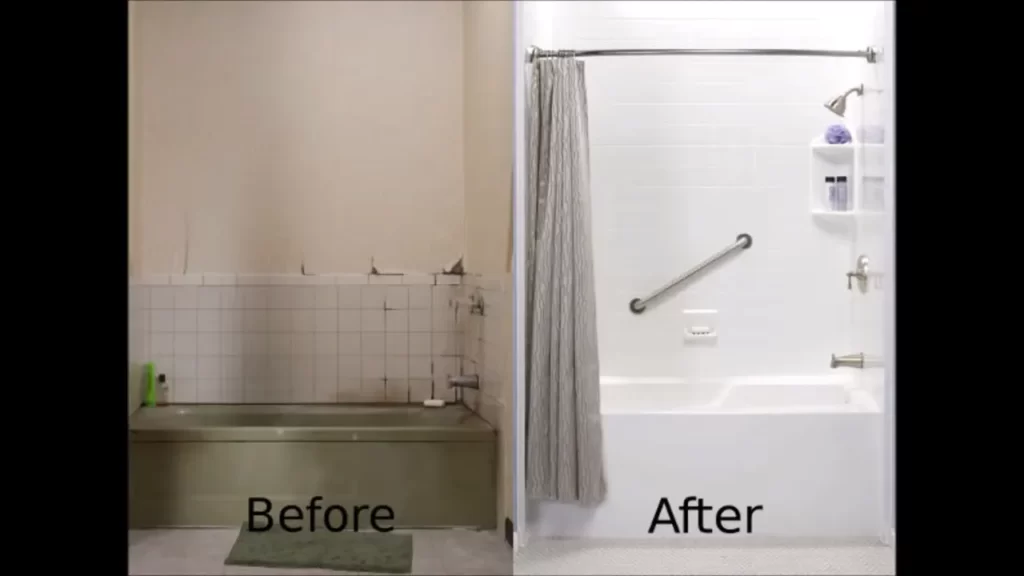
A bathtub liner is a cost-effective way to give your bathroom a fresh look and enhance the durability of your tub. It can cover up any cracks or blemishes on the surface, providing a smooth and attractive finish. Installing a bathtub liner is a straightforward process that can be completed in a few hours, with the right tools and materials.
This guide will take you through the necessary steps to install a bathtub liner effectively.
Getting Started With Bathtub Liner Installation
When it comes to giving your bathroom a fresh, new look, installing a bathtub liner can be a great choice. Not only does it provide an easy and affordable solution for covering up those old and worn-out tubs, but it also offers a range of benefits. In this blog post, we will guide you through the process of installing a bathtub liner, starting with the essentials in our first section: Getting Started with Bathtub Liner Installation.
Understanding the Benefits of Installing a Bathtub Liner
Before diving into the installation process, it’s important to understand the advantages of installing a bathtub liner. Whether your bathtub is chipped, stained, or simply outdated, a liner can instantly transform its appearance. Here are a few key benefits you can expect:
- Enhanced durability: Bathtub liners are made from high-quality materials such as acrylic, which are extremely durable and resistant to scratches and fading.
- Quick and easy installation: Unlike traditional bathtub replacements, installing a liner is a relatively simple and time-saving process.
- Cost-effective solution: Installing a bathtub liner is significantly more affordable than completely replacing your bathtub.
- Low maintenance: The non-porous surface of bathtub liners makes cleaning hassle-free, as they are resistant to mold, mildew, and stubborn stains.
- Customizable options: With a wide range of colors, styles, and designs available, you can easily find a bathtub liner that matches your bathroom décor and personal taste.
Gathering the Necessary Materials and Tools
Before starting the installation process, ensure that you have all the necessary materials and tools at hand. This will help to streamline the process and prevent any unnecessary delays. Here’s a checklist of the essential items you will need:
| Materials | Tools |
|---|---|
|
|
Measuring the Bathtub Dimensions Accurately to Ensure a Proper Fit
Accurate measurements are crucial for ensuring a proper fit of your bathtub liner. Before purchasing a liner, take precise measurements of your bathtub’s length, width, and depth. Make sure to account for any irregularities or curves in the tub’s shape. Use a tape measure to measure the dimensions and record them. These measurements will help you select the correct size of bathtub liner and ensure a seamless installation process.
By understanding the benefits of installing a bathtub liner, gathering the necessary materials and tools, and accurately measuring the bathtub dimensions, you are now well-prepared to begin the installation process. In the next section, we will guide you step-by-step through the process of preparing the bathtub for the installation of the liner.
Preparing The Bathtub
Preparing the bathtub is an essential step before installing a bathtub liner. This ensures a clean and smooth surface for the liner to adhere to, maximizing its durability and longevity. In this section, we will delve into the three crucial aspects of preparing the bathtub for a liner installation: removing any existing fixtures or hardware, cleaning the bathtub thoroughly, and repairing any cracks or damage. Let’s explore each step in detail.
Removing any existing fixtures or hardware
Before proceeding with the bathtub liner installation, it is necessary to remove any existing fixtures or hardware. This includes faucets, showerheads, drain assemblies, and any other attachments that might obstruct the liner’s placement. To do this, follow the steps below:
- Switch off the water supply to the bathtub.
- Use an appropriate wrench or pliers to unscrew and detach the fixtures or hardware from the bathtub.
- Place the removed items in a safe location for reinstallation after the bathtub liner installation is complete.
Cleaning the bathtub thoroughly to ensure a clean surface
A clean surface is crucial for proper adhesion of the bathtub liner. Follow these steps to thoroughly clean your bathtub:
- Start by removing any debris, such as hair or soap scum, from the bathtub.
- Apply a suitable bathtub cleaner to the entire surface, including the sides and bottom.
- Using a non-abrasive sponge or brush, scrub the bathtub thoroughly to remove any stains or residue.
- Rinse the bathtub with clean water to remove any cleaning product residue.
- Dry the bathtub surface completely before proceeding with the next steps.
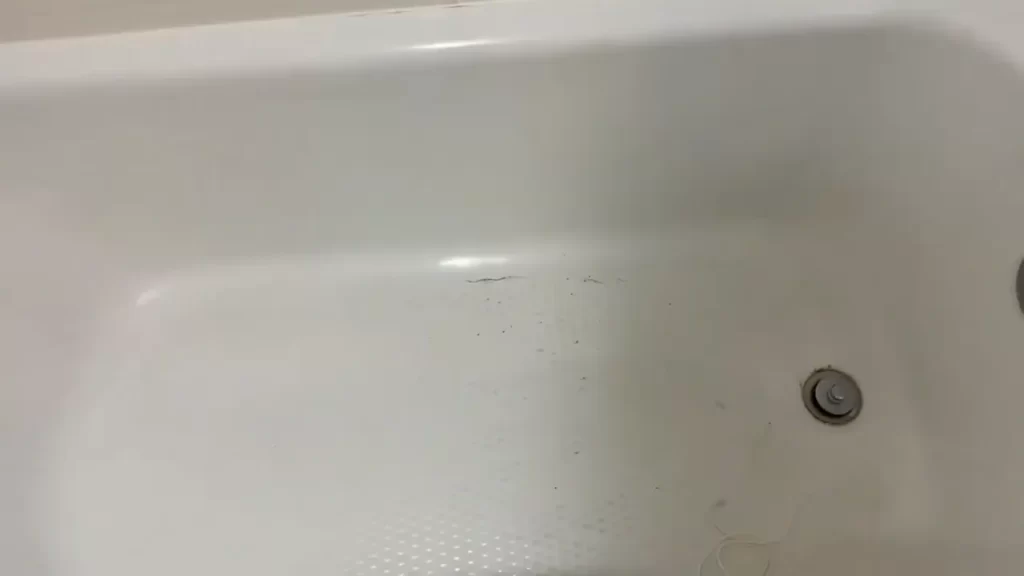
Repairing any cracks or damage on the bathtub surface
Before installing the bathtub liner, it is essential to repair any cracks or damage on the bathtub surface. This ensures a smooth and even surface for the liner. Follow these steps to repair the bathtub:
- Inspect the bathtub surface for any cracks, chips, or dents.
- If you find any, use a bathtub repair kit to fill in the damaged areas.
- Follow the instructions provided with the repair kit for proper application and curing time.
- Sand the repaired areas lightly to ensure a level surface with the rest of the bathtub.
- Clean the sanded areas to remove any dust or debris.
- Ensure the repaired areas are dry and smooth before moving on to the liner installation.
By properly preparing the bathtub, you create an ideal canvas for the bathtub liner installation. Removing existing fixtures, cleaning the surface thoroughly, and repairing any cracks or damage pave the way for a successful liner installation. With these steps completed, you are now ready to proceed with installing the bathtub liner.
Installing The Bathtub Liner
Installing a bathtub liner is an excellent way to give your bathroom a fresh new look without the hassle of a full bathtub replacement. With the right tools and a little know-how, you can easily install a bathtub liner yourself. In this guide, we will take you through the step-by-step process of installing a bathtub liner, ensuring a seamless and beautiful finish for your bathroom.
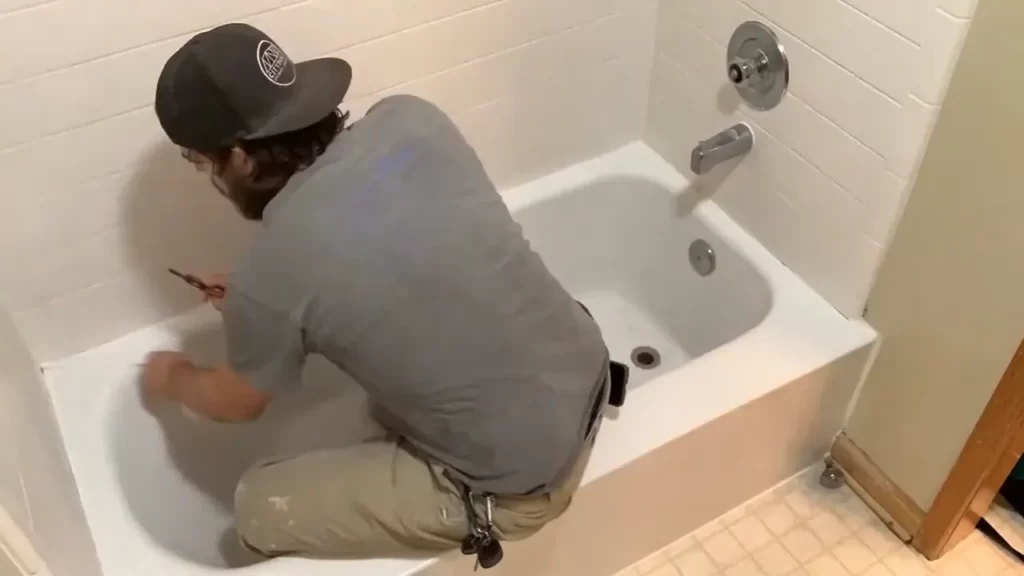
Applying adhesive to the bathtub surface
The first step in installing the bathtub liner is to prepare the bathtub surface by applying adhesive. Make sure to choose a high-quality adhesive that is specifically designed for bathtub liners. These adhesives are typically waterproof and provide a strong bond. It is crucial to follow the manufacturer’s instructions for the adhesive to ensure proper application.
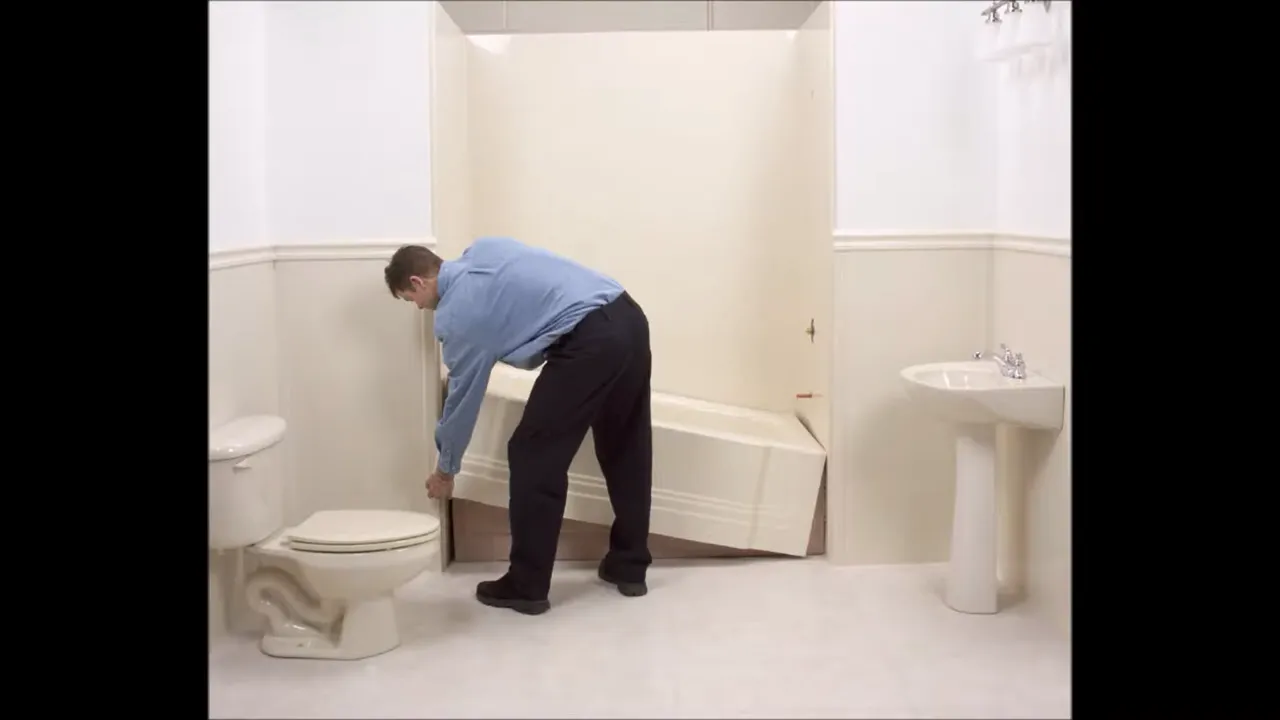
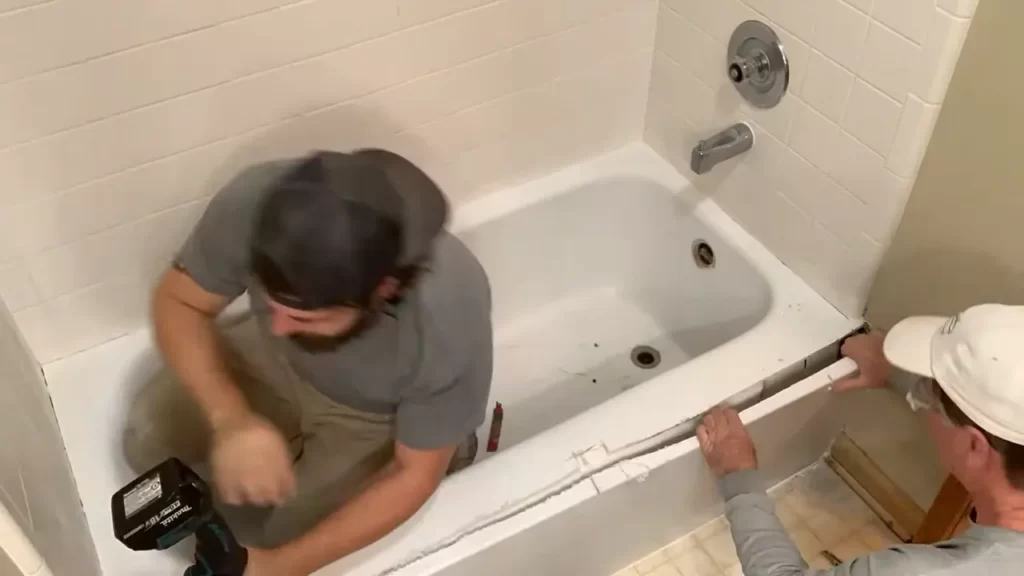
Placing the bathtub liner carefully
Once the adhesive is applied, carefully place the bathtub liner onto the surface. Start by aligning the liner with the back edge of the bathtub and gradually work your way to the front. Take your time to ensure that the liner is positioned correctly and smoothly. It is important to avoid any wrinkles or air bubbles during this process, as they can affect the appearance and longevity of the liner.
Smoothing out any wrinkles or air bubbles
After placing the bathtub liner, it’s time to smooth out any wrinkles or air bubbles. Begin by gently pressing down on the liner, starting from the center and working your way outward. Use a smooth, flat tool such as a squeegee or a flat-edged spatula to carefully smooth out the liner. Be sure to remove any trapped air bubbles or wrinkles as you go along for a perfect finish.
Trimming the excess liner for a neat finish
Once you have smoothed out the liner, it’s time to trim the excess material for a neat and professional finish. Use a sharp utility knife, carefully trim the excess liner along the edges of the bathtub. Take your time and make precise cuts to ensure a clean and seamless edge. Be cautious not to cut into the bathtub itself, but to trim just the liner. Removing the excess liner will give your bathtub a polished look, adding to the overall aesthetics of your bathroom.
Installing a bathtub liner is a cost-effective way to transform the look of your bathroom. With these step-by-step instructions, you can confidently install a bathtub liner yourself and enjoy a refreshed and stylish bathroom for years to come.
Securing And Sealing The Bathtub Liner
Applying sealant or caulk to reinforce the liner’s edges and seams
Once you have successfully positioned the bathtub liner in place, it’s important to reinforce its edges and seams to ensure a watertight seal. Applying sealant or caulk is a simple yet effective way to achieve this.
Here’s how you can reinforce the liner’s edges and seams with sealant:
- Carefully inspect the edges and seams of the liner to identify any gaps or areas that may require additional sealing.
- Using a high-quality waterproof sealant suitable for bathroom installations, fill in any gaps or cracks along the edges and seams of the liner.
- Smooth out the sealant or caulk using a caulking tool or your finger to ensure an even and secure application.
- Allow the sealant to dry according to the manufacturer’s instructions before moving on to the next step.
Securing the liner in place with clips or fasteners
In addition to applying sealant, securing the bathtub liner in place with clips or fasteners is crucial for its stability and longevity.
Follow these steps to properly secure the liner:
- Start by attaching clips or fasteners to the bathtub walls, ensuring they are evenly spaced and securely anchored.
- Position the liner over the clips or fasteners, aligning it carefully with the bathtub walls. Ensure that the liner fits snugly and evenly.
- Secure the liner by pressing it down firmly onto the clips or fasteners, ensuring a tight and secure fit.
- Double-check the alignment and stability of the liner to ensure that it is properly secured before proceeding.
Checking for any gaps or areas that require additional sealing
After securing the bathtub liner and sealing the edges and seams, it’s essential to conduct a thorough inspection for any potential gaps or areas that may require further sealing.
Here’s how you can check for any gaps or areas that need attention:
- Using a flashlight, carefully examine the liner for any visible gaps, cracks, or areas that may compromise its integrity.
- If you spot any gaps or areas that need attention, fill them in with additional sealant or caulk, similar to the process described earlier.
- Ensure that the additional sealing is applied evenly and smoothly, taking care to blend it with the existing sealant for a seamless finish.
- Allow the additional sealing to dry completely before subjecting the bathtub to water or any other stressors.
By following these steps to secure and seal your bathtub liner, you can enjoy a durable and watertight installation that enhances the overall aesthetics and functionality of your bathroom.
Finishing Touches And Cleanup
After successfully installing the bathtub liner, it’s important to focus on the finishing touches and cleanup to ensure a professional and polished look. This final step will not only enhance the appearance of the liner but also guarantee its proper functionality.
Reinstalling Fixtures and Hardware
Now that the bathtub liner is securely in place, it’s time to reinstall any fixtures and hardware that were removed during the installation process. Carefully refer to the notes or photographs taken earlier to ensure proper placement. Use a wrench or pliers to tighten the fixtures securely, but be cautious not to overtighten, as this can cause damage.
Cleaning up Any Adhesive or Sealant Residue
During the installation process, it’s common to have some adhesive or sealant residue left behind. It’s crucial to clean this up thoroughly to avoid any unsightly marks or potential damage. Begin by referring to the manufacturer’s instructions to determine the best method for removing the residue. Typically, a solvent recommended by the manufacturer will work best. Apply the solvent to a clean cloth and gently scrub the affected areas. Rinse with water and dry the surface thoroughly.
Testing the Liner for Proper Fit and Functionality
With the fixtures reinstalled and the adhesive or sealant residue cleaned up, it’s time to test the bathtub liner for proper fit and functionality. Start by filling the bathtub with water, ensuring that no leaks or drips occur. Observe the liner closely for any signs of sagging or shifting. Additionally, check the drain and overflow mechanisms to ensure proper function. It’s also a good idea to test the water temperature control and any additional features your bathtub may have.
By focusing on the finishing touches and cleanup, you can complete the installation of a bathtub liner with confidence. Reinstalling fixtures and hardware, cleaning up any adhesive or sealant residue, and testing the liner for proper fit and functionality are crucial steps to ensure a successful and long-lasting installation. Now that you’ve completed these final steps, you can enjoy the benefits of a revitalized bathtub that not only looks great but functions flawlessly.
Maintenance And Care Tips For Bathtub Liners
Maintenance and Care Tips for Bathtub Liners
Installing a bathtub liner is a fantastic way to transform your bathroom and give it a fresh, new look. But it’s also important to properly maintain and care for your bathtub liner to ensure its longevity and keep it looking great. In this section, we will discuss some essential tips for regular cleaning and maintenance, avoiding abrasive cleaners or materials, and dealing with any issues or damage that may arise.
Regular cleaning and maintenance practices
Regular cleaning is crucial to keep your bathtub liner in the best condition. Here are some recommended cleaning practices:
- Use a non-abrasive, mild liquid cleaner to clean your bathtub liner.
- Avoid using harsh chemicals or abrasive cleansers, as they may cause damage to the surface of the liner.
- It’s important to clean your bathtub liner regularly to prevent the buildup of dirt, grime, and soap scum.
- After each use, rinse the liner with warm water to remove any residue.
Avoiding abrasive cleaners or materials
To protect your bathtub liner from scratches or damage, it’s crucial to avoid abrasive cleaners or materials. Here are some things to keep in mind:
- Avoid using scouring pads, steel wool, or abrasive brushes that can scratch the surface of the liner.
- Instead, use a soft sponge or cloth for cleaning.
- If you need to remove stubborn stains, gently scrub them using a non-abrasive cleaner and a soft-bristled brush.
Dealing with any issues or damage that may arise
Although bathtub liners are designed to be durable, sometimes issues or damage may occur. Here’s how to handle them:
- If you notice any cracks or leaks in your bathtub liner, it’s essential to address them promptly.
- For minor cracks, you can repair them using a bathtub liner repair kit, following the manufacturer’s instructions.
- If the damage is severe or extensive, it’s best to contact a professional to assess the situation and provide the appropriate solution.
By following these maintenance and care tips, you can ensure that your bathtub liner remains in excellent condition for years to come. Regular cleaning, avoiding abrasive cleaners, and addressing any issues promptly will help you enjoy your beautiful bathtub liner and keep your bathroom looking its best.
Additional Considerations And Alternatives
When it comes to installing a bathtub liner, it’s important to consider all your options and weigh the pros and cons. While bathtub liners are a popular choice for their convenience and affordability, there are other alternatives worth exploring. In this section, we will discuss a few other options such as bathtub refinishing or replacement, the cost and longevity of bathtub liners, and why consulting a professional for guidance is essential.
Exploring other options such as bathtub refinishing or replacement
If you’re not sold on the idea of a bathtub liner, there are other alternatives you can explore. Two common options are bathtub refinishing and bathtub replacement. Let’s take a closer look at each alternative:
- Bathtub Refinishing: Refinishing your bathtub involves applying a new coat of finish or paint to the existing tub surface. This can help restore its appearance and give it a fresh, new look. Although refinishing is usually cheaper than installing a bathtub liner, it may not address deep cracks or structural issues.
- Bathtub Replacement: If your current bathtub is beyond repair or you simply want a completely new look, bathtub replacement is an option to consider. This involves removing the old tub and installing a brand-new one. While this option provides the most customization possibilities, it can be the most expensive and time-consuming.
So, if you’re willing to invest more time and money, refinishing or replacing your bathtub could provide long-lasting results.
Considering the cost and longevity of bathtub liners
Before making a decision, it’s crucial to consider the cost and the longevity of bathtub liners. While bathtub liners are generally more affordable than refinishing or replacement, it’s important to understand that they may not last as long. Over time, the liner may experience wear and tear, leading to the need for replacement.
Here’s a breakdown of the cost and longevity factors to consider:
| Cost | Longevity | |
|---|---|---|
| Bathtub Liner | Relatively affordable | Typically lasts around 10-15 years |
| Bathtub Refinishing | Can be cheaper than liners | Typically lasts around 10 years or more with proper care |
| Bathtub Replacement | Moderate to high cost | With proper maintenance, can last several decades |
Keep in mind that these figures are estimates, and the actual cost and longevity may vary depending on factors such as the quality of materials used and the level of maintenance.
Consulting a professional for expert installation guidance
If you’re unsure about which option is best for your specific needs, it’s always a good idea to consult a professional for expert guidance. They can assess your bathtub’s condition, discuss your requirements and preferences, and provide recommendations tailored to your situation.
By seeking professional advice, you’ll have peace of mind knowing that your bathtub liner, refinishing, or replacement project will be handled with utmost care and expertise. Additionally, professionals can ensure proper installation and minimize the risk of any future issues.
Remember, whether you choose a bathtub liner, refinishing, or replacement, consulting a professional will help you make an informed decision and ensure a successful outcome for your bathtub upgrade.
Frequently Asked Questions
Can You Install A Tub Liner Yourself?
Yes, you can install a tub liner yourself. It is a DIY project that can be easily done with basic tools and instructions. Follow the steps carefully to ensure a proper installation.
Are Bathtub Liners A Good Idea?
Bathtub liners can be a good idea as they provide a cost-effective solution for a worn-out or damaged tub. They are easy to install and can improve the appearance of your bathroom. However, they may not last as long as a full replacement and can sometimes feel less sturdy.
How Long Does It Take To Install A Bathtub Liner?
It typically takes around one to two days to install a bathtub liner.
How Does Water Get Under Bathtub Liner?
Water can get under a bathtub liner due to improper installation or damage to the liner.
Conclusion
Installing a bathtub liner is a cost-effective solution to giving your bathroom a fresh new look. With the right tools and a step-by-step guide, you can easily transform your bathtub in no time. From measuring to preparation and installation, this blog post has provided you with the necessary information to successfully install a bathtub liner.
So, what are you waiting for? Get started on your bathroom upgrade today!