
Installing a bathtub drain stopper is a simple process that can be done in a few steps. First, remove the old stopper by unscrewing it from the drain.
Then, clean the drain and apply plumber’s putty around the flange of the new stopper. Finally, carefully insert the new stopper into the drain and tighten it securely. Installing a bathtub drain stopper can be easily done by following these steps.
A bathtub drain stopper is an essential component that helps prevent water from draining out of the bathtub. Whether you’re replacing an old stopper or installing a new one, it’s important to do it correctly to ensure a watertight seal. In this guide, we will walk you through the process of installing a bathtub drain stopper, providing you with simple steps to follow. By the end of this guide, you’ll be able to effectively install a bathtub drain stopper and enjoy a hassle-free bathing experience.
Understanding The Different Types Of Bathtub Drain Stoppers
When it comes to bathtub drain stoppers, there are a variety of options available in the market. Understanding the different types of drain stoppers will help you choose the best one for your needs. In this article, we will explore the common types of bathtub drain stoppers, their pros and cons, and help you make an informed decision.
Common types of bathtub drain stoppers
When it comes to bathtub drain stoppers, there are several common types that you can choose from:
- Pop-up drain stoppers: These stoppers are commonly found in modern bathtubs and have a mechanism that allows you to easily pop it up or push it down to open or close the drain. They are convenient to use and provide a good seal when closed.
- Toe-touch drain stoppers: As the name suggests, these stoppers can be controlled by simply touching them with your toe. They offer a quick and easy way to open or close the drain, but they may not provide as strong of a seal as pop-up stoppers.
- Lift-and-turn drain stoppers: These stoppers require you to lift and then turn them to open or close the drain. They offer a secure seal and are often found in older bathtubs.
- Push-and-pull drain stoppers: Similar to lift-and-turn stoppers, push-and-pull stoppers also require you to manually lift and push or pull them to open or close the drain. They are commonly found in older bathtubs and are generally more affordable.
Pros and cons of each type
Each type of bathtub drain stopper has its own advantages and disadvantages. Here’s a quick overview:
| Type | Pros | Cons |
|---|---|---|
| Pop-up | Convenient to use Provides a good seal Easily adjustable |
May be more expensive Requires proper maintenance Some models may be prone to clogging |
| Toe-touch | Quick and easy to operate Affordable |
May not provide a strong seal Can be prone to wear and tear over time |
| Lift-and-turn | Secure seal Durable and long-lasting |
Requires more effort to operate May require occasional lubrication |
| Push-and-pull | Affordable Easy to install |
May not provide a strong seal Prone to wear and tear over time |
Each type of bathtub drain stopper has its own unique features and considerations. Consider your personal preferences, budget, and the specific requirements of your bathtub when choosing the right drain stopper for you. By understanding the different types and their pros and cons, you can make an informed decision and ensure a hassle-free installation process.
Factors To Consider When Choosing A Bathtub Drain Stopper
Choosing the right bathtub drain stopper is essential for a hassle-free bathing experience. With a wide range of options available in the market, it can be overwhelming to make the right choice. However, considering a few important factors can simplify the process and ensure you find a drain stopper that suits your needs perfectly. Here are three key factors to consider:
Size and compatibility with your bathtub
The first thing you need to consider is the size of the bathtub drain stopper and its compatibility with your bathtub. Not all drain stoppers are designed to fit every type of bathtub, so it’s crucial to measure the diameter of your bathtub drain to ensure a proper fit. A drain stopper that is too small may allow water to seep through, while one that is too large may not fit securely.
Functionality and ease of use
Functionality and ease of use are also crucial factors to keep in mind when choosing a bathtub drain stopper. You want a stopper that is easy to operate and provides a watertight seal, preventing any water from leaking out of the tub. Look for stoppers with a user-friendly design that enables you to open and close the drain effortlessly. Additionally, consider if you prefer a push-and-pull style stopper or one that operates using a lever or knob.
Material and durability
The material and durability of the drain stopper are key factors that can determine its lifespan. Opt for drain stoppers made from high-quality materials such as stainless steel or brass, as these are known for their durability and resistance to rust and corrosion. Plastic drain stoppers are also a popular choice, as they are affordable and lightweight. Remember that a sturdy and durable drain stopper will withstand regular use and last longer, saving you from the hassle of frequent replacements.
Essential Tools For The Installation Process
Wrench or Pliers
One of the essential tools you’ll need for installing a bathtub drain stopper is a wrench or pliers. This tool is necessary to loosen and tighten various fittings during the installation process. A wrench or pliers with a secure grip will help you effectively manipulate and adjust different parts without causing any damage. It’s important to choose the right size and type of wrench or pliers that are compatible with the fittings you’ll be working with.
Screwdriver
Another indispensable tool for installing a bathtub drain stopper is a screwdriver. You’ll commonly encounter screws that need to be removed or tightened during the installation process. A screwdriver with the appropriate head type and size is crucial for effectively securing or releasing these screws. Whether it’s a flathead or Phillips screwdriver, make sure you have the right tool on hand to ensure a smooth and successful installation.
Pipe Wrench
In addition to a regular wrench or pliers, a pipe wrench is an essential tool that you may require while installing a bathtub drain stopper. This specialized wrench is designed to grip, turn, and manipulate pipes, making it extremely useful when dealing with plumbing components such as drainpipes and connectors. A pipe wrench can provide the necessary torque to tighten or loosen pipe fittings securely, allowing you to complete the installation process with ease.
Plumbers Putty or Silicone Caulk
To ensure a watertight seal and prevent leaks, plumbers putty or silicone caulk is a must-have tool for installing a bathtub drain stopper. These sealants are used to create a tight and durable bond between the drain stopper and the bathtub surface. Plumbers putty is a moldable, putty-like substance that is easy to work with and provides an effective seal. On the other hand, silicone caulk is a flexible adhesive that can be applied in a sealant gun, ensuring a reliable and long-lasting seal. Make sure to choose the right type of sealant depending on the material of your bathtub.
Required Materials For The Installation Process
Before you begin installing a bathtub drain stopper, it is important to gather all the necessary materials. Having everything on hand will make the installation process much smoother and faster. Below is a list of the required materials you will need:
New Bathtub Drain Stopper
The first item you will need is a new bathtub drain stopper. This will replace the old stopper and ensure it functions properly. Make sure to choose a stopper that is compatible with your specific bathtub make and model.
Drain Flange
The drain flange is another crucial component for installing a bathtub drain stopper. It is the visible portion of the drain that sits just above the surface of the bathtub. The drain flange covers the drain hole and prevents water from leaking out. Make sure to measure the diameter of your existing drain flange to ensure the new one fits properly.
Drain Basket or Strainer
In addition to the drain flange, you will also need a drain basket or strainer. This component catches small objects and prevents them from clogging the drain. Choose a drain basket or strainer that matches the style and finish of your new drain flange.
Teflon Tape or Plumber’s Tape
Teflon tape, also known as plumber’s tape, is an essential material for sealing threaded connections. It creates a watertight seal and prevents leaks. Before installing the drain flange, wrap a few turns of Teflon tape around the drain flange threads to ensure a secure and leak-free connection.
Once you have gathered all the required materials, you are ready to proceed with the installation process. Having the necessary components on hand will make the installation process easier and ensure a successful outcome.
Preparation And Safety Measures
Before you begin the installation process for a bathtub drain stopper, it is crucial to take certain preparation and safety measures. These steps will not only ensure the smooth execution of the task but also help prevent any accidents or damage. In this section, we will discuss gathering all the necessary tools and materials, ensuring the water supply is turned off, and removing any existing drain stopper or strainer.
Gathering all the necessary tools and materials
Prior to starting the installation process, it is essential to gather all the required tools and materials. By having everything you need within arm’s reach, you can save time and minimize disruptions. Here is a list of the items you will need:
| Tools | Materials |
|---|---|
|
|
Ensuring water supply is turned off
Before you start working on the drain stopper installation, it is crucial to make sure that the water supply is turned off. Turning off the water supply will prevent any accidental leaks or flooding. Follow these steps to turn off the water:
- Locate the main water shutoff valve. It is usually located near the water meter.
- Turn the valve clockwise to shut off the water supply.
- Once the water supply is turned off, open a faucet to release any remaining water pressure in the pipes.
Removing any existing drain stopper or strainer
If there is an existing drain stopper or strainer in your bathtub, it needs to be removed before installing a new one. Follow these steps to remove the existing drain stopper or strainer:
- Identify the type of drain stopper or strainer you have, as different types require different removal methods. Examples include push-pull stoppers, lift-and-turn stoppers, and twist-and-turn stoppers.
- Use the appropriate tools, such as pliers or a screwdriver, to remove the existing drain stopper or strainer. Refer to the manufacturer’s instructions if needed.
- Once the drain stopper or strainer is fully removed, clean the area around the drain thoroughly to ensure a clean and tidy surface for the new installation.
By following these preparation and safety measures, you are now ready to move on to the next steps of installing a bathtub drain stopper. Taking these precautions will not only ensure a smooth installation process but also contribute to the longevity and functionality of your new drain stopper.
Removing The Old Bathtub Drain Stopper
Removing the old bathtub drain stopper is an essential step when installing a new one. This process involves accessing the bathtub drain, unscrewing or unclipping the old drain stopper, and inspecting the drain area for any damage. By following these steps, you can ensure a smooth and successful installation of your bathtub drain stopper.
Accessing the bathtub drain
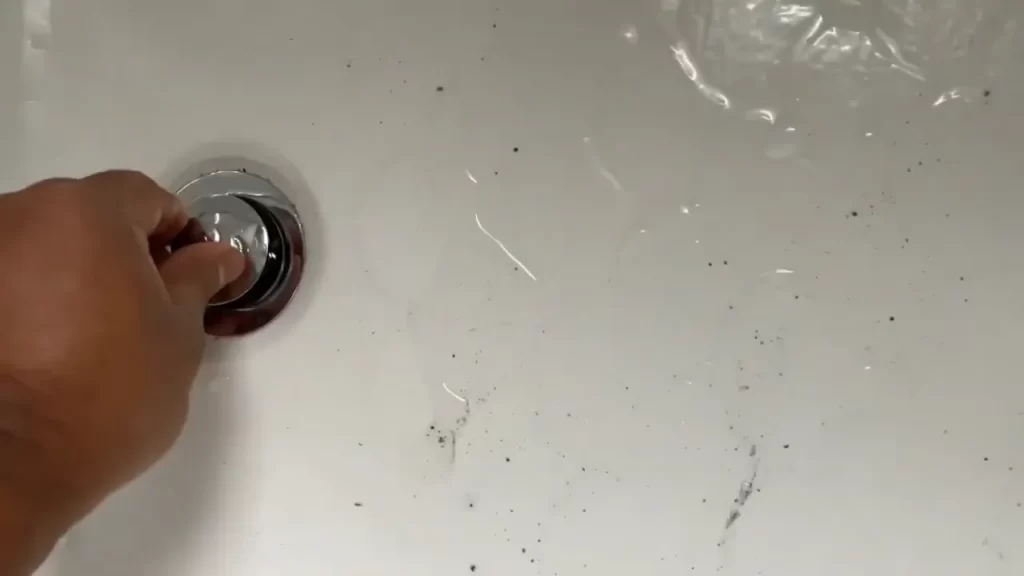
The first step in removing the old bathtub drain stopper is to access the bathtub drain. This may require removing any hair or debris that may be covering the drain area. Take care when doing this to prevent any clogs or blockages from entering the drain system.
Unscrewing or unclipping the old drain stopper
Once the drain area is clear, you can proceed to unscrew or unclip the old drain stopper. The method you use will depend on the type of drain stopper you have. Some drain stoppers are secured with screws, while others can be unclipped or twisted off. Refer to the manufacturer’s instructions or consult a professional if you are unsure about the specific removal process for your drain stopper.
Inspecting the drain area for any damage
After removing the old drain stopper, take the time to inspect the drain area for any damage. Look for any cracks, leaks, or corrosion that may require repair or replacement. Addressing any issues with the drain area before installing the new drain stopper will help prevent future problems and ensure the proper functioning of your bathtub drain.
In conclusion, removing the old bathtub drain stopper involves accessing the drain, unscrewing or unclipping the old stopper, and inspecting the drain area for any damage. By following these steps, you can successfully remove the old stopper and prepare for the installation of a new one.
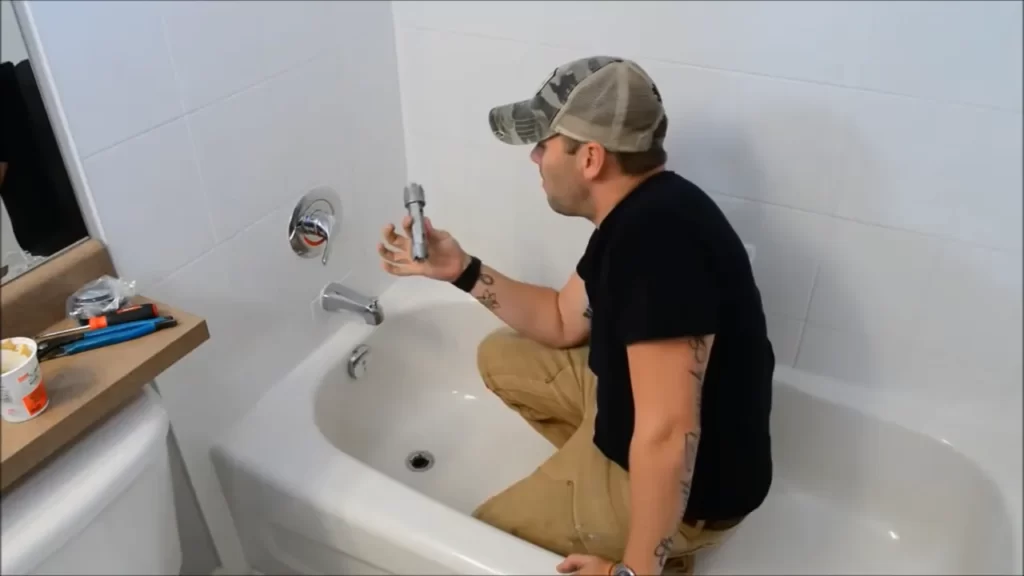
Installing The New Bathtub Drain Stopper
Installing a new bathtub drain stopper can be a simple yet rewarding DIY project. Whether you’re replacing an old stopper or upgrading to a new one, it’s important to follow the correct steps to ensure a proper installation. In this guide, we’ll walk you through the process of installing a new bathtub drain stopper, from applying plumber’s putty or silicone caulk to attaching the drain basket or strainer. Let’s get started!
Applying plumber’s putty or silicone caulk to the drain flange
The first step in installing a new bathtub drain stopper is to apply plumber’s putty or silicone caulk to the drain flange. This helps create a watertight seal and prevents any leaks from occurring. To do this, follow the steps below:
- Remove any old putty or caulk from the drain flange and drain hole.
- Take a small amount of plumber’s putty or silicone caulk and roll it into a thin, snake-like shape.
- Place the putty or caulk around the underside of the drain flange, ensuring it covers the entire circumference.
- Press the drain flange firmly into the drain hole, making sure it sits flush with the bathtub surface.
By applying plumber’s putty or silicone caulk to the drain flange, you’ll create a tight seal that prevents water from seeping through. This is an essential step in the installation process.
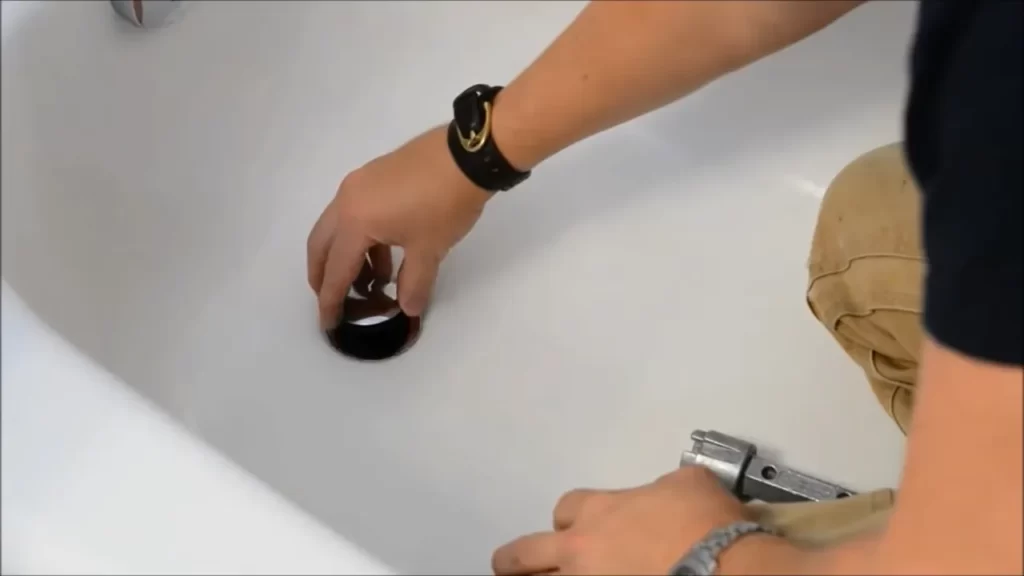
Inserting the drain flange into the drain hole
Once you’ve applied plumber’s putty or silicone caulk to the drain flange, it’s time to insert it into the drain hole. Follow these steps to ensure a proper fit:
- Hold the drain flange by the edges and align it with the drain hole.
- Gently push the drain flange into the hole, applying even pressure until it is fully inserted.
- Ensure that the drain flange is centered and level with the bathtub surface.
Inserting the drain flange correctly is crucial for a secure and stable installation. Make sure it fits snugly in the drain hole before moving on to the next step.
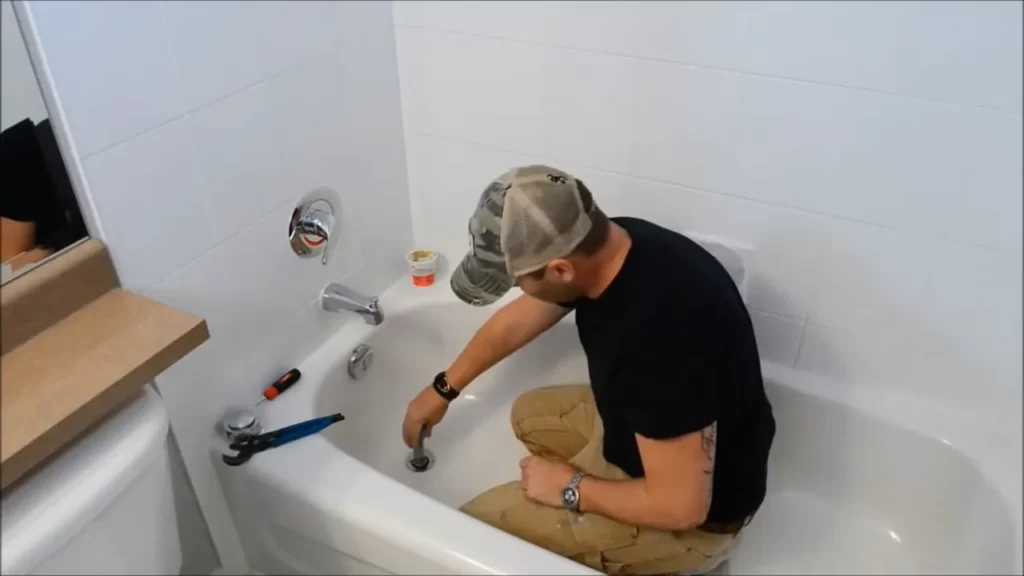
Tightening the drain flange using a wrench or pliers
To ensure the drain flange stays in place, it’s important to tighten it securely. Follow these steps to tighten the drain flange:
- Place a wrench or pliers on the drain flange’s locknut or screws.
- Turn the wrench or pliers clockwise to tighten the drain flange.
- Continue tightening until the drain flange feels secure and doesn’t move.
Tightening the drain flange properly is essential to prevent any leaks or loose fittings. Take your time to ensure a tight and stable installation before proceeding to the next step.
Attaching the drain basket or strainer to the drain flange
Now that the drain flange is securely in place, it’s time to attach the drain basket or strainer. Follow these steps to complete the installation:
- Insert the drain basket or strainer into the drain flange.
- Align the screws or fasteners on the drain basket or strainer with the corresponding holes in the drain flange.
- Tighten the screws or fasteners clockwise to secure the drain basket or strainer to the drain flange.
Attaching the drain basket or strainer ensures that it stays in place and prevents any debris from clogging the drain. Make sure it is properly aligned and securely fastened for optimal functionality.
With these steps completed, you’ve successfully installed a new bathtub drain stopper. It’s important to follow each step carefully to ensure a proper and efficient installation. Now you can enjoy a fully functional bathtub with a new drain stopper that keeps water from flowing away.
Testing The Installed Bathtub Drain Stopper
Once you have successfully installed the bathtub drain stopper, it is crucial to test it thoroughly to ensure proper functioning. Testing the drain stopper will help you identify any leaks or issues that may prevent it from working effectively. In this section, we will guide you through the necessary steps to test your newly installed bathtub drain stopper.
Turning the water supply back on
Before testing the drain stopper, make sure to turn the water supply back on. This step is essential as it allows water to flow through the drain system and verifies whether the stopper is functioning correctly. To turn the water supply back on:
- Locate the water shut-off valve, typically found near the bathtub.
- Turn the valve counterclockwise to open it and allow water to flow.
Once the water supply is restored, proceed to the next step.
Checking for any leaks or issues with the drain stopper
After turning the water supply back on, carefully observe the drain stopper and its surrounding area for any signs of water leakage or other issues. Check for the following:
- Inspect the seal between the drain stopper and the bathtub surface. Ensure there are no gaps or loose connections.
- Watch for any water dripping or pooling around the drain stopper area.
- Listen for any unusual sounds, such as gurgling or bubbling noises, which could indicate a faulty drain stopper.
If you notice any leaks or issues, it is essential to address them promptly to prevent further damage or water wastage.
Making necessary adjustments for proper functioning
During the testing phase, it is important to assess whether the drain stopper is functioning correctly. If you encounter any problems, consider the following adjustments:
- Check the tightness of the drain stopper. If it is too loose, tighten it slightly to achieve a snug fit.
- Ensure the stopper moves up and down smoothly without any resistance. If it feels stuck or difficult to operate, check for any debris or blockages in the drain area.
- If necessary, lubricate the moving parts of the drain stopper using a silicone-based lubricant to ensure smooth operation.
By making these necessary adjustments, you can ensure that your bathtub drain stopper functions optimally and prevents any potential drainage issues.
Testing your installed bathtub drain stopper is crucial to ensure proper functionality and prevent any further issues. By following the steps outlined above, you can confidently assess the effectiveness of your drain stopper and make any necessary adjustments for optimal performance.
Fixing A Leaking Drain Stopper
If you are dealing with a leaking bathtub drain stopper, it’s important to address the issue promptly to prevent further damage and inconvenience. A leaking drain stopper can cause water to seep into the surrounding areas, leading to mold growth and potential structural damage. In this section, we will guide you on how to identify the cause of the leak, replace faulty gaskets or seals, and ensure proper installation and tightness of components.
Identifying the cause of the leak
The first step in fixing a leaking drain stopper is to identify the source of the problem. There could be several reasons for the leak, such as worn-out gaskets or seals, loose components, or improper installation. Start by inspecting the area around the drain stopper for any visible signs of water leakage. Look for water stains, dampness, or pooling water.
If the source of the leak is not immediately apparent, you may need to remove the drain stopper and examine the components underneath. Use a screwdriver to loosen the screw located at the center of the stopper and lift the stopper out of the drain. Inspect the gaskets and seals for cracks, deterioration, or misalignment. These components are often responsible for preventing water from seeping through the drain.
Replacing faulty gaskets or seals
If you identify that the leak is caused by faulty gaskets or seals, it’s essential to replace them to ensure a proper seal. Before purchasing replacement gaskets or seals, measure the diameter of your drain to ensure you get the right size. You can find replacement gaskets and seals at your local hardware store.
To replace the gaskets or seals, carefully remove the old ones using a pair of pliers or a utility knife. Clean the area thoroughly to remove any residue or debris that may affect the seal. Apply a small amount of plumber’s putty or silicone caulk to the new gaskets or seals to create a watertight connection. Insert the new gaskets or seals into their respective positions and press them firmly to ensure a tight fit.
Ensuring proper installation and tightness of components
Once you have replaced the faulty gaskets or seals, it’s crucial to ensure proper installation and tightness of all components. Begin by reinserting the drain stopper into the drain and tightening the screw at the center. Make sure the stopper sits flush with the drain and is securely in place.
Check all other components, such as the overflow plate and linkage, for any signs of looseness or misalignment. Use a wrench or pliers to tighten any loose connections. Ensure that all components are properly aligned and tightly secured to prevent any potential leaks.
Finally, run some water into the bathtub and observe for any signs of leakage. If the drain stopper is functioning correctly and there are no visible leaks, you have successfully fixed the leaking drain stopper.
In conclusion, fixing a leaking bathtub drain stopper involves identifying the cause of the leak, replacing faulty gaskets or seals, and ensuring proper installation and tightness of components. By taking these steps, you can prevent further water damage and enjoy a leak-free bathtub.
Dealing With A Stuck Or Jammed Drain Stopper
A stuck or jammed drain stopper can be a frustrating problem to deal with, especially when you’re in need of a relaxing bath. However, with a little know-how, you can easily diagnose the cause of the jam and take the necessary steps to free the stopper. In this section, we’ll explore how to effectively deal with a stuck or jammed drain stopper.
Diagnosing the cause of the jam
When your bathtub drain stopper is stuck or jammed, the first step is to diagnose the underlying cause. This will help you determine the most appropriate method to free the stopper. Here are a few common reasons for a stuck or jammed drain stopper:
- Hair and debris buildup: Over time, hair, soap scum, and other debris can accumulate in the drain and cause the stopper to become stuck.
- Rust or corrosion: If your drain stopper is made of metal, it may rust or corrode over time, leading to difficulties in moving the stopper.
- Mechanical issues: In some cases, the mechanism that operates the drain stopper may become damaged or malfunction, causing it to get stuck in the closed or open position.
Using lubrication or gentle force to free the stopper
If you’ve identified the cause of the jam as hair or debris buildup, using lubrication can often help free the stopper. Here’s how you can do it:
- Remove any visible hair or debris around the drain stopper using your fingers or a pair of tweezers.
- Apply a small amount of lubricating oil, such as WD-40, to the stopper mechanism.
- Use gentle force to move the stopper up and down or side to side, gradually increasing the pressure if necessary. Avoid using excessive force as it may damage the stopper or the mechanism.
Checking for any obstructions or blockages in the drain
If lubrication alone doesn’t solve the problem, there may be an obstruction or blockage deeper in the drain that’s causing the stopper to get stuck. Follow these steps to check for any obstructions:
- Using a flashlight, visually inspect the drain to look for any visible obstructions or blockages.
- If you can’t see anything, insert a flexible drain snake or wire into the drain and gently twist it to dislodge any debris or clogs.
- Run hot water down the drain to flush out any remaining debris.
By following these steps, you should be able to effectively deal with a stuck or jammed drain stopper. However, if the problem persists or if you’re unsure about any step, it’s always a good idea to consult a professional plumber for assistance.
Addressing Drain Stopper Functionality Issues
When it comes to your bathtub drain stopper, it’s important to ensure that it functions properly. Over time, you may encounter certain issues that can affect its performance. In this section, we will discuss some effective ways to address drain stopper functionality issues, including adjusting the linkage or lift rod, cleaning or removing debris, and considering replacement if the stopper is damaged beyond repair.
Adjusting the linkage or lift rod for better performance
If you notice that your bathtub drain stopper isn’t closing or opening as it should, adjusting the linkage or lift rod can significantly improve its functionality. Follow these steps:
- Remove the drain stopper by unscrewing or lifting it off, depending on the type you have.
- Locate the linkage or lift rod connected to the stopper mechanism.
- Check if there is any slack or excessive tension in the linkage or lift rod. Adjust it accordingly to ensure smooth movement.
- Test the drain stopper by opening and closing it several times to see if the adjustments have improved its performance.
By making simple adjustments to the linkage or lift rod, you can enhance the functionality of your bathtub drain stopper.
Cleaning or removing any debris that may affect functionality
Debris accumulation is a common culprit behind drain stopper functionality issues. To address this problem:
- Remove the drain stopper using the appropriate method.
- Inspect the stopper and the drain assembly for any accumulated debris, such as hair, soap residue, or mineral deposits.
- Clean the stopper and drain assembly using a brush, mild detergent, and warm water. Ensure you remove all debris thoroughly.
- Rinse the stopper and drain assembly with clean water to remove any remaining residue.
- Reinstall the drain stopper and test its functionality by opening and closing it.
Regular cleaning and removal of debris will help maintain optimal functionality of your bathtub drain stopper.
Considering replacement if the stopper is damaged beyond repair
Despite your best efforts, there may come a time when your bathtub drain stopper is damaged beyond repair. In such cases, it is wise to consider replacing it:
- Inspect the stopper for any visible damage, such as cracks, missing parts, or excessive wear.
- Determine if the damage is affecting the stopper’s ability to open or close properly.
- If the stopper is irreparable, search for a suitable replacement that matches your bathtub’s specifications.
- Purchase the replacement stopper and follow the manufacturer’s instructions for installation.
- Test the newly installed drain stopper to ensure it functions properly.
When your bathtub drain stopper is beyond repair, replacing it is the best course of action to restore functionality.
Frequently Asked Questions
How Do You Replace A Pop Up Drain Stopper In A Bathtub?
To replace a pop up drain stopper in a bathtub, follow these steps: 1. Remove the old stopper by unscrewing the top part. 2. Disconnect the linkage underneath the drain. 3. Insert the new stopper and secure it with the screw.
4. Reconnect the linkage. 5. Test the stopper to ensure it’s working properly. Done!
How Do You Replace A Bathtub Stopper?
To replace a bathtub stopper, follow these steps: 1. Remove the existing stopper by twisting counterclockwise or lifting it out. 2. Clean the drain opening and ensure it’s free from debris. 3. Place the new stopper into the drain and press down to create a seal.
4. Test the stopper by filling the tub with water and ensuring it holds. 5. Make any necessary adjustments for a proper fit.
Does The Trip Lever Go Up Or Down To Drain A Bathtub?
To drain a bathtub, you need to push the trip lever down.
Why Won T My Bath Plug Stay Down?
The bath plug may not stay down due to a blockage in the drain, a faulty plug mechanism, or insufficient water pressure. Check for any debris or hair clogging the drain, and ensure the plug mechanism is not damaged or worn.
If the issue persists, it’s recommended to seek professional help to identify and fix the problem.
Conclusion
Installing a bathtub drain stopper may seem like a daunting task, but with the right instructions, it can be a breeze. By following the step-by-step guide in this blog post, you can save yourself time and money by doing it yourself.
Remember to gather all the necessary tools and materials beforehand and take your time to ensure a proper installation. With a little patience and effort, you’ll have a functioning drain stopper in no time. Happy DIY-ing!