
To install a bathroom fan without a vent, you can use a ductless fan or a window fan. Simply mount the fan on the wall or in the window, ensuring it is securely fastened.
Position the fan in a location where it can effectively remove moisture and odors from the bathroom.
Factors To Consider For Your Bathroom Fan Installation
Installing a bathroom fan without a vent can be a challenging task, but taking certain factors into consideration can make the process easier and more effective. To ensure optimal ventilation, noise reduction, and energy efficiency, these three key factors are essential:
Ventilation Needs
Proper ventilation is crucial for maintaining a fresh and healthy bathroom environment. Before installing a bathroom fan without a vent, assess the ventilation needs of your space. Factors to consider include the size of your bathroom, the amount of moisture generated, and the number of occupants. If your bathroom tends to accumulate a lot of moisture or has a limited ventilation system, you may need a fan with a higher airflow capacity. On the other hand, if your bathroom is smaller or generates less moisture, a fan with a lower airflow capacity may suffice.
Noise Level
Noise can be a significant concern when selecting a bathroom fan. Nobody wants a loud and disruptive fan humming in the background, especially when trying to relax or concentrate in the bathroom. When choosing a fan, consider its noise level rating, usually measured in sones. Lower sone ratings indicate quieter operation. Look for a fan that strikes the right balance between noise reduction and airflow capacity, ensuring a peaceful environment without compromising ventilation performance.
Energy Efficiency
Energy efficiency is not only environmentally responsible but also cost-effective for the long term. When selecting a bathroom fan, look for features that promote energy efficiency. Opt for models with efficient motors or those labeled with ENERGY STAR® certification. These fans are designed to minimize energy consumption while maximizing performance. Additionally, consider features such as automatic shut-off timers or motion sensors that help conserve energy by running the fan only when needed.
By considering these crucial factors – ventilation needs, noise level, and energy efficiency – you can make an informed decision when installing a bathroom fan without a vent. This ensures optimal airflow, a quiet environment, and reduced energy consumption, enhancing the overall comfort and well-being of your bathroom space.
Sizing And Selecting The Appropriate Fan Without Vent
Installing a bathroom fan without a vent can be a game-changer when it comes to improving indoor air quality and reducing moisture-related issues. However, it’s crucial to make sure you choose the right fan for your bathroom’s size and needs. In this guide, we will walk you through the process of sizing and selecting the appropriate fan without a vent.
Calculate the Room Size
The first step in selecting the right fan without a vent is to calculate the size of your bathroom. The size of the room will determine the necessary ventilation rate, measured in cubic feet per minute (CFM). To calculate the room size:
- Measure the width, length, and height of your bathroom in feet
- Multiply the three measurements together to get the room’s volume
For example, if your bathroom is 8 feet wide, 10 feet long, and 8 feet high, the volume would be:
8 ft x 10 ft x 8 ft = 640 cubic feet
Determine CFM Requirements
Once you have the room’s volume, you can determine the required CFM. The CFM needed for effective ventilation depends on the bathroom’s size and usage. As a general rule of thumb, the Home Ventilating Institute (HVI) recommends a minimum of 1 CFM per square foot of bathroom area.
For example, if your bathroom is 100 square feet in area, you would need a minimum of:
100 CFM (100 sq ft x 1 CFM/sq ft)
Keep in mind that if your bathroom has a shower or bathtub, you will need to account for additional moisture produced. The HVI recommends adding 50 CFM for each shower or bathtub.
Choosing the Right Fan Power
When selecting a bathroom fan without a vent, it’s important to choose the right fan power to ensure effective ventilation. Fans are typically rated in terms of their CFM capacity, with higher CFM indicating a more powerful fan.
Consider the CFM requirements you calculated earlier and choose a fan that meets or exceeds those requirements. It’s generally good practice to opt for a fan with slightly higher CFM than the minimum recommended to ensure proper airflow and ventilation.
Additionally, pay attention to other factors such as noise levels, energy efficiency, and any additional features that may enhance the performance of the fan.
By following these steps and choosing the right-sized fan for your bathroom, you can enjoy the benefits of improved air quality and reduced moisture, even without a vent.
Tools Required For Installing A Bathroom Fan Without Vent
Installing a bathroom fan without a vent can be a practical solution for bathrooms that do not have access to an exterior wall or a roof for venting. While this method may not be as efficient as a traditional vented system, it can still help circulate air and eliminate excess moisture in the bathroom.
Screwdriver
A screwdriver is an essential tool for installing a bathroom fan without a vent. It will allow you to remove any screws or fasteners that hold the old fan in place and secure the new fan in position. Make sure to use the appropriate size and type of screwdriver for the job.
Drill
A drill will come in handy when installing a bathroom fan without a vent. You may need to create holes in the ceiling or wall for electrical wiring, fan mounting brackets, or other components. Using a drill with the correct drill bit will make the installation process easier and more efficient.
Utility Knife
A utility knife is another tool that you’ll need when installing a bathroom fan without a vent. It can be used to cut through drywall, insulation, or other materials to create openings for the fan and its components. Make sure to use a sharp utility knife and exercise caution to avoid any accidents.
When installing a bathroom fan without a vent, having the right tools is crucial to ensure a successful installation. With a screwdriver, drill, and utility knife at your disposal, you’ll be well-equipped to tackle the job. Remember to follow proper safety precautions and consult the manufacturer’s instructions for your specific fan model.
Materials Required For Installing A Bathroom Fan Without Vent
When it comes to installing a bathroom fan without vent, there are a few essential materials you’ll need to ensure a successful installation. Having the right materials at hand not only makes the process easier but also ensures the fan operates efficiently without causing any damage. So, let’s take a look at the list of materials you’ll need before getting started.
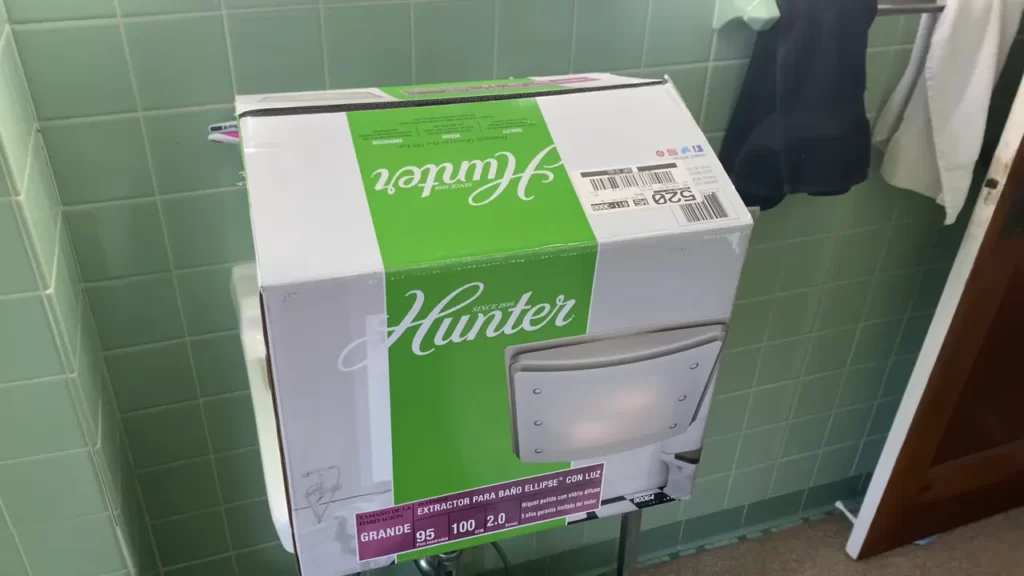
Bathroom Fan Without Vent
The first and most crucial material you’ll need is a bathroom fan that is specifically designed to work without a vent. These fans are equipped with advanced technology to effectively remove moisture and odors from your bathroom without the need for an external vent. It’s important to choose a fan that is suitable for the size of your bathroom and meets the necessary airflow requirements.
Mounting Bracket
A mounting bracket is another important material needed for installing a bathroom fan without a vent. This bracket will securely attach the fan to the ceiling or wall, ensuring stability and proper functioning. The mounting bracket should be made of durable material and suitable for the specific model of fan you have chosen.
Duct Tape or Foil Tape
While a bathroom fan without a vent does not require traditional ductwork, you may still need duct tape or foil tape for sealing purposes. These tapes are essential for ensuring that no air leaks occur between the fan and the ceiling or wall. Proper sealing prevents moisture and odors from escaping into other areas of your home.
Tip: When using tape for sealing, ensure that it is specifically designed for HVAC applications and is made of high-quality material to ensure long-lasting results.
In addition to the materials mentioned above, you may also need a few additional tools such as a screwdriver, measuring tape, wire cutters, and wire connectors.
Having all the necessary materials ready before starting the installation process will save you time and make the process smoother. Remember to carefully follow the manufacturer’s instructions and take all the necessary safety precautions while installing the bathroom fan without a vent.
Preparing For Installation
If you’re considering installing a bathroom fan without a vent, you’re making a wise decision to improve air circulation and reduce humidity in your bathroom. This guide will walk you through the necessary steps to install a bathroom fan without a vent, starting with the preparation process.
Turn Off the Power
Before you begin any electrical work, it’s crucial to turn off the power to the area where you’ll be installing the bathroom fan. This step is essential for your safety and to avoid any possible electrical accidents. Here’s how you can do it:
- Locate the circuit breaker box in your home.
- Identify the circuit that powers the bathroom.
- Switch off the corresponding circuit breaker to cut off power to the bathroom.
- If you’re unsure which circuit breaker controls the bathroom, turn off the main power switch for the entire house.
Double-check that the power is off by attempting to turn on the lights or any other electrical device in the bathroom.
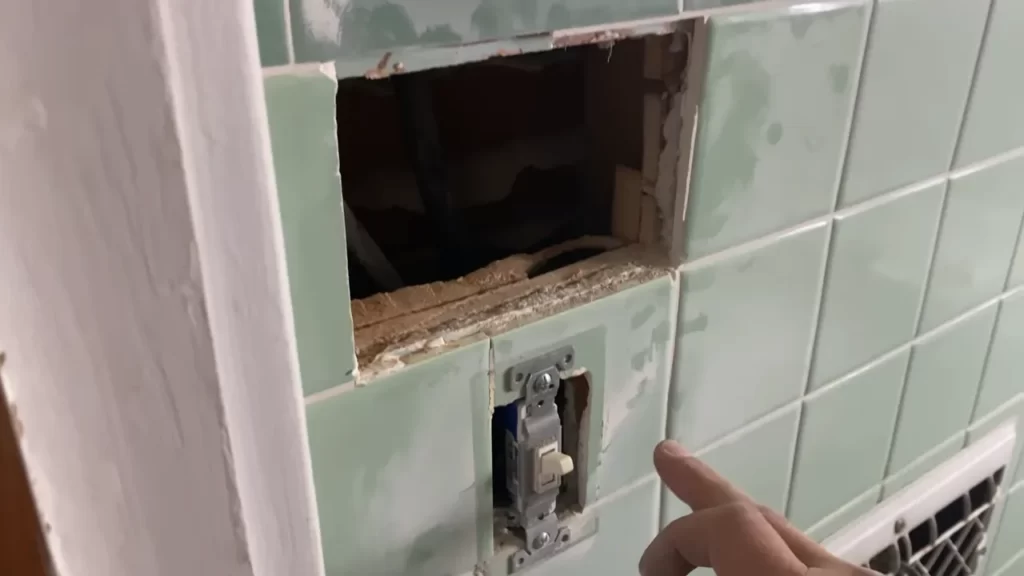
Remove the Old Fan or Cover
If you have an existing bathroom fan or cover, it needs to be removed before installing a new one without a vent. Here’s a step-by-step process to remove the old fan or cover:
- Locate the screws or fasteners that secure the old fan or cover in place.
- Using a screwdriver or the appropriate tool, carefully unscrew or remove the fasteners.
- Gently pull the old fan or cover away from the ceiling or wall to release it from its position.
- Disconnect any electrical wiring connections if applicable.
- Set aside the old fan or cover for proper disposal.
By following these steps, you can ensure the safe removal of the old fan or cover, making way for the installation of your new ventless bathroom fan.
Now that you’ve completed the preparation steps, you’re ready to move on to the actual installation of the bathroom fan without a vent. Stay tuned for the next section of this guide as we walk you through the installation process step by step.
Mounting The Bathroom Fan Without Vent
Mounting a bathroom fan without a vent is a convenient solution for those who want to improve circulation and remove moisture from their bathrooms without the need for extensive ductwork. In this guide, we will take you through the step-by-step process of mounting a bathroom fan without a vent, ensuring proper ventilation and a fresh, comfortable bathroom space.
Attach the Mounting Bracket
The first step in mounting your bathroom fan without a vent is to attach the mounting bracket securely. The mounting bracket serves as the foundation for your fan and ensures it remains in place. To attach the mounting bracket:
- First, locate a suitable spot on the ceiling where you want to install your fan. Ensure it is near an electrical outlet for power supply.
- Mark the location for the fan on the ceiling using a pencil or marker, making sure it is centered and level.
- Next, hold the mounting bracket against the ceiling, aligning it with the marked spot.
- Using a screwdriver and appropriate screws, secure the mounting bracket to the ceiling. Make sure the screws penetrate the ceiling joists for a sturdier installation.
By following these steps, you can ensure that your mounting bracket is securely attached, providing a strong base for your bathroom fan.
Secure the Fan in Place
Once the mounting bracket is securely attached, it’s time to secure the actual fan in place. This step ensures that your fan remains stable and functional without the need for a vent. Here’s how:
- Place the fan on the mounting bracket, ensuring it is aligned with the bracket’s screw holes.
- Using screws and a screwdriver, carefully attach the fan to the mounting bracket. Make sure the screws are tightened firmly but not too tight to avoid damaging the fan or the bracket.
After securing the fan in place, give it a gentle tug to ensure it is firmly attached to the mounting bracket and does not move or wobble. This will guarantee a secure and effective installation of your bathroom fan without a vent.
Mounting a bathroom fan without a vent is a practical solution for improving air circulation and moisture removal in your bathroom. By following the steps outlined above, you can easily attach the mounting bracket and secure the fan in place, ensuring a comfortable and well-ventilated bathroom space.
Electrical Connection And Testing
Wire the Fan to the Power Source
Once you have positioned and secured your bathroom fan without a vent, it’s time to wire it to the power source. Follow these steps to ensure a safe and effective electrical connection:
- Turn off the power: Before working on any electrical connections, make sure to turn off the power to the area where you will be installing the fan. This can be done by flipping the corresponding circuit breaker in your electrical panel.
- Locate the power source: Identify the power source that you will be connecting the fan to. This can often be found in the ceiling or wall near the fan installation site.
- Prepare the wiring: Strip the outer insulation of the electrical cables, exposing the individual wires. Typically, you will find a black wire (hot), a white wire (neutral), and a green or copper wire (ground).
- Connect the wires: Match the corresponding colors of the wires from the fan to the power source. This usually means connecting the black wire to the black wire, the white wire to the white wire, and the green or copper wire to the ground wire. Use wire nuts to securely fasten the connections.
- Secure the connections: After making the wire connections, gently tug on each wire to ensure they are tightly secured. Loose connections can lead to electrical issues, so it’s crucial to double-check each connection.
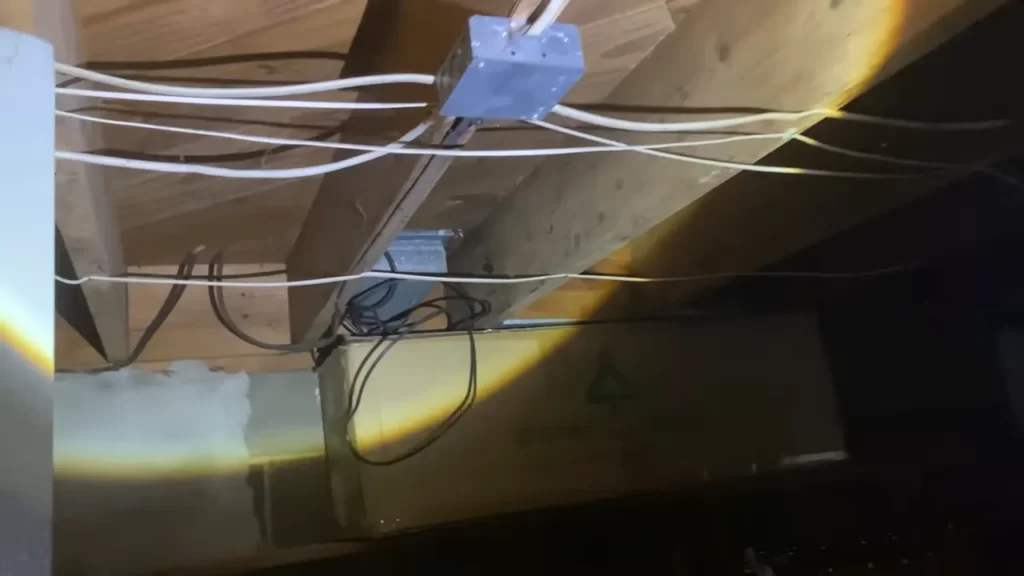
Secure Wire Connections
Once you have successfully wired the fan to the power source, it’s essential to ensure that all wire connections are properly secured. Follow these steps to guarantee a safe and reliable installation:
- Wrap electrical tape: After connecting the wires with wire nuts, wrap electrical tape around the wire nut and the exposed portion of the wires. This provides an extra layer of insulation and helps prevent accidental disconnections.
- Organize the wiring: Neatly bundle the wires together using zip ties or wire clips. This helps minimize the risk of tangling or damaging the connections during installation or future maintenance.
- Place wire connections in a junction box: To protect the wire connections, install them inside a junction box. The junction box should be large enough to accommodate the wires comfortably and have a cover to prevent any accidental contact.
- Verify the connections: Before proceeding to test the fan’s operation, visually inspect all wire connections to ensure they are secure and no bare wires are exposed. If any issues are detected, fix them before proceeding.
Test the Fan’s Operation
With the wiring securely connected, it’s time to test the fan’s operation to ensure it is functioning correctly. Follow these steps to verify the fan’s functionality:
- Restore power: Turn the power back on at the circuit breaker for the area where the fan is installed. This will provide electricity to the fan, allowing it to operate.
- Switch on the fan: Use the fan’s controls (typically a switch or pull cord) to activate the fan. Listen for the sound of the fan motor running to confirm that it is working properly.
- Check airflow: Place your hand near the fan’s vent opening to feel if there is airflow. A properly functioning fan should generate a noticeable amount of airflow.
- Test different settings: If your fan has multiple speed settings or additional features, test them all to ensure they are functioning correctly. This will help you identify any potential issues or malfunctions.
By following these steps to wire the fan to the power source, secure the wire connections, and test the fan’s operation, you can achieve a successful installation of a bathroom fan without a vent. Remember to always prioritize safety and consult a professional electrician if you are unsure about any electrical work.
Common Issues And Solutions
When it comes to installing a bathroom fan without a vent, there are a few common issues that may arise. However, with some simple solutions, you can overcome these challenges and enjoy the benefits of a properly functioning bathroom fan.
Excessive Noise
One of the most common issues when installing a bathroom fan without a vent is excessive noise. This can be caused by a variety of factors, such as incorrect installation or a fan that is not properly rated for your bathroom size. Here are some solutions to address this problem:
- Check the installation: Ensure that the fan is securely mounted and that there are no loose components. Properly aligning the fan blades can also minimize noise.
- Upgrade to a quieter fan: If your current fan is old or low-quality, consider investing in a high-quality fan that is specifically designed for quiet operation. Look for models with a low sone rating.
- Use noise-reducing materials: Installing soundproofing insulation around the fan housing can help to absorb noise and reduce the overall sound level.
Poor Air Circulation
Another common issue with bathroom fans without vents is poor air circulation. This can lead to a buildup of moisture and odors in the bathroom. Fortunately, there are several solutions to improve air circulation:
- Optimize fan placement: Ensure that the fan is installed in an area that allows for optimum airflow. Ideally, it should be positioned near the shower or bathtub to effectively remove excess moisture.
- Check for obstructions: Ensure that the fan is not obstructed by any objects, such as bathroom supplies or furniture. Clearing any obstructions can help to improve airflow.
- Upgrade to a more powerful fan: If your current fan is not providing sufficient airflow, consider upgrading to a more powerful model. Look for fans with a higher CFM (cubic feet per minute) rating to ensure effective air circulation.
Routine Maintenance For Bathroom Fans Without Vent
Cleaning the Fan Blades
One of the key aspects of routine maintenance for bathroom fans without vents is cleaning the fan blades regularly. Over time, dust, debris, and moisture can accumulate on the blades, compromising their performance and efficiency. Fortunately, cleaning the fan blades is a simple task that can be completed in just a few steps.
- Start by turning off the power to the fan to ensure your safety.
- Using a ladder or step stool, carefully access the fan housing.
- Gently remove the fan cover or grille, taking care not to damage it.
- Inspect the blades for any visible debris or dirt.
- Using a soft-bristle brush or a cloth, gently wipe away any accumulated dust or grime from the blades.
- Ensure that all areas of the blades are thoroughly cleaned.
- Once the blades are clean, use a vacuum cleaner with a brush attachment to remove any remaining dust or particles.
- Reattach the fan cover or grille, ensuring it is securely in place.
- Finally, restore power to the fan and test its operation.
Checking for Debris Build-up
In addition to cleaning the fan blades, it is also important to regularly check for debris build-up in the fan housing. Debris such as dust, hair, and lint can accumulate inside the housing, leading to reduced airflow and potential blockages. By regularly checking for debris build-up, you can ensure that your bathroom fan without vent operates optimally.
To check for debris build-up:
- Turn off the power to the fan.
- Remove the fan cover or grille.
- Inspect the inside of the housing for any visible debris.
- Use a soft brush or cloth to gently remove any debris.
- Ensure that all areas of the housing are free from obstructions.
- Once cleaned, reattach the fan cover or grille securely.
- Restore power to the fan and test its operation.
By routinely cleaning the fan blades and checking for debris build-up, you can maintain the performance and efficiency of your bathroom fan without vent. Regular maintenance not only ensures optimal operation but also extends the lifespan of your fan, providing you with fresh and clean air for years to come.
Frequently Asked Questions
Can I Install A Bathroom Exhaust Fan Without A Vent?
Yes, it is possible to install a bathroom exhaust fan without a vent. However, it is not recommended. Ventilation is essential to remove moisture and odors from the bathroom, and without a vent, the fan will not effectively perform its function.
It is best to consult a professional for proper installation.
Is There A Bathroom Fan That Doesn’T Vent Outside?
Yes, there are bathroom fans available that do not require venting outside. These types of fans come with activated carbon filters to help remove odors and improve air quality within the bathroom. However, it is important to note that these fans may not be as effective as traditional vented fans in removing excess moisture.
How Do You Vent A Bathroom With No Outside Access?
To vent a bathroom with no outside access, use a ventless bathroom fan or install a ductless bathroom exhaust fan. These fans purify the air through filters and recirculate it back into the bathroom, eliminating odors and moisture. They are easy to install and maintain.
How Does A Ductless Bathroom Fan Work?
A ductless bathroom fan works by pulling in air through a vent and filtering it to remove moisture and odors. It then releases the clean air back into the room. It’s an effective way to improve air quality and prevent mold and mildew in bathrooms without the need for ductwork.
Conclusion
Installing a bathroom fan without vent may seem challenging, but with the right tools and instructions, it can be done easily. By following the steps outlined in this blog post, you can ensure proper ventilation and maintain a fresh and clean bathroom.
Remember to choose a fan suitable for your bathroom size and location, and don’t forget to regularly clean and maintain your fan for optimal performance. With a little patience and careful installation, you’ll be enjoying a well-ventilated bathroom in no time.